


Table of Contents
- Why Is Photo Editing Crucial in Real Estate?
- How to Edit Real Estate Photos (Top 17 Techniques)
- Outsource Your Real Estate Photo Editing to PhotoUp!
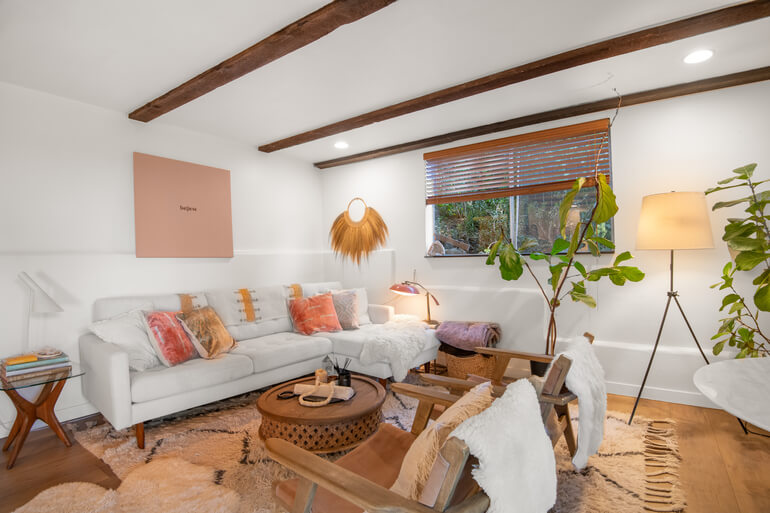
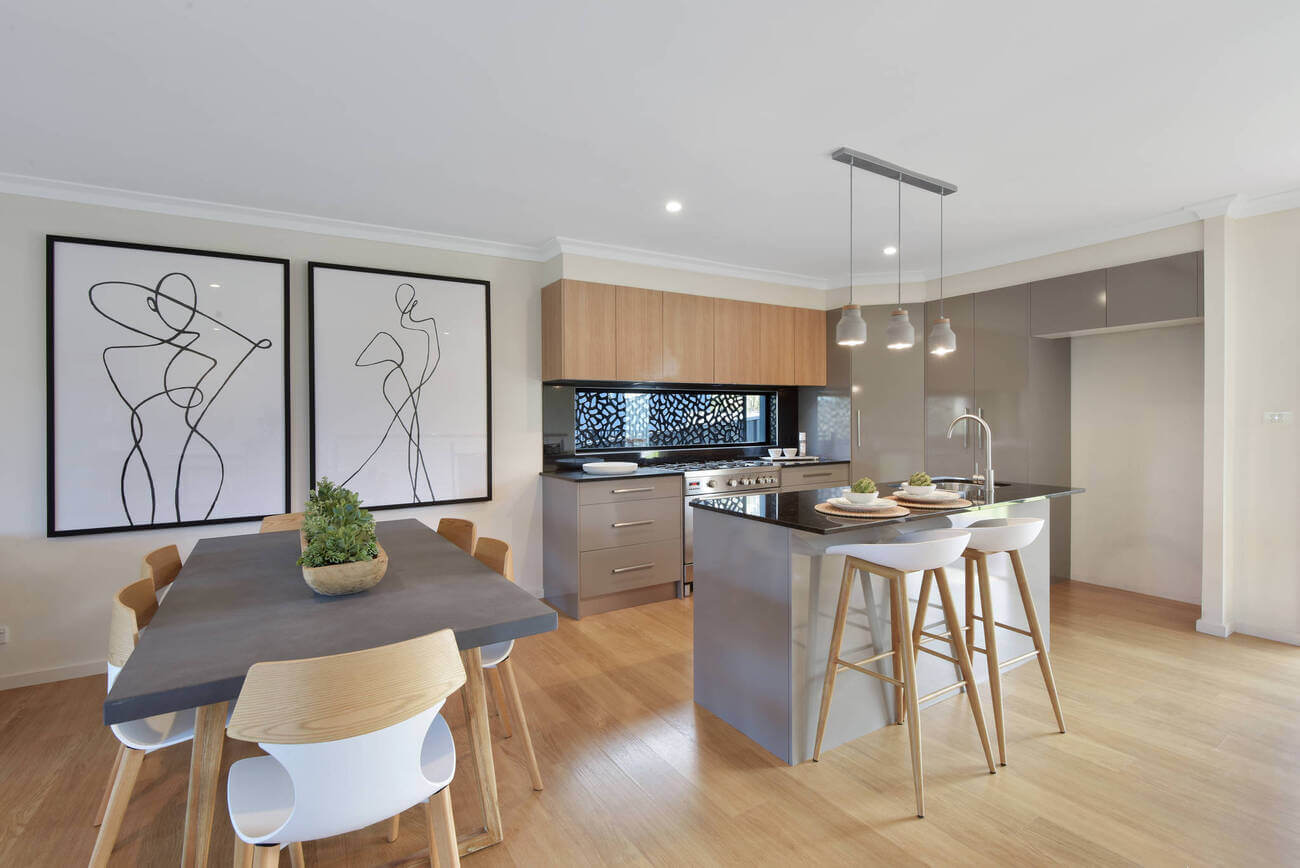
Are you looking into the most common and basic techniques on how to edit real estate photos?
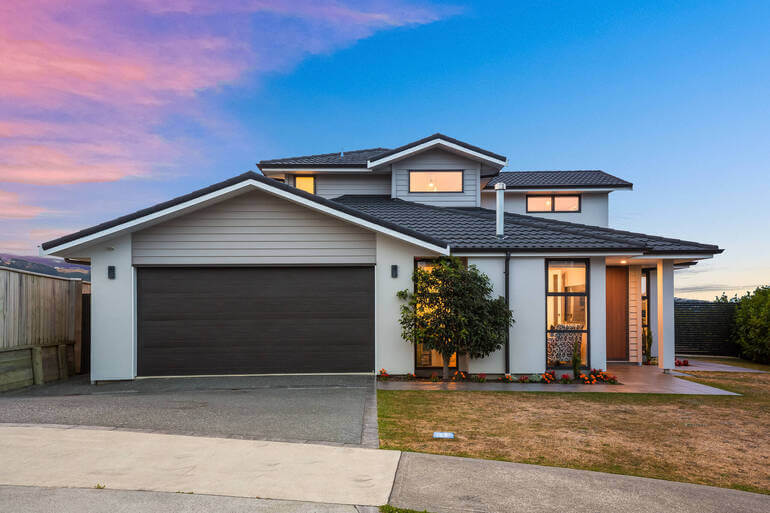
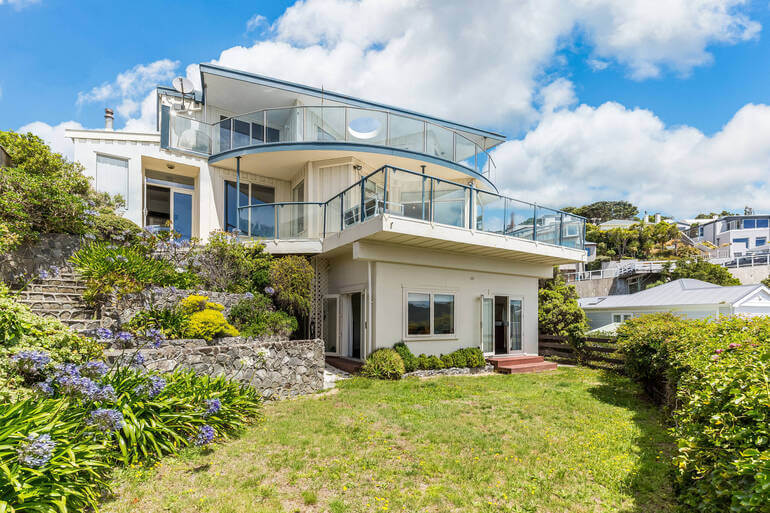
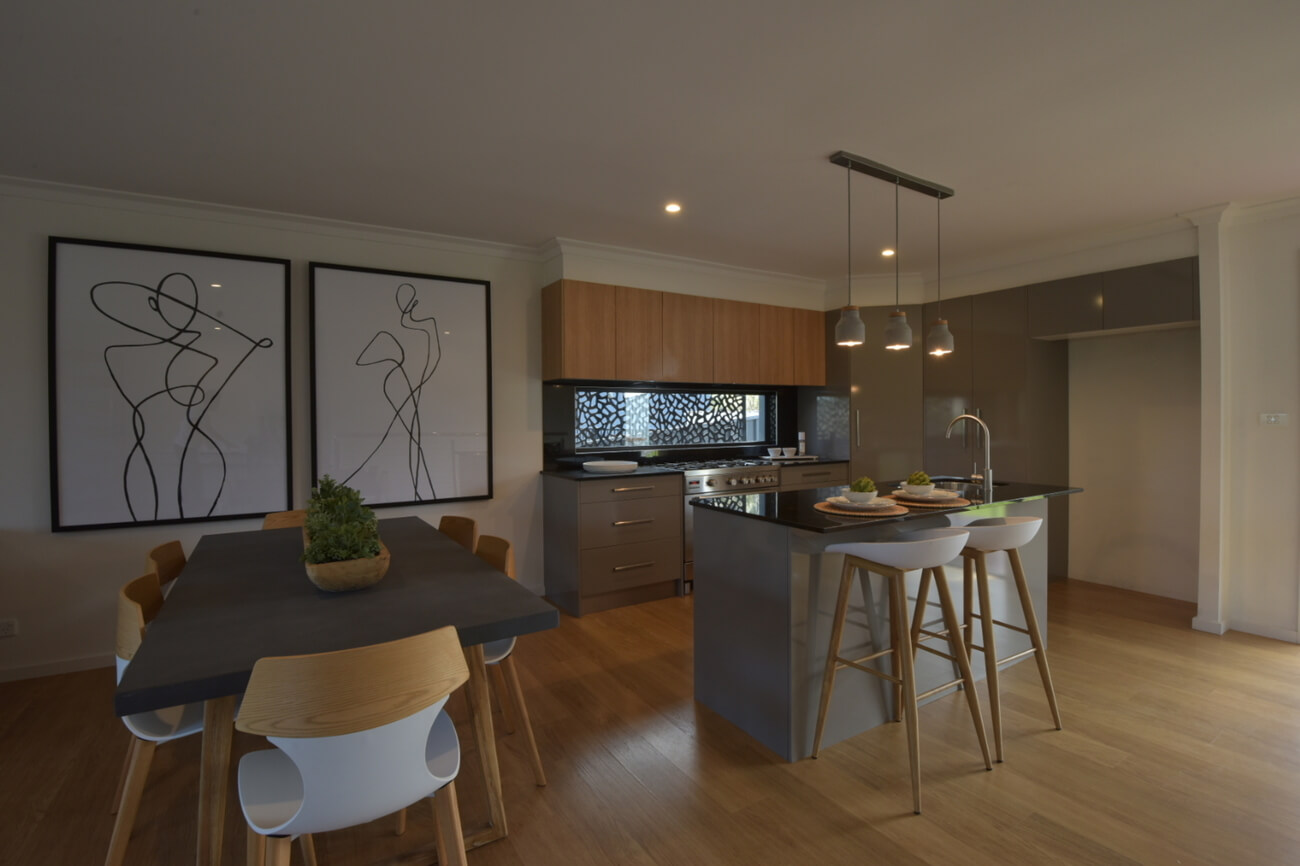
Post-processing for real estate photography is an essential step in creating amazing images that will help your clients sell their listings fast and for top dollar.
There are different techniques that real estate photographers can use to retouch and make property images look simply stunning.
In this post, we’ll share our top 17 techniques on how to edit real estate photos and make your images turn heads and capture the attention of potential buyers.
But first, let’s take a look at why photo editing is crucial in real estate.
Why Is Photo Editing Crucial in Real Estate?
In the real estate industry, high-quality images that appeal to potential buyers are an absolute must.
Especially in today’s digital era, where 100% of people use the internet to search for a home, according to recent studies.
Here are some other powerful real estate photography statistics to consider:
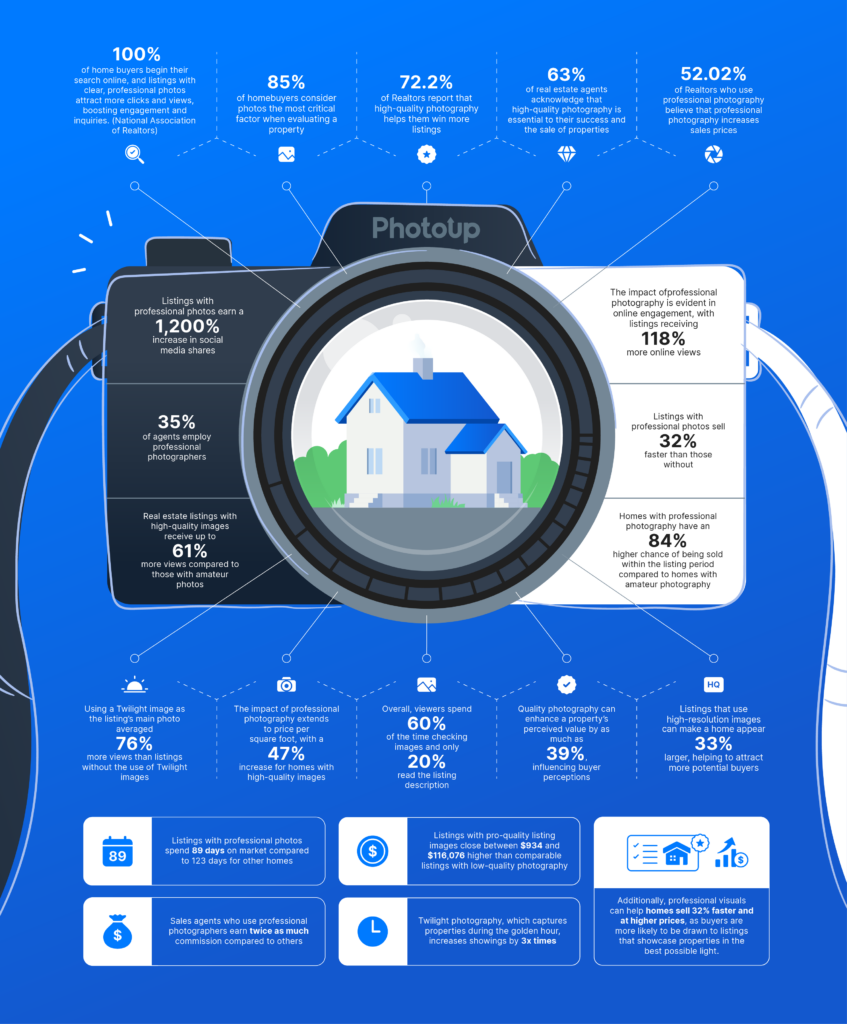
As mentioned earlier, your photography is what is going to help your real estate agent and Realtor clients get homebuyers through the door and hopefully sell their listed properties.
So it’s your job, as a real estate photographer, to provide them with beautiful photos of homes, yards, offices, and interior spaces that will captivate the viewers, which requires good post-processing skills.
With this in mind, let’s move on to showing you how to edit real estate photos for top-notch results!
How to Edit Real Estate Photos (Top 17 Techniques)
Here are our top 17 techniques on how to edit real estate photos in Lightroom and Photoshop to create eye-catching images that are sure to attract buyers.
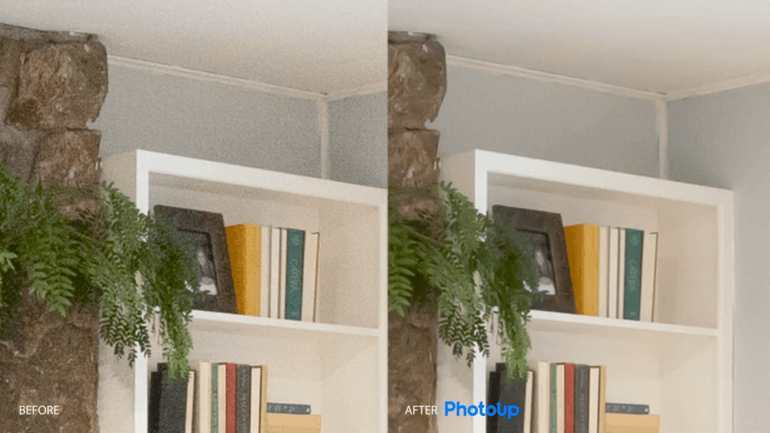
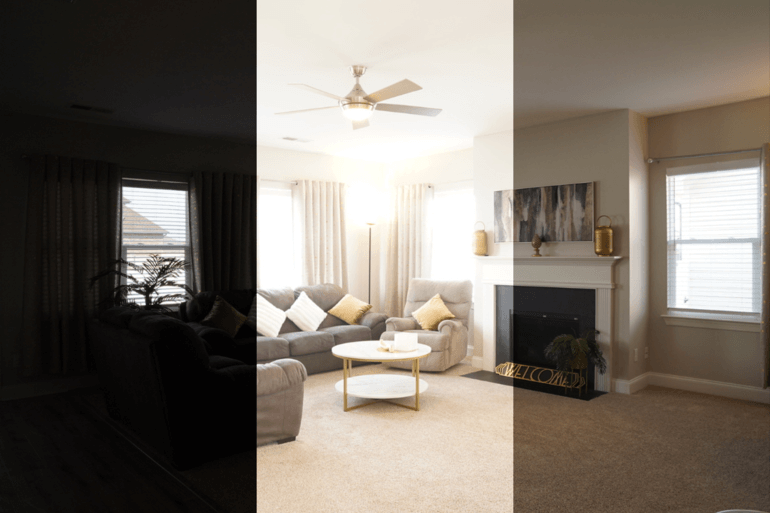
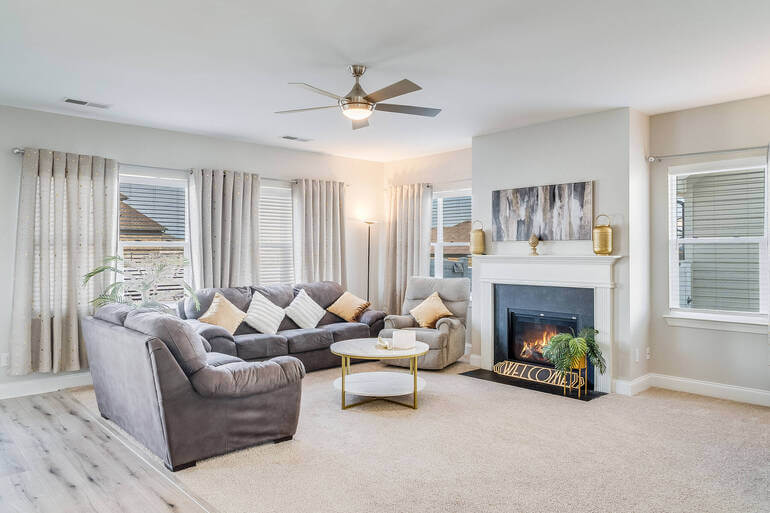
1. Brightness & Color Correction
To get started, brightness and color correction are the backbone of all image enhancement. Color correction can be done in Lightroom and Photoshop.
Making adjustments to color, contrast, tone, and sharpness may seem obvious and simple. But with a few clicks of a mouse, these simple edits can transform an image from looking bland into a bright and appealing image.
Altogether, these basic retouching techniques can turn a mediocre photo into a captivating one that will capture buyers’ attention and help your clients sell their listings.
To learn how to adjust the colors and make your real estate photos pop, check out our tutorial on how to color correct in Photoshop.
Additionally, this video tutorial walks you through how to brighten a photo in Photoshop:
2. Perspective & Horizon Correction
When shooting real estate, you need to be extra careful with your lines. You need to make sure that the horizontal lines and perspectives are aligned.
Straight vertical and horizontal lines that don’t converge are a known issue in real estate photography. Factors such as the curvature of the lens, the shape of the room and its items, and even the positioning of the camera can make these lines come out distorted.
Fortunately, you can fix this issue in post-processing with a simple retouch called perspective correction.
This editing technique corrects the distortion and misalignment between the horizontal lines and the perspective. That is to say, it aligns the lines with the image’s frame to make the photo more natural.
You can align the lines in Photoshop using the Free Transform Tool. Make sure that you select the entire image and drag the corner of the image opposite to where the lines are leaning toward.
To see how to align verticals using an alternative method, you can check out our video tutorial on how to straighten verticals in Photoshop:
High-Quality & Consistent
Real Estate Photo Editing
Hire a dedicated editor with performance metrics from $7/hour.

3. White Balance Adjustment
Getting the colors right is essential—it helps create a warm, welcoming feel in a space. Adjusting the color temperature ensures whites appear neutral and all colors reflect their true tones.
To eliminate unwanted color casts—whether it’s yellow, blue, or green—follow these steps:
- Use the Eyedropper Tool to sample a neutral white or gray area
- Adjust wall and flooring colors to match their natural appearance
- Ensure whites stay crisp and accurate—buyers expect to see the actual finishes
A yellow tint can make walls seem dirty, while a blue hue may give rooms a cold, uninviting vibe.
Proper white balance helps present a space as clean, bright, and inviting—just what potential buyers are looking for. To learn more, check out our video tutorial on how to adjust white balance in Photoshop:
4. Object Removal
More often than not, real estate photography includes unwanted objects that you need to remove to clean up the image.
For example, some common situations where you may want to remove an object are:
- There’s a car in the driveway, blocking the wonderful view of the garden
- The TV cords show and make the image appear cluttered
- The granite counter would have been perfect if not for that old frying pan that was overlooked during the shoot
- There’s an ugly crack in the bathtub, or the wallpaper is coming off in the kitchen
- You failed to notice that someone passed by the property while making the shot
But don’t worry because these can be edited in Photoshop by using the Clone Stamp Tool. Simply, choose the “Clone Stamp Tool” and pick the source area by pressing the “Alt key.” Then, you can start cloning over the object that you wish to remove.
To learn how to use the Clone Stamp Tool to declutter your images, watch this video tutorial on how to remove cords in Photoshop:
For more details and expert tips, check out this video tutorial on how to remove a car from a driveway in Photoshop:
5. Removing Color Cast

When learning how to edit real estate photos, color cast removal is a vital technique to master.
Color cast in a photo can be considered an eyesore, especially in the real estate photography industry, where images need to look extra captivating.
To put it another way, color cast is a tint of a specific color in a photograph that is often unwanted and distracting. For instance, certain lighting can cause film and digital cameras to render a certain color cast.
Here are some situations where color cast can appear:
- Fluorescent bulbs can produce a bluish tinge
- Dark window tint films can alter the color of a beige-colored wall
- Gray skies outside may dull the otherwise bright wall inside
- Even the color settings of the camera can affect the natural colors of the home
Fortunately, through editing, you can restore the original color of the areas with color cast using some simple techniques. These techniques will neutralize and remove the unwanted tint that masks the actual colors.
To learn more, check out our video tutorial on how to easily remove color cast from real estate images in Photoshop:
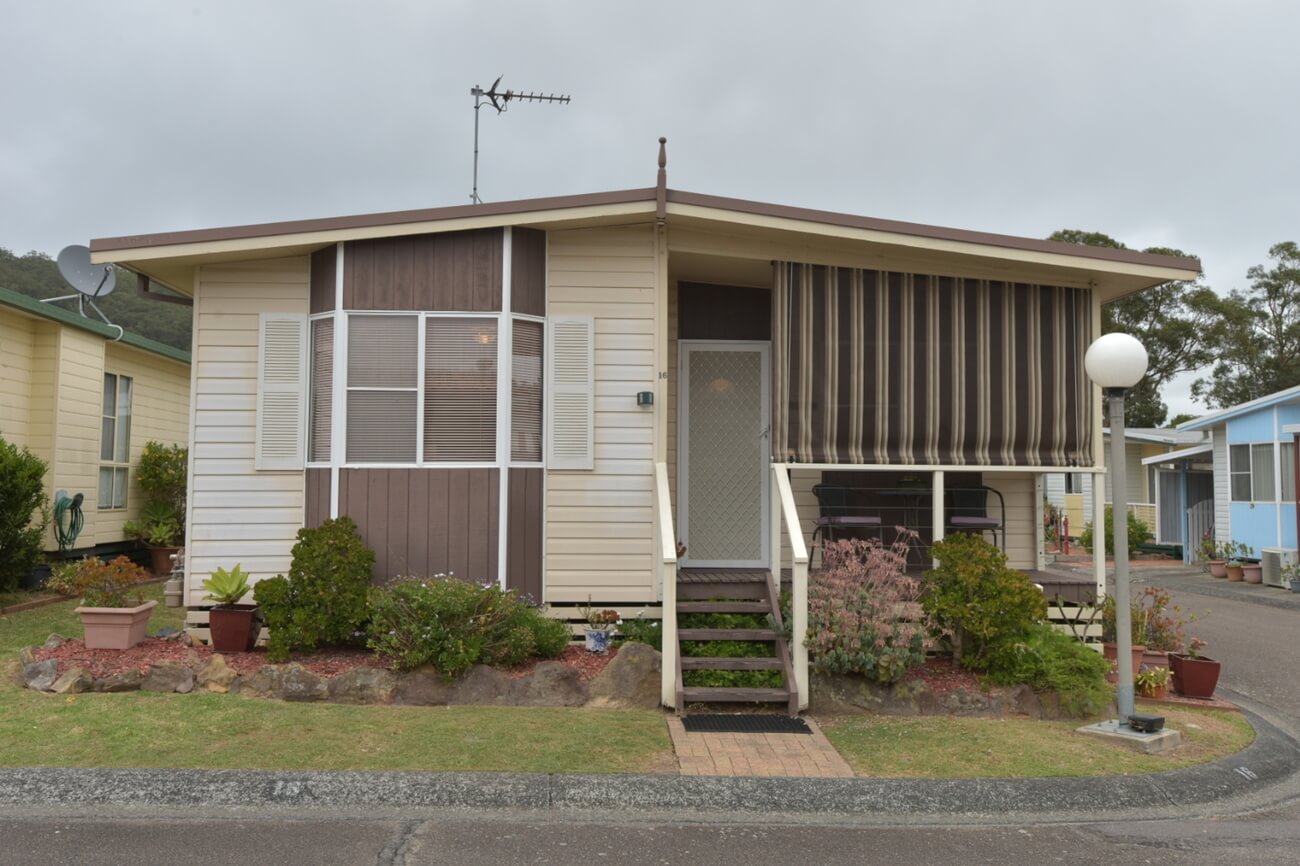
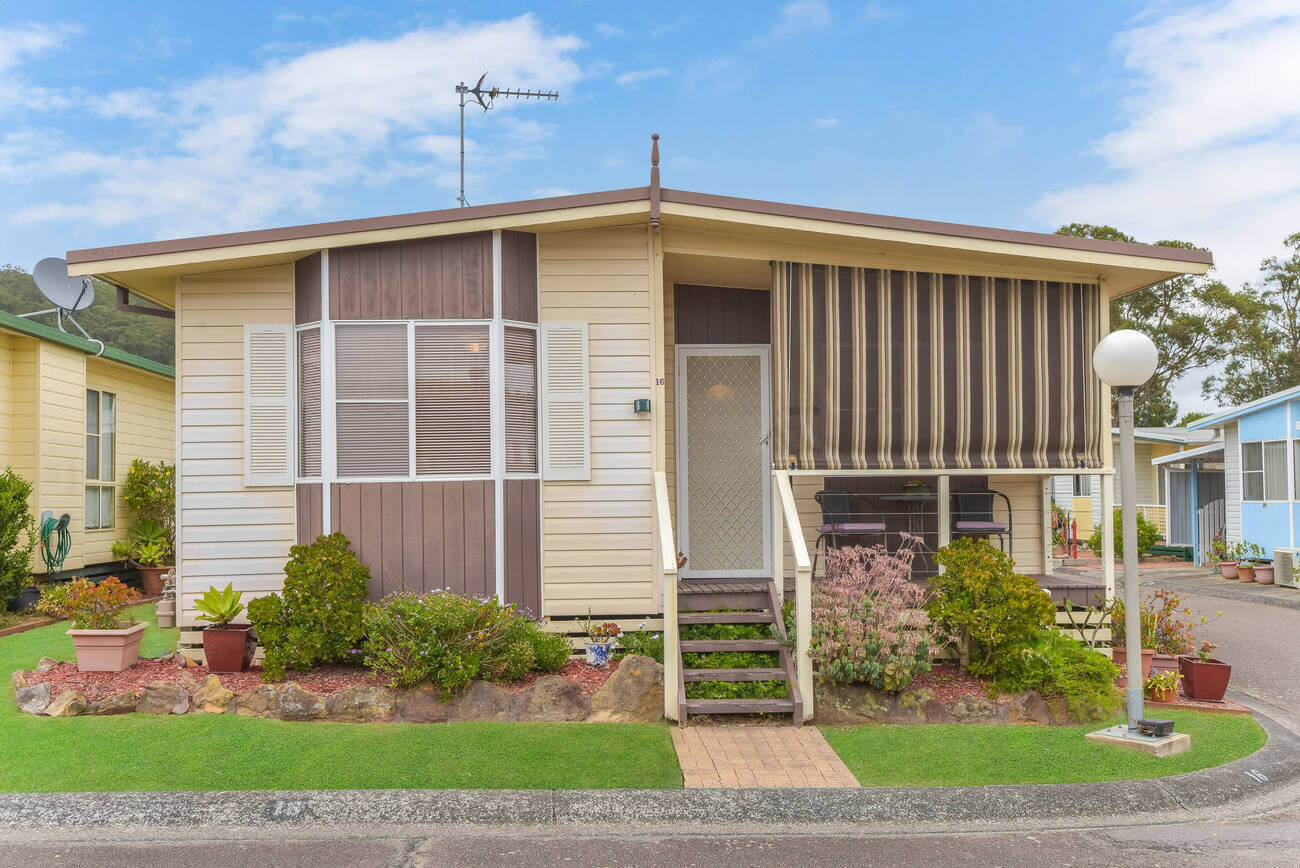
6. Sky Replacement
Undeniably, colors come alive on bright, sunny days. On the other hand, gloomy and overcast skies can make your real estate photography look dull.
Luckily, you can replace the sky with a few not-too-difficult editing tricks and make your dull sky look picture-perfect.
All in all, a sky replacement in real estate photographs can:
- Make the property look more appealing
- Offer a mood booster
- Provide real estate photographers more freedom when not having to worry about the weather or the time of day to do the photoshoot
So with a few tricks, you can replace gray, cloudy, or overcast skies with summery, sunny ones in Photoshop.
To learn how to transform dull winter skies into bright and inviting ones, check out our video tutorial on how to do a sky replacement in Photoshop:
Here’s another video tutorial on how to replace a summer sky in Photoshop:
Don't Try One, Try Three
Freelance Photo Editors
Try editing from 3 professional photo editors. Screened and ready-to-hire.
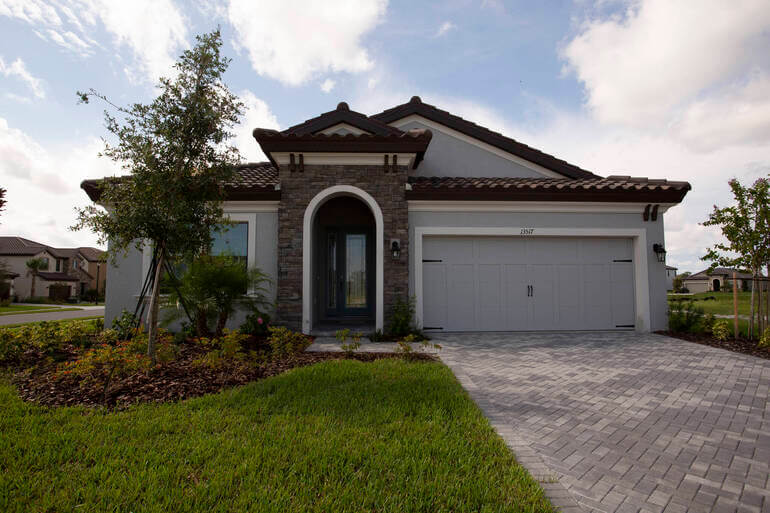
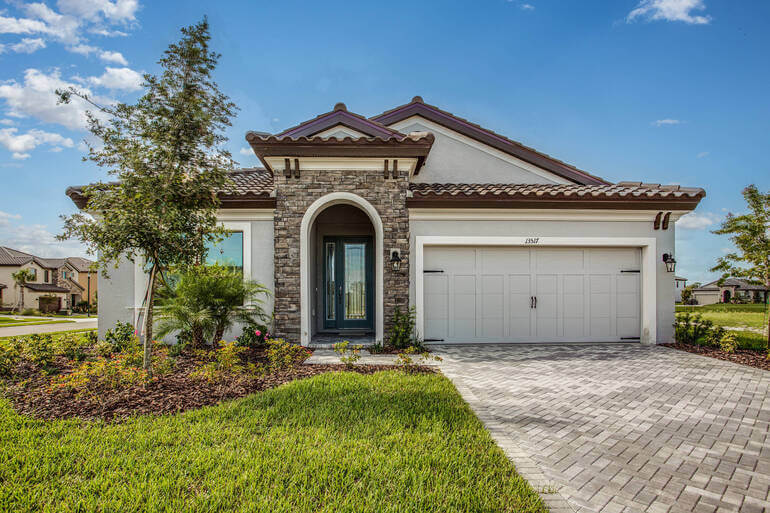
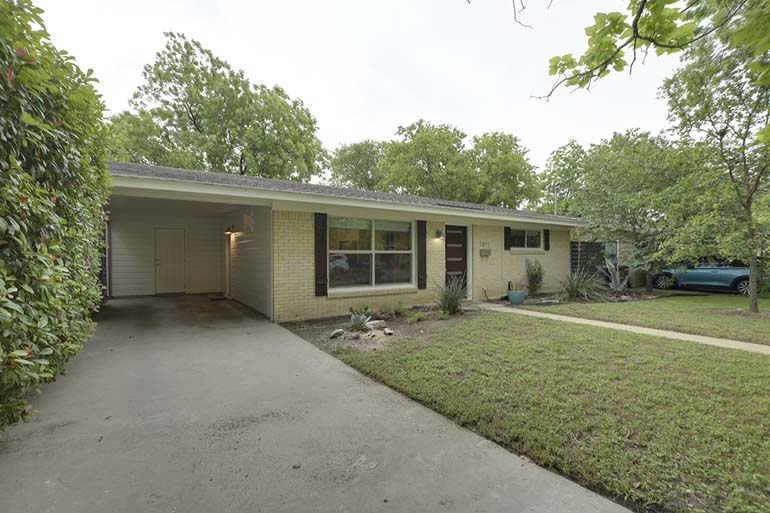
7. Lawn Enhancement
Undoubtedly, nothing is more welcoming and inviting than a full, green lawn outside of a home.
But sometimes, you need to take photos in the wrong season when the lawn has dead spots. Or when there hasn’t been a lot of rain and the grass is brown.
While that’s unfortunate, the good news is that you can use Lightroom and Photoshop to adjust the color of your lawn to enhance the landscaping of your photo.
To learn how to create a green, beautiful lawn, check out our video tutorial on how to make grass green in Photoshop:
In addition, other things you can do to manipulate and enhance your photos are:
- Adding an inviting fire to the fireplace
- Including a pool and patio area outside of the property with the help of virtual staging
- Or, fresh modern furniture on the balcony
- And whatever you can think of to enhance and bring value to your photos
A properly edited photo effectively shows the property in its full glory and beauty, convincing the viewer that the property he is looking at is an ideal investment.
All things considered, these more advanced editing techniques can all be quickly done by PhotoUp’s professional real estate photo editors.
So, now we are halfway through our guide on how to edit real estate photos. We hope you’ve learned many helpful tips so far. We have many more to go!
Let’s show you how to perform noise reduction next.
8. Reducing Noise
Noise or grain appears as millions of hazy dots and decreases the image’s clarity and quality. Seeing that makes otherwise beautiful photos look grainy and unappealing.
For example, noise can be a result of either low light settings, errors in pixel density, exposure time, or even sensor size.
However, it is rather easy to fix!
For example, in Photoshop, you can just click on the “Filter menu,” and choose Noise > Reduce Noise.
For more details, check out our video tutorial on how to reduce noise in Lightroom and Photoshop:
Additionally, PhotoUp’s professional photo editors can tone down noise through a variety of editing techniques. And as a result, your photo will become clearer, richer, and more attractive.
9. HDR Editing
High-Dynamic-Range (HDR) is a technique that many real estate photographers use to create a greater dynamic range of luminosity.
This technique is used to blend multiple images, taken at different exposures, and later combine them in post-processing to create one perfectly blended image.
To create HDR images, you should shoot your subject in at least three bracketed images using different exposures. Then, all you have to do is merge the photos into one to show their highlights and shadows.
For more details, watch our video tutorial on how to edit HDR photos in Lightroom:
10. Removing Ghosting
Light flares and ghosting in real estate photography are fairly common phenomena. Ghosting can happen when shooting bracketed images for HDR photography.
For example, trees blowing in the wind move from one exposure to the next across multiple images, causing the final blended image to show the tree branches or leaves with a blurred or “ghosting” effect.
While it can enhance the mood of a photo, in real estate marketing, ghosting comes across as a bit manipulative and cheesy. The reason for this is that it takes away the professional look of a picture.
Thankfully, it’s easy to remove ghosting using Photoshop if you know your way around the software. Have a look at our video tutorial for more details:
11. Adjusting Shadows
When shooting real estate interiors and exteriors, you may encounter problems with shadows and uneven lighting.
While shadows can add contrast and dimension to an image, they can also be distracting and make your real estate photography look less professional.
You can use Lightroom or Photoshop to adjust shadows, highlights, whites, and blacks. To see how this is done, check out our video tutorial on how to remove shadows in Lightroom:
Additionally, flash shadows are also a common issue when shooting interiors with artificial lighting.
To learn how to combat this, you can check out our short video tutorial on how to remove flash shadows in Photoshop:
Have You Ever Thought To
Outsource Photo Editing?
Try it today with 5 free edits from three professional photo editors.
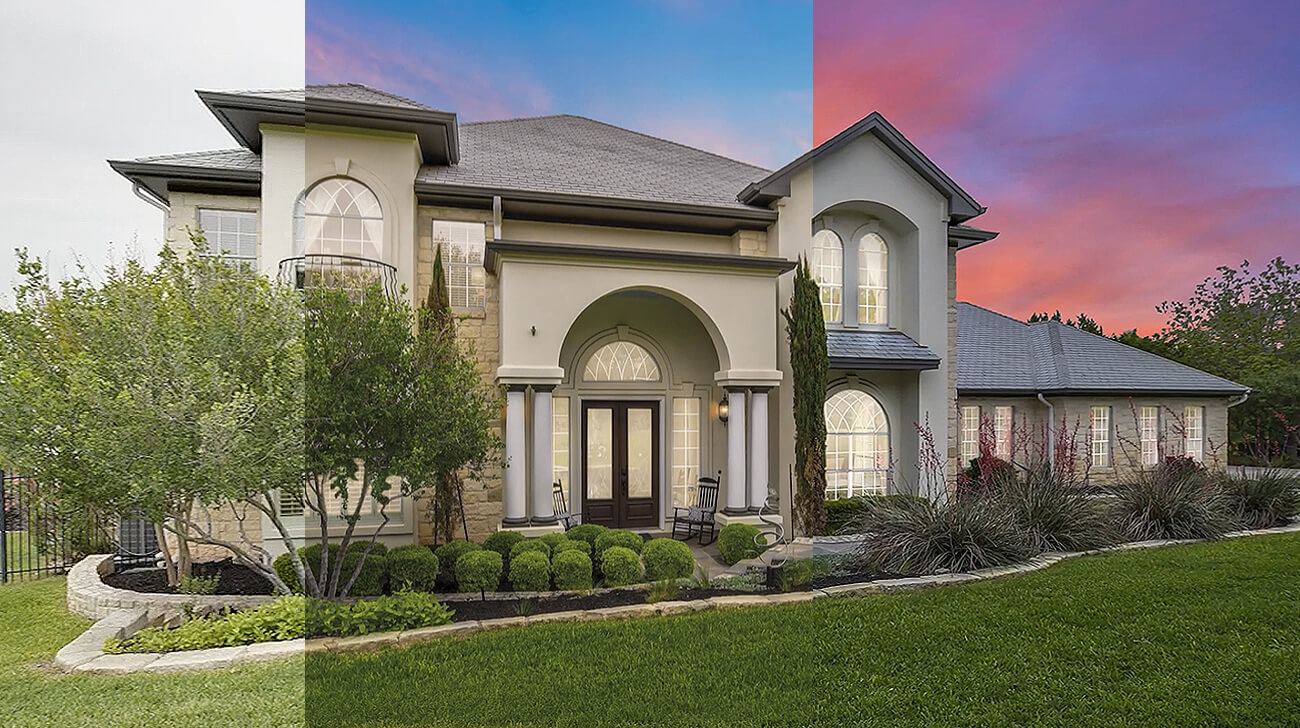
12. Day-to-Dusk Conversions
Turn day shots into dusk by darkening the sky, turning on interior and exterior lights, and adding warm color tones.
It’s a fantastic way to show off a property’s lighting and create an enticing atmosphere that will draw viewers in.
Everyone knows you need to transform the sky into an evening scene, but lots of people forget that you also need to work on a house’s interior and exterior lighting to ensure that it remains the star of the show.
The last thing you want is a sky so pretty that it attracts attention away from the property you’re trying to sell.
Instead, you need to make sure to keep a viewer’s attention on the focus of the image, the house itself.
To learn how to do this effectively, check out our video tutorial on how to edit a day to dusk image:
13. Window Masking
Window masking is essential to show the view outside a window clearly while keeping the interior properly exposed.
Masked windows make interiors feel airy and connected to the outdoors. If there’s a nice view (trees, city skyline, water), showcasing it adds emotional value.
Highlight the view through windows by:
- Masking in a properly exposed exterior
- Retaining the natural look (no blown-out whites or black windows)
This step adds realism and makes interiors feel connected to the environment. To learn this powerful edit, check out our video tutorial on how to mask windows in Photoshop:
14. Adding Text/Watermarking Your Images
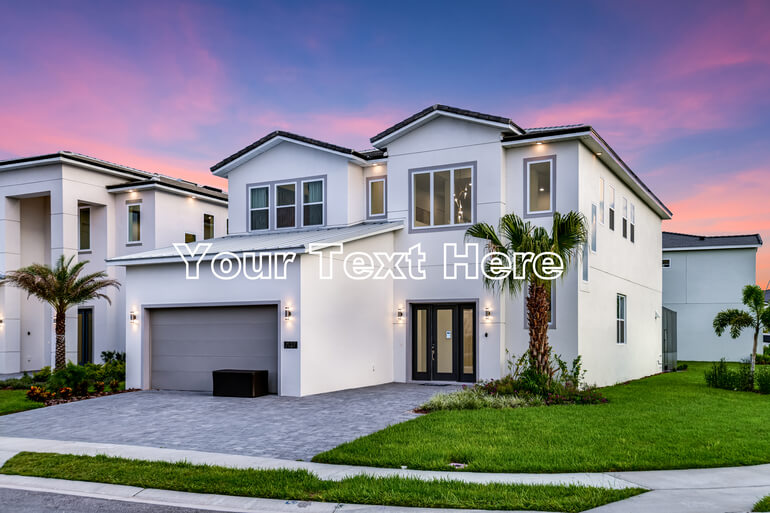

Sometimes you may want to add text or a watermark to your real estate photos for branding as well as copyright purposes.
Watermarks help to protect the photographer’s work from being used without permission or credit. By clearly identifying the source of the image, photographers can prevent others from using their images without permission.
Additionally, you may just want to add your business name or other text to your real estate photos to boost brand awareness.
No matter the reason, Photoshop is your go-to software to help you make these simple yet powerful edits.
To learn how to add text to your images, check out our video tutorial on how to edit text in Photoshop:
And to learn how to work with watermarks, this video walks you through how to add a watermark in Photoshop step-by-step:
15. Lens Correction

Correcting optical distortions caused by wide-angle lenses is essential for producing accurate, professional-looking images. These lenses, commonly used in real estate photography, often introduce visual issues like:
- Barrel or pincushion distortion
- Darkened corners (vignetting)
- Color fringing along edges (chromatic aberration)
Fixing these problems helps ensure that rooms appear true to their actual shape and size. If the walls look bent or edges show unnatural color streaks, it can mislead viewers or make the photos feel untrustworthy.
To learn how to do this edit, check out our video tutorial on how to do lens correction in Photoshop:
16. Flambient Editing
Flambient editing merges the precision of flash with the softness and depth of ambient light to create realistic interior photos.
To achieve a natural look:
- Combine flash and ambient exposures for optimal balance
- Use flash to maintain color accuracy, while ambient light keeps natural shadows and atmosphere
- This method delivers well-balanced images that highlight the space without overexposing or flattening the scene
By preserving both detail and warmth, flambient editing creates consistent, true-to-life visuals—helping build trust with potential buyers.
To learn how to perform this editing technique, check out our video tutorial on how to edit flambient real estate photos:
17. Keep Your Images Realistic
The final but most important tip for editing your real estate photos is to keep them natural-looking.
Don’t go overboard and resist making them look overly saturated and cartoonish. To make your photos appear realistic, you need to ensure a more natural look that’s still appealing.
The goal of real estate photography is to help agents and Realtors to sell a listing. And for that, you need to provide them with captivating, natural-looking real estate photos.
And that’s it!
You’ve now learned 17 powerful techniques on how to edit real estate photos. Using these simple image enhancement techniques will help you take your real estate photography to the next level in no time!
Outsource Your Real Estate Photo Editing to PhotoUp!
As you probably know, post-processing real estate photos can take hours of your precious time, no matter batch editing or other shortcuts.
If you would rather spend time out on the field shooting more amazing property photos instead of being stuck in editing, you can always outsource your editing to PhotoUp.
PhotoUp has a team of highly talented real estate photo editors who are ready and eagerly waiting to enhance your photos.
Browse Top Dedicated
Real Estate Photo Editors
Ready-to-hire editors for real estate photo editing, and more.
Our professional editors can help you with any of the edits included in this guide, as well as more advanced editing techniques like panorama stitching, drone photo editing, 2D & 3D floor plans, and more.
Best yet, you’ll also get access to our user-friendly photo management system, so you can upload and receive photos and send instructions and feedback. As well as track and manage team members and clients, store final images, and more!
Did we say that our photo editing starts at the low cost of $1.50 per image for on-demand editing? Also, Dedicated Editing can go as low as $0.50 per image depending on the style and editing batch.
How to Get Started
Getting started using PhotoUp’s real estate photo editing service is super easy. This is how to do it:
Step 1. Sign up for a free PhotoUp account.
Step 2. Upload your photos to our easy-to-use software.
Step 3. Choose the level of editing that you need and provide instructions (optional).
Step 4. Wait for PhotoUp professional editors to edit and return the photos in less than 24 hours (48 hours for virtual staging).
Step 5. Download and start using your beautifully edited photos.
PhotoUp Real Estate Photo Editing Uploader Demo
Have a look at the real estate photo editing uploader demo to see how easy it is to get started with PhotoUp:
As simple as that!
A Complete Real Estate Marketing Partner
On top of that, PhotoUp is a complete real estate marketing partner and also offers other powerful services like:

We have everything you need to enhance and market real estate photography in one user-friendly software!
So, what are you waiting for? Sign up for a free PhotoUp account today and let our expert editors help you create stunning real estate photos while saving you time and money.
For a limited time, you even get 5 free credits you can use on any of our services when signing up for an account.
We hope this post helped you learn how to edit real estate photos using our top 17 techniques. If you found this post useful, you may also want to check out the following resources:

