


Table of Contents
- Why Captivating Photos Are Crucial in Real Estate Marketing
- When to Remove Unwanted Objects?
- How to Remove a Car From a Driveway in Photoshop
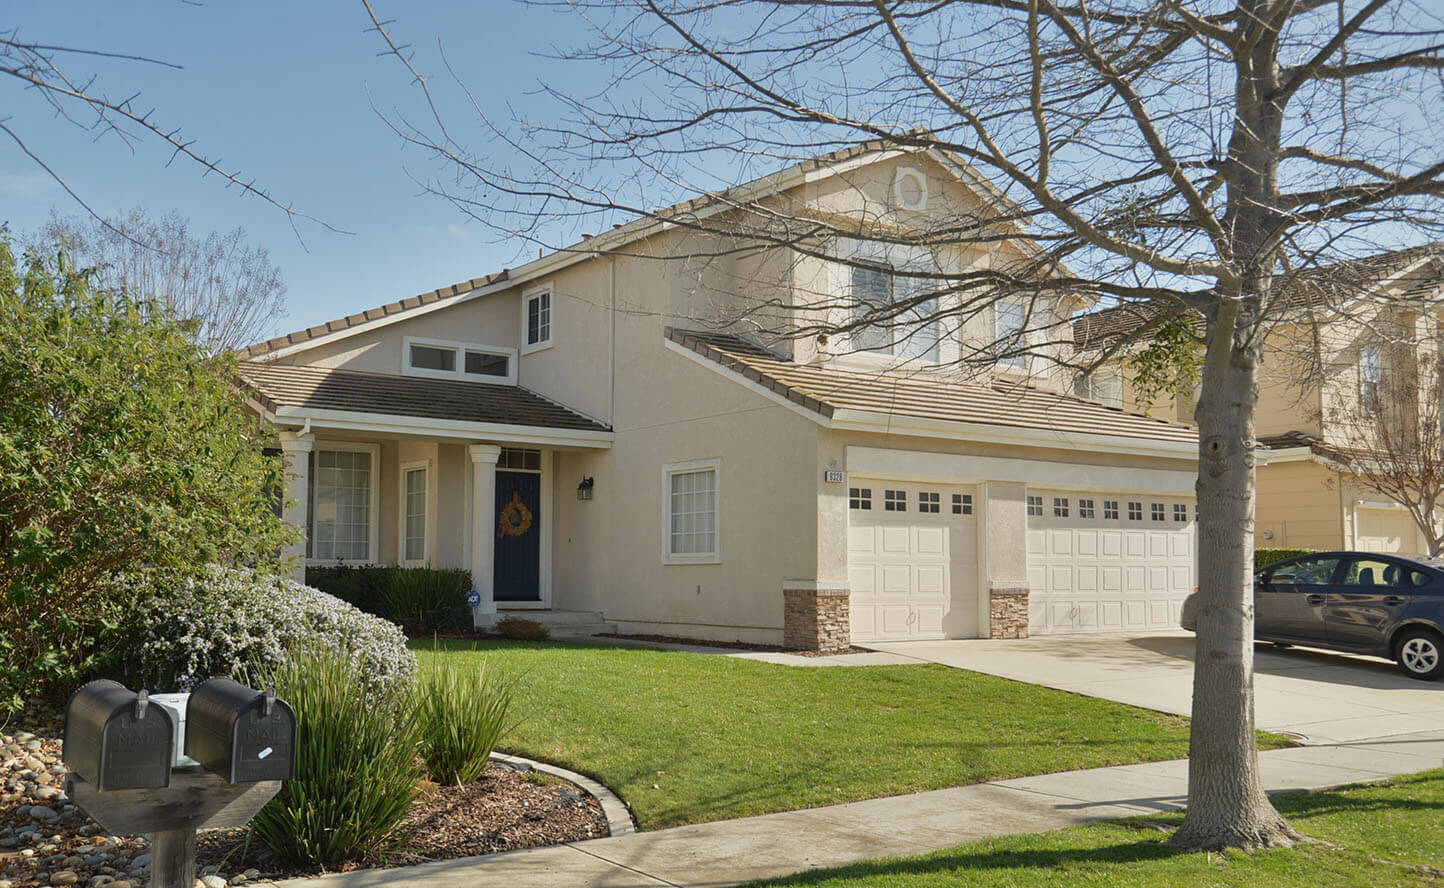
Do you want to know how to remove an object from a photo in Photoshop, and in this case, a car from the driveway?
In real estate photo editing, removals are the most challenging part of the process, especially removing an object with a pattern background.
In this post, we’ll show you how to remove a car from a driveway in Photoshop. We’ll also cover why captivating photos are crucial in real estate marketing and give examples of when you may need to remove unwanted objects.
Why Captivating Photos Are Crucial in Real Estate Marketing

Did you know that 97% of people in 2021 searched the internet for homes and expected to see quality photos?
This means that top-notch, captivating photography has never been more important for real estate marketing.
As more and more homebuyers are browsing listings online before taking the steps to go and see the property, your images need to immediately grab buyers’ attention.
They also need to convey everything there is to know about the listing such as special features, the neighborhood, the property’s curb appeal, etc.
In other words, you can no longer rely on the feel of a place to convince buyers. You need to first get them through the door, and for that, you’ll need exceptional real estate photos.
When to Remove Unwanted Objects?
When would you want to remove an object, you may ask?
There are situations where you would want to remove the unwanted objects to improve your real estate photography, which may be the following:
- There’s an unwanted car or bicycle in the driveway
- There’s an ugly spot of peeling paint in the kitchen or living room
- The photo of the bedroom has clothes strewn all over the carpet
- There is a big crack in the bathtub
- You failed to notice a person passing the house just as you took the shot
Fixing these things will go a long way in enhancing your real estate marketing.
Now, that you know the importance of captivating real estate photography and when to remove unwanted objects, let’s get into the nitty-gritty of this mini-tutorial!
High-Quality & Consistent
Real Estate Photo Editing
Hire a dedicated editor with performance metrics from $7/hour.

How to Remove a Car From a Driveway in Photoshop
Here is a mini-tutorial on how to remove an object from a photo in Photoshop. And in this case, we’ll remove a car from the driveway in 12 simple steps.
You can either watch the video tutorial or continue reading the text below:
Removing a Car From a Driveway in Photoshop (12 Simple Steps)
Step 1. To get started, right-click and then choose Edit in Adobe Photoshop.

Note: It is advisable to duplicate the photo when doing removals to ensure we have a backup image if we mess up on the first one.
Step 2. The first thing to do is to Analyze the Image, and then, choose the easiest way to remove it. And in this case, it is to start in the driveway.
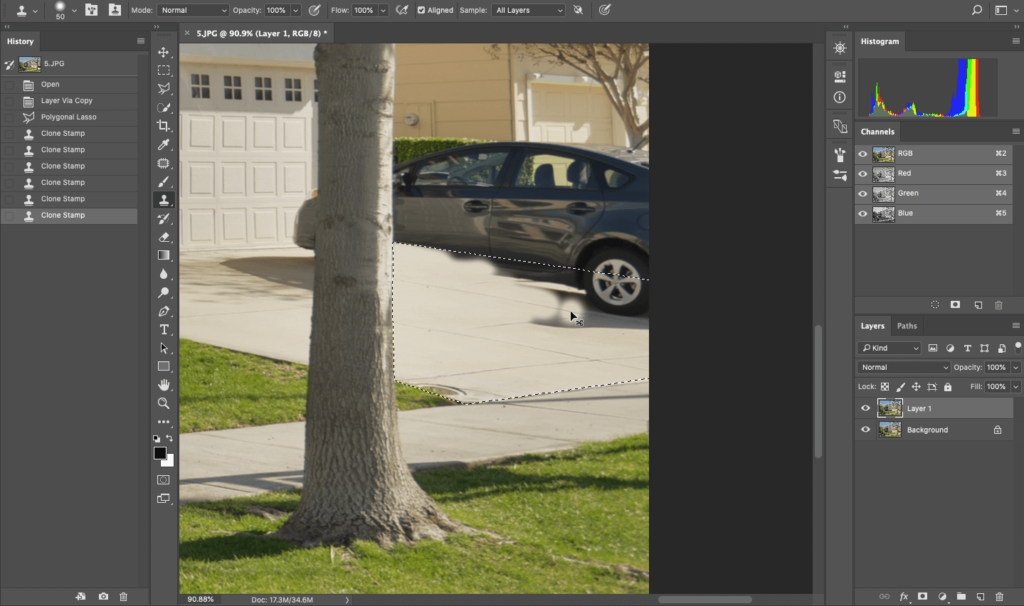
Step 3. So, start by Selecting and Tracing the driveway using the Lasso Tool.
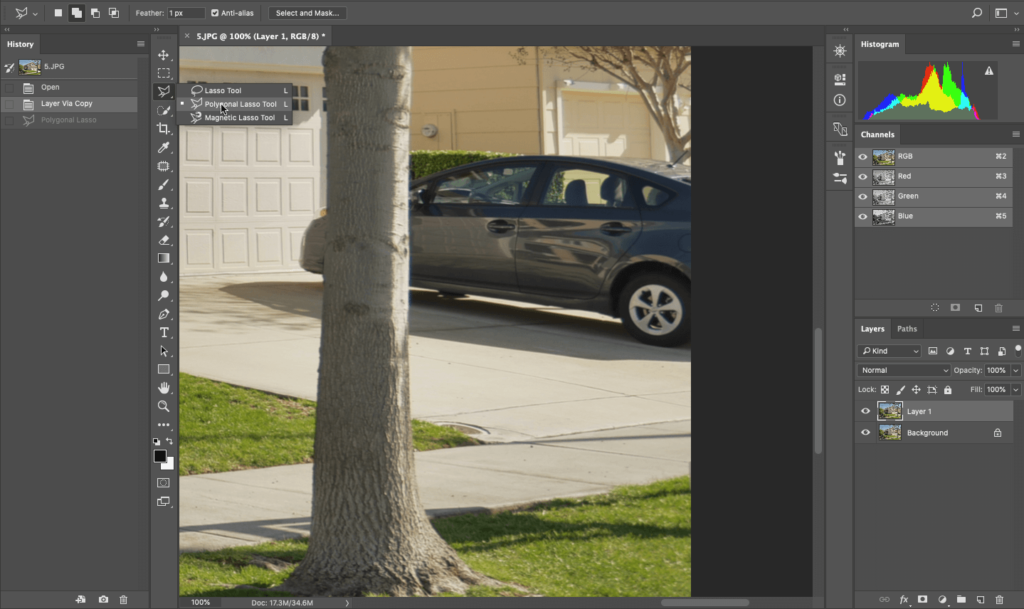
Step 4. Next, work on removing the car using the Clone Stamp Tool, carefully cloning the selected area.
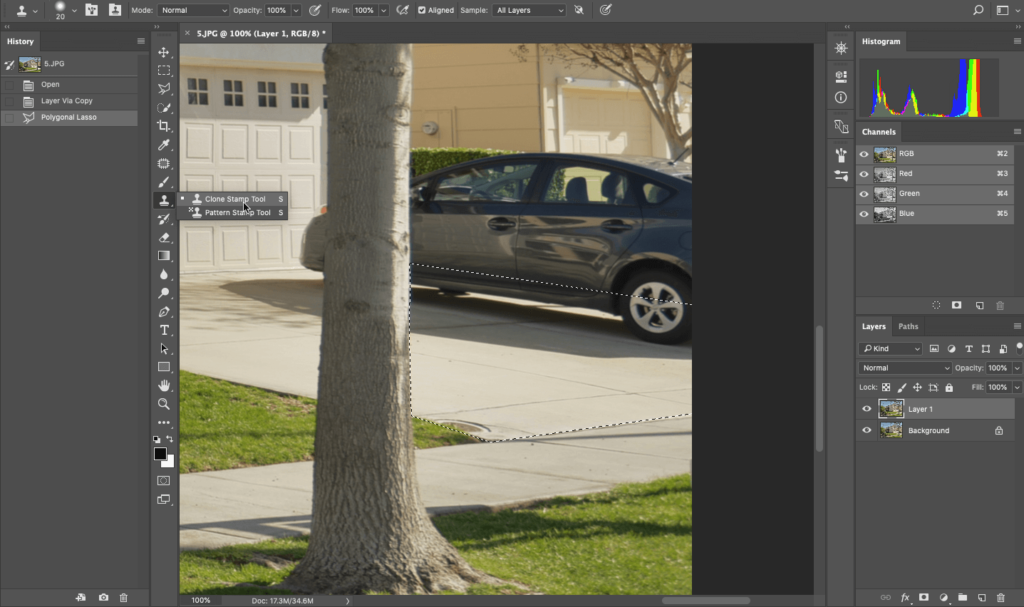
Step 5. The cloned area is a bit pale, so use a Brush Tool to brush the color of the other part of the driveway so that they will look the same.
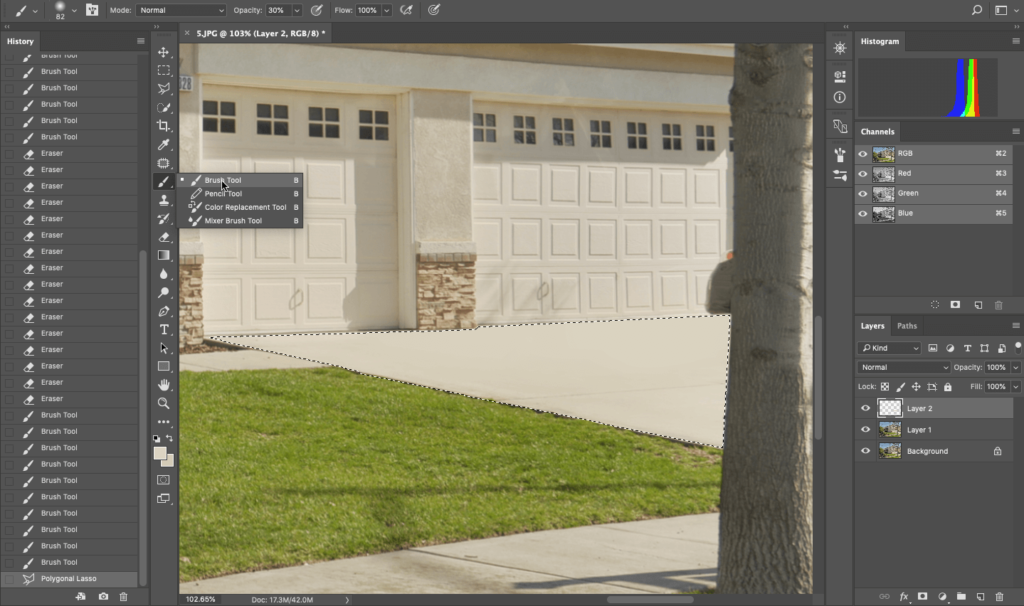
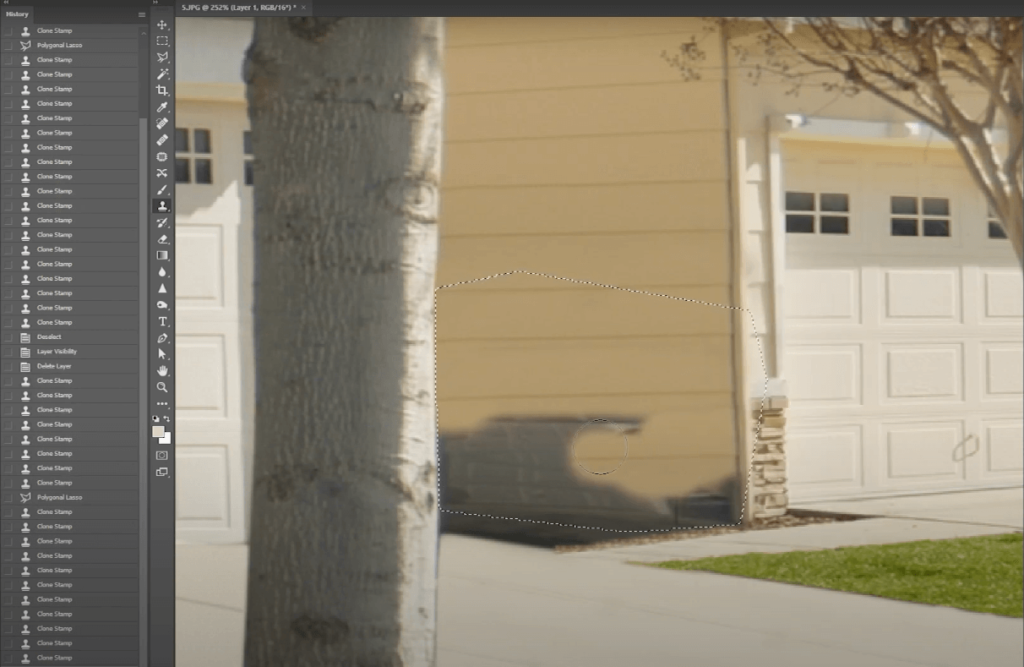
Step 6. Select the other part too. This time, we use a Brush Tool to remove the shadow of the car painted on a different layer (add a New Blank Layer), making it easy to adjust later.
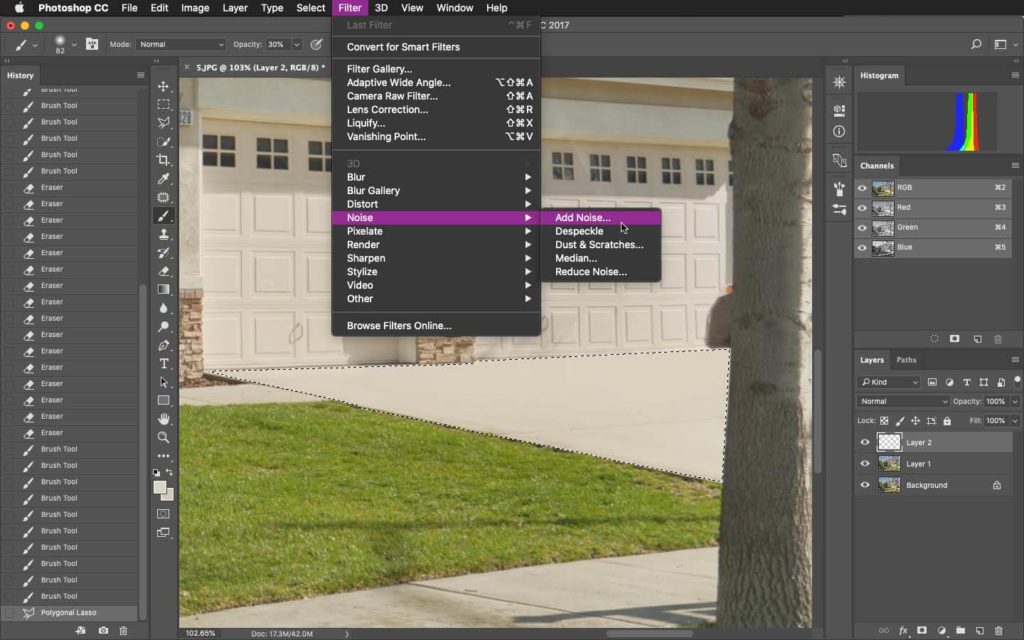
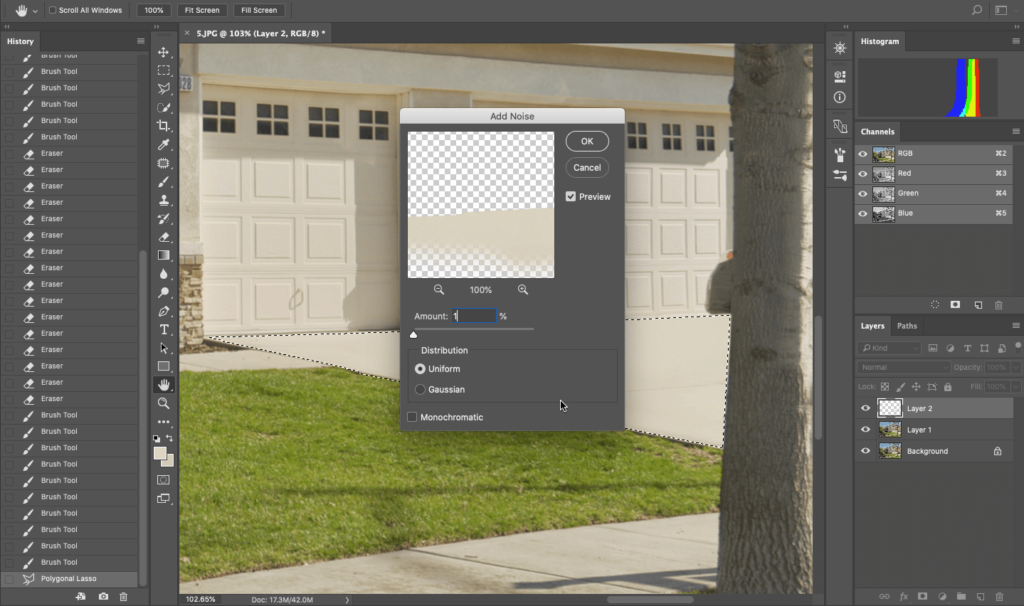
Step 7. Since we painted it, we need to add Noise on it so the painted part won’t look airy and smooth. To add Noise, click on Filter > Noise > Add Noise, and just put 0.5% – 1% amount of noise.
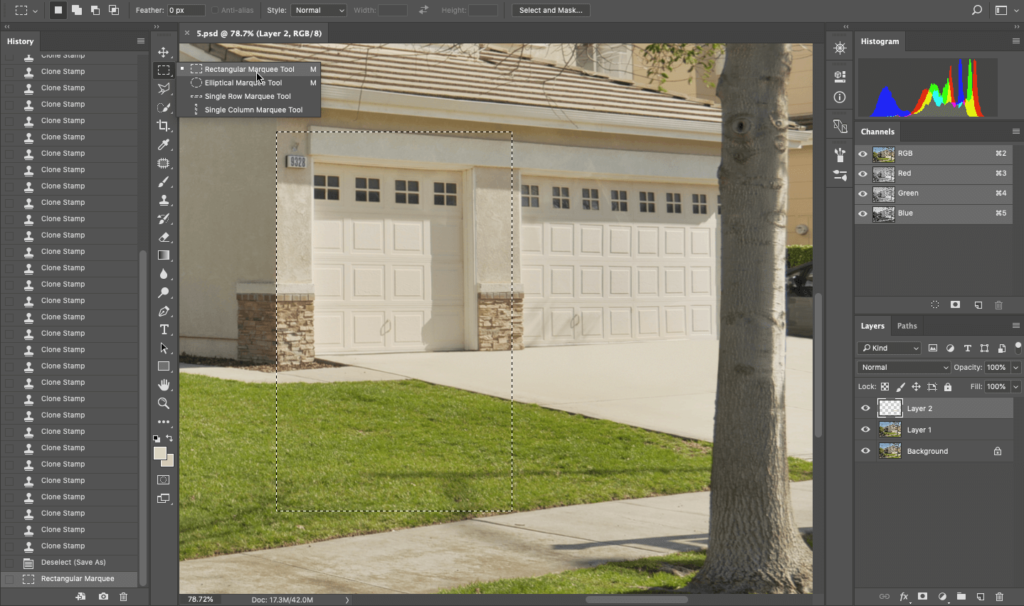
Step 8. And for the body part of the car, since the photo doesn’t have any available similar angle, we are just going to improvise by cutting out the smaller carport area (select it using the Rectangular Marquee Tool) and use it to cover the car.
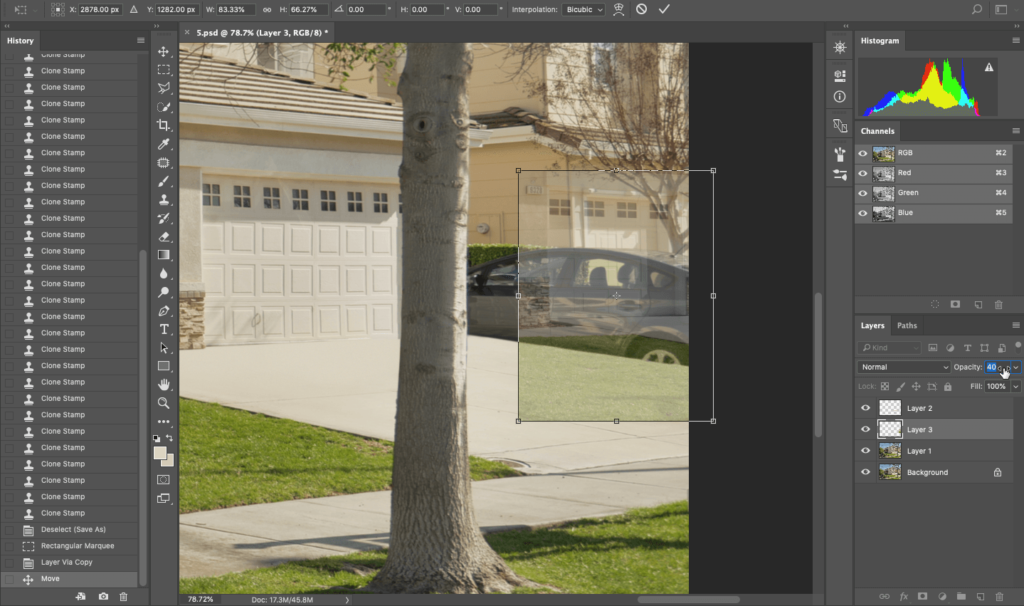
Step 9. Right-click, then select Layer via copy and align the image carefully while changing its opacity to 30%-50%, and cover over the object you want to remove.
Step 10. Now, continue Cloning the wall to cover up the car.
Note: When doing removals on signage, car, or any object removals, make sure there’s no obvious repetitive cloning. Always bear in mind that it is important to make your adjustment realistic. The perspective should always be right and don’t be afraid to use your imagination when it comes to object removals.
Step 11. For the final touch, we’re going to cut another portion of the main house and paste it at the bottom area of the wall. So, select the other area of the house using the Lasso Tool and paste it at the bottom of the wall (right-click, then select Layer via copy).
Step 12. Lastly, we also adjust its exposure on Camera Raw by pressing CTRL+ Shift +A so that the image we cut will blend on the other part of the house.
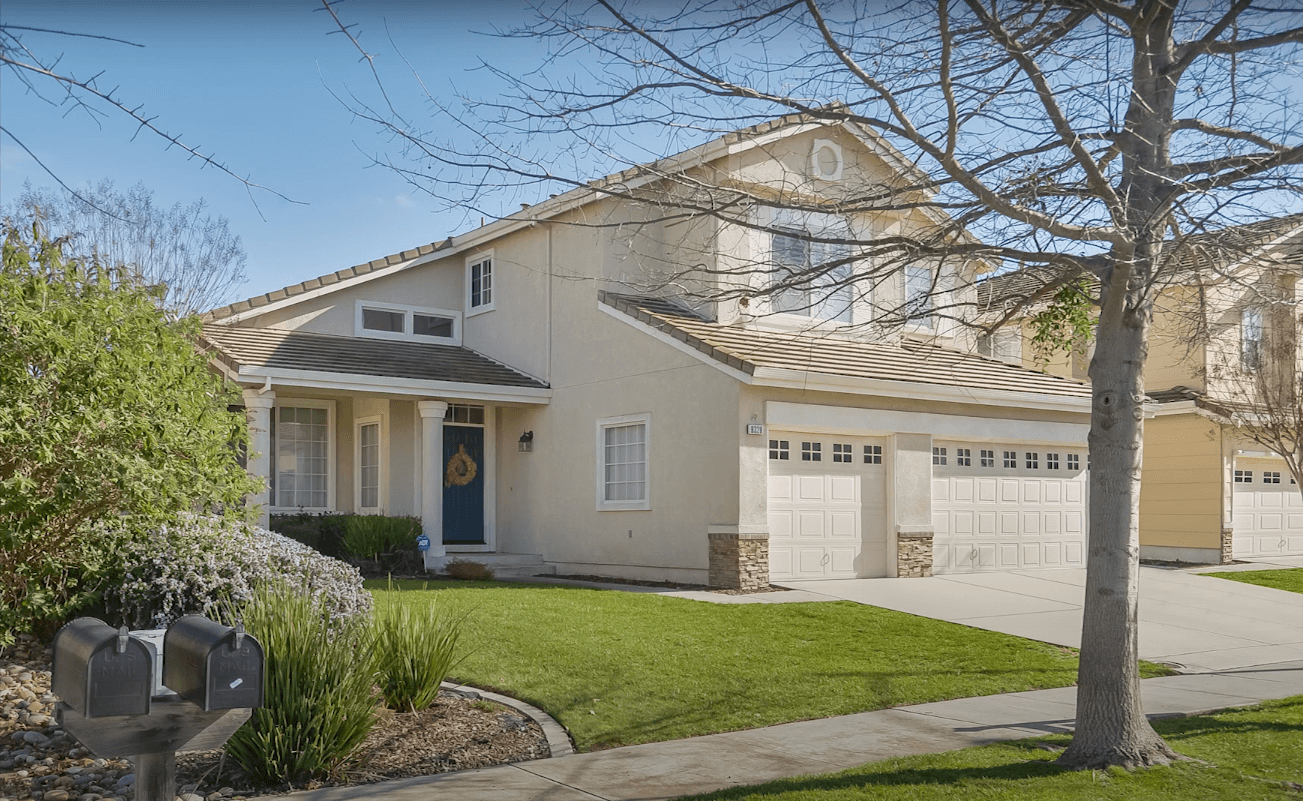
And that’s how you remove a car from a driveway in Photoshop!
Have You Ever Thought To
Outsource Photo Editing?
Try it today with 5 free edits from three professional photo editors.
Wrapping Up
With time and practice, you can become an expert in removing objects from real estate photos in Photoshop.
But if you can think of ways you can better spend your time and energy, then you should consider outsourcing your real estate photo editing to trained professionals.
PhotoUp’s team of professional photo editors and AI virtual staging artists are highly skilled and are waiting to take photo editing off your hands.
Browse Top Dedicated
Real Estate Photo Editors
Ready-to-hire editors for real estate photo editing, and more.
All you need to do is upload your images and instruct the team on what you’d like – they’ll do the rest, starting from only $1.50 per image.
To see how easy it is to get started with PhotoUp, check out our image uploader video tutorial:
And that’s it!
PhotoUp delivers hi-resolution, high-quality images, edited in your style within hours.
To see what PhotoUp can do for your real estate photo editing needs, sign up for a free account today!
We hope this post helped you understand how to remove an object from a photo in Photoshop to enhance your real estate photography and marketing.
If you found this post useful, you may also want to check out the following resources:

