


Table of Contents
- What Is Window Masking and Why Is It Important?
- How to Quickly & Easily Mask Windows in Photoshop
- Leave the Window Masking to the Experts at PhotoUp!
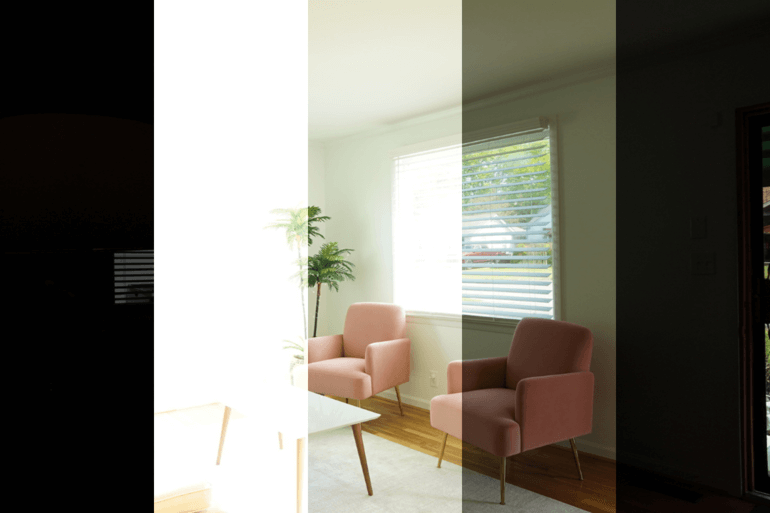
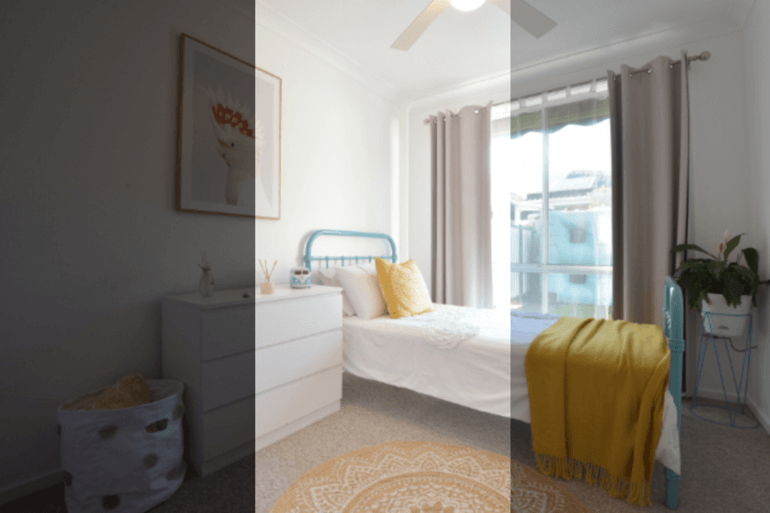
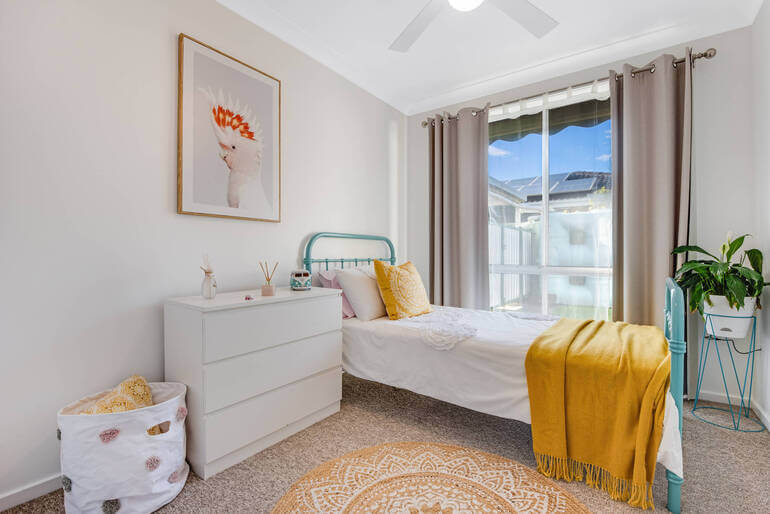
By masking windows in interior shots, you can capture the beauty of the space while also capturing the breathtaking views outside. It’s a great way to draw people in and make the property look absolutely amazing!
During photo shoots, even with thorough preparation, balancing light can be quite a challenge. This is especially true when dealing with strong sources like the sun. As sunlight streams through windows, it gets amplified by the glass, causing glares and overexposures that need to be addressed.
However, there’s a clever technique that real estate photographers use to showcase what a property has in store for potential buyers.
In this guide, we’ll show you a quick and easy way to mask windows in Photoshop to create beautiful views while also maintaining the interior elements in the image.
What Is Window Masking and Why Is It Important?
Being able to see the view from a property photo can greatly help potential buyers decide if the home is the right fit for them, and window masking ensures just that.
Window masking is a significant aspect of real estate photo editing. It allows us to establish which parts of a photo should remain unchanged, especially when it comes to editing the windows.
While the rest of the room stays untouched, the view from the window can be a bit tricky due to harsh glares and needs to be separately edited.
Furthermore, window masking plays a crucial role in showcasing the entire interior of the room. This is important because sometimes the glare from windows can overshadow some of the interior elements, such as the windowsill or nearby furniture, which may hide the best features of the room.
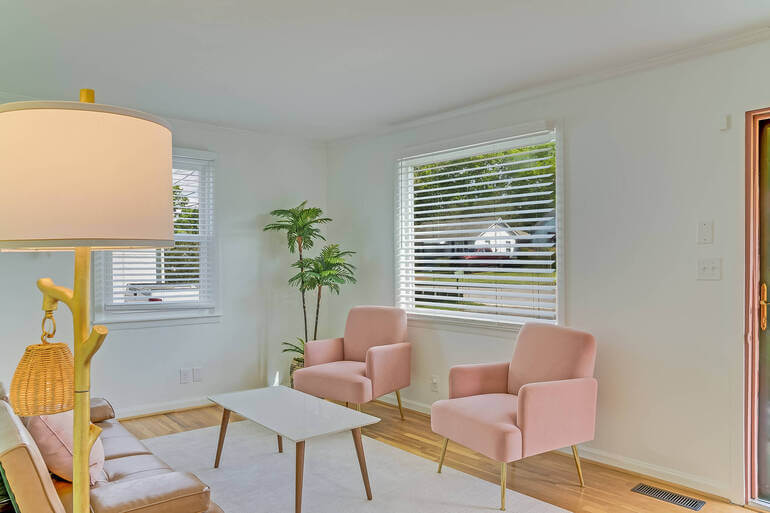
Window masking ensures a nice outside view while the interior elements are also highlighted in the image.
Before we get into the nitty-gritty details of how to mask windows in Photoshop, let’s briefly mention some shooting techniques for the best window views.
Shooting Techniques for the Best Window Views
There are plenty of ways to shoot real estate photography. To produce high-quality shots, we recommend the following:
- HDR – How to shoot HDR for Real Estate Photography
- Single Image – How to Shoot Single Images for Real Estate Photography
- Flambient – How to Shoot Flambient for Real Estate Photography
For the best window views, we suggest shooting using the HDR or Flambient methods as outlined above.
How to Quickly & Easily Mask Windows in Photoshop
With that, let’s move on to how to properly mask the view through your windows. This is a step-by-step tutorial that walks you through the best and quickest way to mask windows in Photoshop.
You can either watch the video or continue reading the text below:
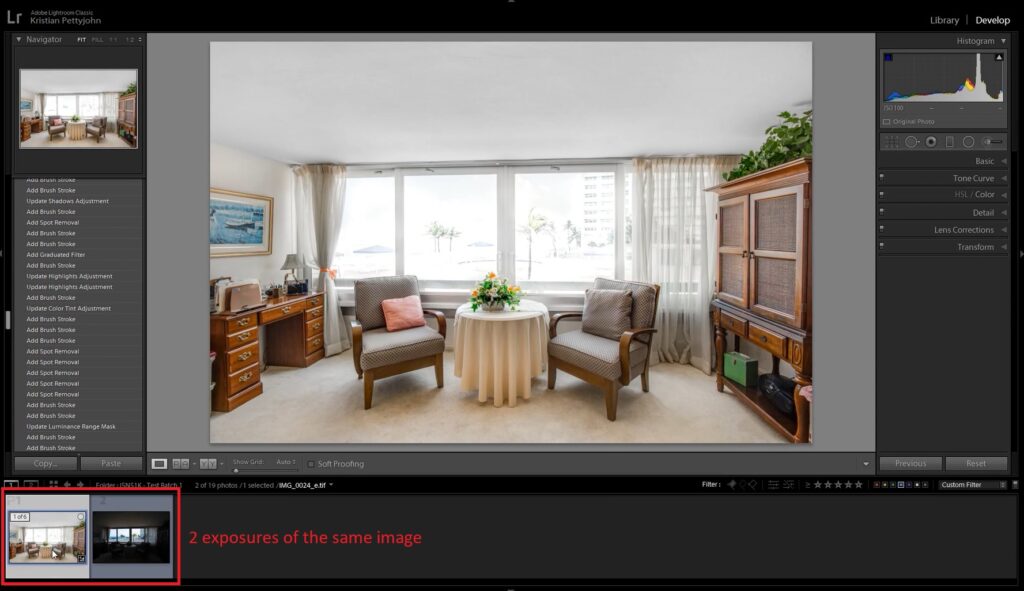
Step 1. To get started, you’ll need (at least) two exposures of the same image. One, the base file, is for the normal exposure of the interior of the room.
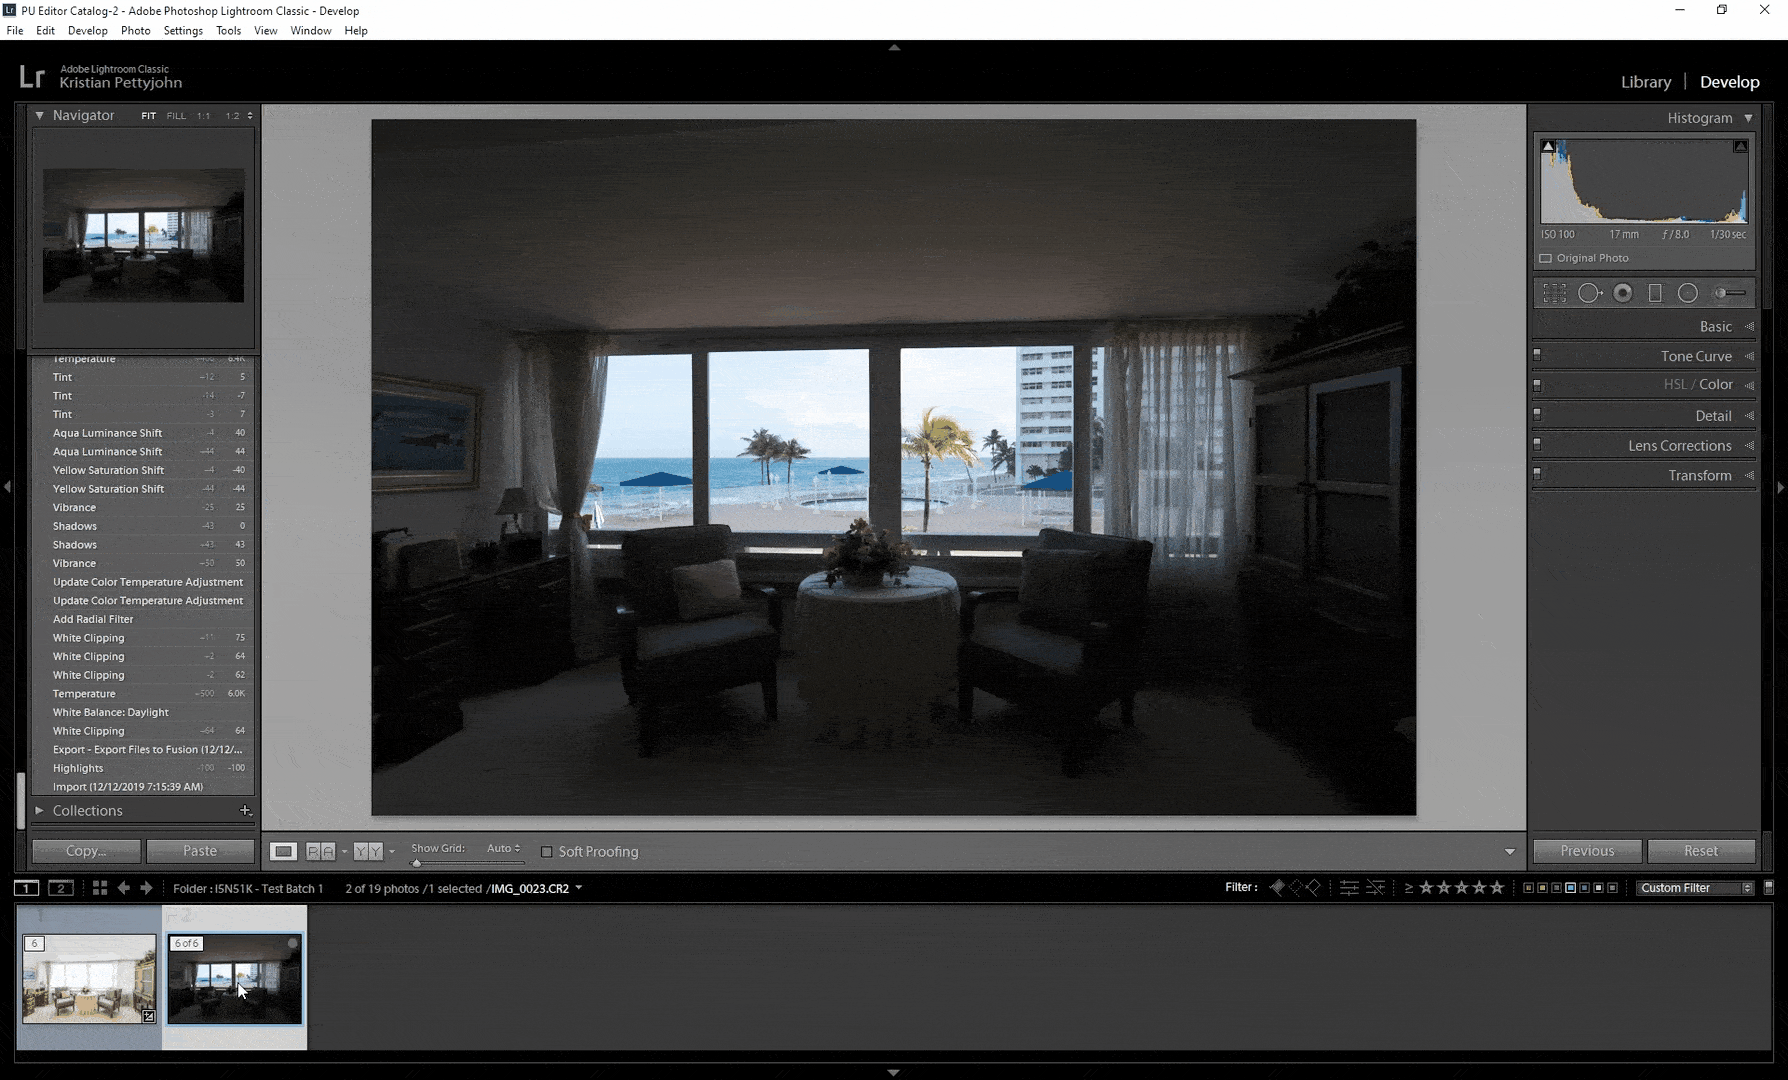
The second exposure is for the window view. The window view is set at the correct exposure while the room view is underexposed.
To enhance the window view in the window view exposure, let’s make a few adjustments using the Image Adjustment Panel in Lightroom.
Keep in mind that the settings you need to change will vary from one photo to another, depending on the level of brightness and vibrance you desire for the window view.
Step 2. Next, select both photos.
Step 3. Right-click and choose Edit In. Then, scroll down and click Open as Layers in Photoshop.
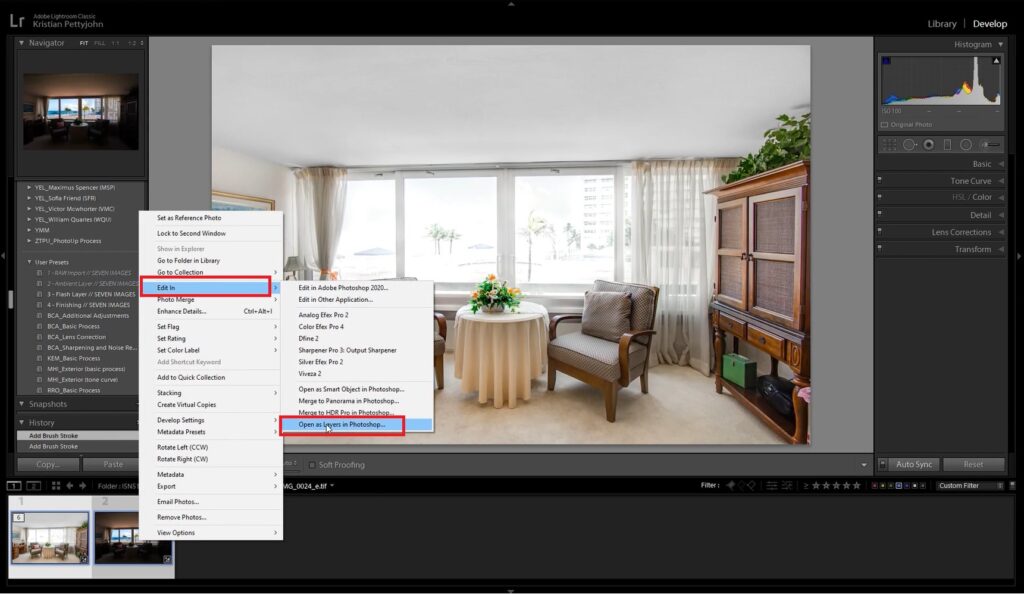
In Photoshop, drag and place the room-view image under the edited window-view image.
Step 4. Now, select the window view layer and click the Add Layer Mask icon at the bottom.
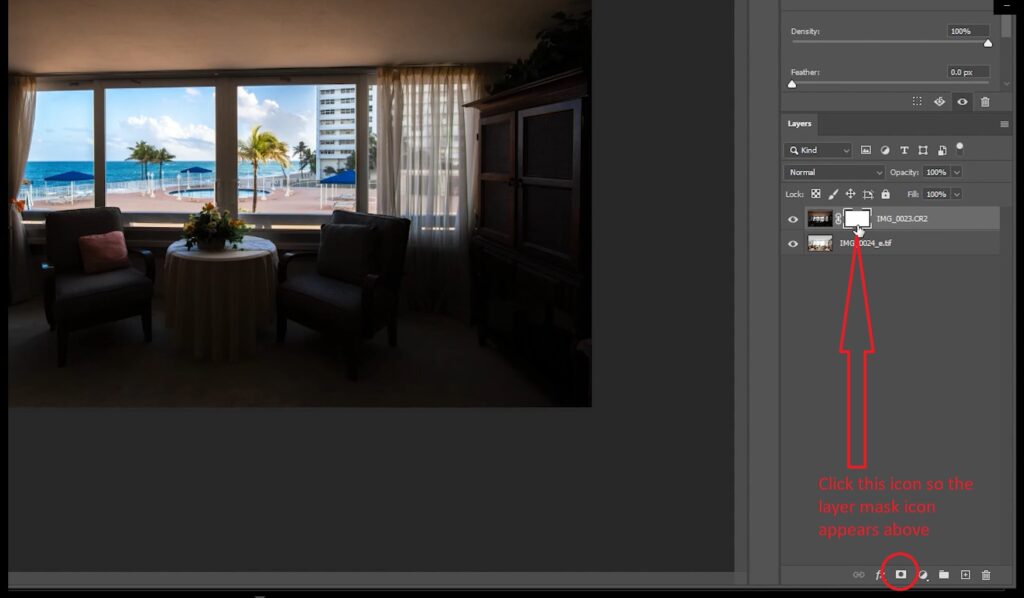
Step 5. To hide the layer without removing it, we need to invert the layer mask. Click Ctrl + I, or Command + I on your keyboard. Then select the Layer Mask.
Have You Ever Thought To
Outsource Photo Editing?
Try it today with 5 free edits from three professional photo editors.

Start Masking the Window View
Step 6. Start masking the window view by using the Brush Tool. Adjust the Hardness setting to around 85%, and make sure the layer color in the menu bar is set to white. Then, brush over the image of the window view to the room view.
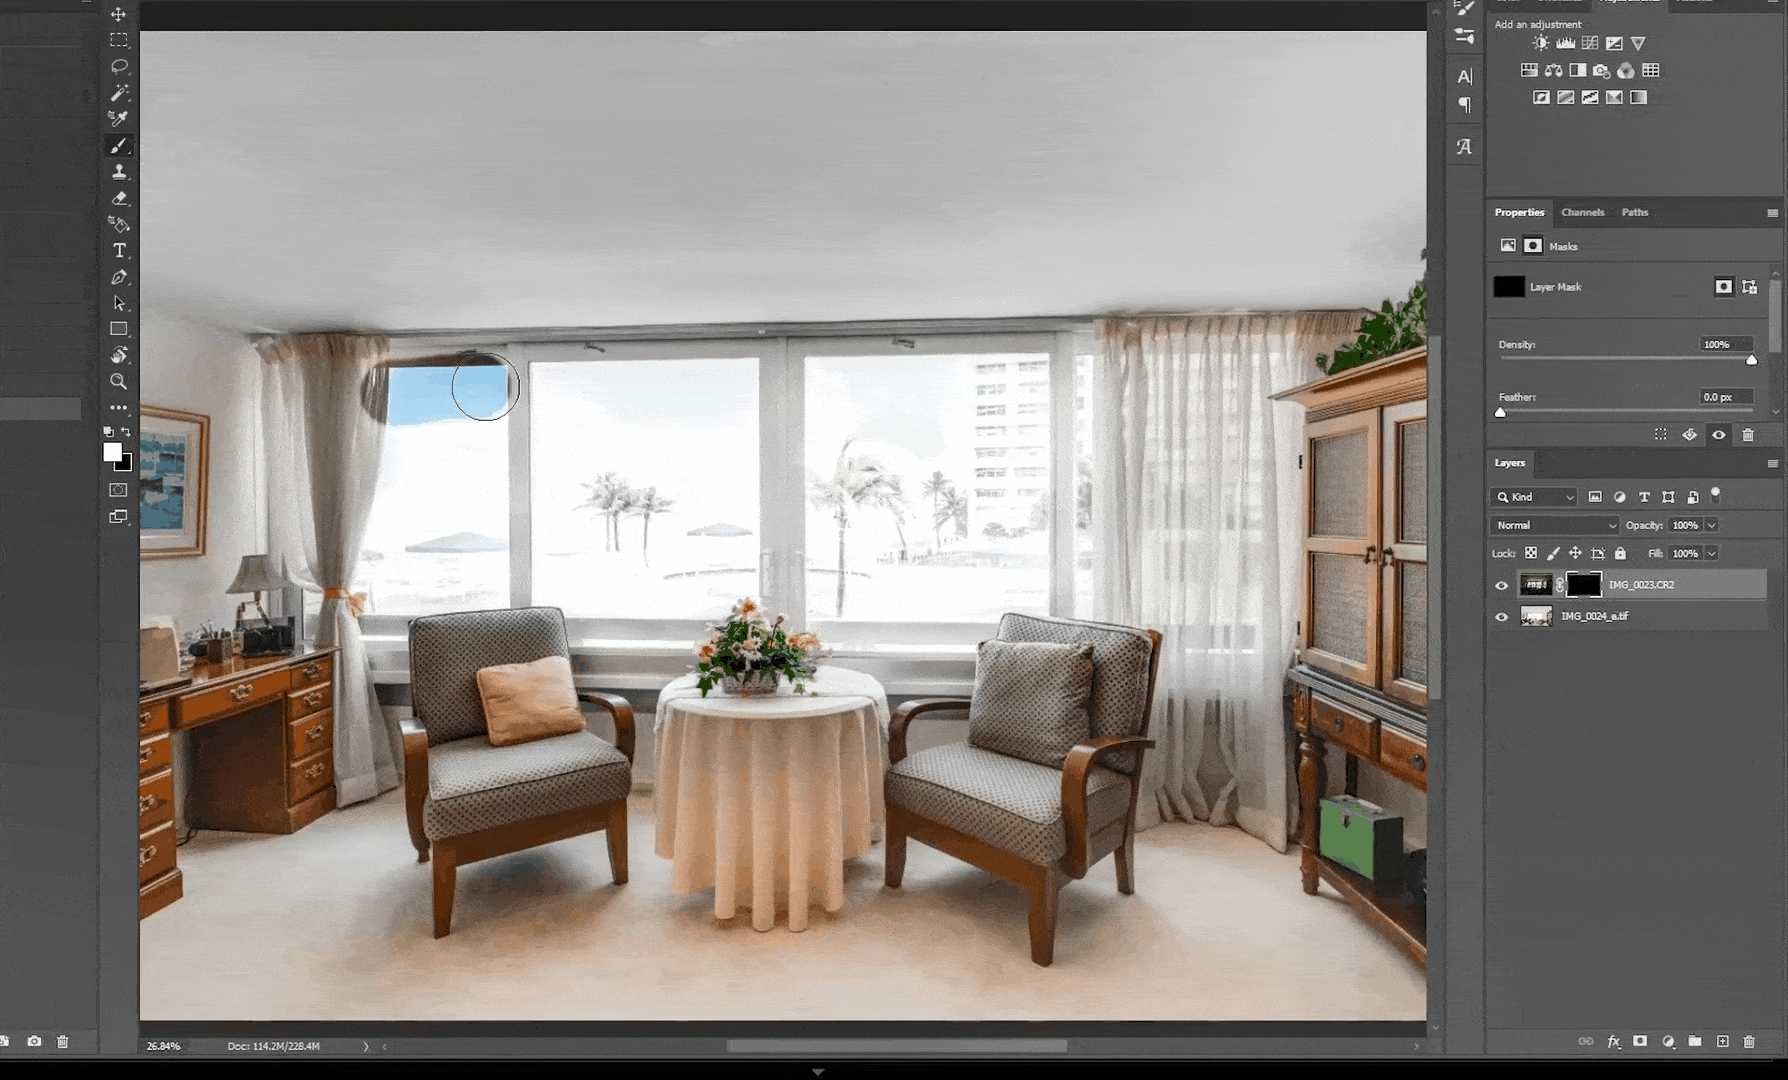
Step 7. To get rid of overlapped frames, let’s change the layer color to black. Simply brush over the areas that are overlapping to restore the original look.

You can also do steps 7 and 8 using the Pen Tool and make a selection of the windows – whatever you find easiest to do.
Step 8. Lastly, if you want to brighten up the window a bit, you can simply adjust the Opacity. This helps with the transition between the inside and outside and makes the view appear more natural.
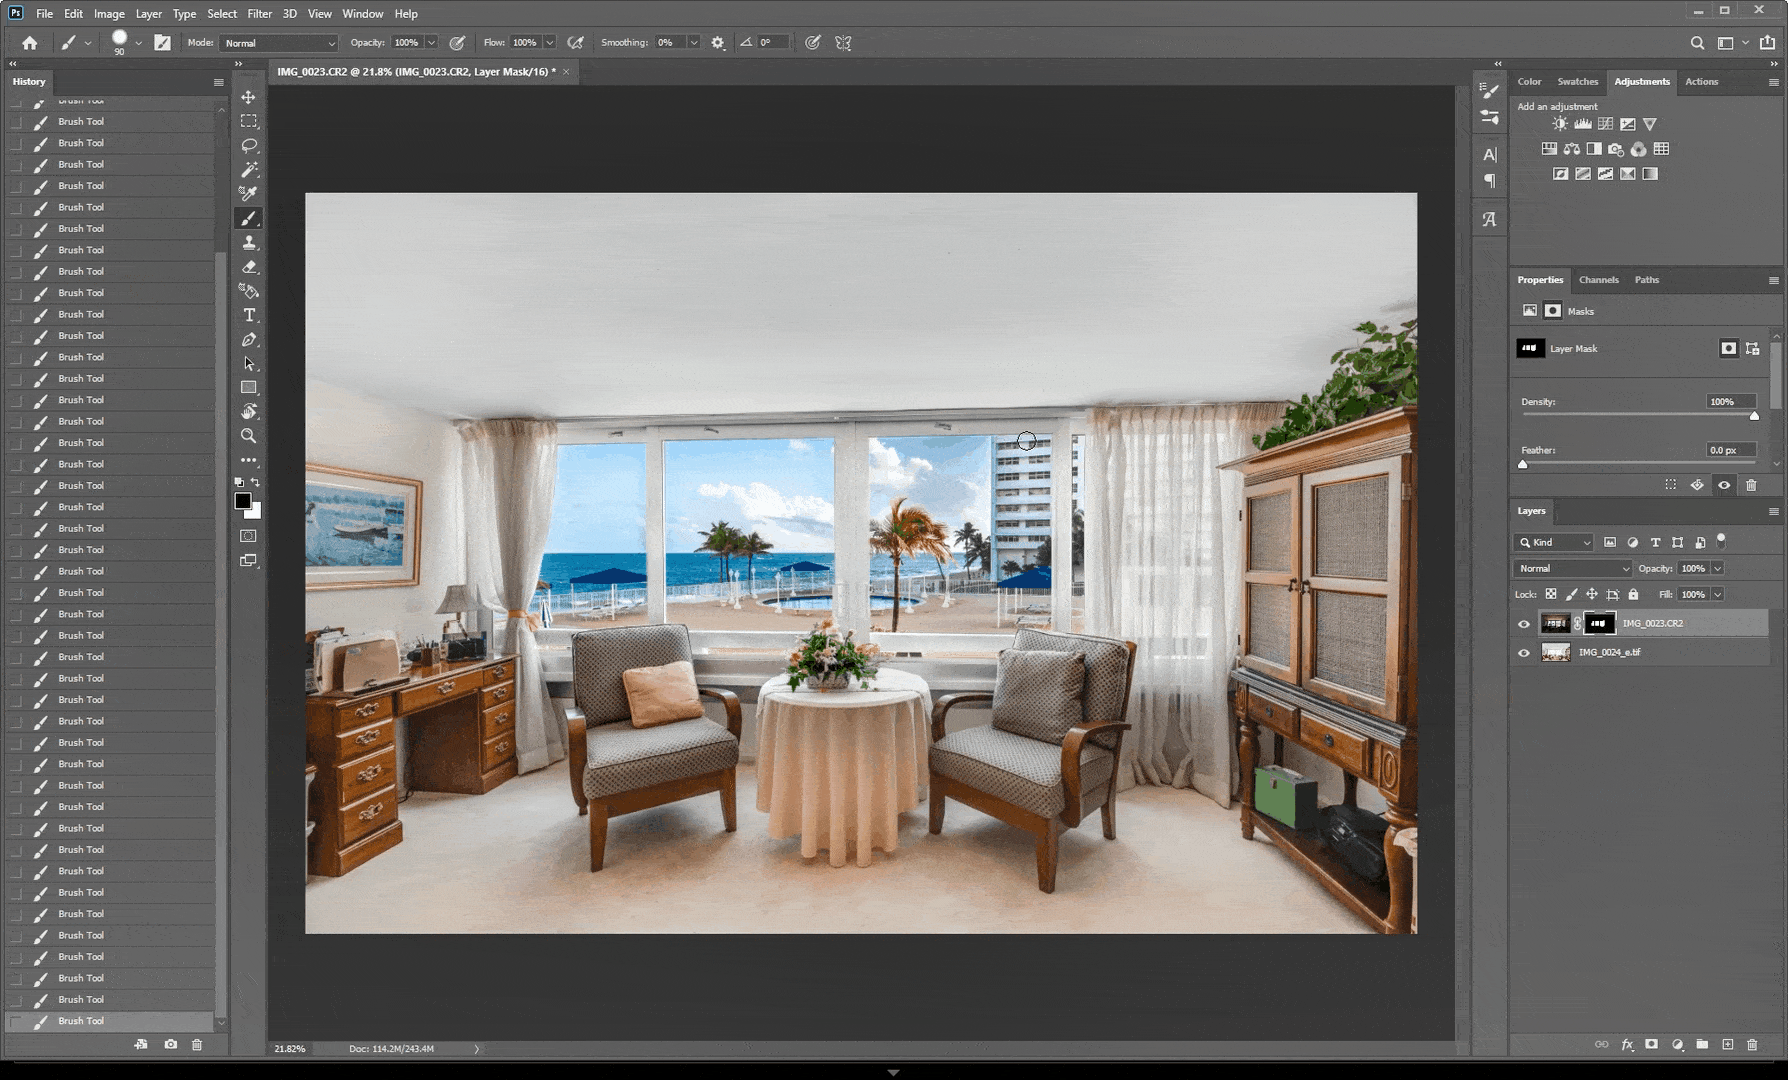
And voila! You have now learned how to mask windows for real estate photography in Photoshop.
Have You Ever Thought To
Outsource Photo Editing?
Try it today with 5 free edits from three professional photo editors.
Leave the Window Masking to the Experts at PhotoUp!
Are you finding window masking to be a little challenging? Don’t worry about the hassle of masking in all your window views!
Simply send your photos to PhotoUp and we’ll handle all the editing for you.
Our team of real estate photo editors is here to professionally edit your photos according to your preferences.
Whether it’s window masking, object removal, sky replacement, or Twilight editing, we’ve got everything covered!
Other common photo editing services we can happily help you with are:
- Image correction and enhancement
- Color and tone adjustments
- Grass greening and improvements to the landscaping
- Decluttering and redecoration
- Line and angle corrections
- Improper exposure levels
- HDR editing
- Harsh shadows, lack of light, etc.
- And much more!
Browse Top Dedicated
Real Estate Photo Editors
Ready-to-hire editors for real estate photo editing, and more.
A Complete Real Estate Marketing Partner
Apart from real estate photo editing, PhotoUp is a complete real estate marketing partner and also offers additional services such as:
We have everything you need to enhance and market real estate photography under one roof!
Easy & Quick Ordering Process
Starting to use PhotoUp’s real estate photo editing service is a breeze!
All you have to do is sign up for a free PhotoUp account, upload your images, select your export settings and turnaround time, and voila! You’re good to go!
PhotoUp Real Estate Photo Editing Uploader Demo
Check out our real estate photo editing uploader demo to see how easy it is to get started:
It’s as easy as 1-2-3!
Sign up for a free PhotoUp account today, and let PhotoUp do the window masking for you! And for a limited time, we even offer you 5 free edits when signing up for an account.
We hope this blog post helped you learn how to mask windows in Photoshop. If you enjoyed this guide, you may also want to check out the following resources:

