


Do you want to know how to edit HDR photos in Lightroom to enhance your real estate photography?
HDR photography is a technique that is used to blend multiple images, taken at different exposures, and later combine them in post-processing, which this tutorial will show you how to do.
In this post, we’ll show you how to edit HDR photos in Lightroom to create well-blended, top-quality real estate photography.
But before we dive into the actual tutorial, let’s first explain what HDR photography is and why photographers should use this technique.
What Is HDR Photography?
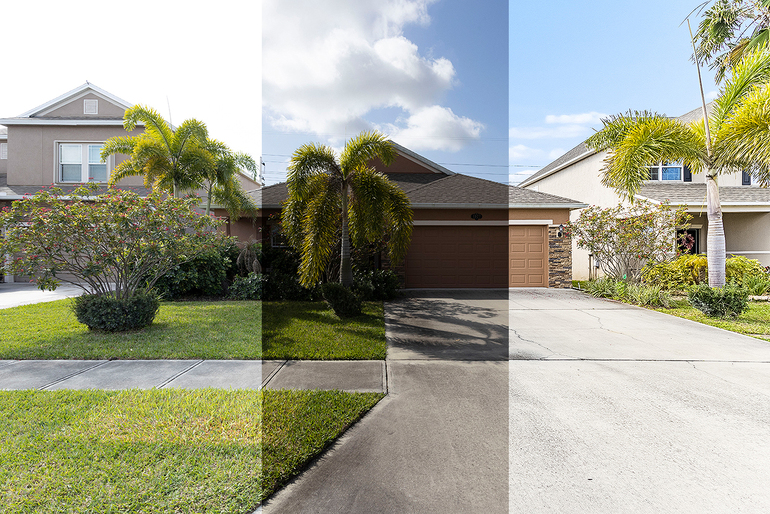
HDR stands for High Dynamic Range, which refers to the amount of contrast between the darkest and the lightest areas of a photograph.
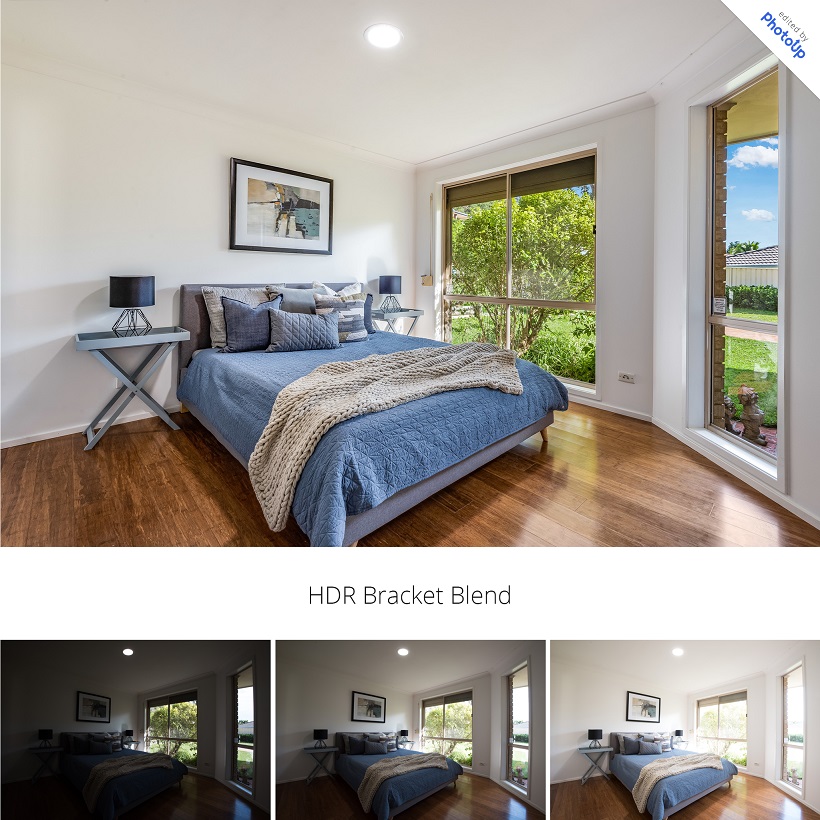
An HDR photo is a series of bracketed photos (often 3) of the same subject taken at different shutter speeds and exposure levels. Each image shows varying degrees of luminosity.
With the use of photo editing software, these bracketed images are then blended together to create a final image that shows all details in perfect exposure.
Why Use the HDR Technique?
The HDR technique is used because most regular cameras struggle to balance photos, where there is a high contrast between dark and light areas.
Too often, photos end up washed out with an overabundance of light, or dark and blurry because of the absence of light.
And this isn’t optimal, especially for real estate photography, where you have to create top-quality, captivating images to market properties for sale.
Shooting in HDR and then blending the images using editing software allows photographers to capture the full detail in the scene, both in the dark and light areas, and generate stunning images.
How to Edit HDR Photos in Lightroom (8 Simple Steps)
Now, let’s show you how to edit HDR photos in Lightroom for real estate photography using 8 simple steps.
You can either watch the video tutorial or continue reading the text below:
Real Estate Photo Editing: Import and Infuse Photos
Step 1. To get started, import your photos into Lightroom. And then sort your photos by filename to keep the photos in order during the HDR process.
As mentioned earlier, HDR stands for High Dynamic Range photo. It’s created by capturing multiple images with different exposures at the same time. This technique mostly consists of 3 or more images.
Step 2. To produce an HDR photo, we need to infuse them. So, select your images, right-click and select Stacking and Group into Stack. Or you can select them all and Auto Stack by Capture Time, and Lightroom will automatically stack them.
Step 3. For the infuse process, you can also infuse multiple stacks of photos. Just select them all, and then go to File, Plug-in Extras and then click on Blend exposures using LR/Enfuse. This will open a dialog box.
Step 4. In the Auto Align tab, you need to make sure the option Automatically align images before blending them is checked so that Lightroom will automatically align the photos before blending them.
Step 5. Since we stack our photos, in the Output tab, the Batch Mode should be checked. Next, in Output files (on the same tab), you need to also check the Create blended images in the same folder as the images in the stack option.
Have You Ever Thought To
Outsource Photo Editing?
Try it today with 5 free edits from three professional photo editors.

Saving Your Infused Files
Step 6. To save the infused files in the same folder as the original (still on the same tab under after blending), check the Reimport image into Lightroom option so the infused product will automatically appear in Lightroom after reviews.
Besides that, you have the option to Stack with originals. Stacking with originals will automatically group with the images you’ve stacked beforehand. It’ll be the first image on the stack.
On the other hand, if you opt not to stack with originals, the infused image will appear beside the stacked images. Either way is fine.
Step 7. Next, click Infuse Images. The progress can be viewed in the upper left corner of the screen. However, since we infused multiple stacks of photos, this will take time.
Step 8. When the infuse is done and you don’t see the infused photos, go to the Library and select the Folder, where you put the images. This will sort of refresh the folder.
If you are still confused, the infused image will always be a tiff file. When the infuse is done you can now start editing the photos with basic editing.
And that’s it!
Wrapping Up
As with any photo editing, it takes time away from shooting more properties and building lasting relationships with agents and Realtors.
So, if you’re spending too much time editing, PhotoUp has teams of professional real estate photo editors who can help edit your photos, starting at $0.75 per image.
Browse Top Dedicated
Real Estate Photo Editors
Ready-to-hire editors for real estate photo editing, and more.
In addition, we offer an all-in-one photo management system, where you can upload your bracketed photos and receive your final HDR edits within hours.
Check out how easy it is to get started in our image uploader video tutorial:
As you can see, it’s simple, quick, and cost-effective, and the results are stunning!
Sign up for a free PhotoUp account today, and let us help you take your real estate photography to the next level!
We hope this post helped you learn how to edit HDR photos in Lightroom. If you found this post useful, you may also want to check out the following resources:

