


Table of Contents
- Why Remove Shadows in Real Estate Photos?
- Simple & Quick Ways to Remove Shadows in Photos
- How to Quickly Remove Shadows in Photoshop
- How to Easily Remove Shadows in Lightroom
- Top 3 Apps to Effectively Remove Shadows From Photos
- Take Help From the Photo Editing Experts at PhotoUp!
Do you want to learn how to remove shadows in photos using Photoshop, Lightroom, or some easy-to-use apps?
As a real estate photographer, you may have encountered the frustration of capturing an otherwise perfect photo, only to be disappointed by unwanted shadows or dark spots. While shadows can be intentionally used as an artistic effect in certain types of photography, they can often detract from an otherwise flawless shot.
Luckily, the process of removing shadows from photos has been significantly simplified with the advent of various online tools and applications.
In this guide, we’ll show you how to remove shadows in photos using both Photoshop and Lightroom. We’ll also present 3 apps that can help you get rid of unflattering shadows when taking pictures with your smartphone.
Let’s get started!
Why Remove Shadows in Real Estate Photos?
Properly balancing light and shadows is crucial in real estate photography. Light enhances brightness, while shadows can add a dramatic touch to specific areas in an image’s composition.

Achieving this contrast creates engaging and captivating photos that showcase the property’s best features.
In some cases, removing shadows from photos is crucial for enhancing their overall quality. It can help to bring out the main subject and greatly improve the overall clarity of the image.
This not only makes the photo more engaging and visually appealing but also helps to showcase the property in its best light.
Simple & Quick Ways to Remove Shadows in Photos
Two of the most popular and widely used tools among professionals are Adobe Photoshop and Lightroom, which both offer advanced features to eliminate shadows from images effortlessly.
Additionally, there are several user-friendly applications available that can help you address shadow-related issues in your pictures quickly such as:
- Afterlight
- TouchRetouch
- And Snapseed
However, we understand that navigating through numerous options can be overwhelming, especially for beginners in the field. So, we’ll present some quick and simple techniques and apps to help you find a technique or tool that works best for you.
After going through this step-by-step guide, you can say goodbye to frustrating shadow-related challenges and embrace the potential for extraordinary real estate photography.
How to Quickly Remove Shadows in Photoshop
Let’s start by showing you how to remove shadows in Photoshop.
To get started, you can either watch the video tutorial or continue reading the text below:
Assuming that you have already enfused the photo, it is now time to add the basic adjustment to it.
Step 1. To begin, make the necessary adjustments to make the photo bright and well-balanced.
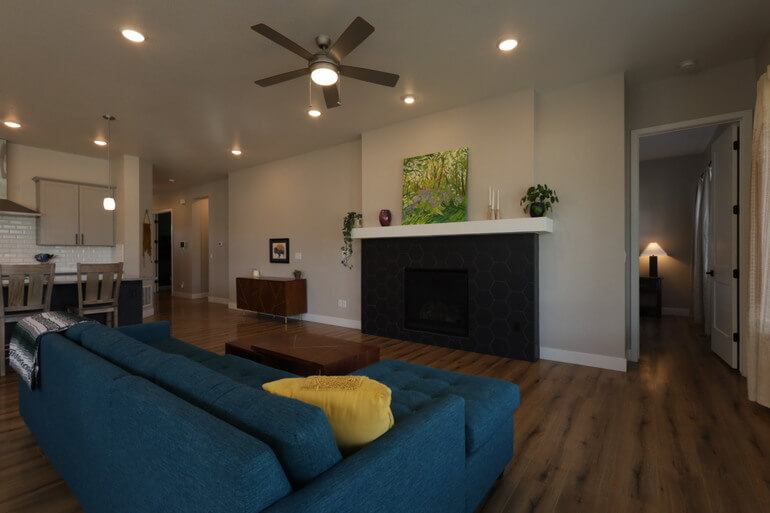
Step 2. When you’re done adjusting the photo, move it to Photoshop. Here we are going to remove the flash shadow of the fan in the ceiling.
Step 3. Next, duplicate the Layer, and use the Path Tool to soften the shadow.
Step 4. Then, use the Clone Stamp Tool to remove the shadow. You can adjust the Opacity depending on how you need it. Just keep Patching till the shadow is completely gone.
Step 5. Now, select the ceiling using the Magic Wand Tool, and use the Dodge Tool to lighten the dark area.
Step 6. Lastly, use the Brush Tool to remove the color cast on the ceiling. Additionally, you can add more adjustments in Lightroom if you want.
And that’s it!


Have You Ever Thought To
Outsource Photo Editing?
Try it today with 5 free edits from three professional photo editors.

How to Easily Remove Shadows in Lightroom
Now, let’s look at how to remove shadows using Lightroom to expose the details in dark areas using 2 super simple techniques.
As in the prior example, you can either watch the video tutorial or continue reading the text below:
Method 1.
Step 1. To get started, adjust the Shadow Slider up to brighten shadow areas.
Step 2. Then, bring down the Highlights to balance it with Shadows.
Step 3. Next, adjust the Exposure to brighten the photos a bit more.
Step 4. Since the shadows were brightened, adjust the Contrast, Blacks, and Clarity to boost the details and decrease the shadows.
Step 5. After some adjustments, the shadows are brightened and you can see more detail in the darker areas.
Method 2.
Another tip to brighten the shadows is to use the Local Adjustment Tool or the Brush Tool.
Step 1. First, use the Brush Tool to brush over the shadowed areas and make sure to avoid the highlighted areas.
Step 2. If you accidentally brushed the highlighted areas, simply Undo or Erase the highlighted section.
Step 4. To blend with the shadow a bit more, adjust the Light or Highlighted Areas as well.
And there you have it!
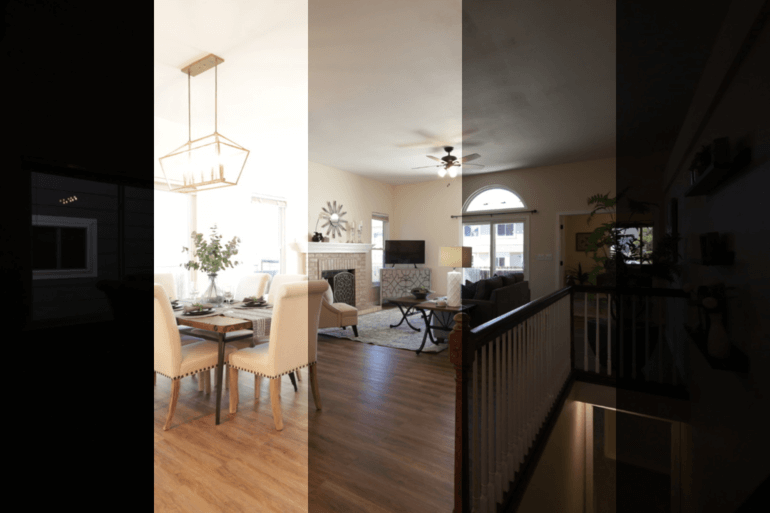
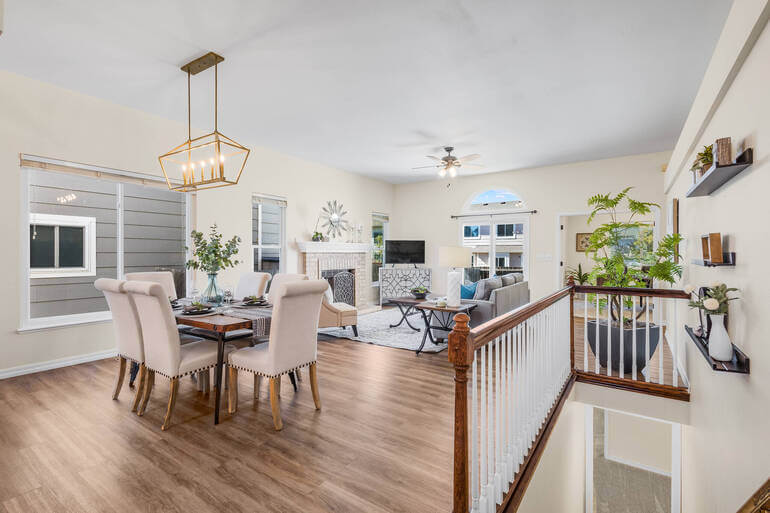
We’ve now restored details and removed all of the darkest shadows in the image. Check out the Before and After preview to see the difference.

Now that you know how to remove shadows in photos with Photoshop and Lightroom, let’s take a look at 3 apps that can help you get rid of shadows in your smartphone images.
Top 3 Apps to Effectively Remove Shadows From Photos
Mobile phone cameras have become incredibly advanced, allowing users to capture high-quality photos with ease. But even in the best quality images, you may want to remove unflattering shadows.
Luckily, there are several excellent apps available to help you remove shadows that obscure your otherwise beautiful property photos, and here are 3 of them:
1. Afterlight

One highly-rated option is Afterlight. This app provides powerful editing tools, with the ability to selectively brighten shadowed areas without overexposing the rest of the image.
Users particularly praise the easy-to-use interface and range of customizable adjustments.
Afterlight also includes filters and the ability to enhance details, making it a versatile photo editor beyond just shadow removal.
2. TouchRetouch

Another top choice is TouchRetouch. This app uses AI technology to detect and eliminate shadows with just a few taps.
It gently evens out lighting gradients for a smooth, natural effect. TouchRetouch can also remove unwanted objects, clone areas, and fix other photo flaws.
The automatic smart removal feature makes this app straightforward to use, even for editing novices.
3. Snapseed
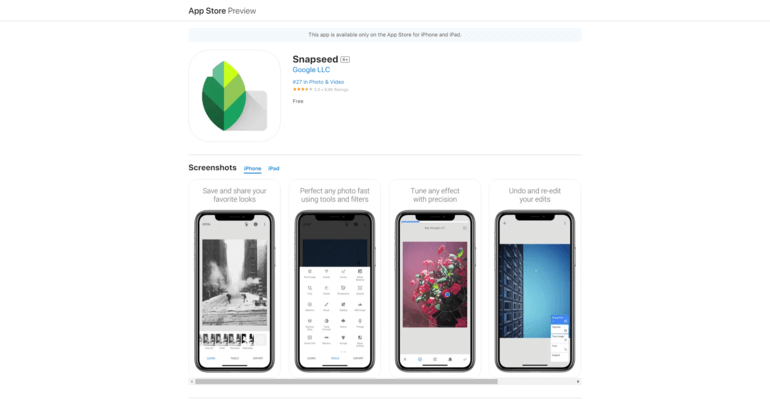
For those looking for a free option, Snapseed provides professional-grade photo editing tools, including options to selectively brighten shadows.
The brush and radial tools allow you to illuminate specific areas with precision. Snapseed also features filters, cropping, and other effects to take your photos to the next level.
While not as specialized for shadow removal, Snapseed is full-featured and user-friendly.
With the right app, anyone can banish pesky shadows from their mobile camera photos. Afterlight, TouchRetouch, and Snapseed are all highly capable in their own regard.
Last but not least, you can also get help from a professional real estate photo editing company like PhotoUp to create brighter and more vivid images in no time.
Have You Ever Thought To
Outsource Photo Editing?
Try it today with 5 free edits from three professional photo editors.
Take Help From the Photo Editing Experts at PhotoUp!
If you’re looking to enhance your image quality and streamline post-processing, PhotoUp’s team of expert real estate photo editors is here for you.
Based in the US, PhotoUp offers a comprehensive range of affordable and skilled photo editing services tailored specifically for professional real estate and architectural photographers, such as:
- Brightness and color correction
- Advanced object removal
- Day-to-dusk conversion
- Lawn greening
- Sky replacements
- HDR editing
- Manual blending
- Flambient editing
- Floor plans
- And much more!
Our expert team can handle any photo editing job — big or small, complex, or simple. Our pricing is also affordable, with most photo editing services starting at $1.10 per image depending on your subscription. We also offer discounts for large bulk orders.
Browse Top Dedicated
Real Estate Photo Editors
Ready-to-hire editors for real estate photo editing, and more.
But that’s not all…
PhotoUp also offers other powerful real estate marketing services like:
How to Get Started
Getting started using PhotoUp’s real estate photo editing service is super easy.
All you need to do is sign up for a free PhotoUp account, upload your images, choose export setting and turnaround time, download your edited images, and that’s it!
PhotoUp Real Estate Photo Editing Demo
Check out our real estate photo editing uploader demo to see how easy it is to get started:
It’s really that easy to get help with editing your real estate photos!
So, don’t wait!
Get started with PhotoUp today, and take advantage of our expertise and elevate the visual appeal of your photos today. For a limited time, you’ll even get 5 free credits when signing up!
We hope this guide helped you learn how to remove shadows in photos. If you enjoyed reading this post, you may also want to check out some related resources:

