


Table of Contents
- What Is White Balance?
- Different Color Temperatures Affect White Balance
- How to Adjust White Balance Through Your Camera Settings
- How to Adjust White Balance in Photoshop (2 Techniques)
- Outsource Your Real Estate Photo Editing to PhotoUp!
Do you want to learn how to adjust white balance in Photoshop?
As a real estate photographer, you know that white balance is crucial for achieving realistic colors in your digital photographs.
It’s the process of setting your images to neutral, ensuring that whites appear white without any unwanted tints such as blue or orange. This adjustment brings a sense of authenticity and enhances the overall quality of your pictures.
In this guide, we’ll show you how to adjust white balance in Photoshop to create realistic images without color cast.
Let’s start by taking a look at what white balance is.
What Is White Balance?
White balance plays a crucial role in determining the warm or cool tones of your images.
When it comes to photos, adjusting white balance has multiple effects. It can alter the color cast, add depth, and enhance saturation.
But what affects white balance in images? Let’s take a look at that next.
Different Color Temperatures Affect White Balance
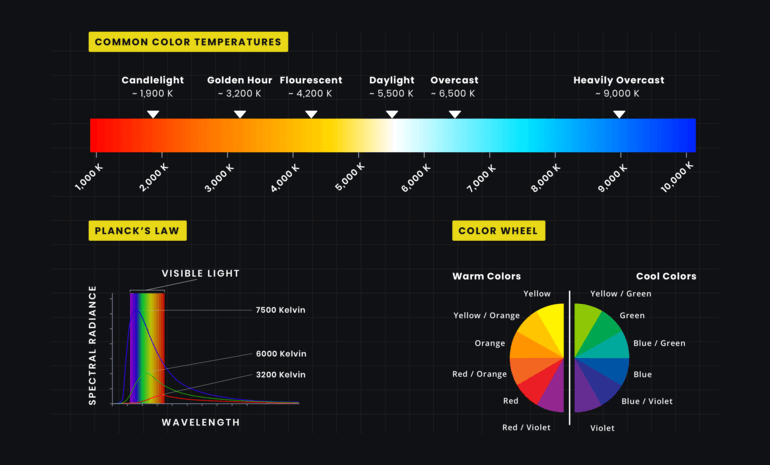
When it comes to real estate photography, understanding different lighting situations is crucial. Each lighting scenario affects the color temperature of your photos.
For example, shooting with natural light from an overcast sky gives a cold color temperature with a blue tone.
On the other hand, using incandescent light with tungsten light bulbs creates a warm color cast that appears more yellow or orange. Additionally, certain types of fluorescent lights can give your photos a green tint.

It’s important to note that different color temperatures can convey different moods in your images. Therefore, mastering white balance is key to achieving your desired outcome.
| Experimenting with different white balance settings can bring a realistic touch to your photos and enhance the overall impact. |
That said, let’s take a look at how to adjust white balance through your camera settings.
How to Adjust White Balance Through Your Camera Settings
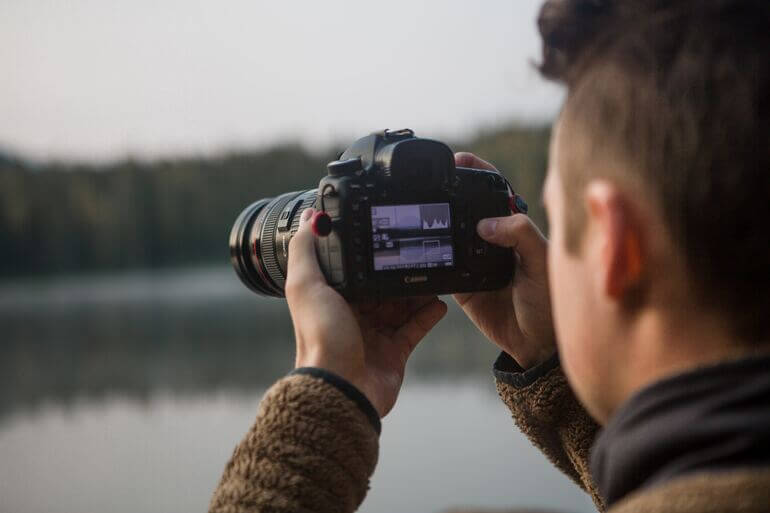
One of the first steps to capturing great shots is taking white balance into account. Fortunately, most newer DSLR cameras come equipped with powerful automatic white balance (AWB) functions.
However, if you’re feeling adventurous and want to experiment with custom settings, manual white balance adjustments are also available. This allows you to select the appropriate setting based on your specific light source.
Consider these tips:
1. Shoot in RAW
Real estate photographers should consider shooting in the RAW file format to ensure maximum post-processing flexibility.
By preserving all the image data recorded by the camera’s sensor, RAW allows for effective white balance adjustments during post-production.
2. Try to Get Uniformity in Light Sources
Consistency in lighting is key to capturing optimal real estate photos.
Mismatched light sources can complicate the editing process, particularly when it comes to adjusting white balance.
To avoid this issue, it is recommended to strive for uniformity in light sources.
3. Use a Gray Card
For those seeking a precise white balance, utilizing a gray card can be immensely helpful.
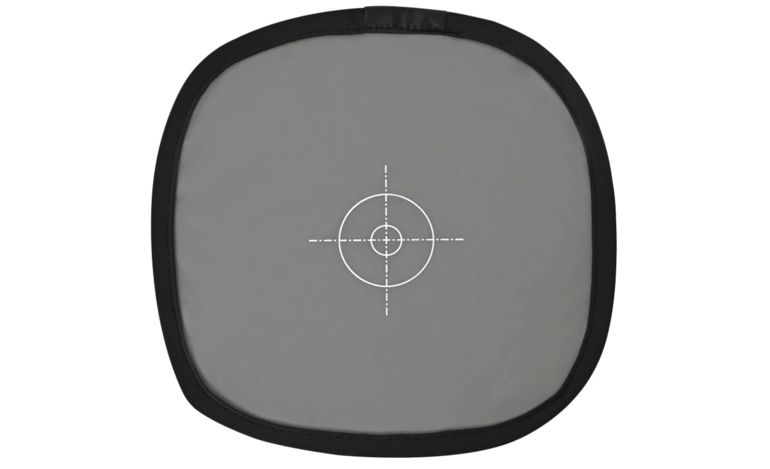
A gray card is a square of material shaded at 18% gray, specifically designed to aid in achieving accurate colors in scenarios where precision is critical, such as product or food photography.
To set the white balance using a gray card, take a photo with the card filling the entire frame.
Then, access your camera’s menu, select the option to set a custom white balance, and choose the photo of the gray card.
In addition, you can leverage shots of the gray card to adjust the white balance during post-production.
High-Quality & Consistent
Real Estate Photo Editing
Hire a dedicated editor with performance metrics from $7/hour.

How to Adjust White Balance in Photoshop (2 Techniques)
Except for the camera settings, you can also adjust the white balance in post-processing. Here are 2 simple techniques on how to adjust white balance in Photoshop.
You can either watch the tutorial video or continue reading the text with the screenshots below:
Technique 1. Adjusting the Color Balance
The easiest way to correct the white balance in your images in Photoshop is to adjust the Color Balance.
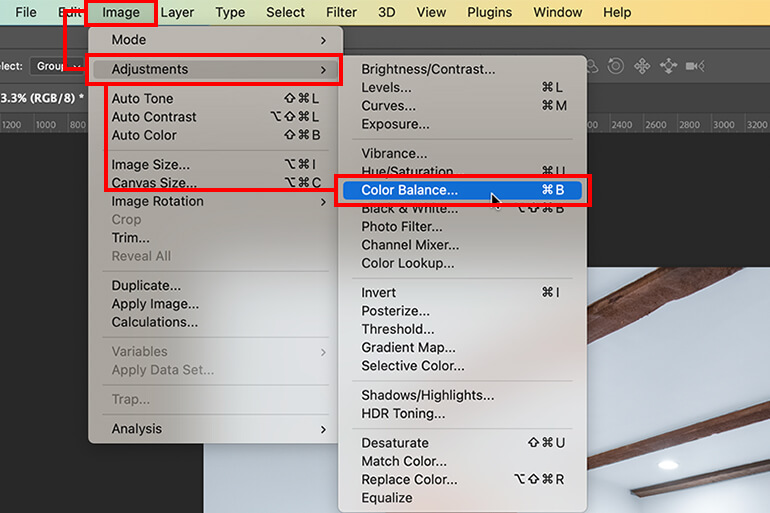
Step 1. Go to Image > Adjustments > Color Balance. You can also use the shortcut Command (cmd) + B on Mac and Ctrl + B on Windows.
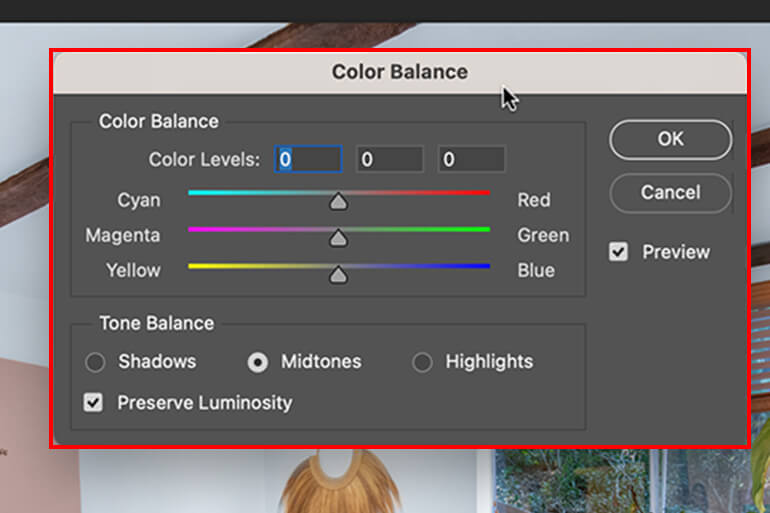
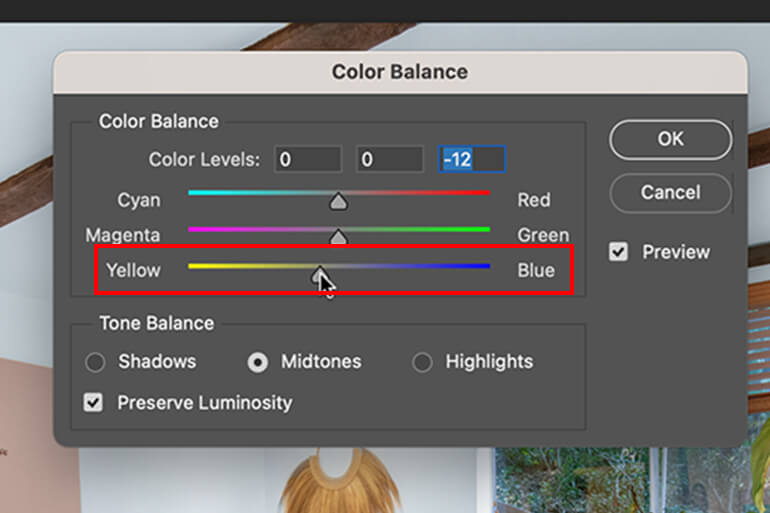
Step 2. A box with three sliders will pop up. To change color temperature simply drag the Yellow/Blue slider one way and the Cyan/Red slider an equal amount the other way.
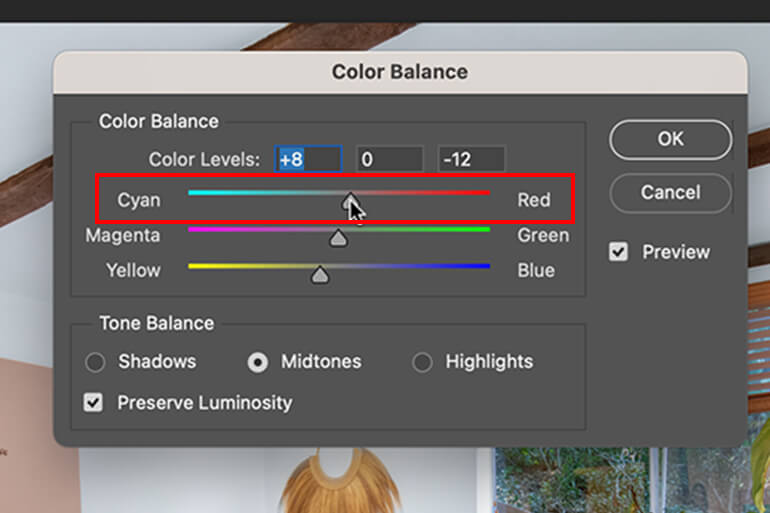
And that’s it!
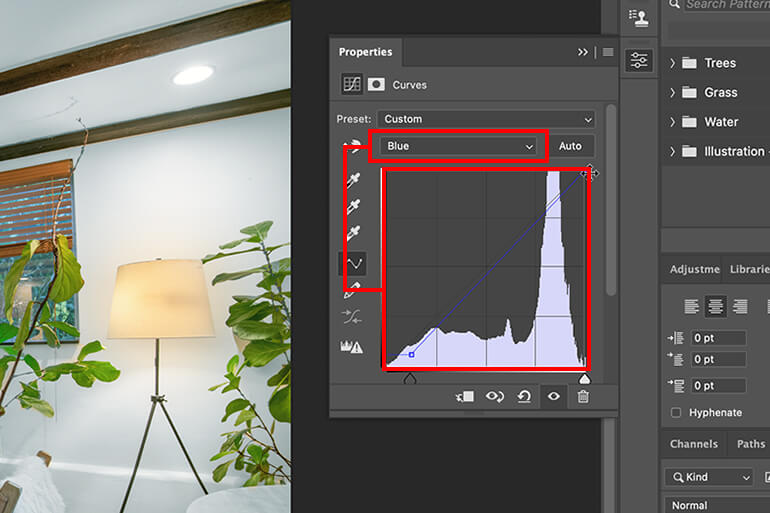
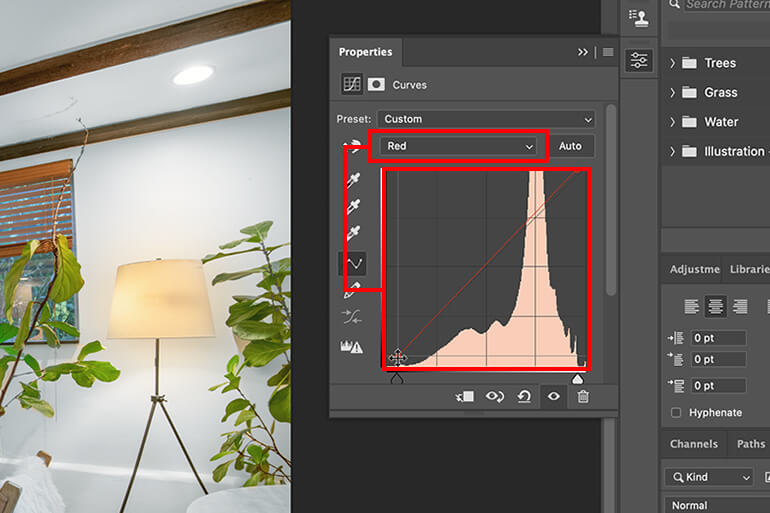
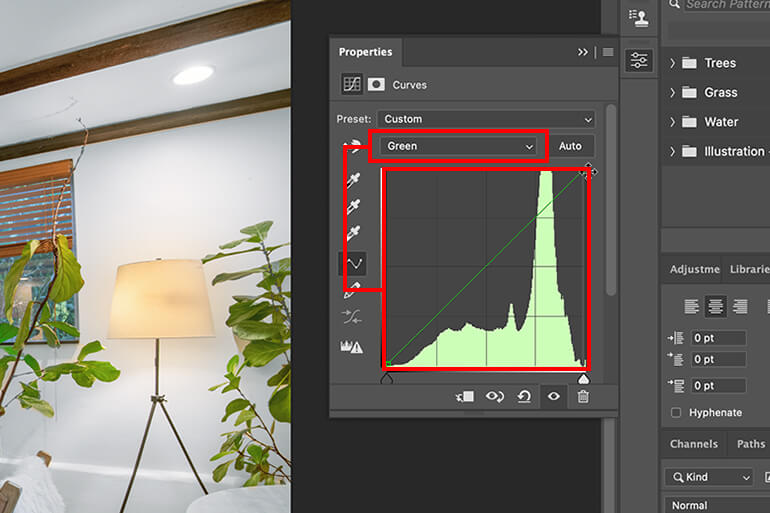
Technique 2. Utilize the Curves Tool
While commonly used for exposure and contrast adjustments, Curves can also work wonders for white balance and color correction. This powerful tool enables you to make delicate edits to your overall image color and tone.
To automatically fix the white balance of a photo in Photoshop, follow these steps:
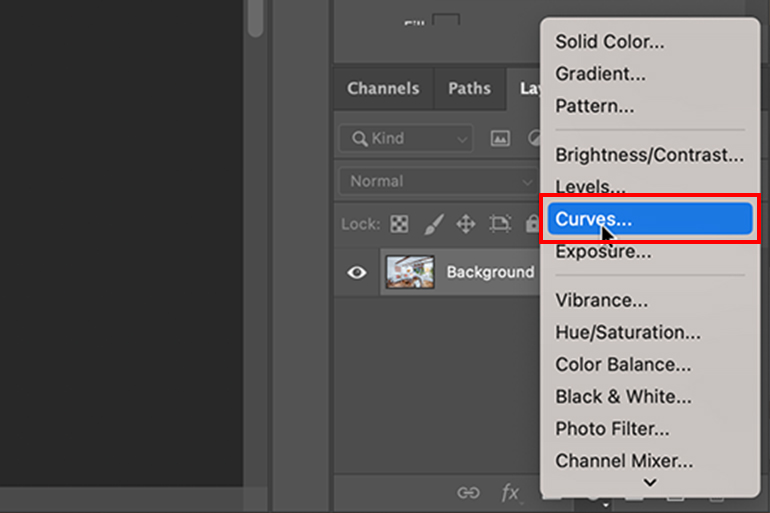
Step 1. Add a Curves Adjustment Layer.
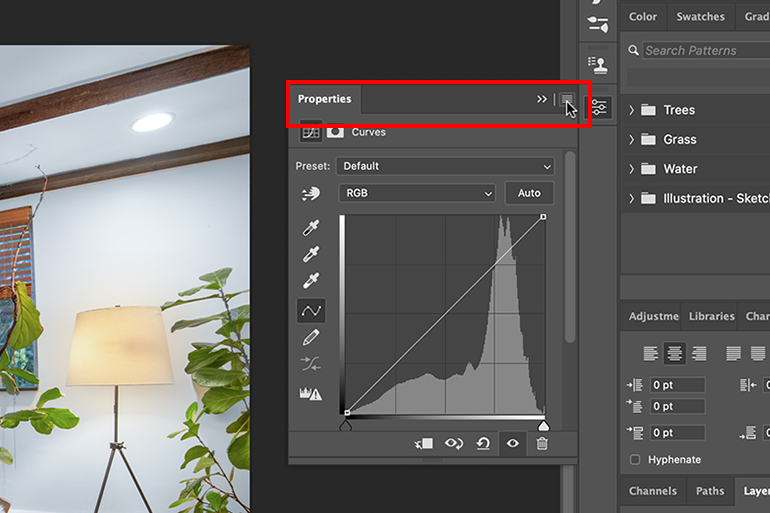
Step 2. Next, click on the right edge of the Properties tab.
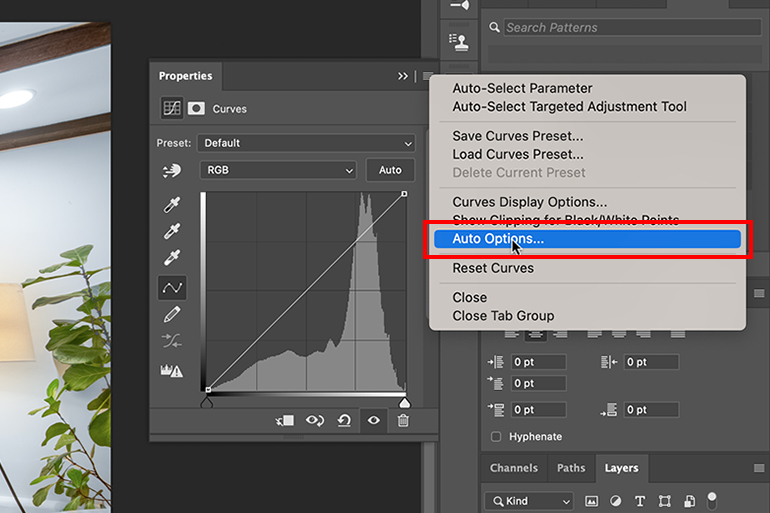
Step 3. Now, select Auto Options from the menu that appears after clicking on the Properties tab.
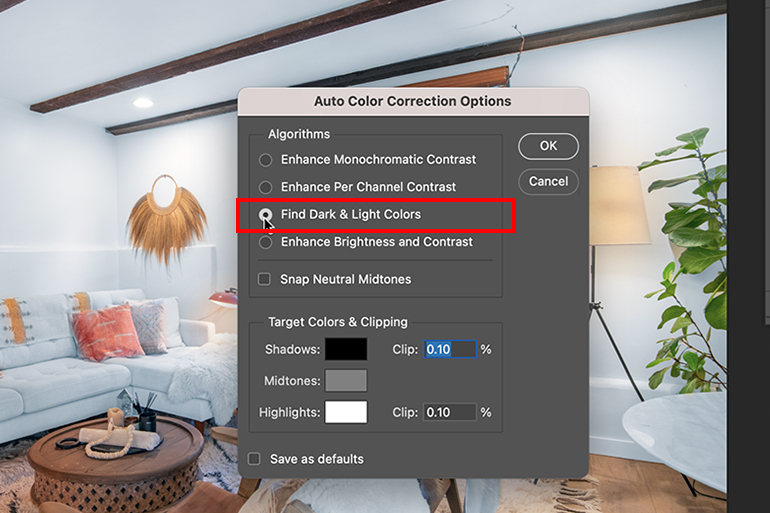
This will open the Auto Color Correction Options window. Lastly, select the Find Light & Dark Colors option from the window, and click OK.
For even greater control, you can manually adjust the white balance of an image using Curves.
Furthermore, you can also adjust the white balance in Photoshop by applying a Cooling or Warming Filter or Gradient Map Adjustment Layer.
By incorporating these techniques into your editing workflow, you can enhance the white balance of your real estate photographs and create captivating visuals for your clients.
Have You Ever Thought To
Outsource Photo Editing?
Try it today with 5 free edits from three professional photo editors.
If this seems complicated and time-consuming, we have the perfect solution for you – outsourcing your real estate photo editing to PhotoUp.
Outsource Your Real Estate Photo Editing to PhotoUp!


When it comes to creating breathtaking images, quality really matters. 72.2% of Realtors report that high-quality photography helps them win more listings, and homes with impressive listing photos receive 47% higher asking prices per square foot.
That’s why investing in a professional real estate photo editing service can be a game-changer.
PhotoUp is the ideal choice for real estate photographers seeking an affordable and highly skilled photo editing service.
Based in the US and with additional offices in the Philippines, we offer a full range of services to cater to all your photo editing needs, including:
- Brightness and color correction
- Vertical lines adjustments
- Advanced object removal
- Day-to-dusk conversion and Twilight editing
- Lawn greening and sky replacements
- HDR editing
- Manual blending
- Flambient editing
- And much more!
We can handle any type of editing from large, small, or complex with a quick turnaround time of 12-24 hours.
Browse Top Dedicated
Real Estate Photo Editors
Ready-to-hire editors for real estate photo editing, and more.
But that’s not all…
A One-Stop-Shop for Real Estate Marketing
Additionally, PhotoUp is a complete one-stop-shop for real estate marketing and also offers additional services such as:
With PhotoUp, you get access to a user-friendly photo management system, so you can upload and receive photos, send instructions and feedback, track and manage team members and clients, store final images, and more!
How to Get Started
Getting started is super easy – this is what to do:
Step 1. Sign up for a free PhotoUp account.
Step 2. Upload your photos to our easy-to-use software.
Step 3. Choose the level of editing that you need and provide instructions (optional).
Step 4. Wait for PhotoUp professional editors to edit and return the photos in less than 24 hours.
Step 5. Download and start using your beautifully edited photos.
PhotoUp Real Estate Photo Editing Uploader Demo
Check out how easy it is to get started with PhotoUp’s software in this real estate photo editing uploader demo:
It’s really that easy to get beautifully edited photos in less than 24 hours!
So, what are you waiting for?
Sign up for a free PhotoUp account today, and let our expert real estate photo editors edit your photos to perfection!
Best of all, for a limited time, we even offer you 5 free credits you can use on any of our services when you sign up for an account!
We hope this blog post helped you learn how to adjust white balance in Photoshop. If you found this post useful, you may also want to check out the following resources:

