


Table of Contents
- The True Worth of Real Estate Photo Editing
- A Complete Real Estate Photo Editing Tutorial (16 Techniques)
- Delegate to Elevate Your Real Estate Photography
Are you looking for a complete real estate photo editing tutorial that will teach you everything you need to know to create captivating, top-notch real estate photos?
Then, you’ve come to the right place!
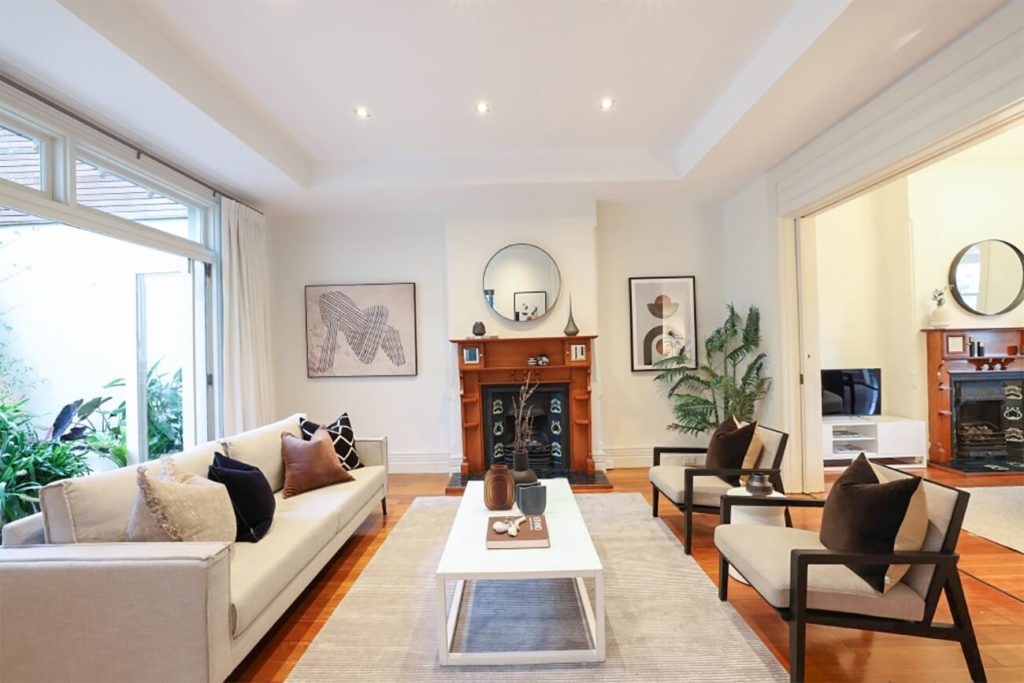
In the realm of real estate photography, mastering image enhancement is key. This skill transforms dull photos into an inviting visual narrative that will entice buyers to see more.
In this real estate photo editing tutorial, we’ll set the stage for breathtaking imagery that commands attention and admiration, much like the properties they represent.
The True Worth of Real Estate Photo Editing
In 2022, 99% of home buyers between the ages of 24 and 57 used the Internet to find homes in their home-buying process. And among the oldest generation, 77 to 97-year-olds, as many as 84% searched for homes online.

The essence of professional real estate photography lies in its ability to create buyer interest and accelerate the sales process.
Eye-catching yet believable real estate photos capture potential buyers’ attention, helping agents and Realtors highlight a property’s best features and get them through the door.
As a real estate photographer, your expertise not only showcases the property in its finest form but also assists agents in creating a strong visual selling point.
Providing your agent clients with top-notch real estate photography will not only help them sell more homes but also strengthen your personal brand and grow your photography business.
A Complete Real Estate Photo Editing Tutorial (16 Techniques)
Now, let’s dive into the actual real estate photo editing tutorial. We’ll provide you with a brief introduction to each editing technique and you’ll then be directed to where you can learn more about how to perform each edit, either by a step-by-step tutorial or a video demonstration.
With these techniques at your command, every real estate photograph has the potential to be a flawless representation of reality.
1. Brightness, Exposure, and Color Correction


To begin, brightness, exposure, and color correction are indeed the bedrock of all enhancements. Utilizing programs like Lightroom and Photoshop, professionals can infuse life and vibrance into their visuals with precision.
Admittedly, it appears straightforward to adjust color, contrast, tone, and sharpness.
However, the subtlety and finesse demanded in these tweaks are not to be underestimated. A seemingly mundane image can be revitalized into a captivating centerpiece with careful adjustments.
It’s imperative to appreciate that these elementary retouching maneuvers hold the power to turn an unremarkable photograph into a marketing gem.
By perfecting these techniques, real estate photographers can seize the attention of potential buyers, enhancing the chances of facilitating successful property sales for their clients.
To learn how to adjust the colors and make your real estate photos pop, check out our tutorial on how to color correct in Photoshop.
Additionally, this guide walks you through 3 ways on how to change exposure in Photoshop.
2. Adjusting the White Balance


Poor white balance ranks as a prevalent pitfall that diminishes the allure of real estate photography.
Imbalance in white balance can cast a drab layer of yellow, blue, or green hues over your photos. Such tinting can be off-putting to prospective buyers, deterring the visual impact of your showcase.
The objective is to recalibrate until you capture the ambiance accurately, emanating a natural and inviting atmosphere through your images.
Fine-tuning this element not only revives the vibrancy of the property but also encapsulates an aesthetic that resonates with viewers.
To learn how to rectify this, you can visit our step-by-step tutorial on how to adjust white balance in Photoshop:
3. Removing Color Tint/Color Cast
Color cast in photographs can significantly detract from the visual appeal, a critical setback in real estate photography where captivating images are not just desired, but essential.


Let’s unpack this: a color cast is an unwelcome tint that permeates your photo, creating a distraction from the image’s true colors. It’s that stubborn guest who wasn’t invited to the party but shows up anyway, altering the mood and the overall ambiance.
Lighting doesn’t always cooperate with our creative endeavors. Sometimes, it imposes a specific color cast on your images, much like an unwanted filter.
For real estate photographers, understanding the situations that give rise to color casts is key:
- Those sleek fluorescent bulbs? They’re casting a blue spell over your perfectly staged room
- Tinted windows might seem like a classy touch, but watch out—they might be throwing beige walls off-balance
- That gray, overcast sky lurking outside? It can sneak in and dull the brightness of interior walls
- And don’t overlook your camera’s color settings—they could be the hidden culprit behind less-than-natural home colors
However, color casts are but a temporary inconvenience. With the magic of real estate photo editing, you can wield your digital wand to correct and restore the true, original colors of the environment, as though the color cast was never there.
Not only does it ensure that your photos do their job—showcasing properties in the best light—it also reaffirms your status as a master of real estate imagery.
To learn more, check out our video tutorial on how to easily remove color cast from real estate images in Photoshop:
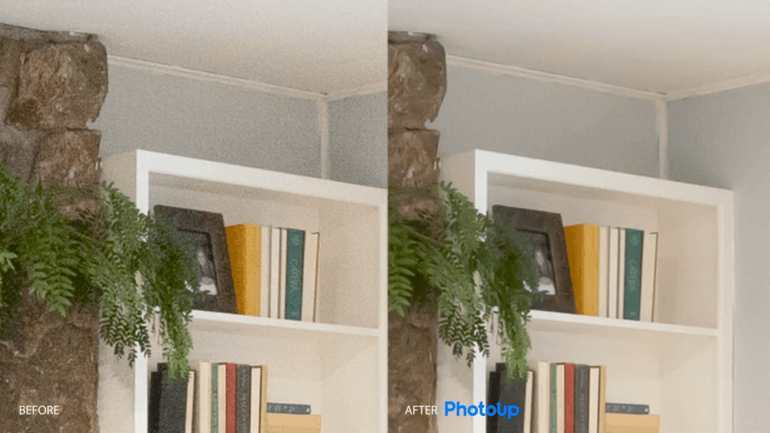
4. Decluttering Your Images/Removing Unwanted Objects


Unsightly objects in your real estate photographs can overshadow the true allure of the property. Often, these distractions require a keen eye and a swift removal to realize a pristine and appealing image.
Imagine a picturesque garden obscured by an uninvited vehicle in the driveway, untidy TV cables that disrupt the living space’s harmony, or everyday kitchenware marring the sleekness of granite countertops.
These are common predicaments in real estate photography. Even more challenging are structural blemishes such as cracks or peeling wallpaper that bespeak disrepair.
Each of these scenarios demands meticulous attention to detail—and, thankfully, a solution resides within the powerful realm of Photoshop.
The “Clone Stamp Tool” in Photoshop is the magic wand you seek. Engaging with this tool is straightforward.
To learn how to use the Clone Stamp Tool to declutter your images, watch this tutorial video on how to remove cords in Photoshop:
5. Aligning Horizontal and Vertical Lines

In the world of real estate photography, precision is key — and it all starts with your lines. Making sure that the horizontal and vertical lines are properly aligned can make or break your shot.
The challenge of keeping straight lines from converging in your photographs stems from various factors. Lens curvature, the intrinsic shape of rooms and furnishings, and even the angle at which you hold your camera can result in those pesky distorted lines.
But don’t worry; there’s a fix that can be applied during post-processing. Enter the magic of perspective correction.
This retouching technique is a lifesaver for real estate photographers. It’s designed to address distortion and misalignment in your shots, ensuring all your lines run true to the edge of the frame.
The result? A photo that looks as natural and precise as the property you’re capturing.
To see how to align verticals, you can check out our video tutorial on how to straighten verticals in Photoshop:
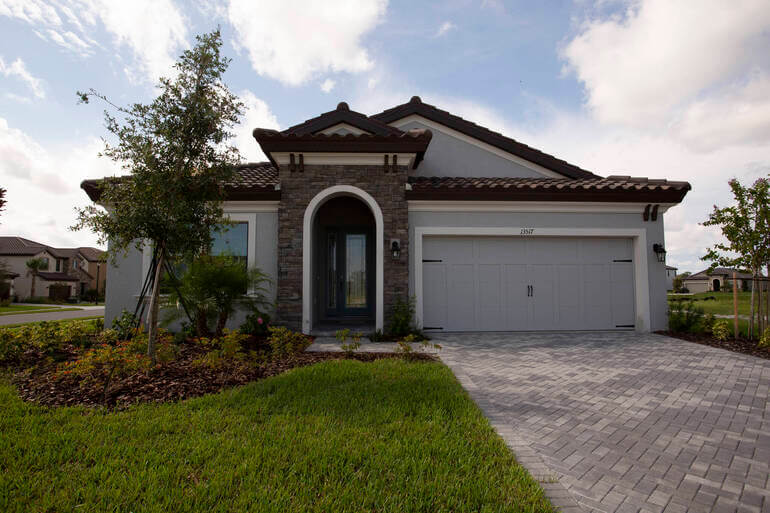
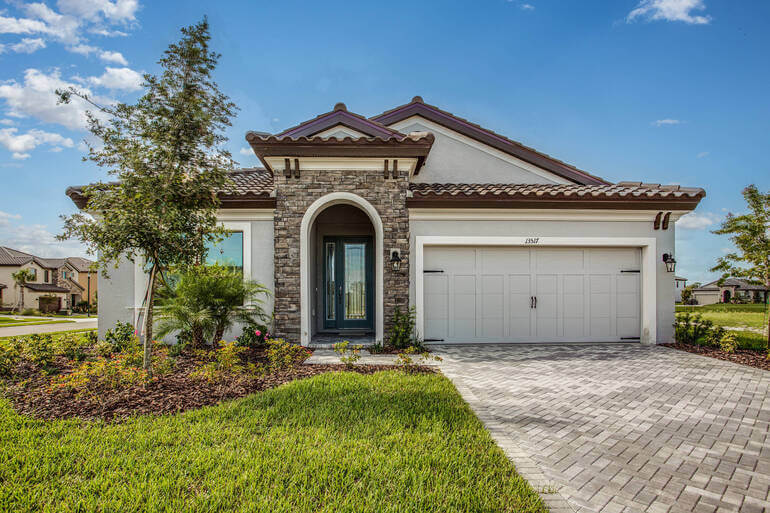
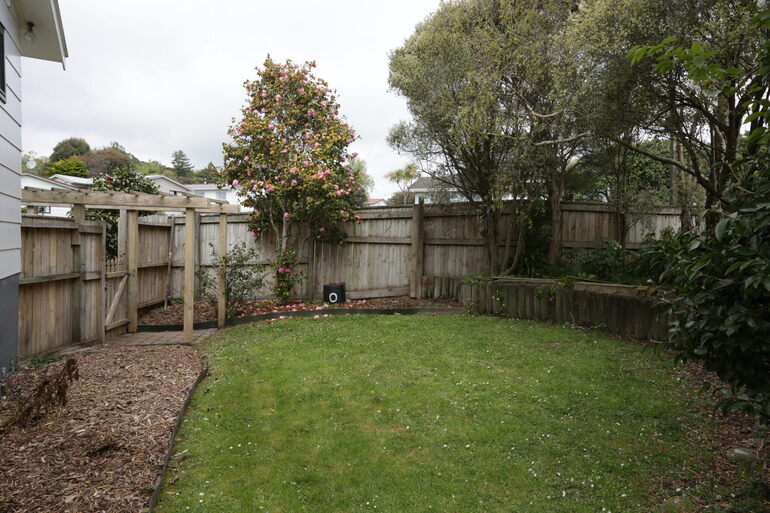
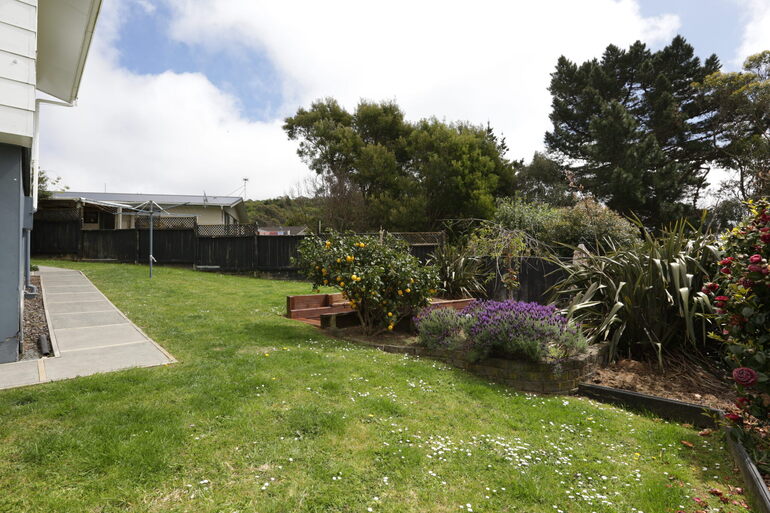
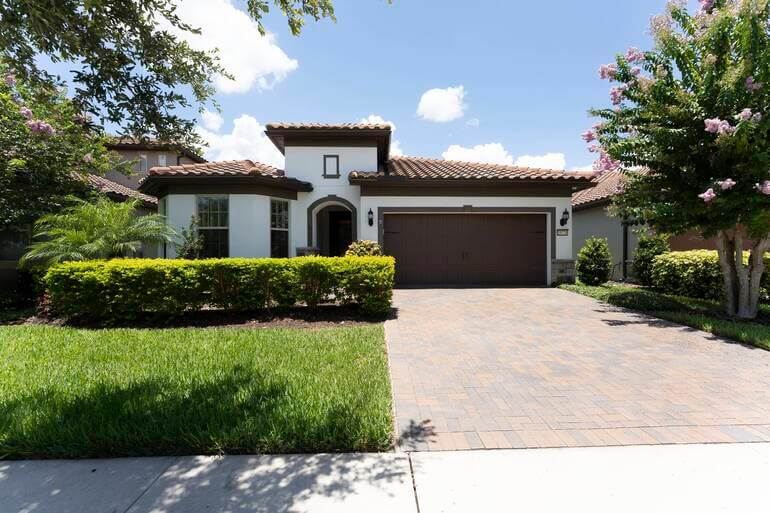
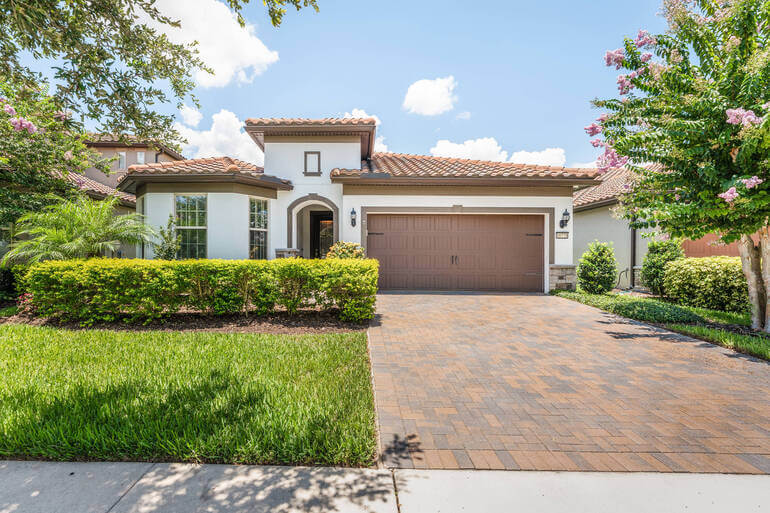
6. Transforming a Dull Lawn Into a Green Oasis
A lush, vibrant lawn acts as the perfect frame for any property, instantly boosting its curb appeal.
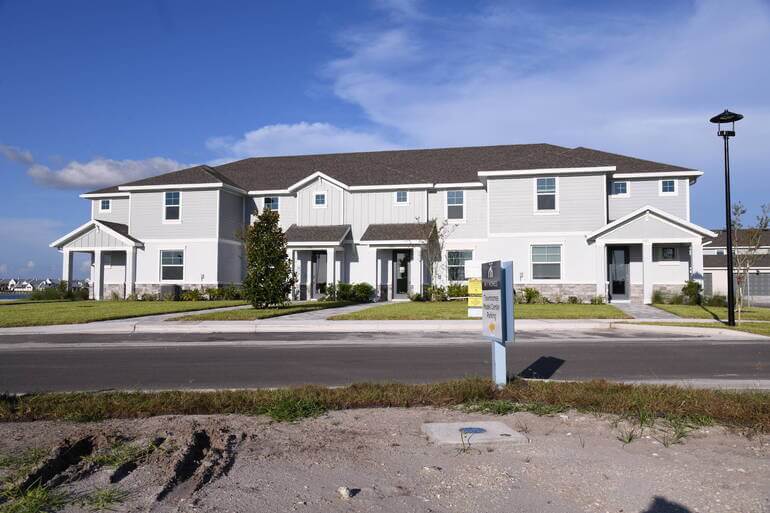
However, as a real estate photographer, you might find yourself on location during off-peak seasons or periods of drought when lawns are less than picture-perfect, sporting unsightly brown patches or an overall lifeless hue.
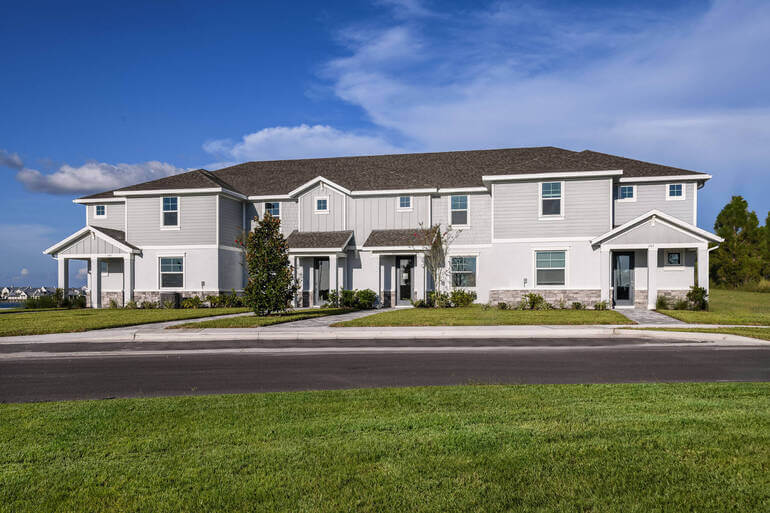
The challenge of capturing inviting images under less-than-ideal conditions is all too common, but fortunately, there’s a solution at your fingertips.
In a few clicks, you can breathe life into the grass and transform a dull lawn into a verdant oasis, ensuring the property is showcased at its best, regardless of the season.
To learn how to create a green beautiful lawn, check out our video tutorial on how to make grass green in Photoshop:
In addition, other things you can do to manipulate and enhance your photos are:
- Adding an inviting fire to the fireplace
- Using AI virtual staging to add a pool and patio area outside of the property
- Or fresh modern furniture on the balcony
- And whatever you can think of to enhance and bring value to your photos
A properly edited photo effectively shows the property in its full glory and beauty, convincing the viewer that the property he is looking at is an ideal investment.
If this made you sweat a bit, don’t worry! You don’t have to learn all these editing techniques. These more advanced editing techniques can all quickly be done by PhotoUp’s professional real estate photo editors.
7. Reducing Noise in Your Photos
Experiencing grainy or noisy images can be frustrating, especially when it invades your crisp real estate photography that’s meant to capture every detail intriguingly.
Cluttered with countless fuzzy specks, the overall sharpness and appeal of your photos may diminish, making that stunning property appear less inviting.
Grain often emerges due to inadequate lighting, digital hiccups in pixel arrangements, prolonged exposure durations, or the limitations of sensor dimensions.
Fortunately, resolving this common issue is not as daunting as it may seem. With a few adjustments, clarity begins to resurface in your images.
To learn noise reduction, check out our video tutorial on how to reduce noise in Lightroom and Photoshop:
The clarity of your imagery is imperative in real estate photography, as it represents the initial impression of a property.
By utilizing these tips or partnering with professional real estate photo editing services, you ensure that each image you produce is not only eye-catching but impressively polished and professional.
High-Quality & Consistent
Real Estate Photo Editing
Hire a dedicated editor with performance metrics from $7/hour.

8. Editing HDR Images


Unlock the full spectrum of light in your real estate photography with High-Dynamic-Range (HDR) imaging.
HDR isn’t just a buzzword; it’s a game-changing technique that enables you to capture a scene in all its glory, highlighting the deepest shadows and the brightest spots with incredible clarity.
Imagine combining the best parts of multiple photos, each snapped at varying exposures, into one immaculate composition that bursts with detail. That’s the magic of HDR.
To bring this magic to life, all you need to do is:
- Bracketing Your Shots: Begin by taking a minimum of three images of your property, each with a different exposure level. One should be underexposed (darker), another overexposed (brighter), and one just right. This brackets your scene in a full range of light.
- Digital Darkroom Wizardry: After your photo session, it’s time to merge these separate exposures using post-processing software. Let technology work its wonders, blending these layers to create a harmonious photograph that boasts the full array of luminosity you witnessed firsthand.
For more details on post-processing HDR images, see our video tutorial on how to edit HDR photos in Lightroom:
Wielding the power of HDR, you can present properties in their most flattering light, ensuring every nook and cranny is visible and vibrant.
9. Removing Distracting Shadows

When capturing the essence of real estate properties through your lens, navigating the challenges of shadows and uneven lighting is crucial.
These natural elements can, at times, lend a dramatic effect—yet, when they overshadow the details and distort the ambiance, they do a disservice to your professional portfolio.
You can use Lightroom or Photoshop to adjust shadows, highlights, whites, and blacks.
To see how this is done, check out our video tutorial on how to remove shadows in Lightroom:
Additionally, flash shadows are also a common issue when shooting interiors with artificial lighting.
To learn how to combat this, you can check out our short video tutorial on how to remove flash shadows in Photoshop:
10. Making a Sky Replacement
Bright skies bring out the vibrant hues of any landscape, making for exceptional real estate photography. Yet, when the clouds roll in, casting a gloomy overlay, even the most striking properties can appear washed out and uninviting.
However, such challenges present an opportunity for creativity. With modern editing techniques, replacing a dreary sky is not only possible but remarkably straightforward.
Cultivating this skill can elevate your real estate imagery from forgettable to breathtaking.
By mastering the art of sky replacement, photographers can:
- Enhance the property’s allure, ensuring it stands out in the competitive real estate market
- Inject a dose of cheerfulness into the scene, creating a warm and welcoming ambiance
- Gain invaluable flexibility, no longer constrained by the whims of weather or the restrictions of time
Through the magic of tools like Photoshop, skies once gray and lackluster can be transformed into canvases of blue, brushed with the golden light of a seemingly endless summer.
To learn how to transform dull winter skies into bright and inviting ones, check out our video tutorial on how to replace a winter sky in Photoshop:
In contrast to a winter sky, here’s another tutorial video on how to replace a summer sky in Photoshop instead:
11. Removing Ghosting From Trees


Real estate photographers often encounter challenges like light flares and the eerie effect of “ghosting” in their work.
Specifically, ghosting tends to arise during HDR photography—a technique that combines multiple exposures of the same scene to achieve a perfectly lit final image.
Ghosting is particularly noticeable when elements such as tree limbs and leaves sway between shots, leaving a transparent, smeared impression in the composite photo.
Although this can sometimes add an intriguing ambiance to a picture, such anomalies are generally unwelcome in the world of real estate marketing, primarily because they detract from the photo’s professionalism, giving it an unintentional, kitschy feel.
Understanding how to prevent or fix these common issues is key to producing high-quality, professional real estate imagery.
Mastering techniques to minimize movement between bracketed exposures and proficient editing skills can ensure that your real estate photos consistently convey clarity and quality.
To learn how to master this editing technique, watch our tutorial video on how to remove ghosting from trees in HDR editing:
12. Performing Twilight Photo Editing


Capturing the perfect shot of a property can truly set it apart in the bustling real estate market.
As photographers, we understand that the soft glow of dawn or the warm hues of twilight can elevate the visual allure of an exterior shot.
By skillfully implementing twilight effects in your post-production process, you can:
- Infuse each image with a heightened sense of elegance and allure
- Intensify the emotional pull of your photos, adding a dramatic flair that captivates potential buyers
- Dismiss concerns about inclement weather or inconvenient shoot times that could delay your project
Yet, it’s no secret that these times of day, while beautiful, come with their own set of photographic challenges.
Fear not, modern photo editing software is here to arm you with the ability to recreate nature’s enchanting twilight magic—regardless of when you click the shutter.
To learn twilight editing, you can watch our video tutorial on how to edit a day to dusk image for real estate photo editing:
Overall, incorporating these effects need not be daunting. With a few well-executed steps, you can transform a standard image into a spellbinding scene that propels your real estate portfolio to new heights.
13. Mastering Window Masking
Unmanageable sunlight streaming through a room’s windows can wreak havoc on photo quality, casting excessive glare, blurring fine details, and washing out colors.


Even spotless windows can become an unintended focal point when blinds impose their patterns or obscure the view. These commonplace scenarios can mar the picture-perfect appeal vital for real estate imagery.
Enter the realm of window masking, a savvy photo-editing solution that real estate photographers can harness to overcome such obstacles.
This technique not only rectifies issues with light but also offers the creative liberty to modify or enhance the exterior landscape as viewed through the windows.
Consider it an editing wand that gives you complete control over how natural light and outdoor perspectives are portrayed in your property images.
To learn how to do window masking, visit our blog post on how to mask windows for real estate photography in Photoshop or watch this tutorial video:
Embrace window masking and empower your real estate photography to consistently capture compelling interiors, regardless of external conditions.
14. Sharpening Your Images
You can bring your visuals to life by experimenting with image sharpening in Photoshop—add dimension, depth, and contrast along the edges of any object.

Sharpening enhances the definition of edges in an image. Whether your images come from a digital camera or a scanner, most images will benefit from sharpening.
Enhancing definition in edges by using editing software like Photoshop can bring out details that you didn’t even know were there.
To learn how to perform this editing technique, watch our tutorial video on how to sharpen an image in Photoshop:
With this simple technique, you can make dull images pop, whether it’s a real estate listing or an artsy masterpiece, you can create truly captivating photos.
15. Leveraging Batch Editing


Optimizing your workflow is key in the dynamic field of real estate photography—especially when managing a substantial volume of images that require similar edits.
The secret to efficiency lies in batch editing, a technique perfectly suited for this niche.
Photoshop emerges as your ally in this process, offering a batch editing feature that can significantly cut down your editing time.
Here’s how it streamlines your workload: once you’ve completed the retouches and tweaks on a single photo, you can synchronize these alterations across a series of images with just a few clicks.
This strategy not only fast-tracks the editing process but also ensures consistency in quality and style across your photo set, a vital aspect of professional real estate photography.
Embracing batch editing means more time capturing stunning properties and less time tethered to your desk editing.
To learn how to do this, you can watch our video on how to batch edit RAW files in Photoshop:
The Ultimate All-in-One
Real Estate Photographer Business Platform
Grow a successful real estate photography business with PhotoUp.
16. Striking the Right Balance in Photo Editing
Your objective in real estate photo editing should be to produce vibrant, sharp images that remain grounded in reality.


It’s tempting to push the sliders to their extremes, but restraint is your ally. Remember that over-editing can lead to unnaturally bright colors and an artificial feel, which can be counterproductive.
Your clients—the agents and their buyers—prefer images that accurately reflect the property’s true character.
Now, we’re at the end of our real estate photo editing tutorial… Before sharing any property photographs, make sure to take a second look at your images.
Check for consistency when it comes to aspect ratio, angle of the shot between rooms, and photo saturation.
If you have multiple images, make sure that they have a certain degree of consistency so that they all sit well together.
And that’s it!
Delegate to Elevate Your Real Estate Photography
Enhancing real estate images can be a meticulous and time-intensive task. Achieving that perfect balance between allure and authenticity requires a considerable investment of resources.
Recognizing the value of time, many skilled photographers and agencies prefer to allocate this aspect of the business to dedicated professionals.
Here’s where delegating the editing workload can be a game-changer.
Enter PhotoUp—your support system that takes on the detailed task of editing, allowing you to focus on shooting stunning properties.
With PhotoUp, you gain a partner eager to assist you in producing high-quality, natural-looking real estate photos, saving you time and enabling you to engage more clients.
Based in the US and with additional offices in the Philippines, we offer a full range of services to cater to all your photo editing needs, including:
- Brightness and color correction
- Vertical lines adjustments
- Advanced object removal
- Day-to-dusk conversion and Twilight editing
- Lawn greening and sky replacements
- HDR editing
- Manual blending
- Flambient editing
- And much more!
PhotoUp’s team of editors can handle any editing job — big or small, complex, or simple.
Plus, our pricing is also affordable, with most photo editing services starting at only $1.10 per image depending on your subscription.
Dedicated Photo Editing
We also offer dedicated photo editing services. A dedicated editor learns your style and approach and provides consistency while improving turnaround times.
You’ll also be surprised at how dedicated photo editing can save you money.
Consider this – on average, a dedicated editor outputs 1,800+ edits per month, at a final cost of $0.72 per edit. We have even seen $0.50 per edit.
Working with a dedicated photo editor is not only affordable, but it will save you countless hours while also boosting your image quality!
Browse Top Dedicated
Real Estate Photo Editors
Ready-to-hire editors for real estate photo editing, and more.
Full-Service Real Estate Marketing Partner

PhotoUp does much more than just real estate photo editing. We are a full-service real estate marketing partner and also offer powerful marketing tools such as:
So, take the next step, and have all your listing photos look their absolute best.
Sign up for a free PhotoUp account today, and give PhotoUp’s professional real estate photo editing service a try! For a limited time, we even offer 5 free edits when you sign up for an account.
We hope this real estate photo editing tutorial helped you learn how to enhance your real estate photography and create captivating images that will impress your clients. If you found this guide useful, you may also want to check out some related resources:

