


Do you want to know how to easily do object removal such as cords and wires in Photoshop?
In our hyper-digital lives, the one thing it’s impossible to avoid are cables plugged into walls. From extension cables to chargers, earphones, router cables, and much more…
In this post, we’ll show you how to do object removal in Photoshop and clean up your photos in just a few simple steps to create captivating real estate photography.
Why Should You Remove Unnecessary Objects?
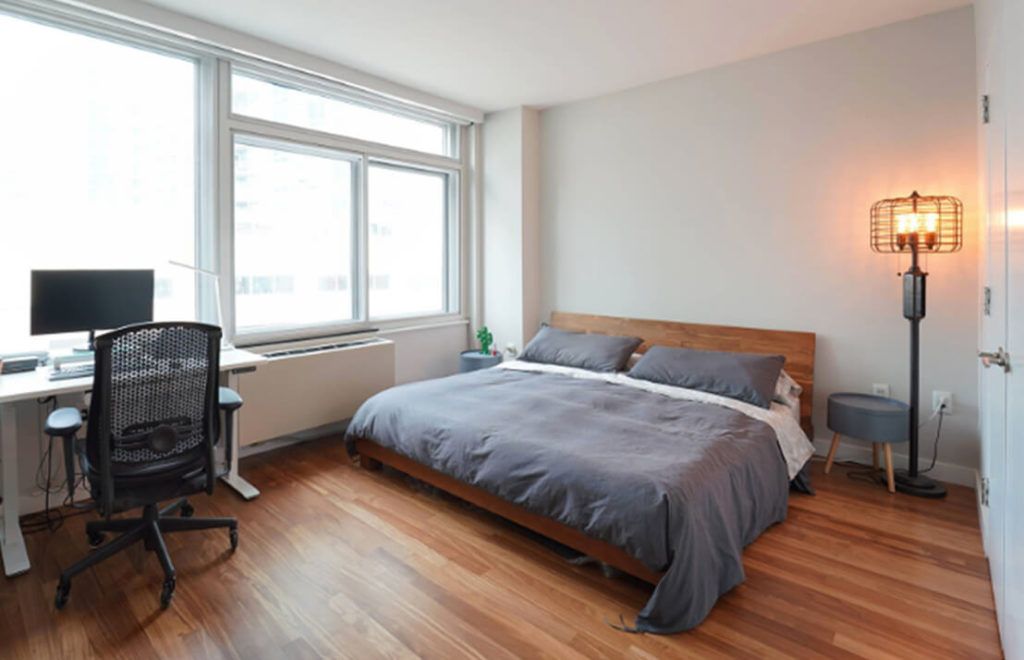
We seem to spend half the day keeping our devices charged and ready to go. While that’s great for productivity, it’s awful when trying to create beautiful, sellable images of well-designed houses and apartments.
Real estate photos need to sell the vision of perfection, not reality. Prospective buyers won’t get a good feel for the property if the images look cluttered and messy.
In other words, that won’t get them interested and in the door, but a decluttered, clean, and depersonalized photo will!
Additionally, most people love to see a nice flat-screen TV on the wall but don’t need to see how it’s connected. The good news is that cords are relatively simple to remove using Adobe Photoshop, which we’ll show you how to do next.
8 Quick Steps to Do Object Removal in Photoshop
To learn how to remove cords and other objects in Photoshop, you can follow along with PhotoUp’s simple video tutorial or read the instructions below:
- To begin, import your real estate photo into Photoshop.
- Then, locate the areas where there are exposed cords and wires.
- Find a selection of wall / floor behind the wires that is free of clutter. That’s what you’re going to clone.
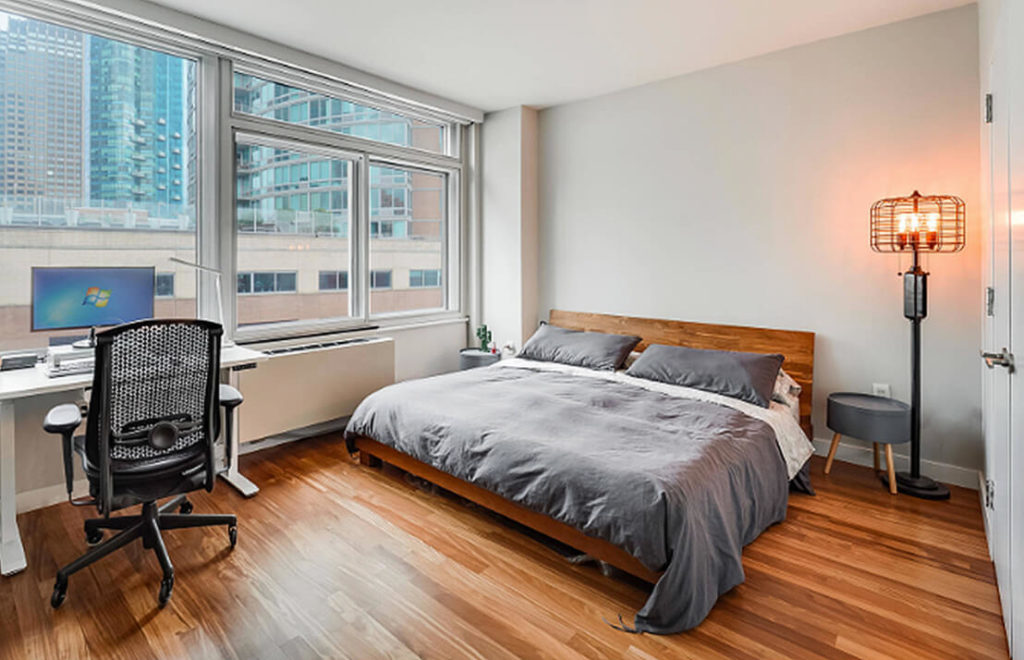
- Next, open the Clone Stamp Tool in Photoshop by going to the Windows menu and choosing Clone Source.
- Alternatively, you can position the cursor over the area you want to clone and then Alt-click (Windows) or Option-click (Mac) to define the clone source.
- Now, go back to the cluttered problem areas and simply brush over the wire and watch it disappear like magic.
- If the wire snakes over a different background then Alt-click once again on the new background and continue brushing over.
- Once you have brushed over all the wires and digital clutter in the photo, click SAVE.
As simple as that!
More Than Industry Leading
Real Estate Photo Editing
PhotoUp is the end-to-end business platform for real estate photographers.

Save Time With PhotoUp’s Real Estate Photo Editing Service

To conclude, this kind of attention to detail is what lifts an average real estate photo into something very special that stirs emotions and leads to sales.
And those are the kind of images you need in your portfolio!
If you have the time, learn to do it yourself or set up a relationship with an online real estate photo editing specialist with just a few clicks of the mouse.
The bottom line is, start taking your real estate images seriously and watch the difference it makes to your business.
Get started with PhotoUp and give us the chance to show how we can help you transform your real estate photography.
For more details, you can check out our real estate photo editing uploader demo to see how easy it is to get started:
And there you have it!
Sign up for a free PhotoUp account today, and receive 5 free credits for your first images.
We hope this post helped you understand how to do object removal in Photoshop. If you found this post useful, you may also want to check out the following resources:

