


Table of Contents
- What Is Exposure In an Image?
- High vs Low Exposure
- How to Change Exposure in Photoshop (3 Simple Ways)
- Leverage Professional Real Estate Photo Editing
For your shots to really shine, always take the time to nail down the perfect exposure. After all, that’s when photo magic happens!
Capturing the perfect exposure in a photo is no easy feat – it takes skill, patience, and the right tools. While adjusting your camera’s exposure meter to its dead center may seem like you’ve nailed that picture-perfect shot, there are times when this doesn’t quite translate.
Fortunately, Photoshop has got us covered!
In this post, we’ll show you how to change the exposure in Photoshop using 3 simple yet effective ways for getting your pictures just right. But first, let’s start by explaining what exposure in an image is.
What Is Exposure In an Image?
Capturing the perfect photo means understanding exposure—that amazing phenomenon of light streaming into a camera’s aperture to create meaningful data.
With each click of the shutter button, you bring life and emotion to your image through insights gained from exposing just enough light into your camera.
High vs Low Exposure
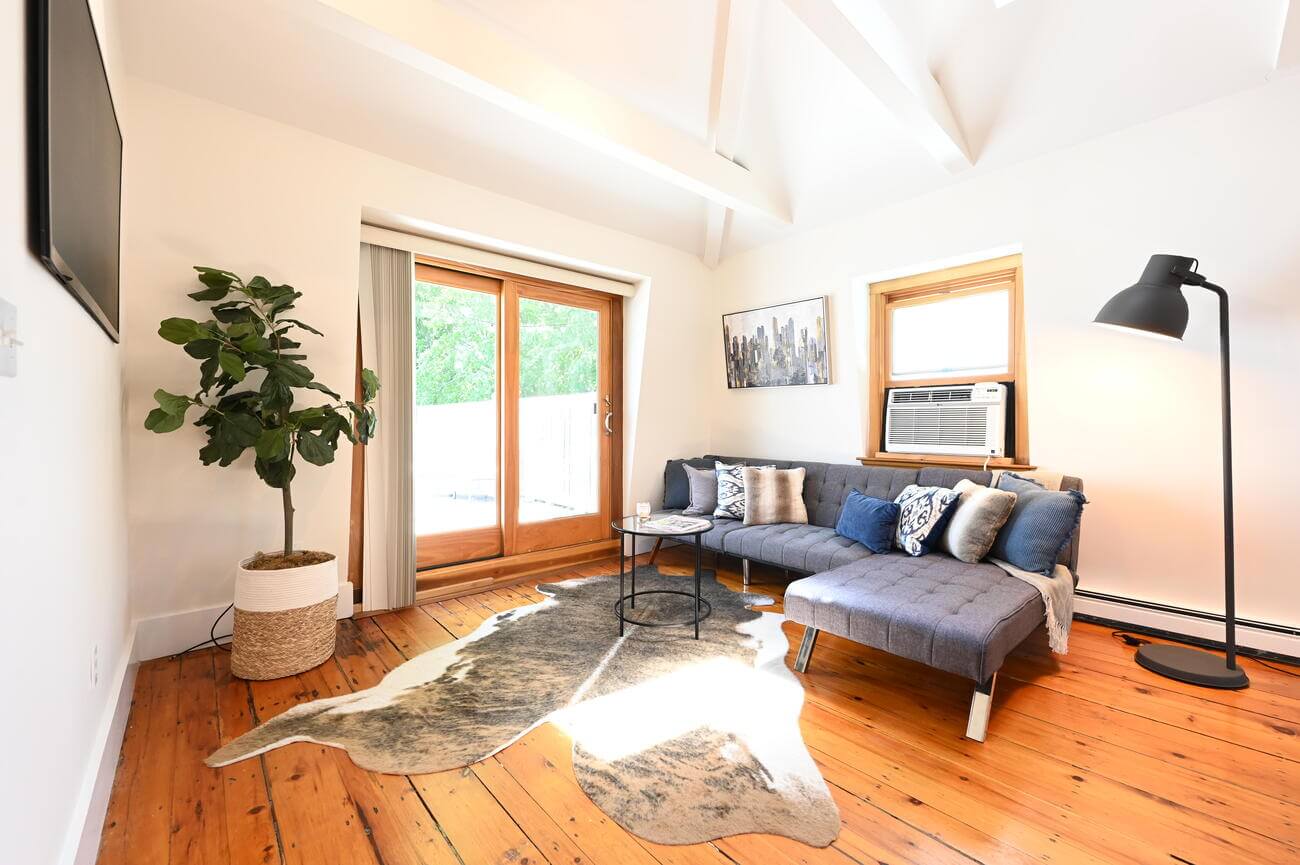
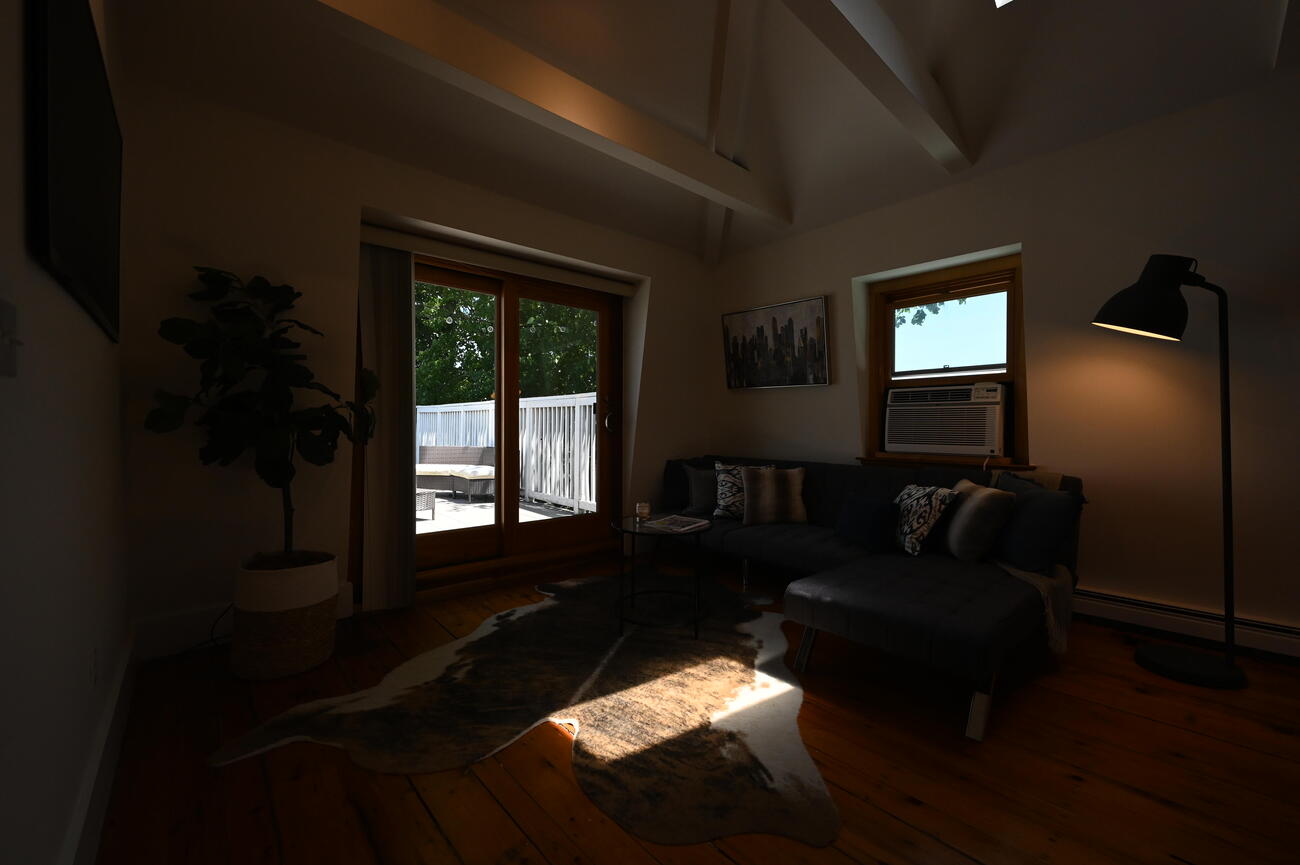
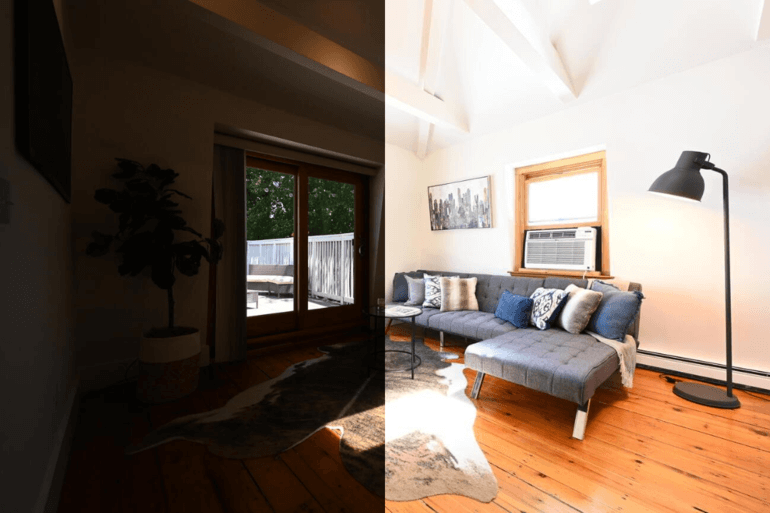
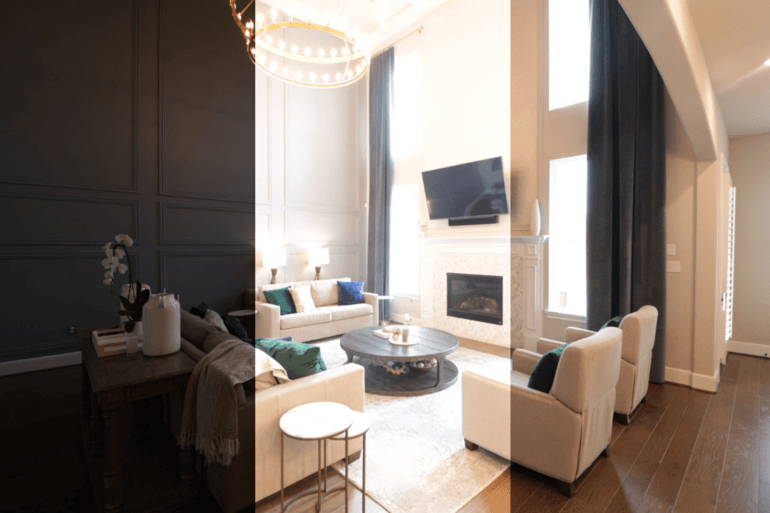
The right light can make or break an image, and a slight overexposure or underexposure could be enough to ruin it.
High exposure means that more light enters the sensor and the picture is brighter. Low exposure results in a darker picture, due to a lack of light. Both options can negatively affect image quality.
Even experienced photographers struggle with getting the exposure just right, but thankfully, there are ways to easily change exposure in Photoshop once taken your shot!
How to Change Exposure in Photoshop (3 Simple Ways)
To capture specific details in a picture, we often end up taking slightly under or over-exposed images, which can affect image quality.
Luckily, it can easily be corrected in Photoshop. Here’s how to change exposure in Photoshop using 3 simple ways. Let’s begin by taking a look at why you should edit in raw.
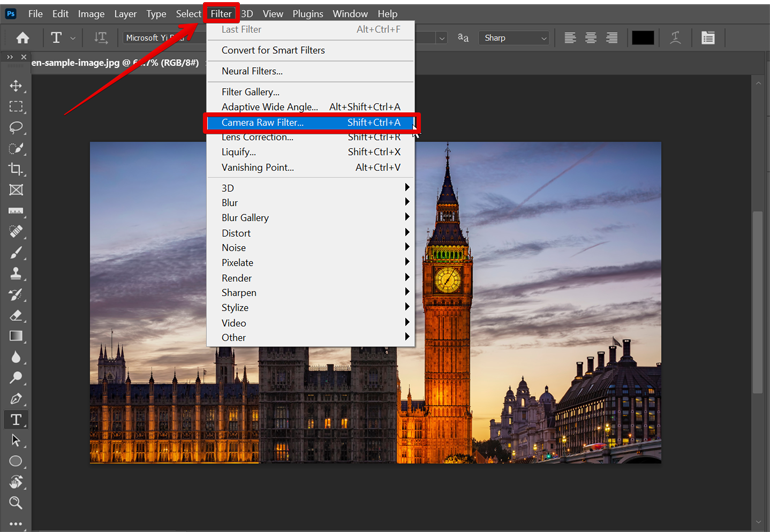
Always Edit in Raw
To get started, working with raw files has so many benefits for mastering your exposure as well as making other edits – and not to mention, Photoshop’s Camera Raw is the perfect partner in crime.
With Photoshop’s Camera Raw, you can make all kinds of adjustments without ever leaving that precious RAW format.
Once you have opened an image in Photoshop, go to Filter in the top menu and click on Camera Raw Filter or just use the shortcode Shift+Ctrl+A and your image will now open in the Camera Raw workspace.
This will change the image to a smart object, allowing you to quickly move back to Camera Raw later to adjust any edits you make.
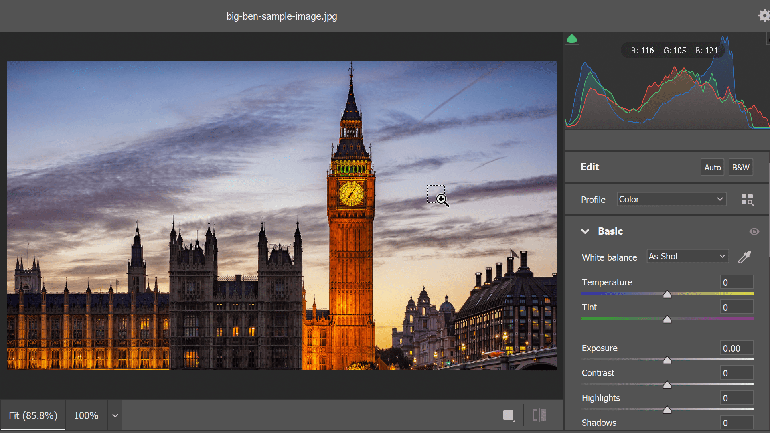
Once the layer is a smart object, as indicated by the icon in the layer’s thumbnails, you can open the Camera Raw workspace.
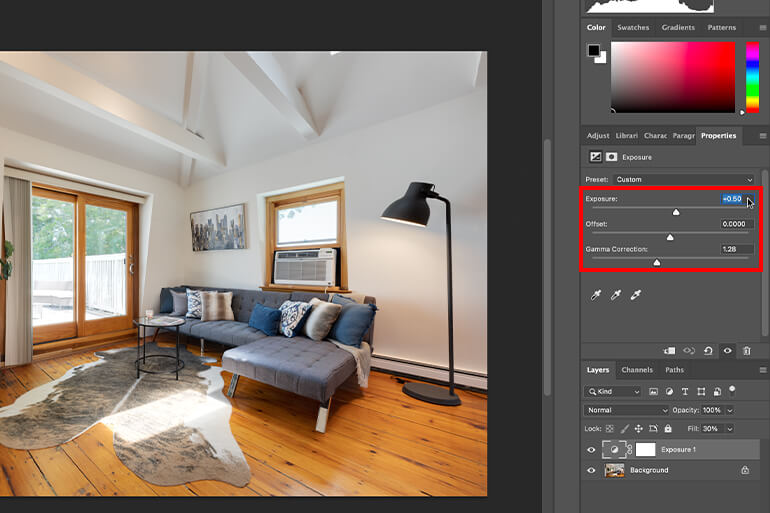
Way 1. Create an Exposure Adjustment Layer
To get started, create a new Exposure adjustment layer by clicking on the Plus-Minus icon in the Adjustments tab and choose Exposure.

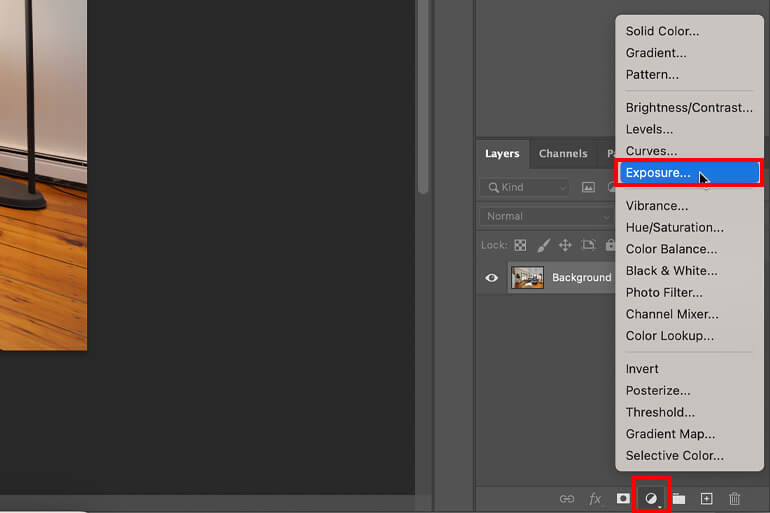
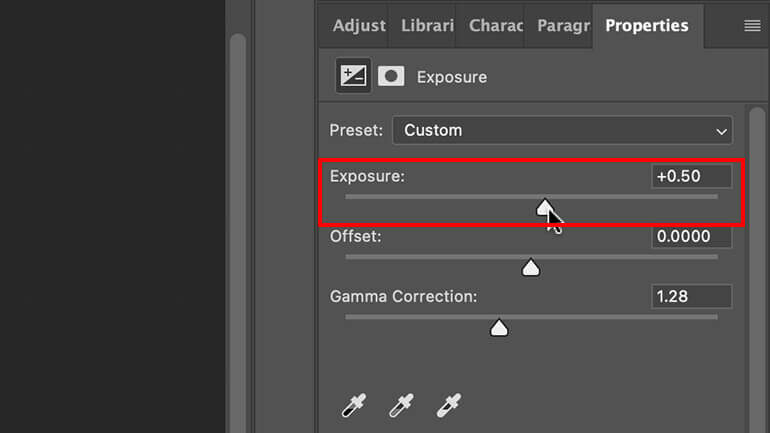
The Exposure window will now pop up, and you can use the Exposure slider and drag it to the left or right to adjust the exposure.
As simple as that!
The only issue with this method is that the image can easily be over-exposed or under-exposed, but that’s where you’ll have to use your discernment.
For example, adjusting the exposure too high will create blown-out details and if under-exposed, the image will look too dark.
When adjusting exposures, remember it’s always best to trust your eye for what looks just right!
High-Quality & Consistent
Real Estate Photo Editing
Hire a dedicated editor with performance metrics from $7/hour.

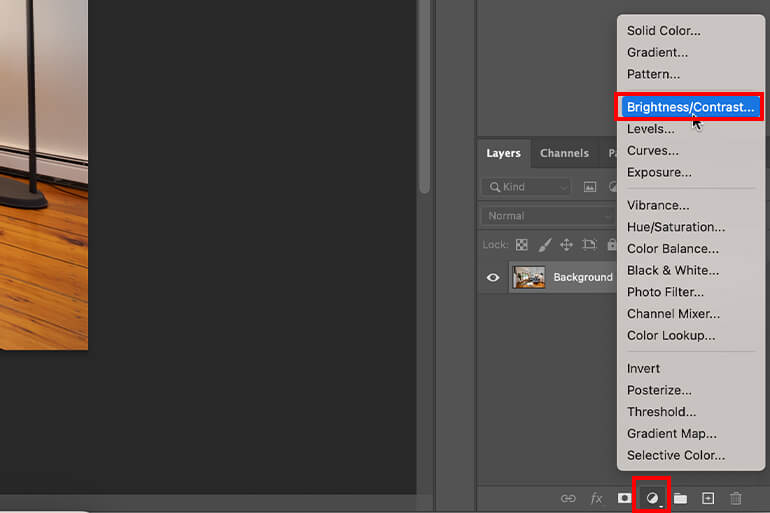
Way 2. Create a Brightness & Contrast Adjustment Layer
The easiest way to adjust the exposure of a photo in Photoshop is to create a new Brightness/Contrast adjustment layer.
All you need to do is navigate to Layer and then click on New Adjustment Layer > Brightness/Contrast. Or you can simply click on the Create new fill or adjustment layer icon in the bottom menu and then click Brightness/Contrast.
In the Brightness/Contrast window, you can now adjust the brightness slider left or right to darken or lighten the photo.
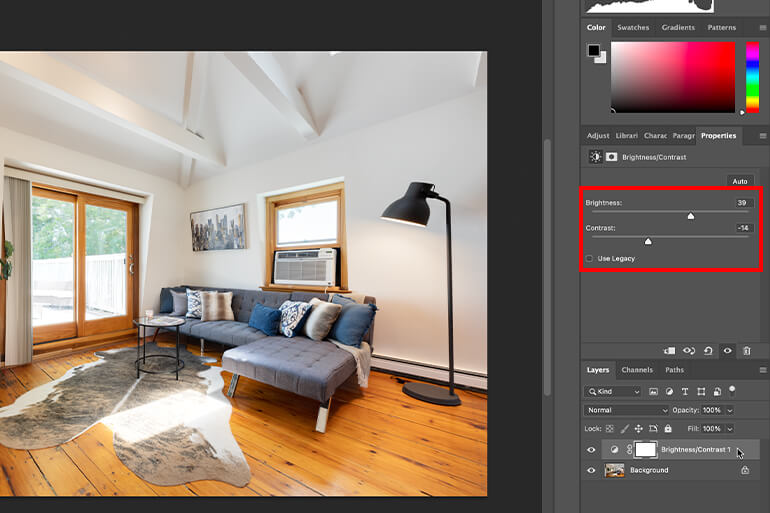
Super easy!
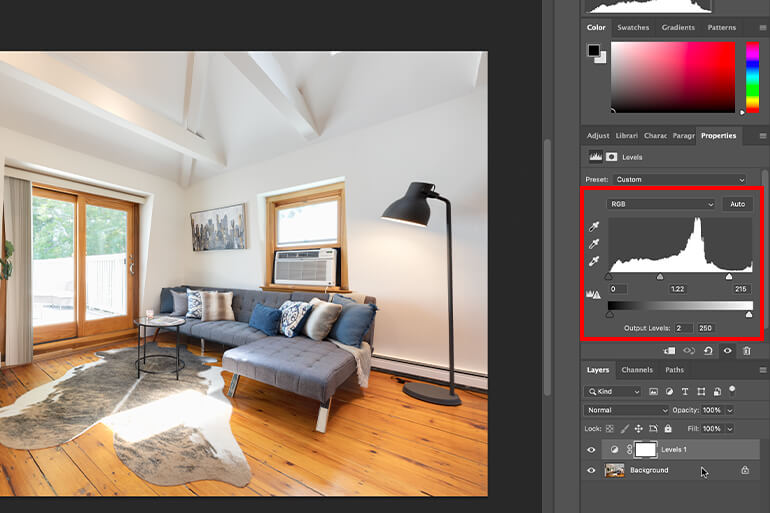
Way 3. Add a Levels Adjustment Layer
Perfecting the exposure of your photos is a breeze thanks to histograms. To use this method, click on the Adjustments tab and then the Create a new Levels adjustment layer icon, and choose Levels.
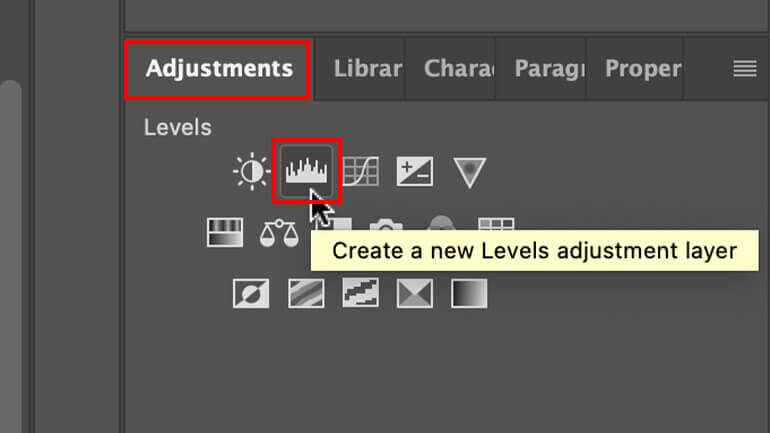
This action will open the Levels window, displaying a histogram of the image.
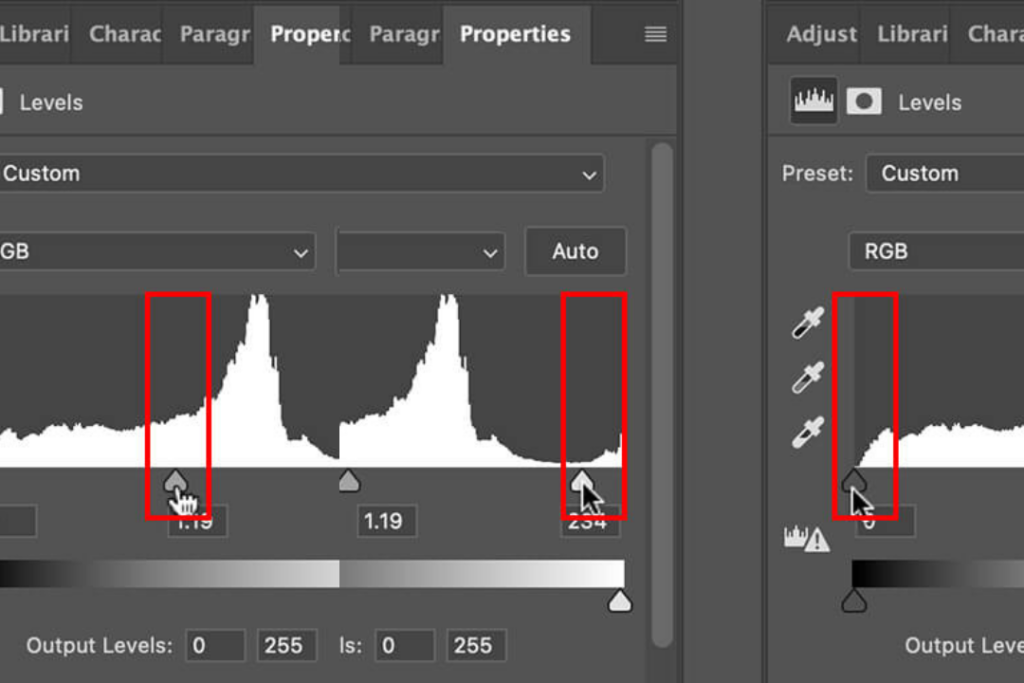
By keeping an eye on where the tones stack up, you can instantly tell if there’s too much darkness or brightness. Generally speaking, aim for more Mid-Tones in your images to ensure correct exposure.
Now, use the slider in the middle to adjust the Mid-Tones, which will make the overall image brighter or darker.
You can also use the Black and White slider to adjust the Shadows and Highlights. This will add contrast to the image.
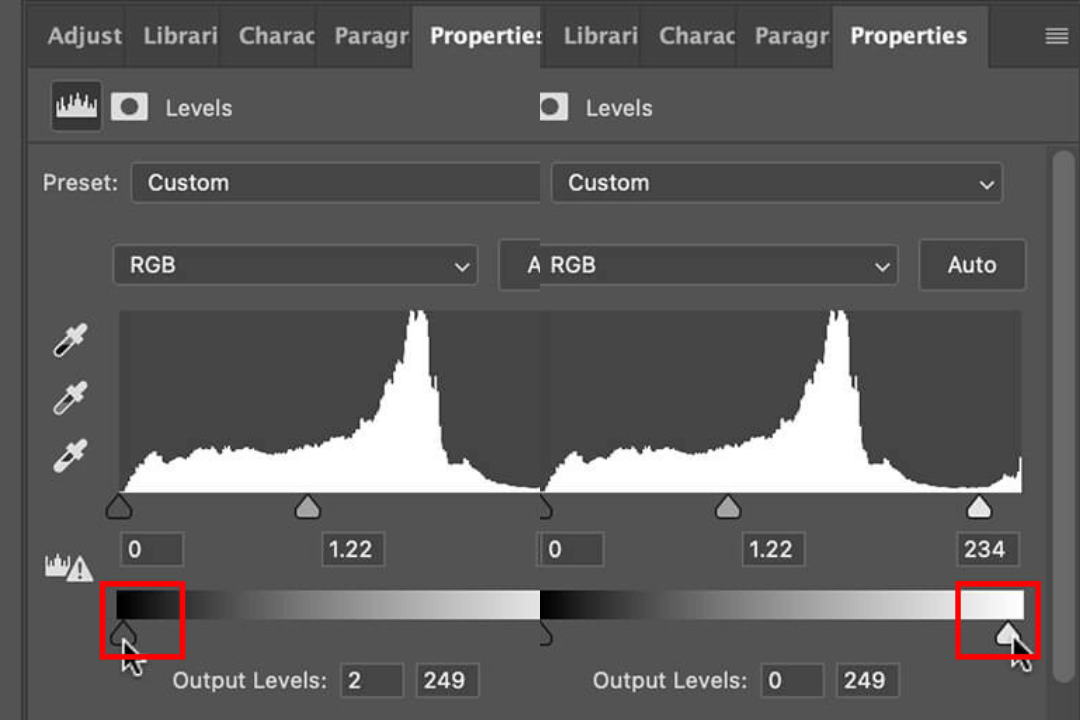
Next, for Output Levels, you can boost the impact of your photos using the slider. Set a value for the darkest and brightest pixels to bring out details in the overexposed areas.
Just don’t go too far – too much tweaking takes away from the authenticity of an image, making it look washed out or faded.
And that’s it!
High-Quality & Consistent
Real Estate Photo Editing
Hire a dedicated editor with performance metrics from $7/hour.
Leverage Professional Real Estate Photo Editing
If you want to take the tedious and time-consuming photo editing off your plate and ensure top-notch quality of your real estate photography, PhotoUp is happy to be your editing partner.
PhotoUp has more than 10 years of experience in the business and employs several hundred photo editors around the world, making it hard to match our quality, service, and pricing.
We have a team of highly talented real estate photo editors who can help with for example:
- Image brightness and exposure correction
- Color and tone adjustments
- Window masking and glare reduction
- Clutter and advanced object removal
- Line and angle corrections
- HDR editing and manual blending
- Harsh shadows and lack of light
- Sky replacements
- Twilight and day-to-dusk editing, etc.
Browse Top Dedicated
Real Estate Photo Editors
Ready-to-hire editors for real estate photo editing, and more.
But that’s not all…
PhotoUp has everything you need for your real estate marketing needs under one roof and also offers additional services such as:
With our user-friendly software, you can upload and receive photos, and send instructions and feedback. Plus manage team members and clients, store final images, and more!
PhotoUp Real Estate Photo Editing Uploader
Have a look at our real estate photo editing uploader demo to see how easy it is to get started:
As simple as that!
Did we say that our photo editing starts at the low cost of $1.15 per image?! And for a limited time, you even get 5 free edits when you sign up for a PhotoUp account!
We hope this blog post helped you learn 3 easy ways to edit the exposure in Photoshop. Before you go, you may also want to check out the following resources:

