


Real estate photography is more than just snapping shots of homes and properties. It is the art of making a space look as inviting and attractive as possible.
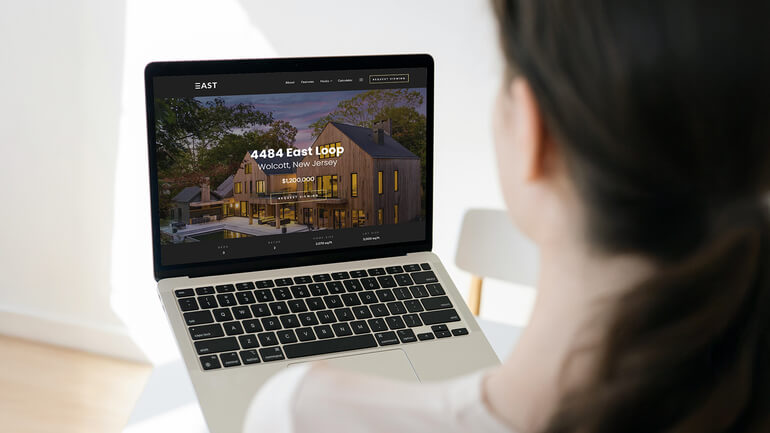
In today’s digital age, where 99% of homebuyers begin their search online, high-quality real estate photos can make or break a sale. As a real estate photographer, it’s essential to know not only how to take great photos but also how to edit them effectively.
In this guide, we’ll share 14 simple yet powerful tips for editing real estate photos that are sure to impress your agent clients and help them sell more homes.
Let’s dive in!
14 Powerful Tips for Editing Real Estate Photos
Here are our 14 powerful tips to help you enhance your real estate photos and ensure they stand out in a crowded marketplace.
1. Understand the Basics of Composition


Before you even start editing, it’s necessary to have a good understanding of composition. Taking the photo from the right angle can significantly reduce the amount of editing you need to do.
When photographing, use the rule of thirds to balance your shot, focus on straight lines and symmetry, and ensure that you capture each room from its best angle.
If your angles still don’t come out right, you can luckily fix this issue in post-processing with a simple retouch called perspective correction.
This editing technique corrects the distortion and misalignment between the horizontal lines and perspective. That is to say, it aligns the lines with the image’s frame to make the photo more natural.
To see how to align verticals using an alternative method, you can check out our video tutorial on how to straighten verticals in Photoshop:
2. Get the Exposure Right


The second tip for editing real estate photos is getting the exposure right, which should be one of the first steps in your editing process.
Real estate photos should be bright and welcoming. However, be wary of overexposure which can lower the quality of the image.
Use editing software to balance the light and dark areas of your photos so that the details of the interior can be clearly seen, and windows aren’t washed out.
To learn how to adjust exposure, check out this video tutorial on how to brighten a photo in Photoshop:
Additionally, this guide walks you through 3 ways on how to change exposure in Photoshop.
Lastly, bracketing shots and blending them can help achieve a well-exposed final photo, which we’ll take a closer look at next.
3. Boost Image Detail With HDR
High Dynamic Range (HDR) photography can bring out the best in your real estate images, especially when dealing with challenging lighting situations.


Combining images taken at different exposures (often 3 or more) into a single HDR image can ensure that every part of your photo is properly illuminated, from the natural light coming through the windows to the nooks and crannies of a room.
With the use of photo editing software, these bracketed images are then blended together to create a final image that shows all details in perfect exposure.
To learn how to blend these exposures, see our video tutorial on how to edit HDR photos in Lightroom:
4. Color Correction Is Key
Our fourth tip for editing real estate photos is color correction. Why is this edit necessary?


Different light sources can cast various color tints on your images, which may not represent the actual color of the interiors.
Making adjustments to color, contrast, tone, and sharpness may seem obvious and simple. But with a few clicks of a mouse, these simple edits can transform an image from looking bland into a bright and appealing image.
To learn how to adjust the colors and make your real estate photos pop, check out our tutorial on how to color correct in Photoshop.
Also, this video tutorial walks you through how to easily remove color cast from real estate images in Photoshop:
Remember to neutralize colors carefully to retain warmth without compromising on realism.
5. Sharpen the Details


Sharpening can help bring out the finer details in your photos, making them appear crisp and clear.
Whether your images come from a digital camera or a scanner, most images will benefit from sharpening.
You can easily bring your visuals to life by experimenting with image sharpening in Photoshop—add dimension, depth, and contrast along the edges of any object.
For more details, check out our video tutorial on how to sharpen an image in Photoshop:
Use the sharpening tools sparingly, as overdoing it can lead to unnatural-looking images and excessive noise.
You should aim for a subtle enhancement that defines the textures and edges within the space.
6. Don’t Forget to Declutter
During your photoshoot, you might not always have control over the state of the property.


Some common situations where you may want to remove objects and declutter your images for a cleaner look are:
- There’s a car in the driveway, blocking the wonderful view of the garden
- The TV cords show and make the image appear cluttered
- The granite counter would have been perfect if not for that old frying pan that was overlooked during the shoot
- There’s an ugly crack in the bathtub, or the wallpaper is coming off in the kitchen
- You failed to notice that someone passed by the property while making the shot
Post-processing is an excellent time to clean up those stray objects that can distract from the composition of your photos.
Use the Clone Stamp Tool or Healing Tool to remove unwanted items and keep the viewer focused on the space itself.
To learn how to use the Clone Stamp Tool to declutter your images, watch this tutorial video on how to remove cords in Photoshop:
In this video, you can also learn how to remove a car from a driveway in Photoshop using more advanced editing techniques:
7. Correct Lens Flares
It’s not uncommon to spot a few snags with lens flares after the fact. But, here’s where Photoshop becomes your photo hero – it’s like a magic wand for ironing out those optical quirks.


To keep those pesky lens flares at bay while capturing your shots, you can start by popping on a lens hood—they’re not just for show; they really do shield your lens from those flare-inducing rays.
No lens hood? No problem. Just be mindful of where the sun is hanging out. If it’s edging into your frame, just mimic a lens hood with your hand to fend off those flares.
And if, despite your best efforts, a wild lens flare sneaks into your shot, there’s always Photoshop to the rescue!
To learn how to perform this edit, watch our video tutorial on how to remove lens flare in Photoshop:
We have now come halfway in our tips for editing real estate photos. Well done! Let’s continue by looking at how to eliminate reflections in the mirror when shooting crowded spaces with mirrors.
High-Quality & Consistent
Real Estate Photo Editing
Hire a dedicated editor with performance metrics from $7/hour.

8. Eliminate Mirror Reflections


Sometimes when taking real estate photography, especially in a crowded bathroom, your reflection might show up in the mirror.
This makes your images look unprofessional and you need to address this in post-processing.
Just like in the declutter/object removal and lens flare sections, your best bet is to use the Clone Stamp Tool in Photoshop. It’s perfect for removing reflections. The shortcut for the Clone Stamp tool is Cmd/Ctrl+S.
9. Add a Bit of Drama With Twilight Editing


Having a Twilight image as the listing’s main photo averaged 76% more views than listings without the use of Twilight images. This editing technique also gives a luxurious vibe to a property, which can lead to a higher sales price.
Twilight editing is the process of taking an exterior photo of a home taken during a sunset or sunrise — the golden hour and editing it to enhance or alter its colors and/or light to give it a romantic glow.
To learn how to add more drama and a romantic feel to your real estate photography, check out this video tutorial on how to edit a Twilight or day-to-dusk image using Photoshop:
10. Make a TV Screen Replacement


When shooting real estate photography, large flat-screen TVs are prominent appliances in dens, bedrooms, living rooms, and family rooms in any home.
It’ll look more inviting to replace that black screen with a nice baking show or something else representing a “homey” feeling. It’ll help potential buyers visualize themselves relaxing on the sofa in their new home.
Here’s a neat and easy trick to add a TV image to an otherwise empty TV screen using Adobe Photoshop:
11. Add a Fire in the Fireplace
If your interior real estate photos look a bit cold and dull, there’s an easy fix!


You can make your interior images warm, interesting, and inviting by adding a beautiful fire in that unlit fireplace using some simple steps in Photoshop.
Imagine how much warmer and cozier your real estate photos will look with a fire you can almost hear crackling.
To learn how to do this neat edit, check out our tutorial on how to add fire to a fireplace using Photoshop:
12. Leverage Virtual Staging
AI Virtual staging acts as a powerful technique to reimagine vacant and outmoded properties, offering prospective buyers an engaging glimpse of a furnished space.


It skillfully integrates computer-generated furniture and décor into your photos, creating a contemporary, warm, and welcoming ambiance that captivates and connects with house hunters
Virtual staging services like PhotoUp give you several design options to help you cater to any market.
We offer a design style to stage any empty or outdated space!
Best of all, our virtual staging service is affordable and starts at the low cost of $5.00 per image.
Offering this service to your agent clients can help make you even more valuable as a marketing source and grow your photography business.
PhotoUp AI Virtual Staging Demo
To see how quick and easy it is to use PhotoUp’s virtual staging service, check out our short AI virtual staging demo:
13. Replace Dull Skies With Vivid Blue Ones


There’s something about a vivid blue sky that breathes life into a photograph, especially in real estate imagery where first impressions are everything.
Conversely, a blanket of gray clouds can cast a pall on the most scenic property, leaving the image feeling lackluster and uninspiring.
Yet, with modern editing techniques at your disposal, drab skies are no longer an issue. Substituting a lifeless sky for a dynamic one is not only feasible; it’s a straightforward enhancement that can dramatically elevate the visual appeal of your photographs.
Whether it’s a hint of cirrus or the full glow of a summer day, you can infuse a vibrant atmosphere into your shots with a simple swap of the skies in Photoshop.
It’s almost like controlling the weather to showcase each property in its finest light.
To learn how to create blue vivid skies, here’s a video tutorial on how to replace a summer sky in Photoshop:
14. Keep It Real
Homes with impressive listing photos receive 47% higher asking prices per square foot.


While it’s tempting to use all the tools at your disposal to create eye-catching images, over-edited photos can set unrealistic expectations and dissuade potential buyers.

Resist making your photos look overly saturated and cartoonish. To make your photos appear realistic, you need to ensure a more natural look that’s still appealing.
So, keep your edits subtle for a realistic portrayal that highlights the property’s best features.
Conclusion
And there you have all 14 tips for editing real estate photos like a pro.
To recap, editing real estate photos is a crucial step in the process of creating captivating imagery that can showcase properties in their best light.
By applying these tips, you’re not only improving your photographs but also contributing to the property’s appeal and marketability.
Always aim for a balanced approach that enhances rather than obscures the true character of the spaces you’re capturing.
Remember, in real estate photography, your images are often the first impression a potential buyer gets, so make sure it’s a good one. Happy editing!
Have You Ever Thought To
Outsource Photo Editing?
Try it today with 5 free edits from three professional photo editors.
Need Help? Outsource Your Photo Editing to PhotoUp
As we all know, editing real estate photos can take many hours. Therefore, many real estate photographers and Realtors outsource their photo editing.
And here’s where PhotoUp is ready and eager to help!


PhotoUp offers an affordable editing service that streamlines the editing process, providing high-quality, customized images and videos at a fraction of the cost of hiring an in-house editor.
For example, our skilled photo editors can help with the following issues:
- Improper exposure levels
- Harsh shadows, lack of light, etc.
- Blurred images that were taken without a tripod
- Images that need cropping or other effects
- Lawn greening and sky replacements
- Twilight and day-to-dusk editing
- Manual blending and pano stitching
- Clutter and advanced object removal
- Line and angle corrections
- And much more!
Browse Top Dedicated
Real Estate Photo Editors
Ready-to-hire editors for real estate photo editing, and more.
Plus, it’s hard to beat PhotoUp’s quality, service, and pricing, with most photo editing costing $0.50 to $9.00 per image, depending on the complexity.
It doesn’t stop there…
Your Real Estate Marketing Partner
PhotoUp is a complete one-stop-shop for real estate marketing and also offers additional services such as:
We have everything you need to create impressive real estate photography that will impress clients and sell listings faster at higher rates!
How to Get Started
Getting started with PhotoUp is easy breezy!
All you need to do is sign up for a free PhotoUp account. This will give you access to our user-friendly photo management system where you can upload photos, provide instructions and feedback, and lastly download your beautifully edited images.
PhotoUp Real Estate Photo Editing Uploader Demo
To see how easy it is to get started with PhotoUp, have a look at our real estate photo editing uploader demo:
As simple as that!
So, what are you waiting for?
Sign up for a free PhotoUp account today and let our skilled real estate photo editors help you create stunning images while you can spend more time shooting more properties.
For a limited time, we even offer you 5 free credits you can use on any of our services when signing up for an account.
We hope this blog post provided some simple yet powerful tips for editing real estate photos. Before you go, you may also want to check out the following resources:

