


Table of Contents
- The Evolution of Real Estate Photo Editing
- Why Should You Edit or Retouch Real Estate Photos?
- The Importance of Accuracy in Real Estate Photography
- Common Real Estate Photo Editing Mistakes to Avoid
- 10 Advanced Real Estate Photo Editing Techniques
- Outsource Your Real Estate Photo Editing to PhotoUp
In the competitive real estate market, captivating images can be the determining factor that draws a potential buyer’s attention. 68% of buyers say that great photos made them want to visit the home and 99% of home searchers start their search online.
High-quality real estate photos not only showcase properties in the best light but also can evoke an emotional response, compelling buyers to imagine their future in that space.
Whether you’re a seasoned real estate photographer or looking to refine your editing skills, this guide will share 10 powerful editing and retouching tips and techniques to create captivating images.
We’ll also cover the difference between editing and retouching, quality metrics, and common mistakes to avoid when editing real estate photography.
The Evolution of Real Estate Photo Editing


From the days of darkroom tweaks to state-of-the-art digital software, the realm of real estate photo editing has undergone substantial transformation.
Today, sophisticated tools like HDR photography, panoramic stitching, and virtual staging have become an integral part of the industry.
Staying abreast of these technological advancements is vital to keep your services cutting-edge and client-friendly.
Understanding the Difference Between Editing, Retouching, and Photo Manipulation
Understanding the distinction between real estate photo editing and retouching can magnify the professional appeal of your work.
Real estate photo editing generally refers to adjustments in color balance, exposure, and contrast to bring out the true charm of the property.


Meanwhile, retouching is about perfecting details, including:
- Removing a car parked in the driveway
- Smoothing out imperfections on walls
- Adding a warm glow to light fixtures
- Or making day-to-dusk conversions
Balancing both practices leads to a pristine and inviting portrayal of any property.
However, watch out not to manipulate your images and make a property appear more attractive or desirable than it really is.
This can be misleading and could potentially lead to disappointment or mistrust when buyers or renters see the property in person.
For example, it is generally not allowed to use photo manipulation to alter the appearance of a property in a way that would violate zoning or building codes. Or to make a property appear as though it has features or amenities that it doesn’t have.
Why Should You Edit or Retouch Real Estate Photos?
Editing and retouching are not just about beautifying images; it’s about translating the potential of a property into a visual form that speaks directly to buyers.
Well-edited photos ensure that clients can see the best version of a property, where every element, from the lighting to the spatial dimensions, is in harmony.
It’s a crucial step in storytelling that often compels buyer action.
Well-edited real estate photos, including a floor plan and a virtual house tour, can lead to a buyer placing an offer without even visiting the property in person and paying a premium rate.
It also boosts the quality of your portfolio, which typically leads to more referrals and new clients.
The Importance of Accuracy in Real Estate Photography
In real estate photography, quality isn’t just about aesthetics, it’s also about accuracy.
While it’s tempting to create an idealized version of a property, maintaining honesty in your representation ensures credibility with both your clients and their prospects.
High-quality real estate photo editing respects the property’s integrity while enhancing its appeal.


How to Meet Quality Metrics for Professional Real Estate Photo Editing
Meeting and setting quality standards comes down to a few key practices. Keep these practices in mind when editing or retouching your real estate photography:
- Ensuring consistency across images in color, brightness, and tone
- Paying close attention to natural light usage often determines the ambiance and mood of a photo
- Adopting a detail-oriented approach, especially when retouching, to avoid the uncanny effect of over-processed images
- Being mindful of keeping your editing within realistic parameters that reflect genuine properties of real estate offerings
Now that you know the quality standards for real estate photo editing, let’s look at some common mistakes to avoid.
Common Real Estate Photo Editing Mistakes to Avoid

Avoiding common pitfalls can drastically improve your final output. Here are some mistakes to avoid when editing or retouching real estate photos:
- Over-saturation of colors can lead to gaudy images that detract from the property’s true look
- Excessive exposure adjustments might wash out details or create unnaturally dark areas
- Ignoring vertical and horizontal lines can result in a skewed perspective, making the property appear distorted
- Overuse of HDR can lead to halos around edges and an overall unnatural feel
- Being tempted to remove structures and other solid elements can lead to legal repercussions
In the end, mastering real estate photo editing is about finding that sweet spot – where artistic enhancement meets the transparent revelation of a property’s best features.
Hone your skills, keep abreast of current trends, and remember that your work helps build the dreams that turn houses into homes.
10 Advanced Real Estate Photo Editing Techniques
With this in mind, let’s take a look at 10 advanced real estate photo editing techniques that will help you create captivating listing images.
All these techniques are presented with educational video tutorials to help you improve your editing and retouching skills.
1. Perspective Correction
Before you even start editing, it’s necessary to have a good understanding of composition. Taking the photo from the right angle can significantly reduce the amount of editing you need to do.


When photographing, use the rule of thirds to balance your shot, focus on straight lines and symmetry, and ensure that you capture each room from its best angle.
If your angles still don’t come out right, you can luckily fix this issue in post-processing with a simple retouch called perspective correction.
This editing technique corrects the distortion and misalignment between the horizontal lines and perspective. That is to say, it aligns the lines with the image’s frame to make the photo more natural.
To see how to align verticals, you can check out our video tutorial on how to straighten verticals in Photoshop:
2. HDR Editing
High Dynamic Range (HDR) editing is a game-changer for real estate photography.


This technique combines multiple exposures of the same scene to create a single image with balanced lighting and increased detail.
HDR brings out the best in both the shadows and highlights, providing a natural and appealing look even in challenging lighting scenarios.
This helps to bring out more detail in your images and make them pop.
To learn this simple yet effective editing technique, watch this video tutorial on how to edit HDR photos in Lightroom:
3. Virtual Staging
Empty rooms can feel soulless and uninviting. AI Virtual staging breathes life into these spaces by digitally inserting furniture and decor.


Empty or outdated spaces can be redecorated with modern, beautiful furniture in seconds to help prospective buyers see the home’s possibilities.
This allows clients to visualize the property as a home and can generate interest and excitement for what otherwise might seem like an uninspired space.
“Virtual staging can help you stage faster than traditional staging and is up to 97% cheaper than traditional staging. What’s not to love!?”
Devon Higgins, Head of Sales & Marketing at PhotoUp, Realtor at Hello Homes GR
With the help of PhotoUp’s professional CAD designers, you can get your images digitally staged and returned to you in less than 48 hours for the low cost of $5.00 per image.
All you need to do is take photos of your property, upload your images, select furniture and export settings, and then sit back and wait for your staged images to be delivered.
PhotoUp AI Virtual Staging Demo
To illustrate how easy it is to get your images virtually staged, have a look at our virtual staging demo:
For a more detailed tutorial, you can visit our blog post on how to virtually stage a room in less than 5 minutes.
Have You Ever Thought To
Outsource Photo Editing?
Try it today with 5 free edits from three professional photo editors.

4. Sky Replacement
Never underestimate the power of a beautiful sky in real estate photos.


Sky replacement technology enables photographers to replace a dull or overcast sky with a vibrant and sunny backdrop, which can instantly uplift the aesthetic of the property and evoke positive emotions associated with sunny weather.
Besides, real estate photographers are no longer at the mercy of unpredictable weather or specific times of day.
Honing this skill can transform standard real estate photos into unforgettable showcases no matter the weather at the time of the photoshoot.
To learn how to do a sky replacement, check out our video tutorial on how to replace a summer sky in Photoshop:
5. Object Removal
Clutter and unwanted objects can be distracting in real estate photos.
Imagine a tranquil garden that’s unexpectedly disrupted by a car parked right in the middle of the view, unsightly television wires crisscrossing through a peaceful living room, or everyday pots and pans taking away from the elegance of polished granite countertops.


These visuals are all too familiar in the realm of real estate imagery.
Editing out these items ensures that potential buyers focus on the property itself rather than being led away by insignificant details in the surroundings.
To learn how to declutter your images using the Clone Stamp Tool, watch this video tutorial on how to remove cords in Photoshop:
Additionally, in this video tutorial, you can learn how to use the Healing Brush Tool together with the Clone Stamp Tool to remove a car from the driveway:
6. Window Masking
Windows are the eyes of a property’s soul, offering views and providing insight into the local environment.


With window masking, you can balance the exposure of the interior and the view outside, providing a clear and attractive glimpse of both worlds.
It also offers the possibility to entirely alter the scenery captured through the window, providing photographers with the tools to enhance their images significantly.
To learn more, watch this video tutorial on how to mask windows for real estate photography in Photoshop:
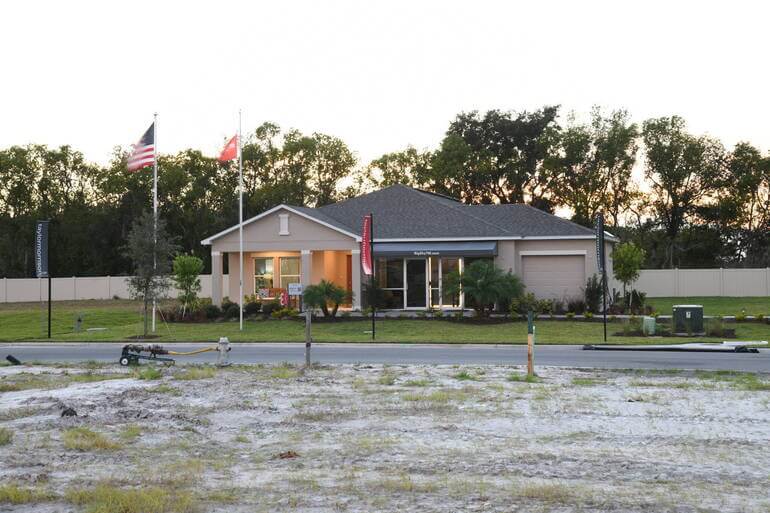
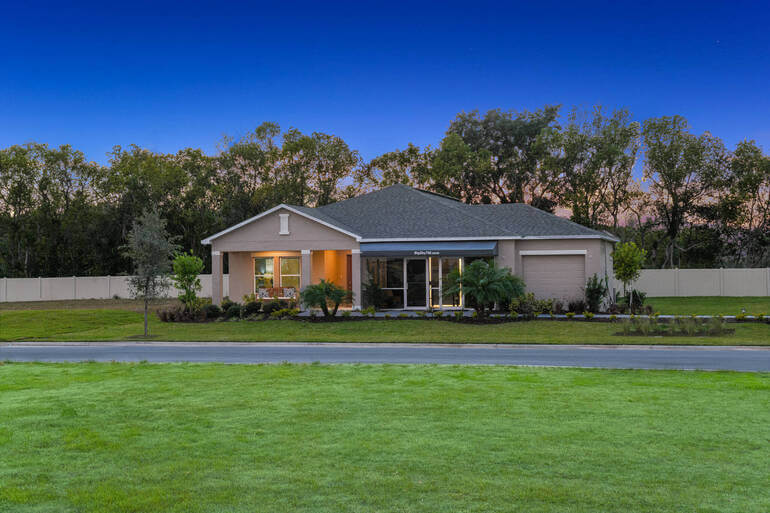
7. Twilight Editing
Twilight photography captures properties in the warm and inviting glow of dusk, creating a dramatic and eye-catching image.


It’s a fantastic way to show off a property’s lighting and create an enticing atmosphere that will draw viewers in.
However, if an actual twilight shoot isn’t possible, twilight editing can simulate that golden hour magic.
To learn how to do twilight editing, check out our video tutorial on how to edit a day to dusk image:
8. Grass Greening
First impressions count, and lush green lawns can make a significant impact on property appeal.
Grass greening in photo editing ensures that exteriors look well-maintained and vibrant, showcasing outdoor spaces at their verdant best.
This simple step can significantly improve the curb appeal of a property and make it look more appealing to potential buyers.
To learn how to create a beautiful green lawn, check out our video tutorial on how to make grass green in Photoshop:
9. Eliminating Ghosting
If using HDR techniques or shooting in windy conditions, you may encounter ghosting—where moving objects leave a trail or blur.


While certain artistic photography styles might intentionally incorporate ghosting to evoke a particular ambiance or emotion within the imagery, this effect can detract from the professionalism of real estate photos by giving them an unfinished and subpar aesthetic.
Luckily, removing ghosting using Photoshop is simple if you know your way around the software.
For more details, check out our video tutorial on how to remove ghosting in real estate photos:
10. Adding Fire in the Fireplace
You can make your interior images warm, interesting, and inviting by adding a beautiful fire in that unlit fireplace.


Who wouldn’t feel drawn to a nice, crackling fire in a beautiful fireplace? Potential buyers can imagine themselves cozying up with a loved one in front of that fire.
Check out this video tutorial to learn how to add fire to a fireplace using Photoshop:
And there you have 10 tips for editing real estate photos like a pro!
By applying these tips, you’re not only improving your photographs but also contributing to the property’s appeal and marketability.
Have You Ever Thought To
Outsource Photo Editing?
Try it today with 5 free edits from three professional photo editors.
Outsource Your Real Estate Photo Editing to PhotoUp
As we all know, editing real estate photos can take many hours. That’s why outsourcing your post-processing to PhotoUp is a game changer!


PhotoUp offers an affordable editing service that streamlines the editing process, providing high-quality, customized images and videos at a fraction of the cost of hiring an in-house editor.
Our skilled photo editors can help with issues such as:
- Improper exposure levels
- Harsh shadows, lack of light, etc.
- Blurred images that were taken without a tripod
- Images that need cropping or other effects
- Lawn greening and sky replacements
- Twilight and day-to-dusk editing
- Manual blending and pano stitching
- Clutter and advanced object removal
- Line and angle corrections
- And much more!
Browse Top Dedicated
Real Estate Photo Editors
Ready-to-hire editors for real estate photo editing, and more.
Plus, it’s hard to beat PhotoUp’s quality, service, and pricing, with most photo editing costing $1.10 to $9.00 per image, depending on the subscription and complexity.
And it doesn’t stop there…
A Complete Real Estate Marketing Partner
PhotoUp is a complete real estate marketing partner and also offers additional services such as:
We have everything you need to create impressive real estate photography that will impress clients and sell listings faster at higher rates!
How to Get Started
Getting started with PhotoUp is easy breezy.
All you need to do is sign up for a free PhotoUp account. This will give you access to our user-friendly photo management system, where you can upload photos, provide instructions and feedback, and lastly download your beautifully edited images.
PhotoUp Real Estate Photo Editing Uploader Demo
To see how easy it is to get started with PhotoUp, have a look at our real estate photo editing uploader demo:
As simple as that!
So, what are you waiting for?
Sign up for a free PhotoUp account today and let our skilled real estate photo editors help you create stunning images while you can spend your precious time shooting more properties.
For a limited time, we even offer you 5 free credits when signing up for an account you can use for any of our services.
We hope this blog post helped you understand the nuances of real estate photo editing and retouching and also provided you with 10 powerful editing techniques. If you found this guide useful, you may also want to check out the following resources:

