


Table of Contents
Do you want to know how to virtually stage a room in less than 5 minutes and create captivating real estate photos?
68% of buyers say that great photos made them want to visit the home. Virtual staging enhances real estate photographs to make your home look more appealing to potential buyers.
Virtual staging is a powerful real estate marketing tool!
In this post, we’ll show you how to virtually stage a room in less than 5 minutes to create stunning real estate photos and help sell your property listing faster and for top dollar.
What Is Virtual Staging?
Virtual staging is the digital version of home staging. With the help of CAD software, you can add new furnishings and decor to any room.


Additionally, virtual staging allows you to save money on costly home staging that requires the delivery of physical furniture and decor to make a home look up-to-date and attractive to the real estate market.
In fact, virtual staging is up to 97% cheaper than traditional staging.
Traditional home staging isn’t only an expensive and time-consuming process, but also a headache for the seller.
No matter whether the property is vacant or just needs an update, virtual staging can create magic in any space!
Here’s an example of how virtual staging can elevate an empty space and create an inviting home with a few clicks of the mouse:


As you can see, this technology enables potential home buyers to see beyond the home’s current state and helps them visualize themselves living in the home.
For example, empty or outdated spaces can be redecorated with modern, beautiful furniture in seconds to help prospective buyers see the home’s possibilities.
If you’re still not convinced what virtual staging can do for you, let’s take a look at how this groundbreaking technology can help sell your property faster and above market rate.
Quick & Easy
AI Virtual Staging
Interiors. Landscapes. Commercial. Virtually transform any space.

Virtual Staging Can Help Sell Your Property Faster
Have you ever looked at a property listing in one of these fancy magazines and imagined yourself living there? That’s where virtual staging comes into the picture!


It enhances a property photograph and helps potential homebuyers to imagine themselves living in the home. They can see the home’s full potential and get an idea of how to decorate the space.
With virtual staging, you can give character to any room and create the space you want to market to your buyers.
Additionally, it can neutralize, depersonalize, and declutter messy rooms to make them appeal to everyone.
For instance, it can help you remove bold and outdated colors and replace them with new and brighter choices that brighten up the room and make it look modern. Plus, you can also spice it up with the latest home decor and furniture.
It also allows you to save thousands of dollars in renovating costs or staging it using a traditional home staging service that can cost anywhere from $1,000 to $20,000, and take days or weeks. The digital version of staging is up to 97% cheaper.
The bottom line is that if you want your listing to sell faster and for a higher price, you need to create stunning real estate photos that will grab buyers’ attention and get them in the door.
Virtually staging your images can help you get more eyes on your listing, more offers, and close on your home faster and for top dollar.
How to Virtually Stage a Room With PhotoUp
Luckily, there’s a quick and easy way to virtually stage your real estate photos with PhotoUp. Best yet, it won’t break the bank.
With the help of PhotoUp’s advanced AI virtual staging technology, you can get your images digitally staged and returned to you in just 1 to 2 minutes for the low cost of $3 per image.
All you need to do is take photos of your property, upload your images, select furniture and export settings, and then sit back and wait for your staged images to be delivered.
PhotoUp AI Virtual Staging Demo
To illustrate just how easy it is, let’s take a closer look at how to virtually stage a room using PhotoUp’s AI virtual staging software next. You can either watch the video tutorial or read the text below:
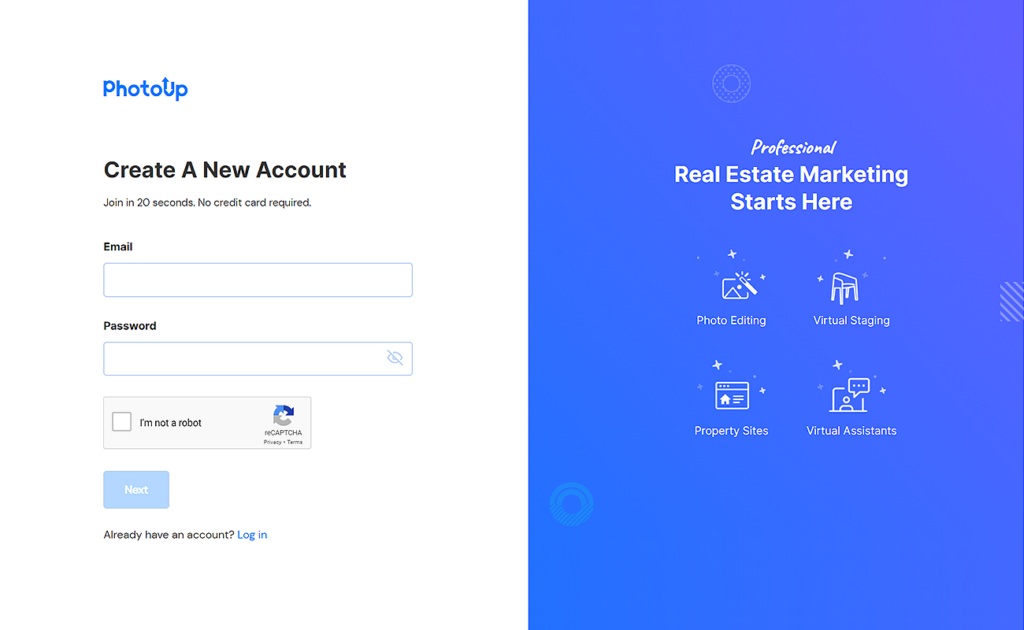
Step 1. Sign Up for a PhotoUp Account
To begin, sign up for a free PhotoUp account on PhotoUp’s website by entering your email address and creating a password.
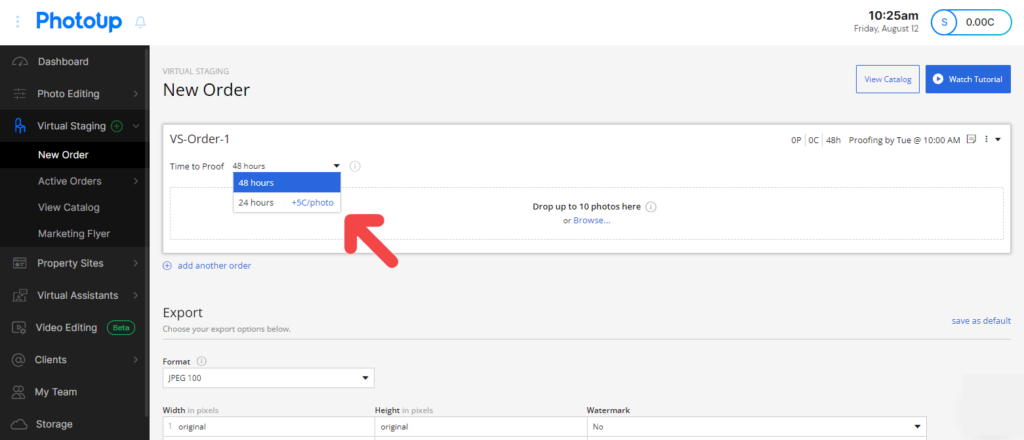
Step 2. Choose Virtual Staging
Once you’ve signed up for an account, it’ll take you to the PhotoUp Dashboard, where you can choose Virtual Staging » New Order.

Step 3. Choose Your Preferred Turnaround Time
In the next step, you can choose your preferred turnaround time. PhotoUp offers either 24 or 48 hours turnaround.
Step 4. Upload Your Photos
Now it’s time to upload your real estate photos of your vacant space that you want staged.
Although virtually staging empty spaces is the most common option, you can also choose to declutter and redecorate your photos, or even make virtual renovations.
To begin uploading your images, click on the Browse button in the New Order window and select your photos. Or, you can simply drag and drop up to 11 images at the same time.

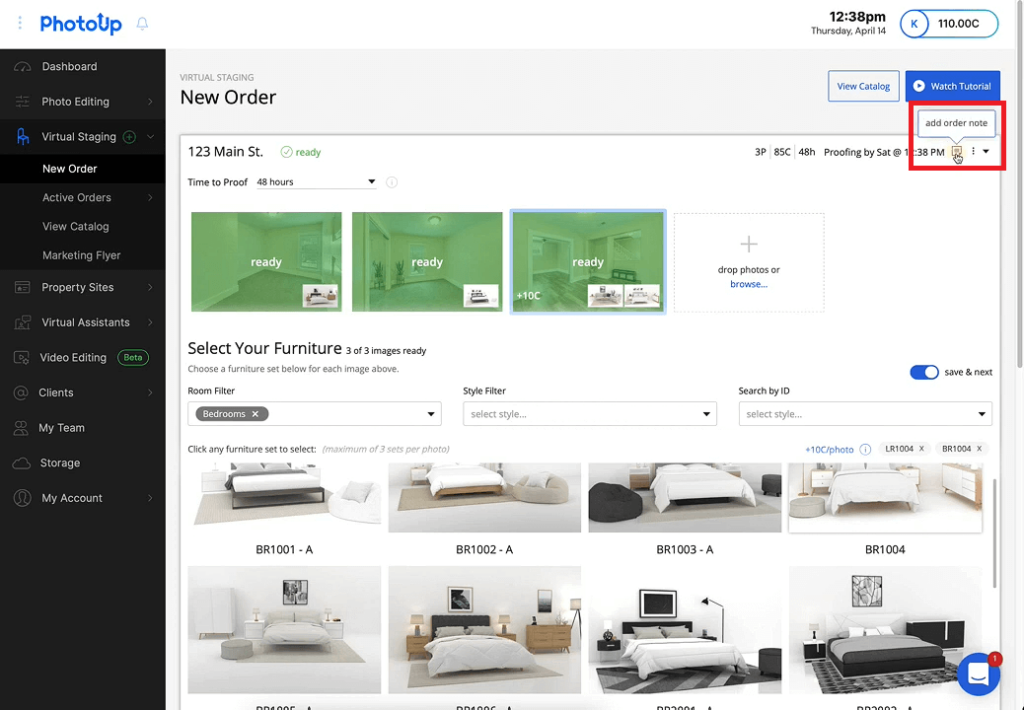
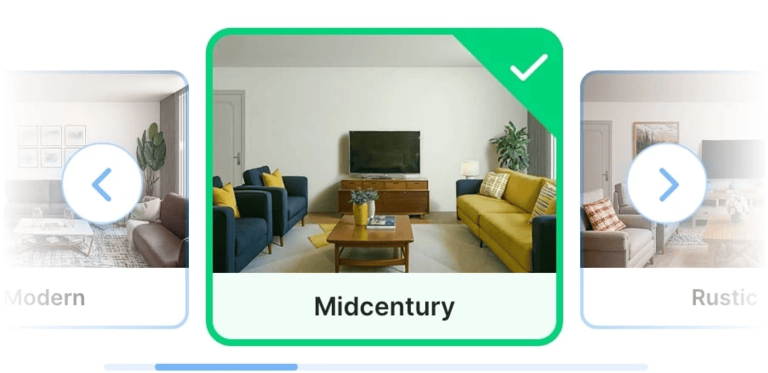
Step 5. Choose Your Furniture
After you’ve uploaded your photos, you need to choose your furniture.
Start by marking the photo you want to add furniture to, and then click on the furniture set you want to add to your image.
You can choose up to 3 sets per photo. And you can either use the Style Filter or Room Filter option, or Search by ID for furniture sets.
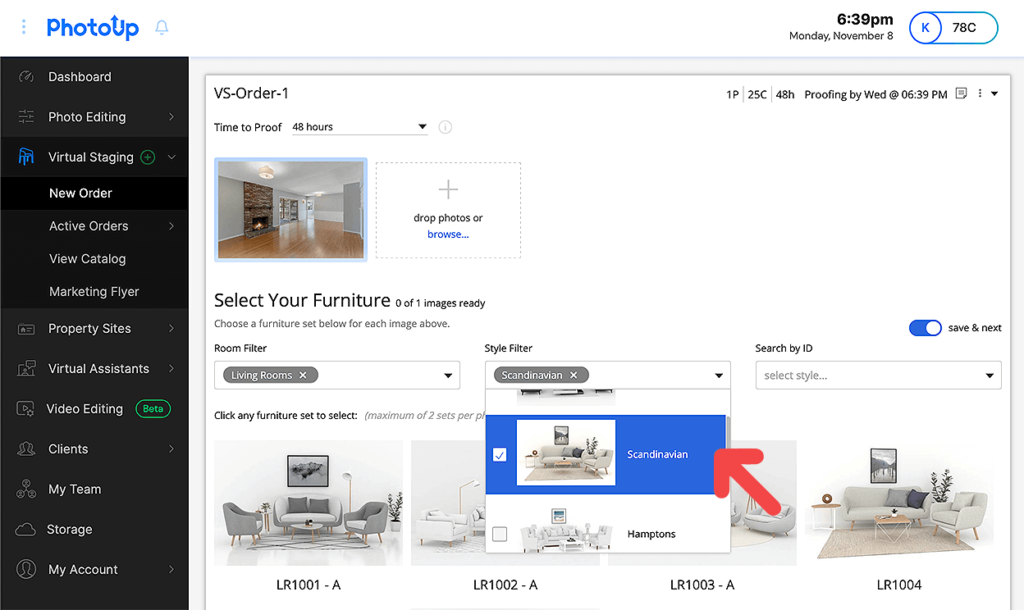

Once you’ve clicked on the set you wish to add to your photo, you’ll see thumbnails of them at the bottom right corner of the uploaded image.
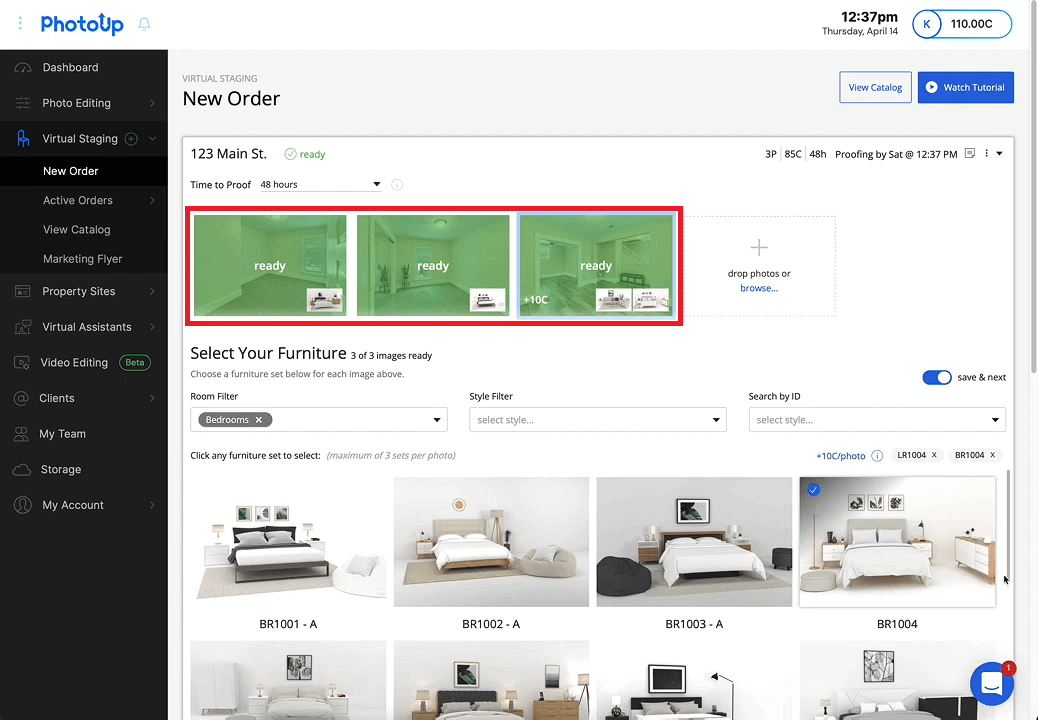
You also have the option to add your comments and instructions in Add order note in the menu in the top right corner of the dashboard. Or, you can leave your comments on each individual photo.
Step 6. Choose Your Export Settings
Once you’ve selected the furniture you want to stage your photos with, you need to scroll down and choose your preferred Export Settings.

This will be the type of image format you want your photos to be delivered in.
Additionally, you can also choose to have your images watermarked. Simply click on the + add watermark button below the export settings and upload your logo or icon.
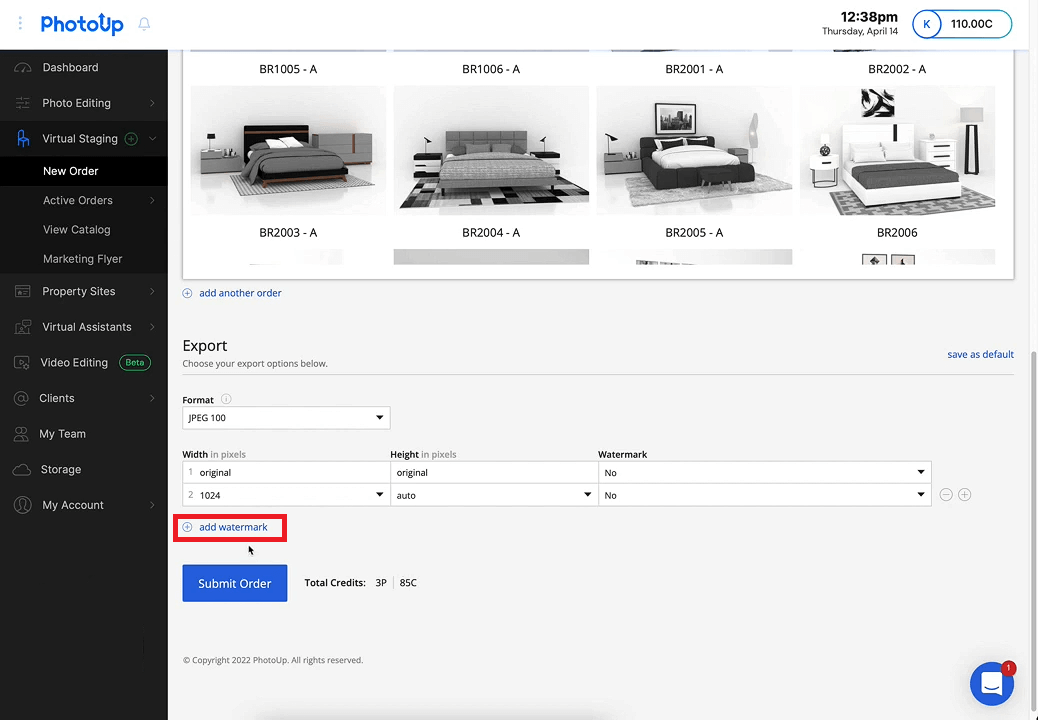
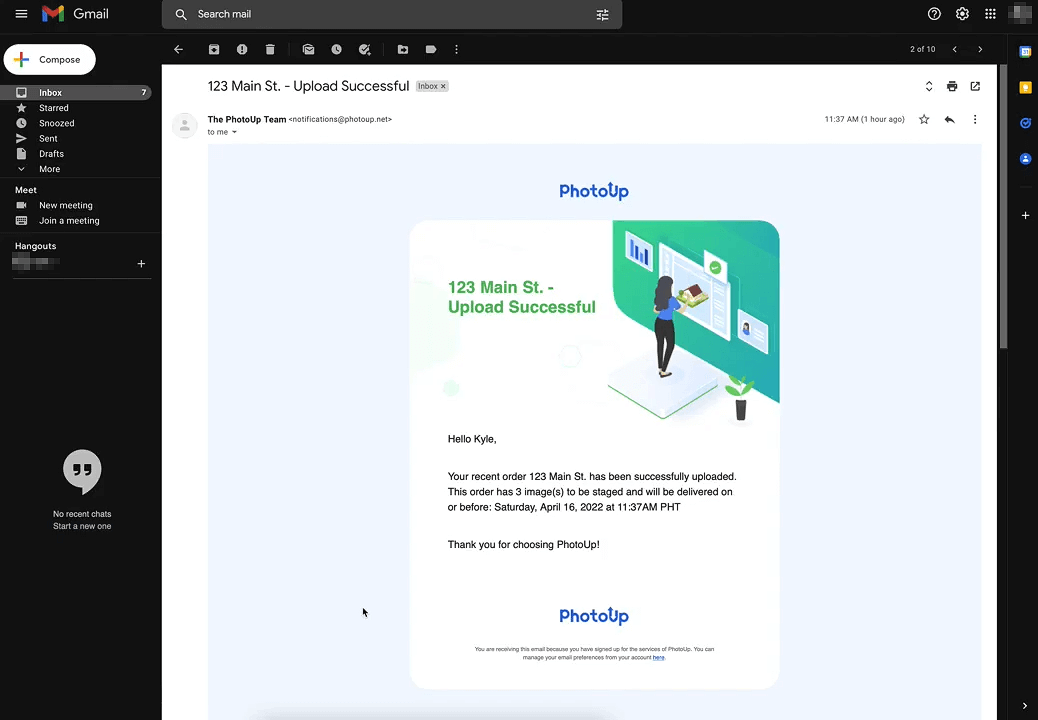
Then, click on the Submit Order button, and you’ll get a confirmation of your order. You’ll also receive a separate email that your upload was successful.

Now, you’re almost finished!
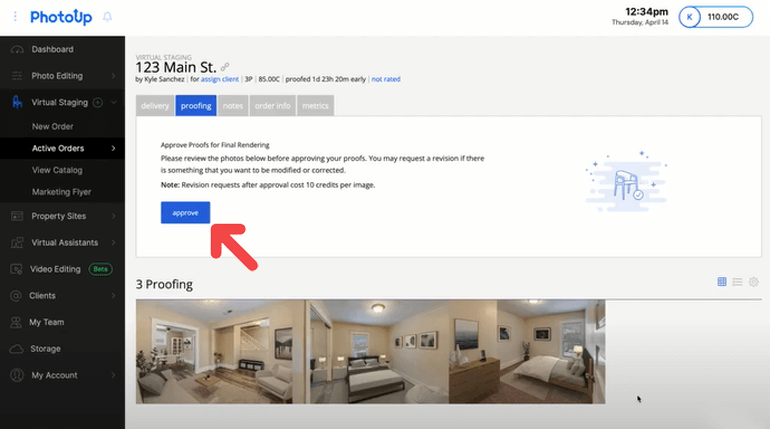
Step 7. Proofing Your Virtually Staged Photos
The final step is to review your virtually staged photos. When your photos are ready for proofing, you’ll receive an email containing a link.
This link will take you to an order page where you have the ability to view your photos and request revisions if needed or approve your order. Just click on the proofing button and review your images.

Additionally, PhotoUp offers 2 free revisions and then each additional revision costs 10 credits.
Further, each image contains a before and after slider of the image. Simply, drag the slider back and forth to see the original photo and the final image.

8. Approve & Download Your Rendered Images
If everything looks okay, you can go ahead and Approve the order.
When the images are fully rendered, you’ll receive a notification email. And when you click on the link in the email, it’ll take you back to the order page where you can download your high-resolution photos.
And that’s it!
You are now ready to share your beautifully staged real estate photos and impress your clients.
Why Use PhotoUp?
There are many advantages to choosing PhotoUp for all your virtual staging needs.
For starters, PhotoUp delivers high-quality, virtual staging with fast turnaround times of 1 to 2 minutes.
For only $3 per image, you can cater to any market with an extensive selection of digital furniture, design styles, and decor.
Our services include:
- Virtually staging for vacant or furnished rooms
- Color changes for walls, furnishings, and flooring
- Digital decluttering, repairs, and updates
- Virtual landscaping
- And much, much more!
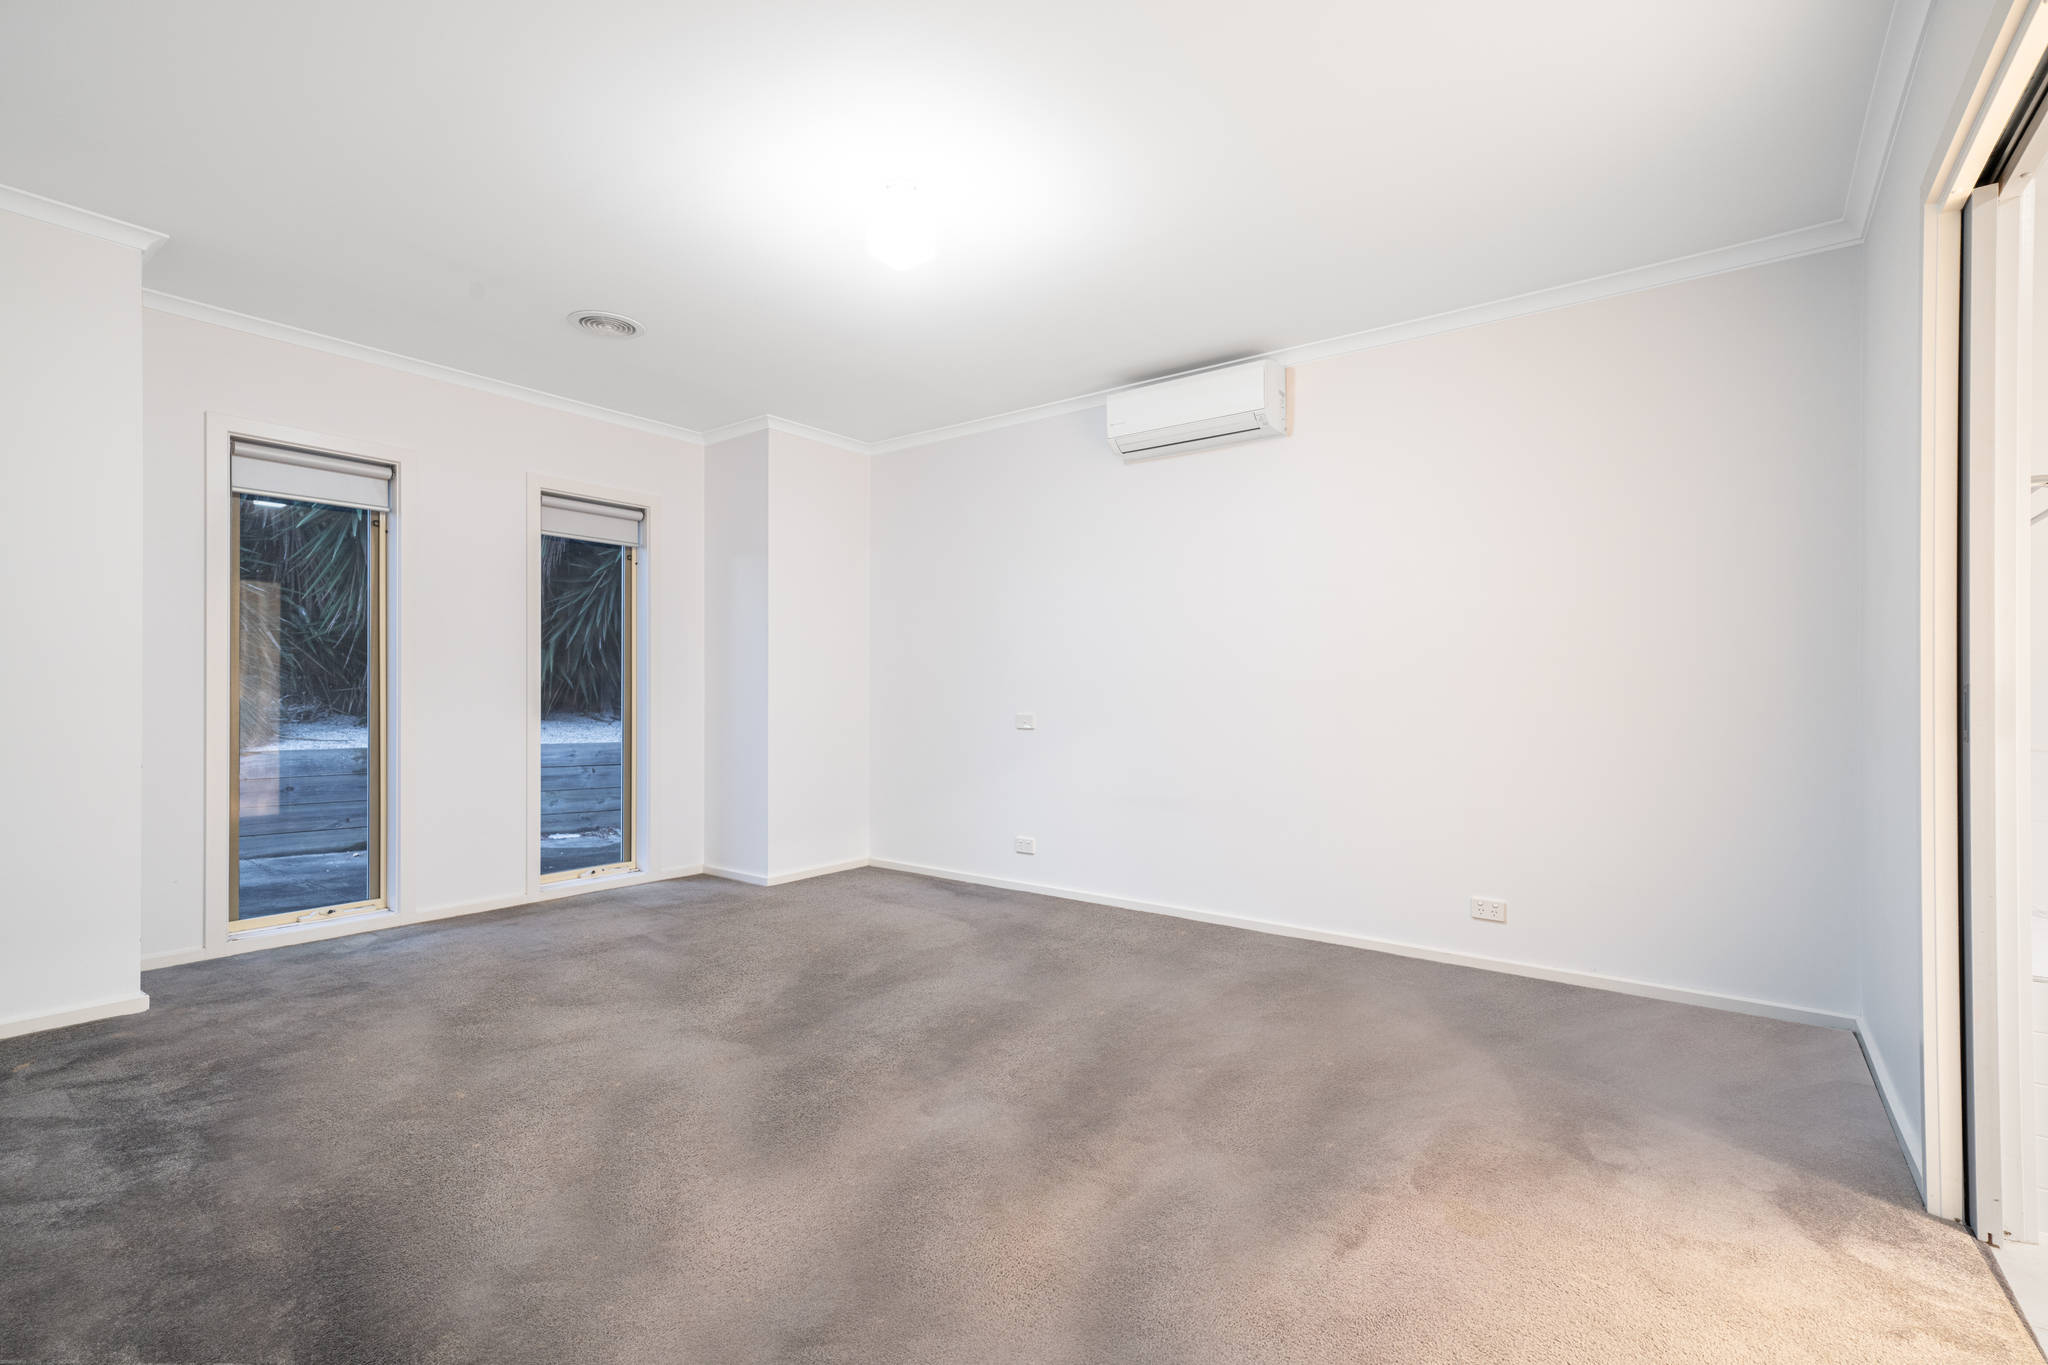
As you can see in these before & after photos of a living room, it makes quite a difference to the room:
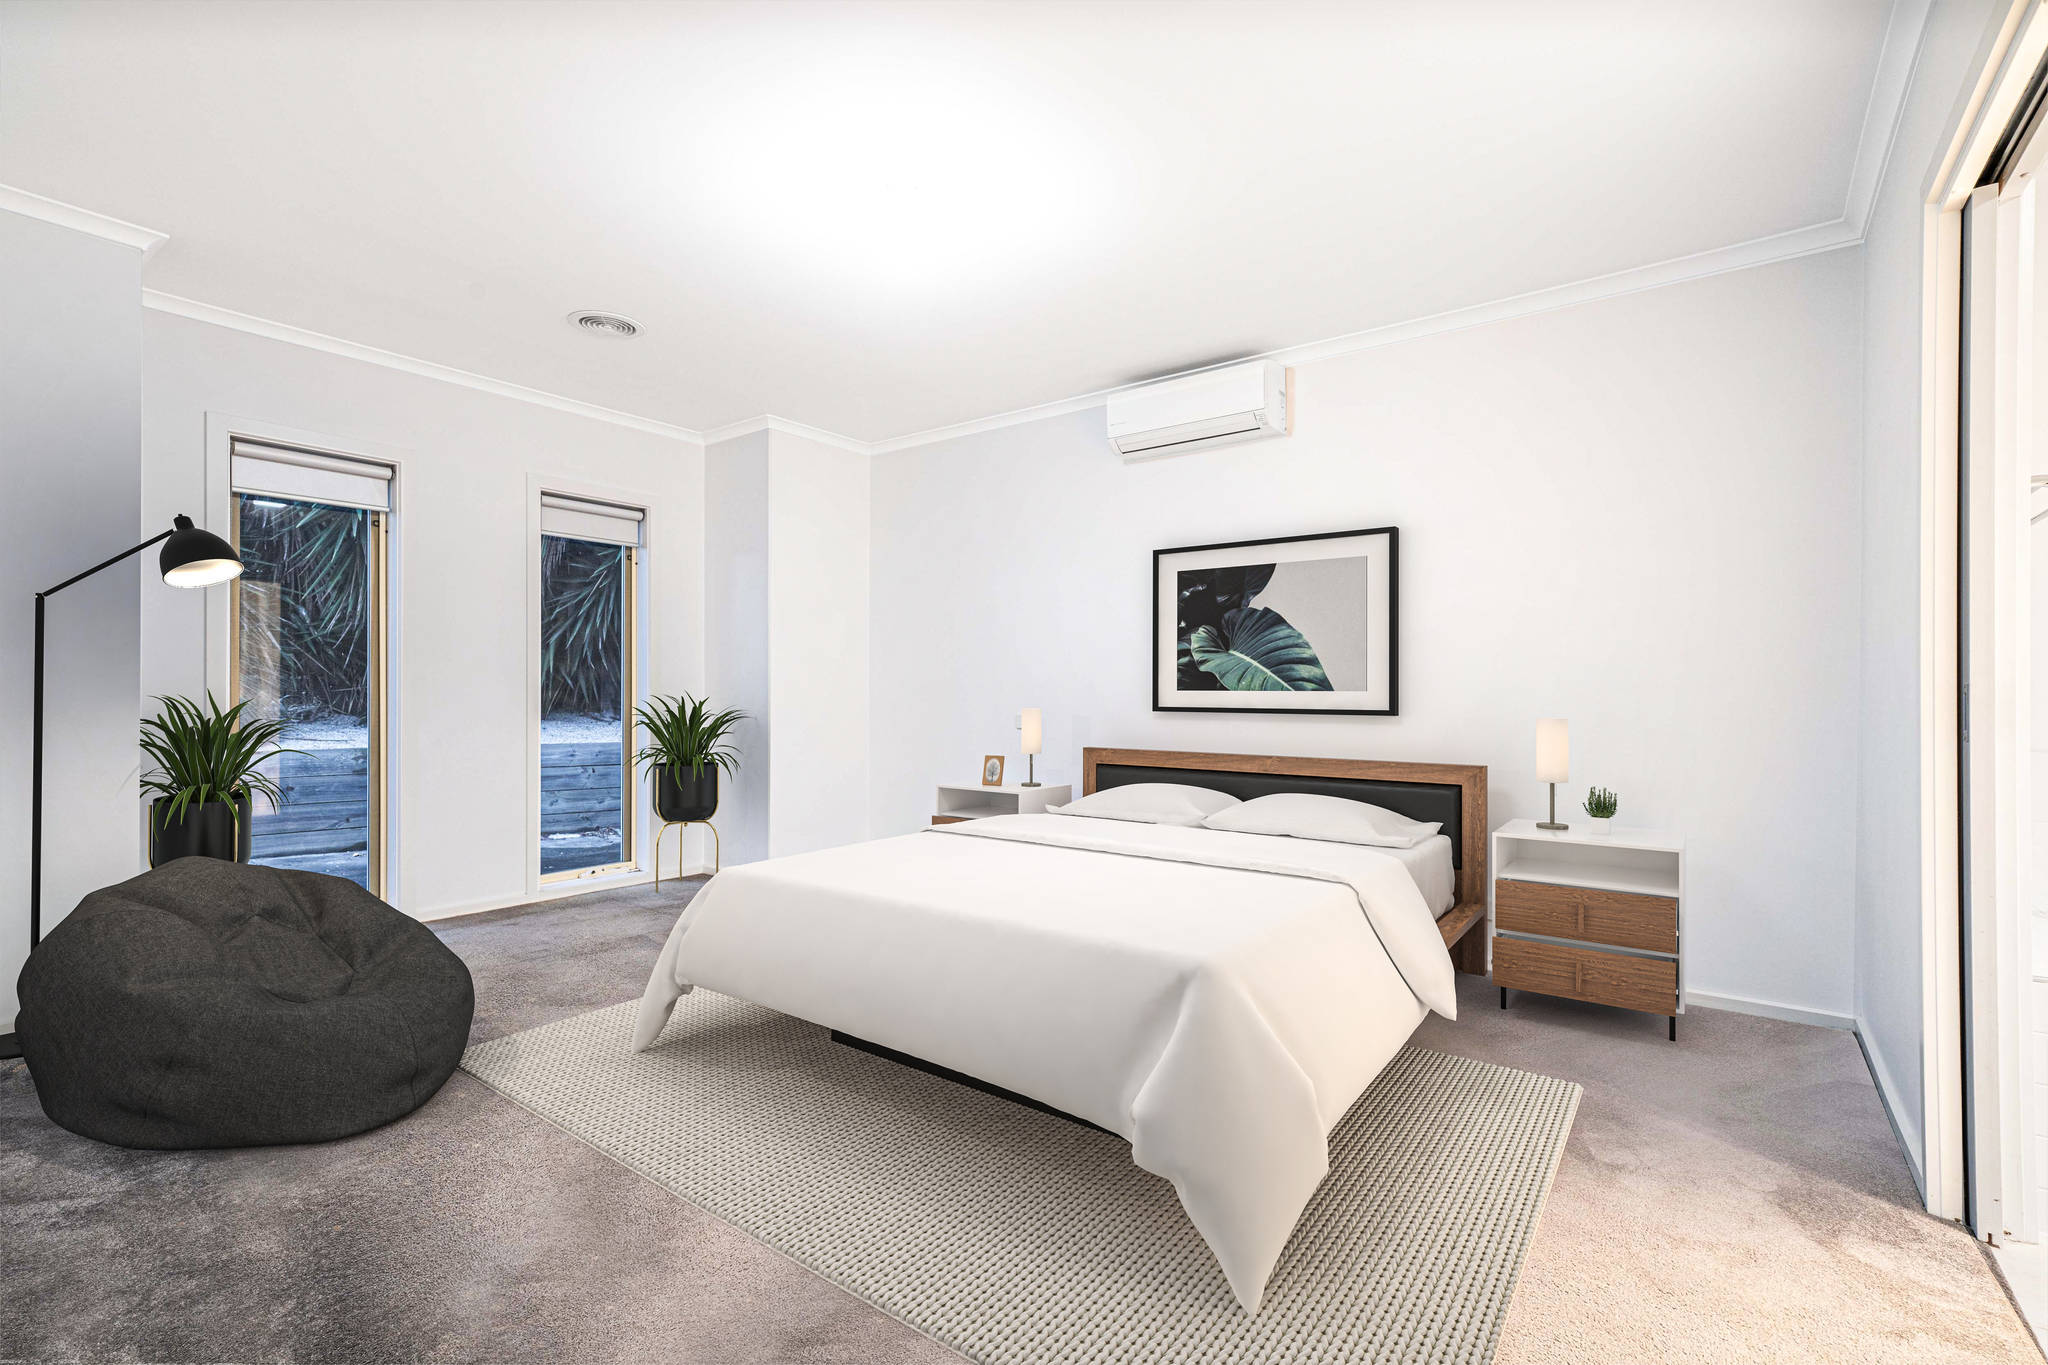
A master bedroom to call your own! The room literally comes alive and generates a “homey” feeling that homebuyers won’t be able to resist.
But it doesn’t stop there!
A Complete Real Estate Marketing Partner
On top of that, PhotoUp is a complete real estate marketing partner and also offers powerful marketing services such as:
The low cost (starting at $3 per image) of using PhotoUp’s AI virtual staging service rather than paying for traditional home staging, cleaning, and making renovations will be well worth it in the end.
Not only that, but PhotoUp believes that business should be a force for good, benefiting all in the communities where we operate. As a result, we’re committed to sustainable, eco-friendly, and fair-trade practices.
Sign up for a free PhotoUp account today, and get 5 free credits that you can use to start virtually staging your images.
You’ll be happy you did!
We hope this blog post helped you learn how to virtually stage a room and enhance your vacant or outdated real estate photos. Before you go, you may also want to check out the following resources:

