


Table of Contents
- The Challenge of Object Removal in Photo Editing
- Is Object Removal Necessary?
- How to Edit a Car Out of a Picture in Photoshop
- Outsource Your Real Estate Photo Editing to PhotoUp
Do you want to learn how to edit a car out of a picture to clean up your property photos?
There are situations where you’d want to remove unwanted objects in an image to make it look less cluttered and easier on the eye, and a car that’s blocking the driveway is one of these situations. Removing unflattering objects will go a long way in enhancing your real estate photography.
So in this guide, we’ll show you how to edit a car out of a picture in Photoshop to create clear, decluttered, and captivating real estate photos.
Before we get started, let’s first discuss the challenge of object removal in real estate photo editing.
The Challenge of Object Removal in Photo Editing
As a real estate photographer, removing unwanted objects from property photos is no easy feat.
In fact, it’s often the most challenging part of the entire photo editing process. But when it comes to removing an object with a patterned background, things can get even trickier.
At its core, it all comes down to the complexity of the task at hand. When you’re trying to eliminate an object from a photo, you have to make sure that the surrounding area is seamlessly blended in.
And when you’re dealing with a patterned background, that can be incredibly difficult to achieve.
For example, imagine trying to remove a chair from a living room photo that has a busy geometric rug underneath it. In order to make the edit look natural, you’d need to carefully select and replace each individual section of the pattern around the chair.
One wrong move and the entire image could be thrown off balance.
That’s why real estate photo editors need to have a keen eye for detail and be willing to put in the time and effort necessary to get the job done right.
But when it all comes together and you’re left with a polished, professional-looking photo, there’s no denying the tremendous sense of satisfaction that comes with a job well done.
Is Object Removal Necessary?
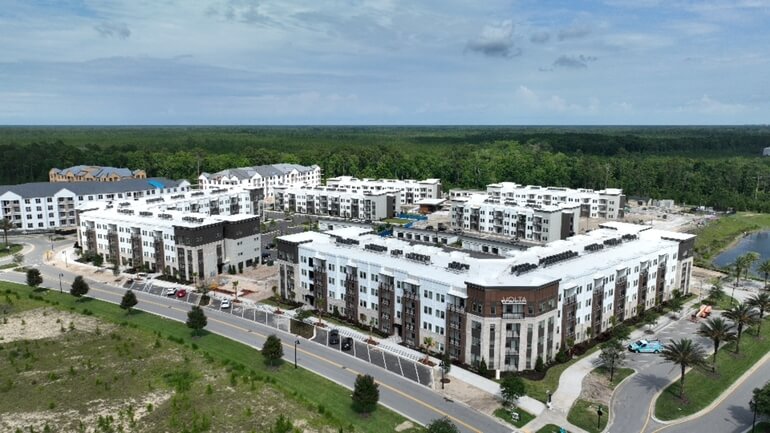
In real estate marketing, capturing stunning photos of a property is key to drawing in potential buyers or renters.
For example, did you know that last year 97% of people searched the internet for homes and expected to see quality photos?
There’s no denying that your listing images have to be of top-notch quality to capture potential buyers’ attention.
However, despite your best efforts, there may still be unwanted objects or blemishes that appear in your shots. That’s when it’s important to consider removing them.
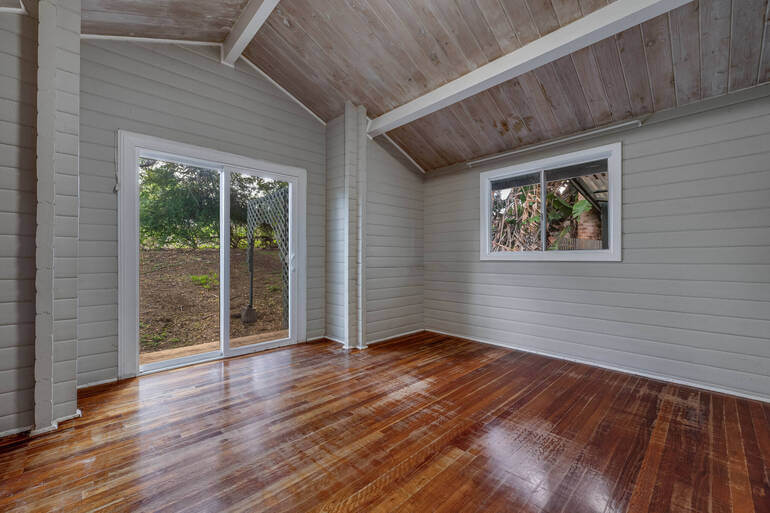
For example, if there’s a bike or car parked in the driveway, it can detract from the beauty of the home’s exterior. Or, if there’s a noticeable crack in the bathtub, it can make the bathroom look outdated and unmaintained.
By removing these distractions, you can ensure that prospective buyers or renters are fully focused on the property itself, which is important for a successful sale.
But how to best do this, you may ask? Let’s dive into the actual tutorial next.
Have You Ever Thought To
Outsource Photo Editing?
Try it today with 5 free edits from three professional photo editors.

How to Edit a Car Out of a Picture in Photoshop
In this video tutorial or text below (whatever you prefer), we’ll show you how to easily edit a car out of a picture with the help of some effective Photoshop tools.
Let’s get started!
Step 1. Right-click and then choose Edit in Adobe Photoshop.

Note: It’s advisable to duplicate the photo when doing removals to ensure we have a backup image if we mess up on the first one.
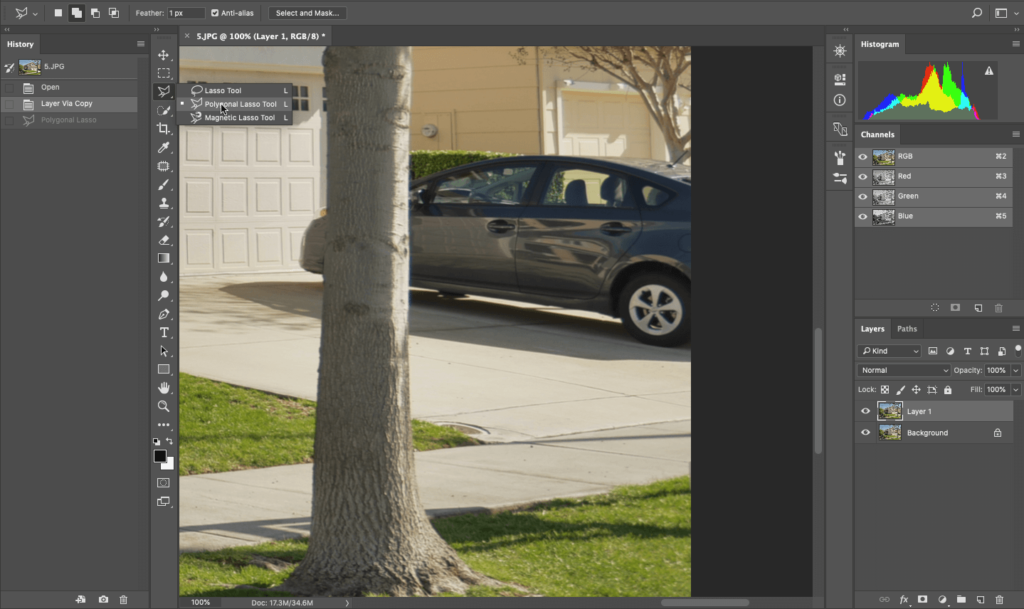
Step 2. The first thing to do is to Analyze the Image, and then, choose the easiest way to remove it. And in this case, it is to start in the driveway.
Step 3. So, start by Selecting and Tracing the driveway using the Lasso Tool.
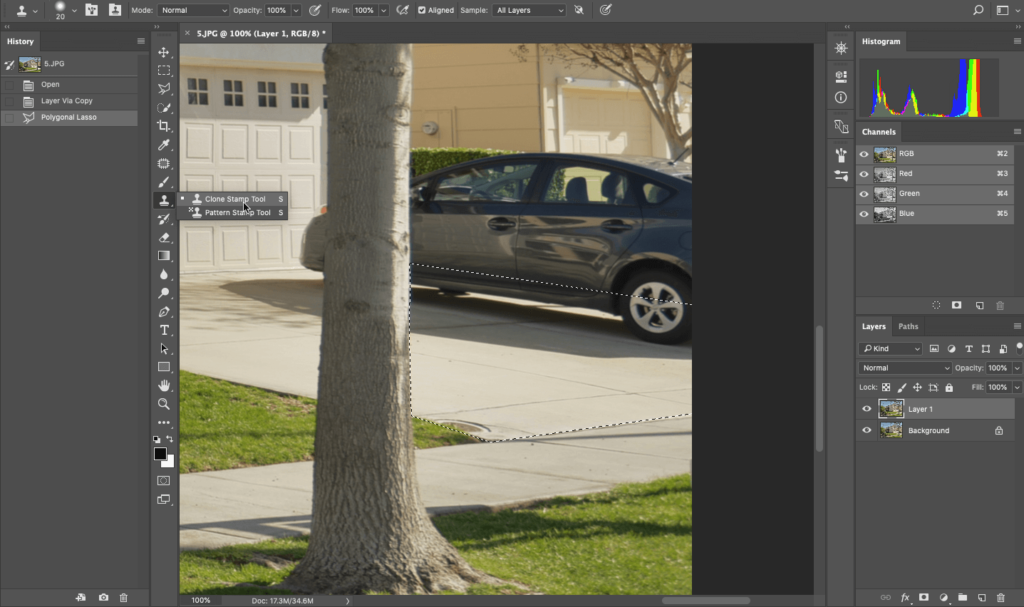
Step 4. Next, work on removing the car using the Clone Stamp Tool, carefully cloning the selected area.
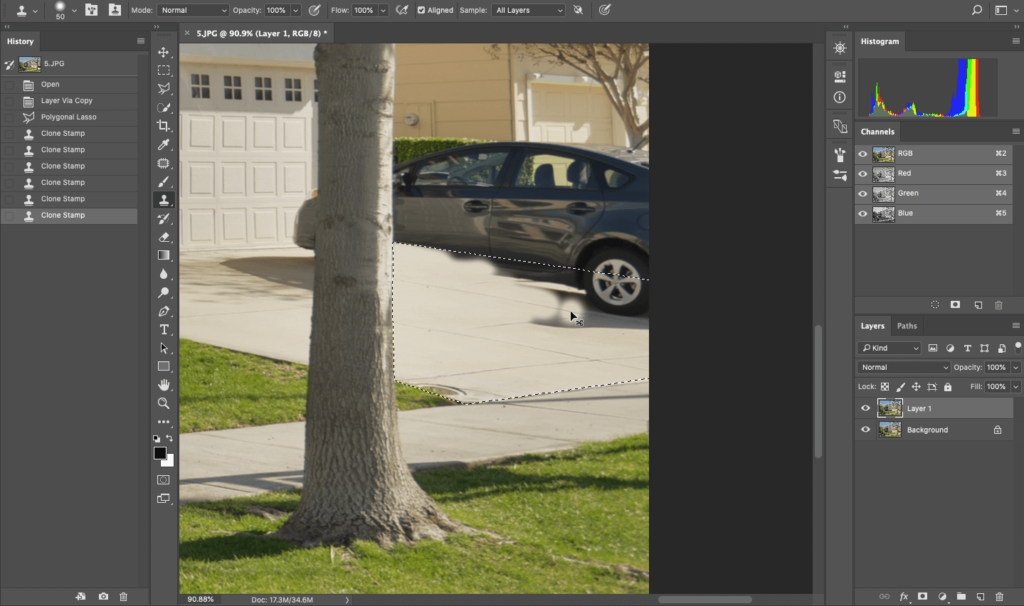
Step 5. The cloned area is a bit pale, so use a Brush Tool to brush the color of the other part of the driveway so that they will look the same.
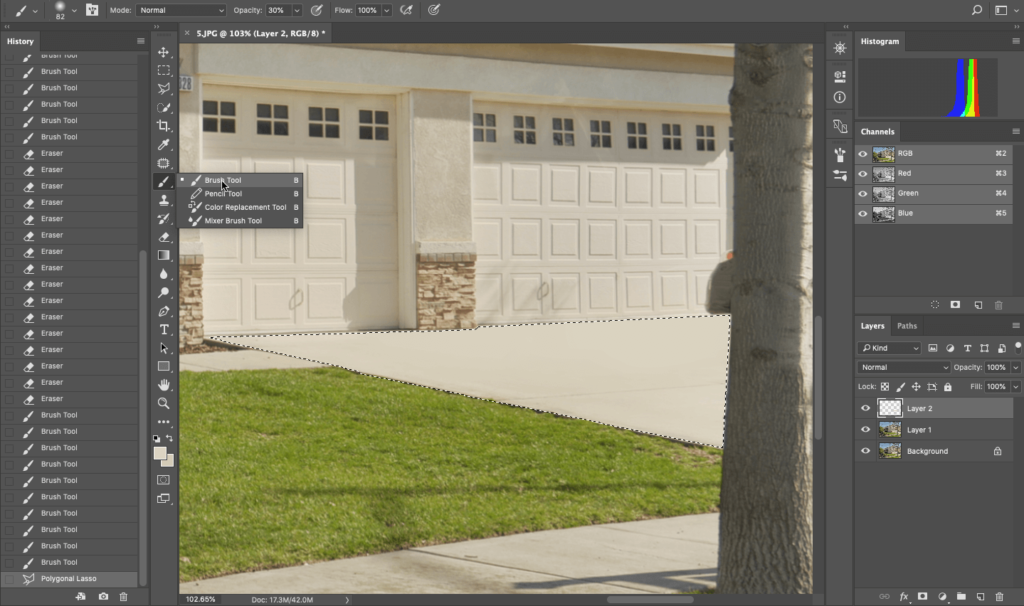
Step 6. Select the other part too. This time, we use a Brush Tool to remove the shadow of the car painted on a different layer (add a New Blank Layer), making it easy to adjust later.
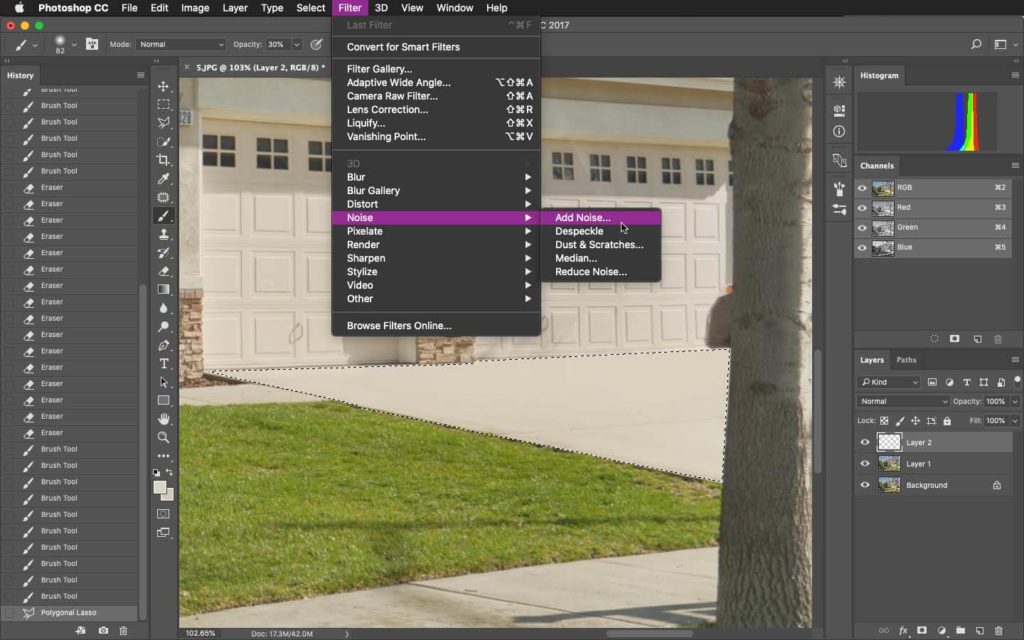
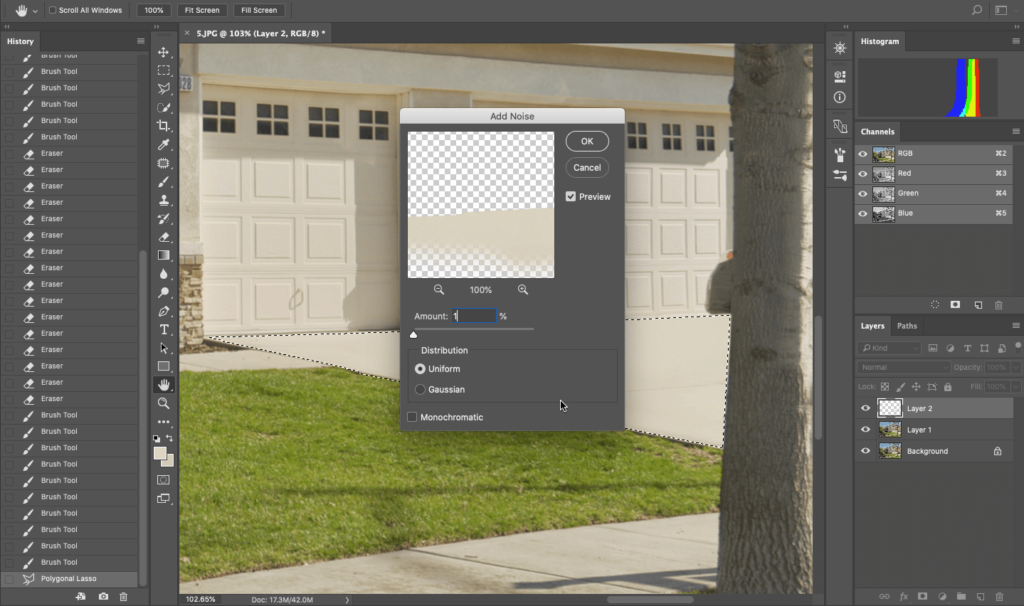
Step 7. Since we painted it, we need to add Noise on it so the painted part won’t look airy and smooth. To add Noise, click on Filter > Noise > Add Noise, and just put 0.5% – 1% amount of noise.
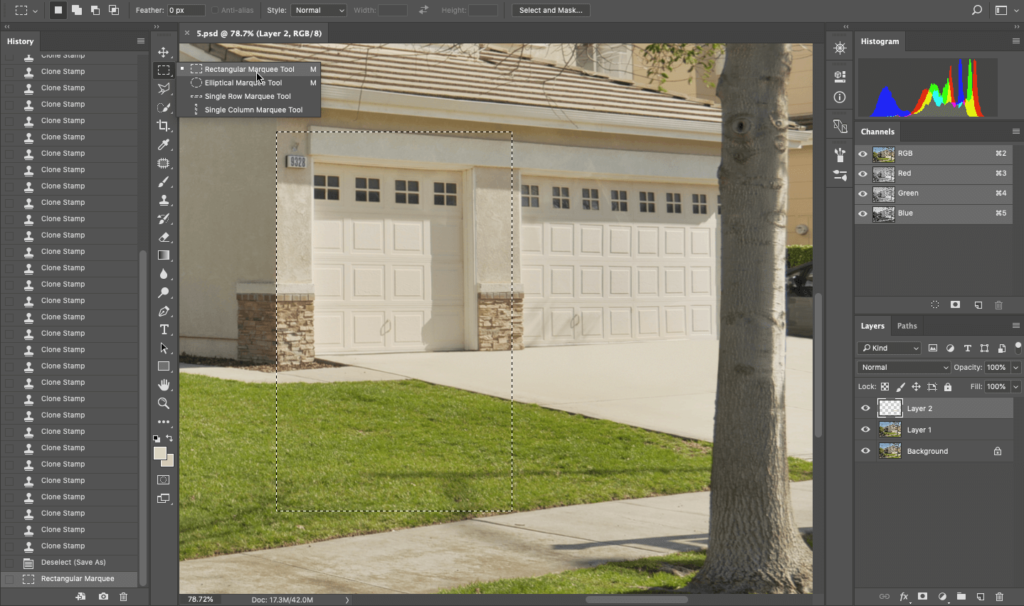
Step 8. And for the body part of the car, since the photo doesn’t have any available similar angle, we are just going to improvise by cutting out the smaller carport area (select it using the Rectangular Marquee Tool) and use it to cover the car.
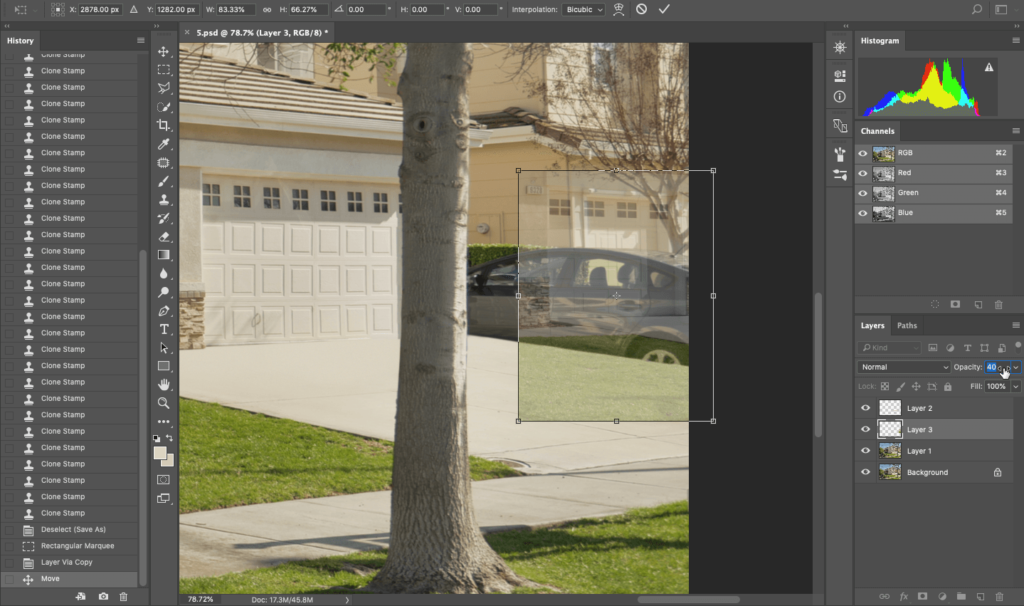
Step 9. Right-click, then select Layer via copy and align the image carefully while changing its Opacity to 30%-50%, and cover over the object you want to remove.
Step 10. Now, continue Cloning the wall to cover up the car.
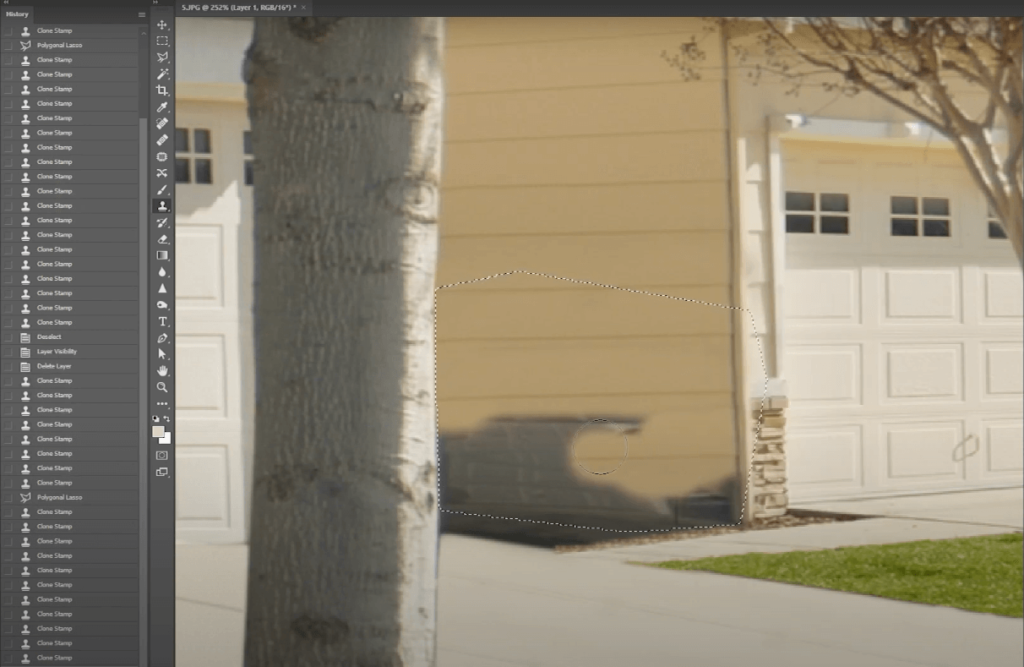
Note: When doing removals on signage, car, or any object removals, make sure there’s no obvious repetitive cloning. Always bear in mind that it’s important to make your adjustment realistic. The perspective should always be right and don’t be afraid to use your imagination when it comes to object removals.
Step 11. For the final touch, we’re going to cut another portion of the main house and paste it at the bottom area of the wall. So, select the other area of the house using the Lasso Tool and paste it at the bottom of the wall (right-click, then select Layer via copy).
Step 12. Lastly, we also adjust its exposure on Camera Raw by pressing CTRL+ Shift +A so that the image we cut will blend with the other part of the house.
And that’s how you edit a car out of a picture in Photoshop!
High-Quality & Consistent
Real Estate Photo Editing
Hire a dedicated editor with performance metrics from $7/hour.
Outsource Your Real Estate Photo Editing to PhotoUp
As a professional photographer, you know how time-consuming it can be to edit your photos and remove any unwanted objects. It takes a lot of practice to become an expert in Photoshop and Lightroom.
However, your time and energy could be spent elsewhere, especially if you have a large portfolio to edit.
That’s where PhotoUp comes in!
Our team of highly skilled professionals is ready to take on your real estate photo editing needs, starting from only $1.10 per image depending on your subscription.
Browse Top Dedicated
Real Estate Photo Editors
Ready-to-hire editors for real estate photo editing, and more.
For example, we can help with editing services like:
- Image brightness and exposure correction
- Color and tone adjustments
- Window masking and glare reduction
- Clutter and advanced object removal
- Line and angle corrections
- HDR editing
- Harsh shadows and lack of light
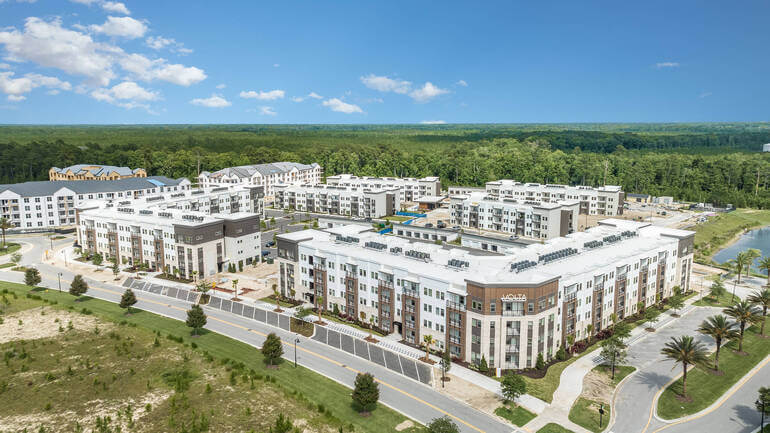
- Sky replacements and grass greening
- Twilight and day-to-dusk editing
- Drone editing
- And much more!
And except for standard editing, our real estate photo marketing services also include:
To start using our photo editors or any of these powerful real estate marketing tools, all you have to do is sign up for a free PhotoUp account, and get to action!
PhotoUp Real Estate Photo Editing Uploader
Check out how easy it is to get started with PhotoUp in this real estate photo editing uploader demo:
As simple as that!
With PhotoUp, you can focus on other aspects of your business while knowing that your photos are in good hands.
So why not give us a try?
Sign up for a free PhotoUp account today, and let PhotoUp take care of the photo editing for you. Plus, for a limited time, you’ll even get 5 free edits when you sign up for an account!
We hope this blog post helped you learn how to edit a car out of a picture in Photoshop. If you found this post useful, you may also want to check out the following resources:

