Table of Contents
- What Is a Hero Shot in Real Estate Photography?
- 9 Amazing Editing Techniques to Perfect the Hero Shot
- Are These Real Estate Photo Edits MLS Compliant?
- Turn Your Hero Shot Into a Showstopper With PhotoUp
Do you want to learn some powerful real estate photo editing techniques to create the perfect hero shot?
In the highly visual world of real estate marketing, first impressions are everything. Buyers are browsing hundreds of listings online, and the one image that determines whether they click or scroll past is the hero shot.
This single photo can make or break interest in a property—and that’s why perfecting it through professional real estate photo editing is more than just helpful, it’s essential.
In this guide, we’ll share 9 amazing real estate photo editing techniques to create the perfect hero shot that will captivate buyers’ attention.
Let’s begin by taking a look at what a hero shot in real estate photography is.
What Is a Hero Shot in Real Estate Photography?📸
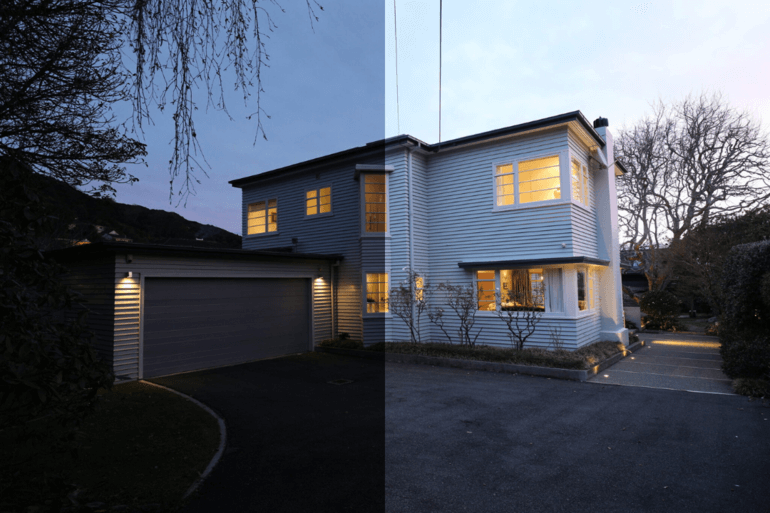
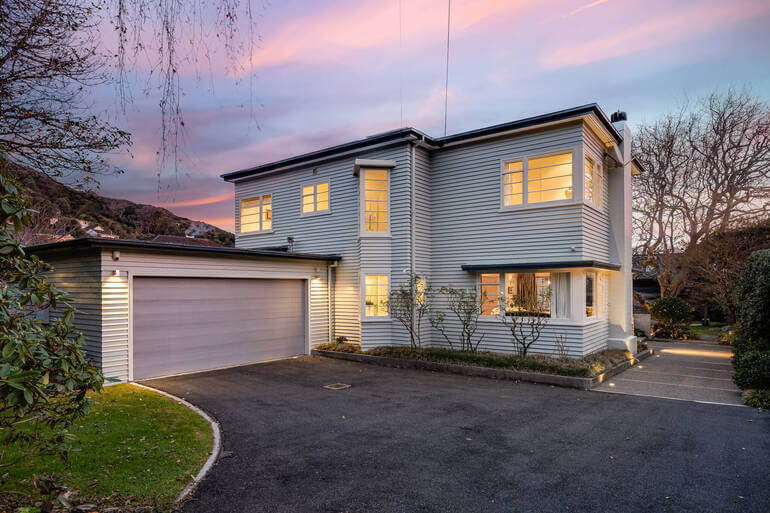
A hero shot is the most impactful image used to represent a real estate listing—usually the exterior front of the property, but not always.
It’s the lead image displayed in listings, on flyers, brochures, and social media ads.
The hero shot needs to capture attention, evoke emotion, and showcase the property at its best in a single glance.
Recent studies show that listings with professional real estate photography receive 118% more online views compared to those with lower-quality images. And 85% of homebuyers consider photos the most critical factor when evaluating a property online.
Because of this, editing the hero shot to perfection is a strategic move.
But how do you enhance a photo without crossing the line into misleading? That’s where high-level, ethical real estate photo editing comes into play.
9 Amazing Editing Techniques to Perfect the Hero Shot ✨
To create an irresistible hero shot, photographers and editors use a combination of real estate photo editing techniques.
Here are 9 editing techniques to create amazing-looking and captivating hero shots:
1. Sky Replacement
Cloudy skies or dull lighting can drain the energy from your hero shot.
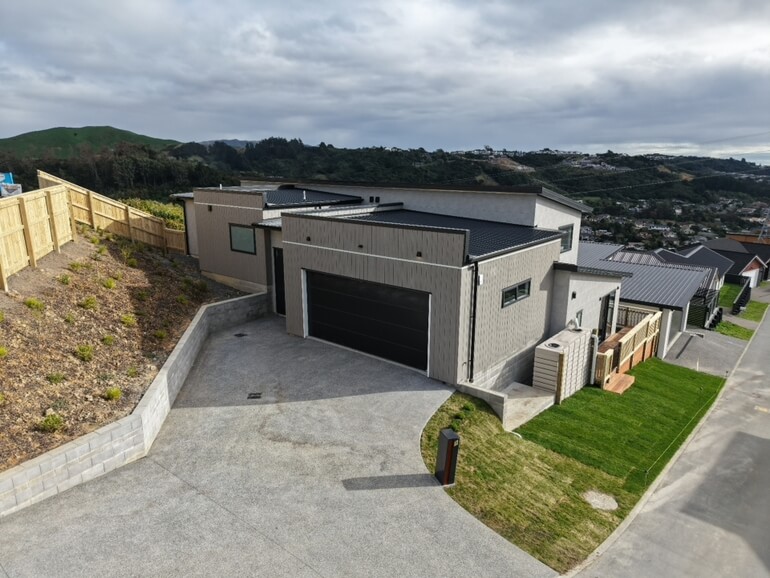
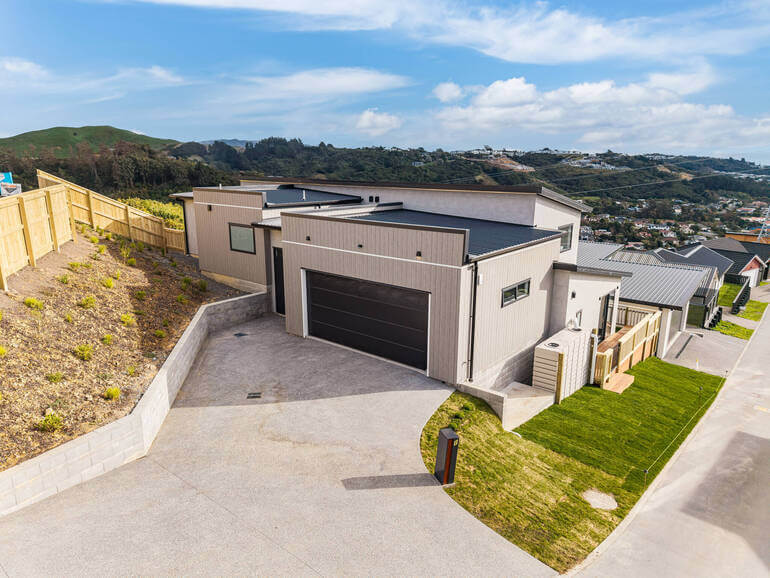
Sky replacement transforms a gray, overcast sky into a vibrant blue or even a dramatic sunset.
This not only adds warmth and life to the photo but also helps evoke emotion and create an atmosphere.
- Best for: Exterior shots taken on cloudy or rainy days
- Pro tip: Match the lighting direction of the new sky with the original scene to maintain realism
To learn how to transform dull winter skies into bright and inviting ones, check out our tutorial on how to do a sky replacement in Photoshop.
2. Day-to-Dusk Conversion
Few things say “dream home” like a warm, glowing dusk scene. In fact, having a twilight hero shot increases views by 76%.
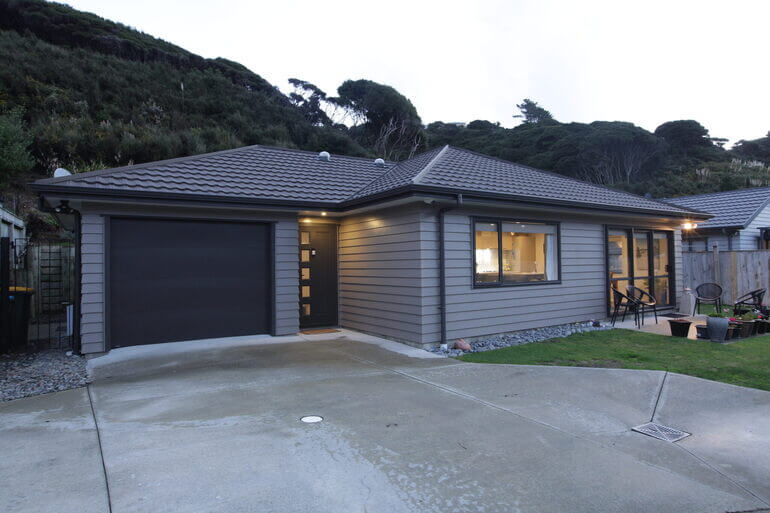
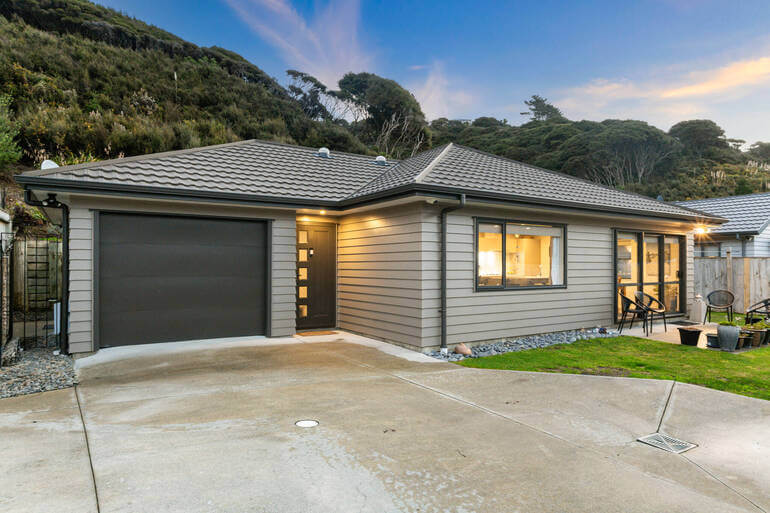
With day-to-dusk editing, editors digitally transform a daytime photo into a twilight masterpiece.
Indoor and outdoor lighting is adjusted, windows are illuminated, and the ambiance becomes instantly more inviting.
- Best for: Luxury listings or properties that look better in evening lighting
- Pro tip: Add soft lighting to landscape features like pool lights or path lights for extra appeal
To learn this powerful edit, you can visit our guide on how to edit a day to dusk image.
3. Lawn Enhancement
A patchy or brown lawn can distract from an otherwise beautiful property.
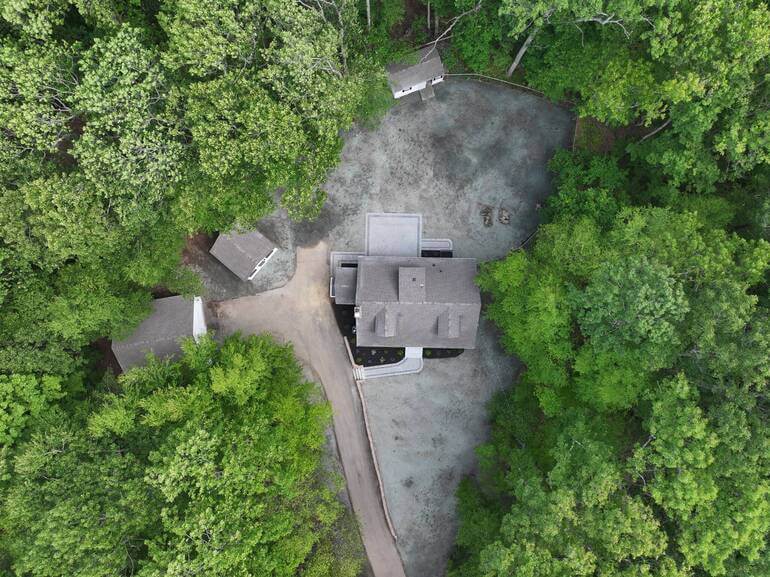
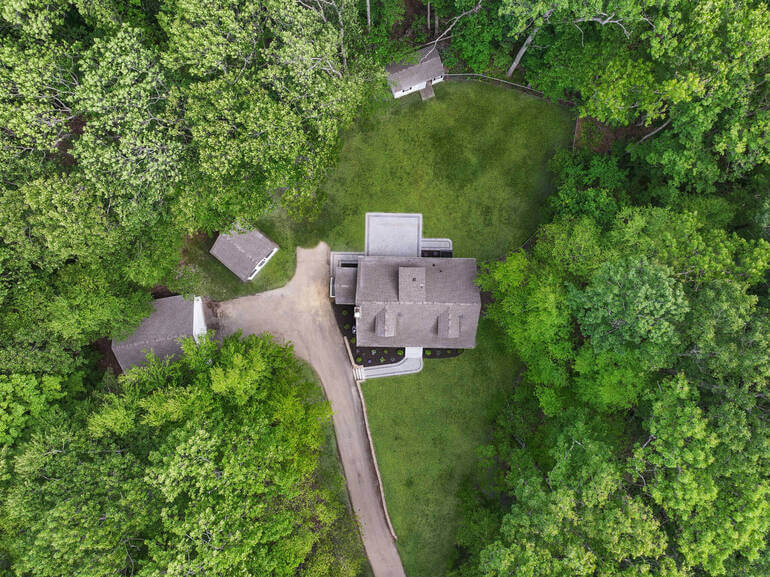
Lawn enhancement gives the grass a lush, green makeover. Editors can use digital painting and color correction techniques to breathe life into dead patches and create a manicured look.
This will boost curb appeal and help your hero shot capture buyers’ attention.
- Best for: Homes taken during off-seasons or droughts
- Pro tip: Keep saturation, textures, and shadows intact to avoid a fake-looking result
To learn how to create a green, beautiful lawn, check out our tutorial on how to make grass green in Photoshop.
4. Window Masking
Window masking is essential to show the view outside a window clearly while keeping the interior properly exposed.

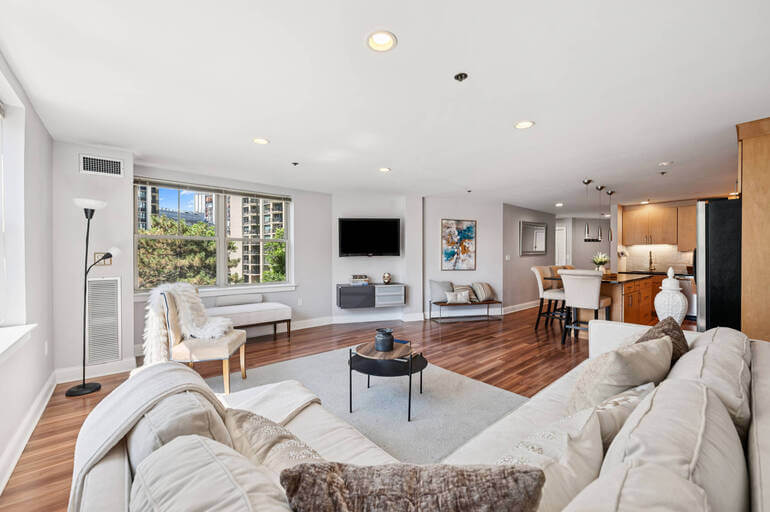
Masked windows make interiors feel airy and connected to the outdoors. If there’s a nice view (trees, city skyline, water), showcasing it adds emotional value.
This step also adds realism and makes interiors feel connected to the environment.
- Best for: Interior shots with scenic views or large windows
- Pro tip: Use subtle masking to preserve the natural light while revealing details
To learn this impactful edit, you can visit our guide on how to mask windows in Photoshop.
5. Object Removal
Sometimes, unwanted items like trash bins, pet toys, power lines, or cars in the driveway can clutter the hero shot.

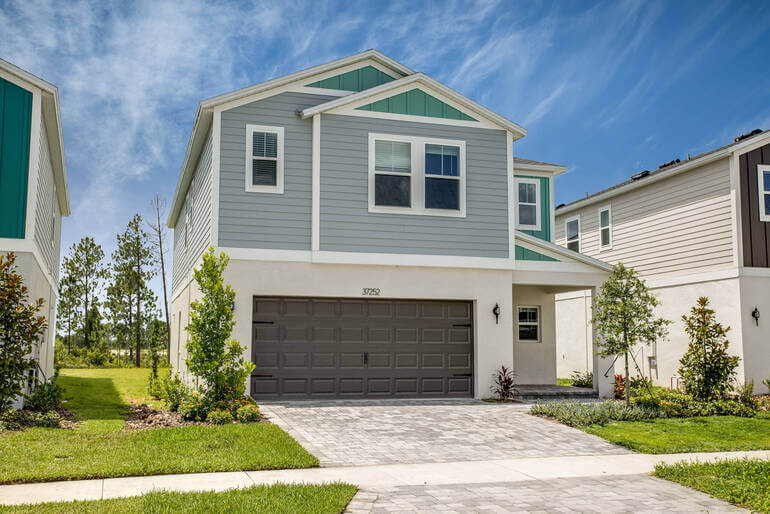
Object removal techniques can eliminate these distractions and create a cleaner, more professional-looking image.
You can effectively declutter your hero shot by using the Clone Stamp Tool in Photoshop or virtual staging.
- Best for: Any hero shot with visual distractions
- Pro tip: Ensure that removed objects are not critical to the structure or landscaping to remain compliant
To learn how to use the Clone Stamp Tool to declutter your images, you can check out our tutorial on how to remove cords in Photoshop.
Have You Ever Thought To
Outsource Photo Editing?
Try it today with 10 free edits from three professional photo editors.
6. TV Screen Edits
A black or off-TV screen can feel like a dead spot in the photo.
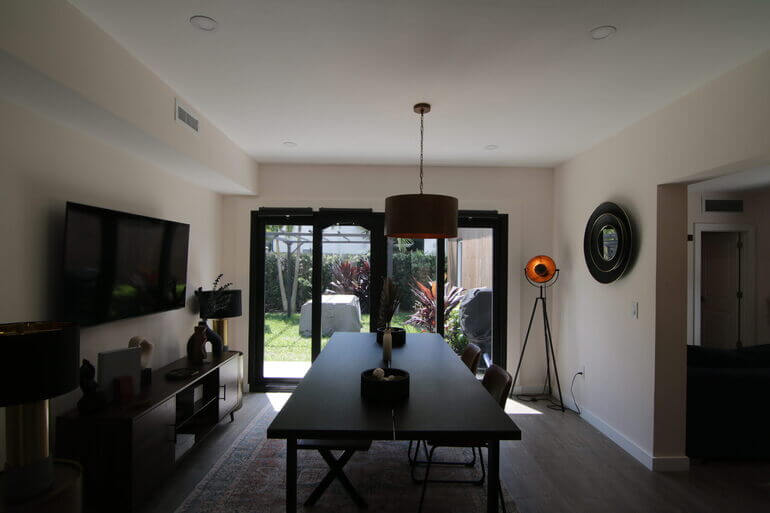
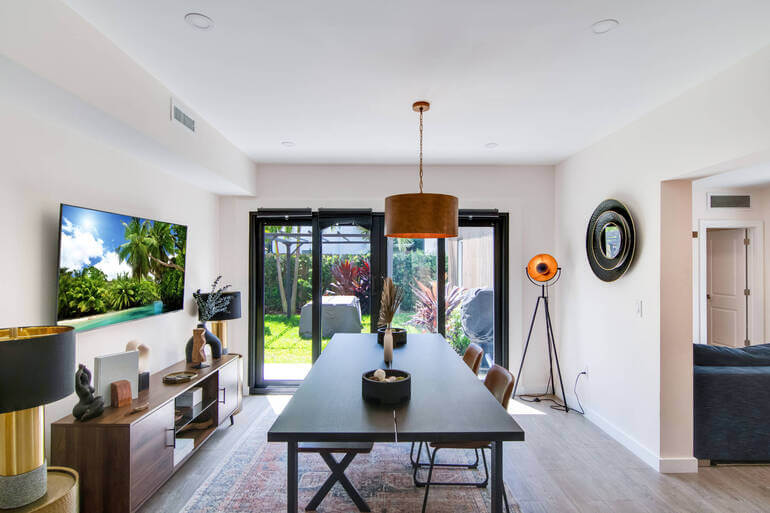
By editing in an attractive still image or lifestyle shot on the screen, you draw the eye and enhance the overall aesthetic. It can help create an emotional appeal to the space.
- Best for: Living room or entertainment area photos
- Pro tip: Use subtle, non-branded content like nature scenes or abstract art
For more details, you can visit our guide on how to add a TV image to an empty TV screen using Photoshop.
7. Fire in the Fireplace Edits
A lit fireplace creates a cozy, inviting feeling that can’t be matched.
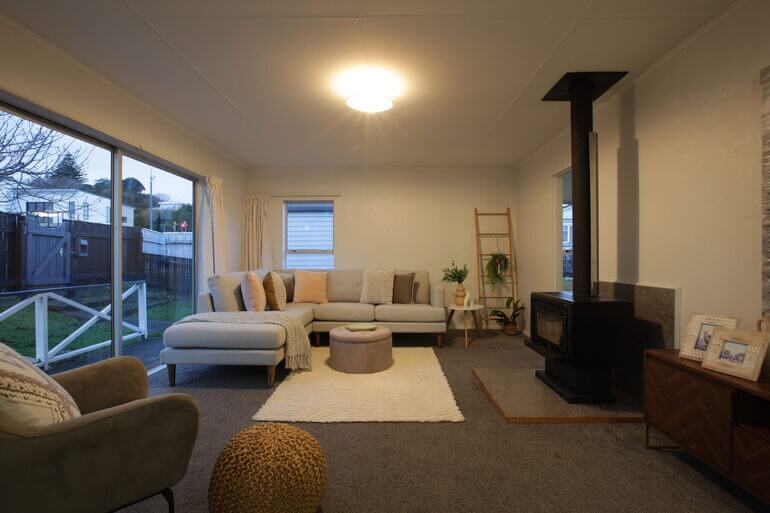
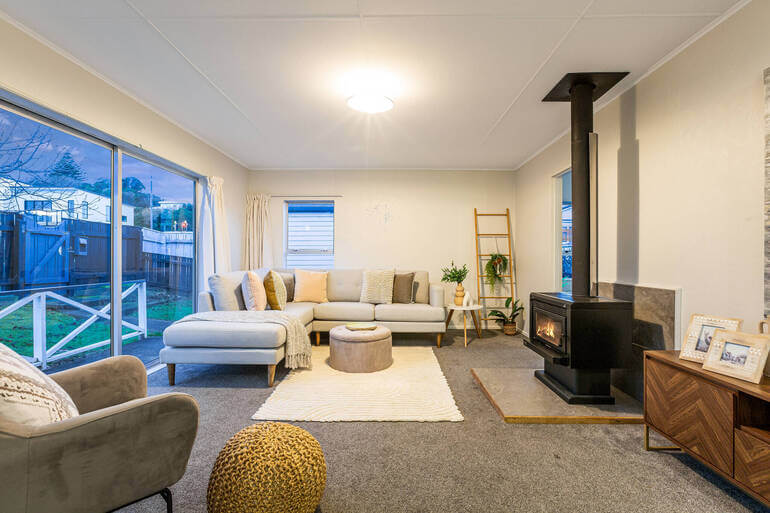
If the fire wasn’t lit during the shoot, editors can digitally add fire to the fireplace to give the room warmth and ambiance.
- Best for: Living rooms or bedrooms with fireplaces
- Pro tip: Match the lighting in the room so the added flame feels natural
To learn this powerful edit, you can visit our tutorial on how to add a fire to a fireplace using Photoshop.
8. Virtual Landscaping Touch-Ups
Shrubs, flowerbeds, and trees may be overgrown or out of season.
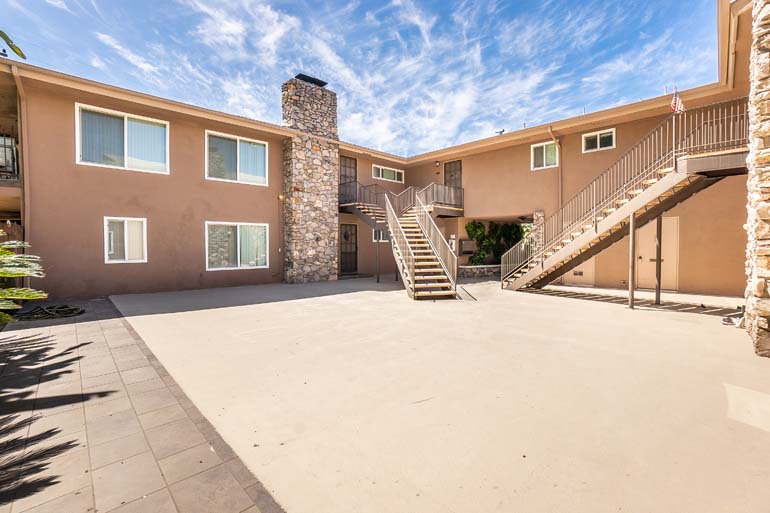

Virtual landscaping can add color, trim hedges, and clean up yard clutter to make the front of the house pop.
- Best for: Spring-fall listing photos or yards with minimal landscaping. Also, useful during summer months with droughts causing dry patches
- Pro tip: Keep changes subtle and realistic—MLS rules require the landscaping to reflect potential, not fantasy
PhotoUp’s virtual staging service is super easy to use, and starts at the low cost of $5.00 per image.
All you need to do is sign up for a free PhotoUp account, upload your images, choose furniture, and wait 24-48 hours for your virtually staged images to be ready to download.
9. Lighting & Color Correction
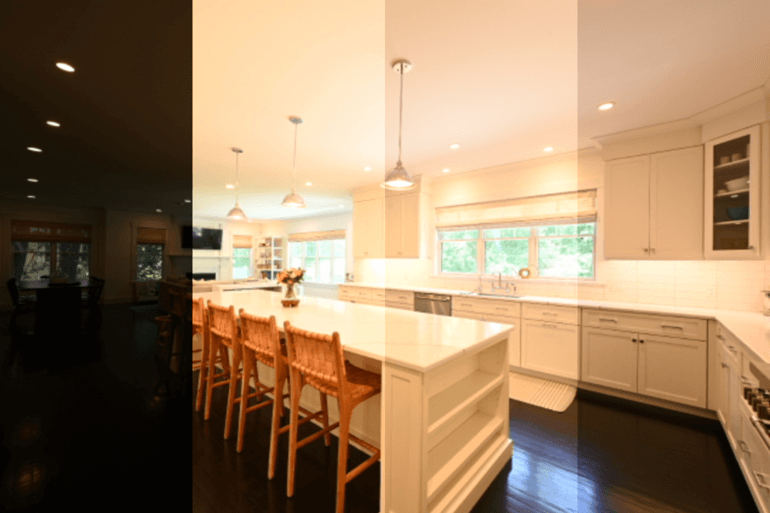
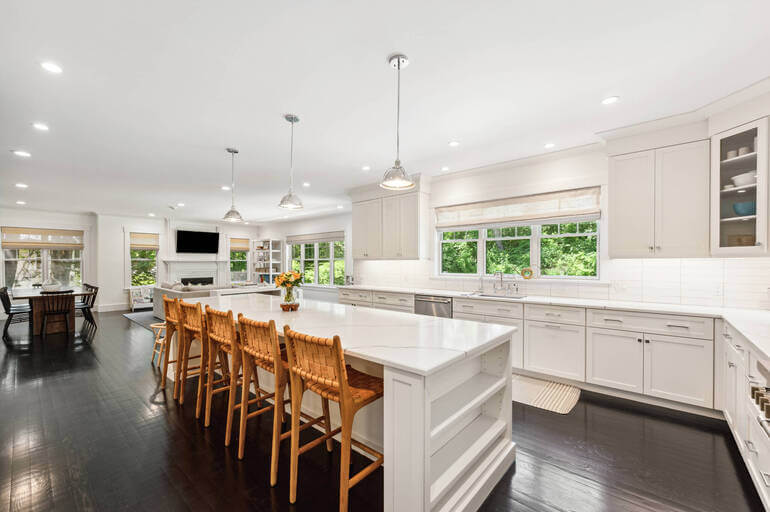
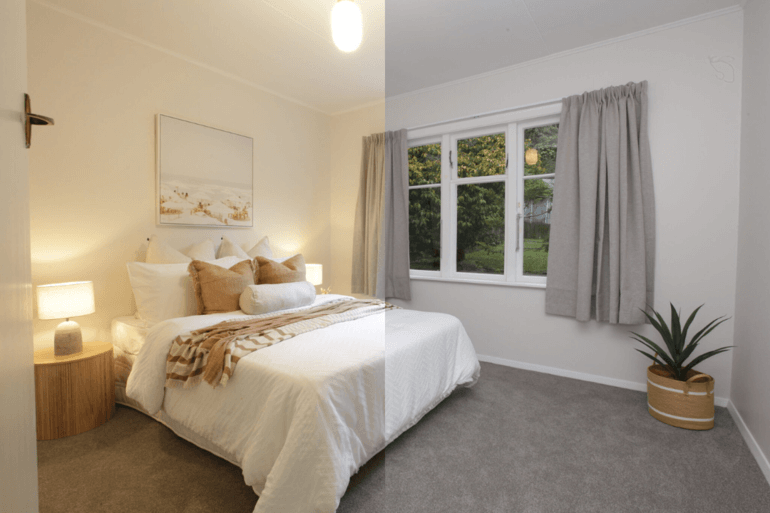
The final touch in any hero shot edit is adjusting lighting and color to ensure a clean, well-balanced image.
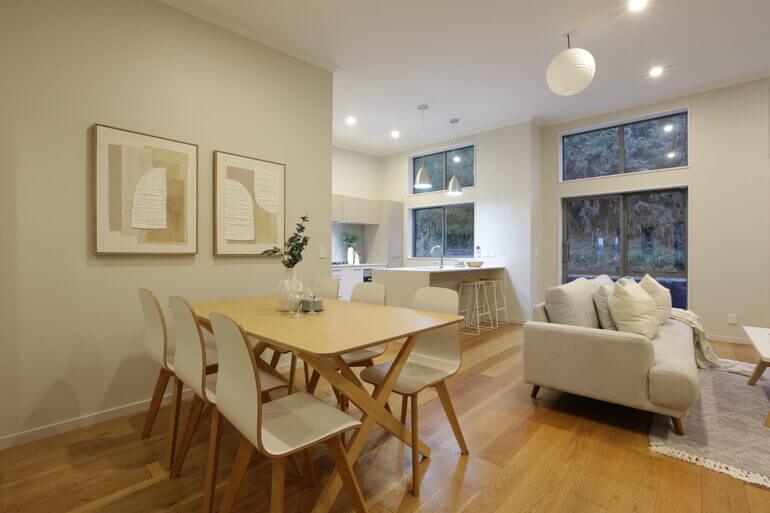
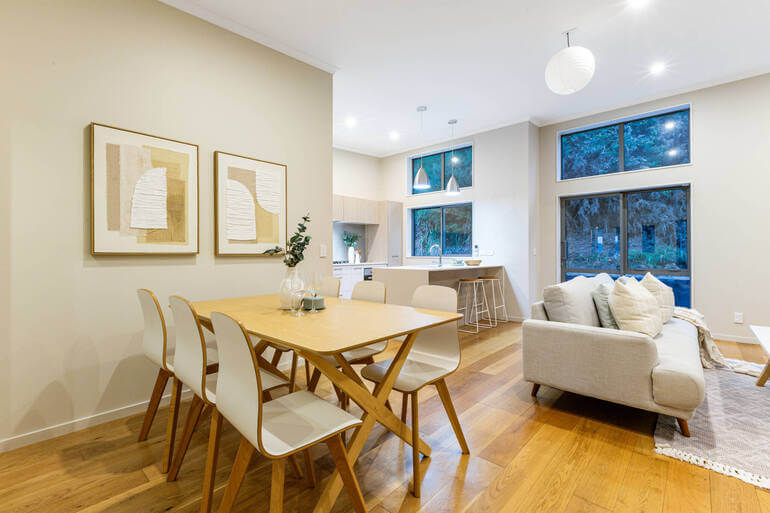
Shadows are softened, highlights controlled, and colors corrected to showcase the property in the best possible light.
- Best for: All images
- Pro tip: Use a calibrated monitor when editing to ensure color accuracy
Here are some tutorials that can help you with lighting, shadows, and color correction:
- How to brighten a photo in Photoshop
- How to color correct in Photoshop
- How to adjust white balance in Photoshop
- How to remove shadows in real estate photos
And there you have 9 real estate photo editing techniques to help you create amazing-looking hero shots!
By implementing these editing techniques in your post-processing, you can turn your hero shots into true showstoppers.
Are These Real Estate Photo Edits MLS Compliant?⚖️
Real estate photo editing walks a fine line between enhancement and misrepresentation.
The good news is that most MLS platforms allow photo enhancements as long as they do not mislead buyers or alter the structure or key features of the property.
Here’s a summary of what’s allowed and not recommended:
✅ Allowed Edits:
- Sky replacement
- Day-to-dusk conversions
- Grass greening
- TV screen and fireplace edits
- Object removal (e.g., cars, trash bins)
- Window masking
- Perspective correction
- Brightness and white balance adjustments
- Color and exposure adjustments
- And more common editing techniques like noise reduction and sharpening
🚫 Not Allowed Edits:
- Adding structures (e.g., pools, decks, walls that don’t exist)
- Over-enhancing landscaping that doesn’t resemble what’s currently present
- Removing permanent defects (like cracked walls or leaning fences)
- Digitally staging without proper disclosure
If you’re unsure of an edit, check with your local MLS or brokerage to ensure compliance. Also, remember to clearly label virtually staged or enhanced images when necessary.
Wrapping Up
Creating the perfect hero shot isn’t just about taking a great photo—it’s about elevating it with smart, tasteful editing that enhances the home’s best features and helps it stand out in a crowded market.
With the right real estate photo editing techniques like sky replacement, day-to-dusk conversion, lawn enhancement, and more, you can transform a standard listing photo into a scroll-stopping masterpiece.
When done correctly and ethically, these edits not only attract more clicks, but also generate more leads, boost buyer engagement, and ultimately help sell the home faster—and at a better price.
Have You Ever Thought To
Outsource Photo Editing?
Try it today with 10 free edits from three professional photo editors.
Turn Your Hero Shot Into a Showstopper With PhotoUp🏡
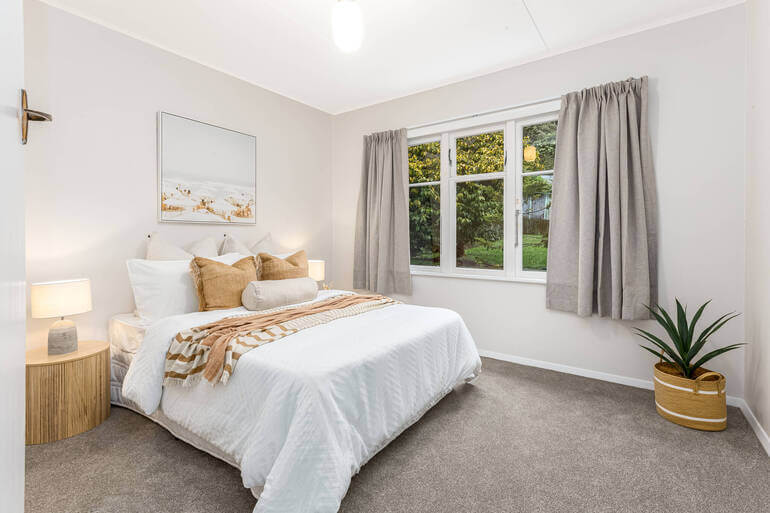
If you need help creating hero shots that sell, you should consider outsourcing your editing to PhotoUp.
PhotoUp’s expert team of real estate photo editors offers all the editing services mentioned above and more, starting at just $1.50 per image with a turnaround in under 24 hours.
Additionally, our Dedicated Editing can go as low as 0.50 per image, depending on your style and editing batch.
From simple sky replacements to full hero shot transformations, we’re here to help you make your listings shine. We even help you with marketing…
Have You Ever Thought To
Outsource Photo Editing?
Try it today with 10 free edits from three professional photo editors.
A Complete Real Estate Marketing Partner
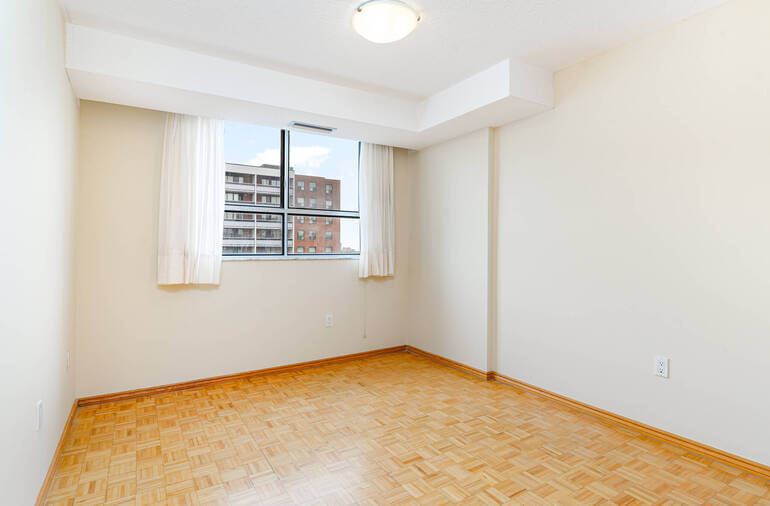
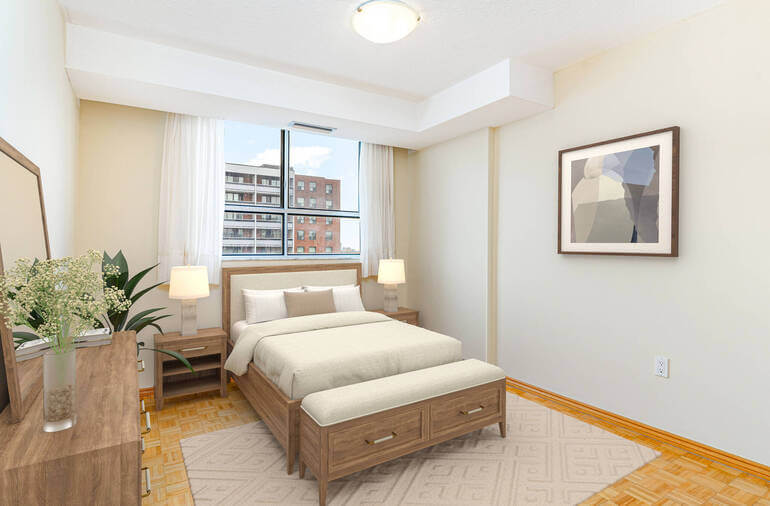
PhotoUp offers so much more than just editing! We are a complete real estate marketing partner and also offer other powerful services like:
- Virtual staging
- Virtual house tours
- Single property websites
- House portraits
- Property flyers
- And floor plans
We have everything you need to enhance and market real estate photography in one user-friendly software!
How to Get Started
Getting started using PhotoUp’s real estate photo editing service is super easy.
This is all you need to do:
Step 1. Sign up for a free PhotoUp account.
Step 2. Upload your photos to our easy-to-use software.
Step 3. Choose the level of editing that you need and provide instructions (optional).
Step 4. Wait for PhotoUp professional editors to edit and return the photos in less than 24 hours (48 hours for virtual staging).
Step 5. Download and start using your beautifully edited photos.
PhotoUp Real Estate Photo Editing Uploader Demo
Have a look at the real estate photo editing uploader demo to see how easy it is to get started with PhotoUp:
As simple as that!
Sign up for a free PhotoUp account today and let our expert editors help you create stunning hero shots while also saving you time and money.
For a limited time, you even get 10 free credits you can use on any of our services when signing up for an account.
We hope this guide helped you learn 9 real estate photo editing techniques to create amazing-looking hero shots. If you found this post useful, you may also want to check out the following resources:


