


Table of Contents
- The Issue With Dark Interiors in Real Estate Photography
- How to Fix Dark Interiors in Real Estate Photos
- Editing Dark Interiors FAQ
- How PhotoUp Helps Fix Dark Interiors Effortlessly
In today’s competitive real estate market, bright interior photos aren’t just nice to have—they’re essential.
With the right shooting techniques and professional editing workflow, even the darkest interiors can be transformed into inviting, market-ready visuals that help listings stand out and sell faster.
In this step-by-step guide, we’ll walk through how to fix dark interiors—from capture to final editing—so your listing photos highlight the home at its best.
Let’s begin by discussing the issue with dark interiors in real estate photography.
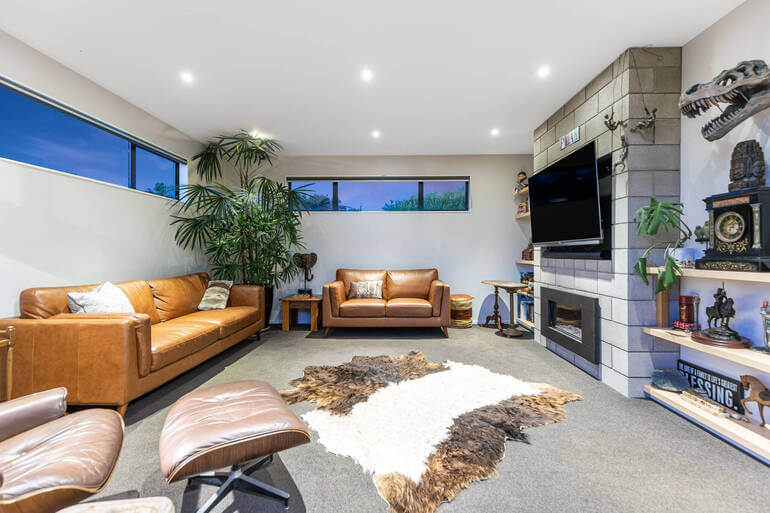
The Issue With Dark Interiors in Real Estate Photography🏠
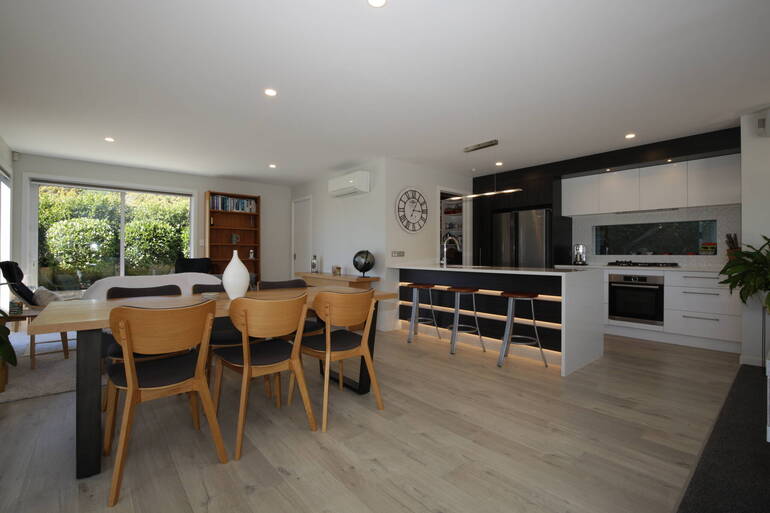
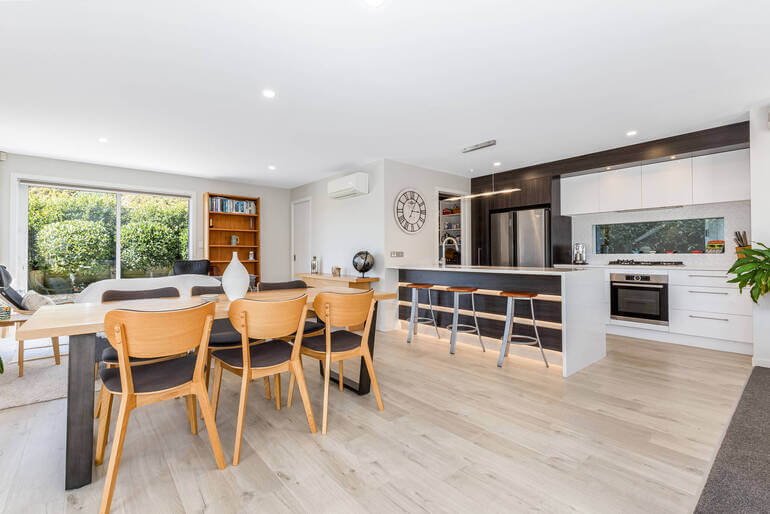
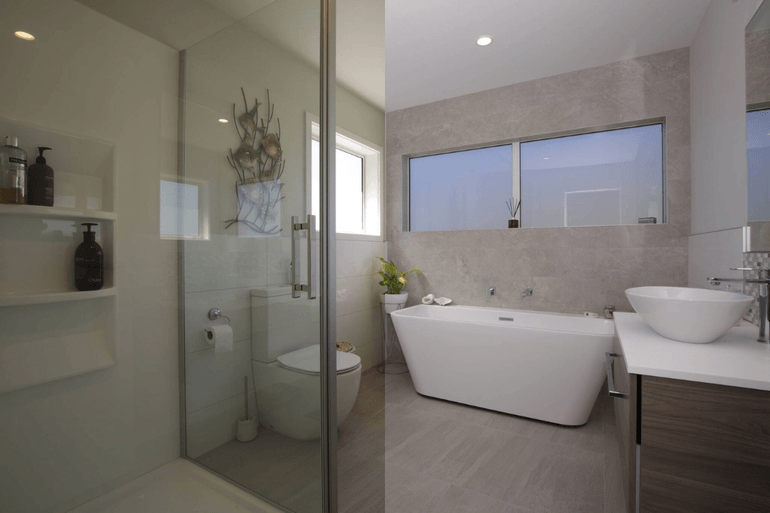
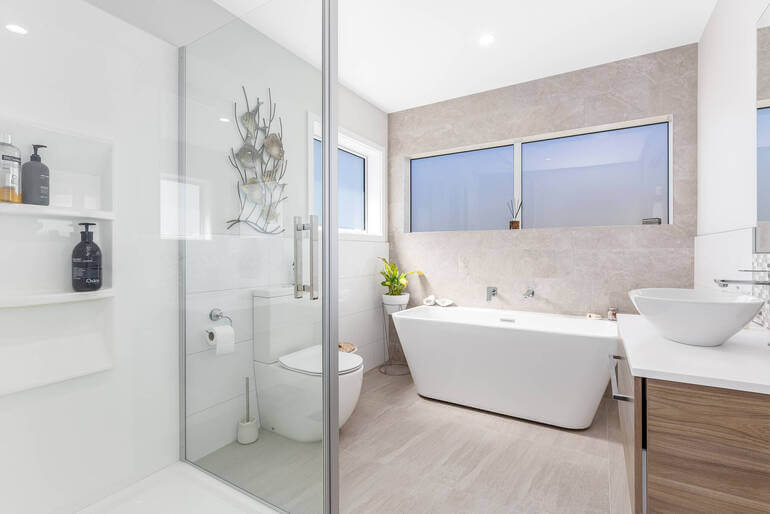
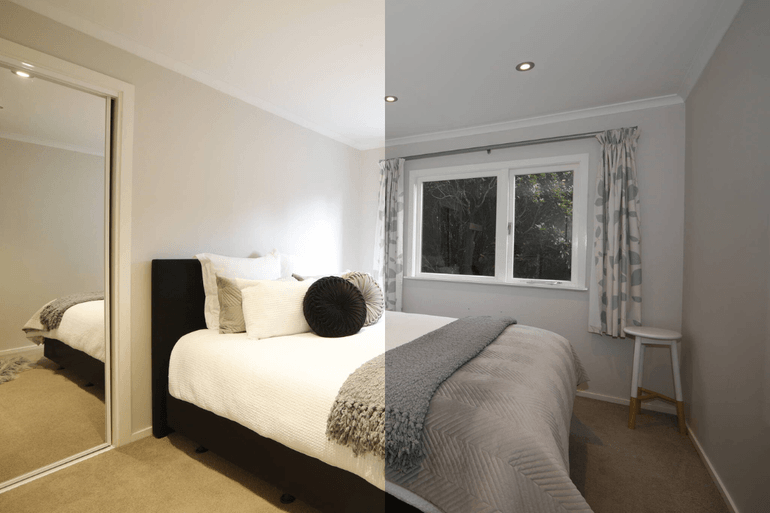
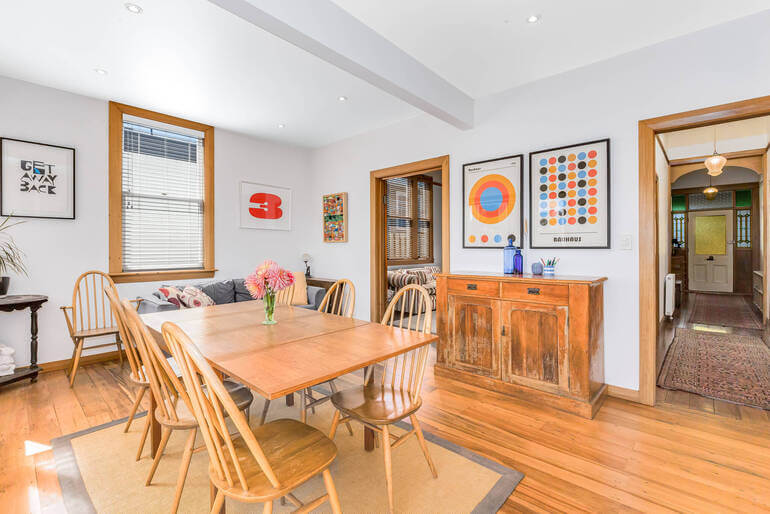
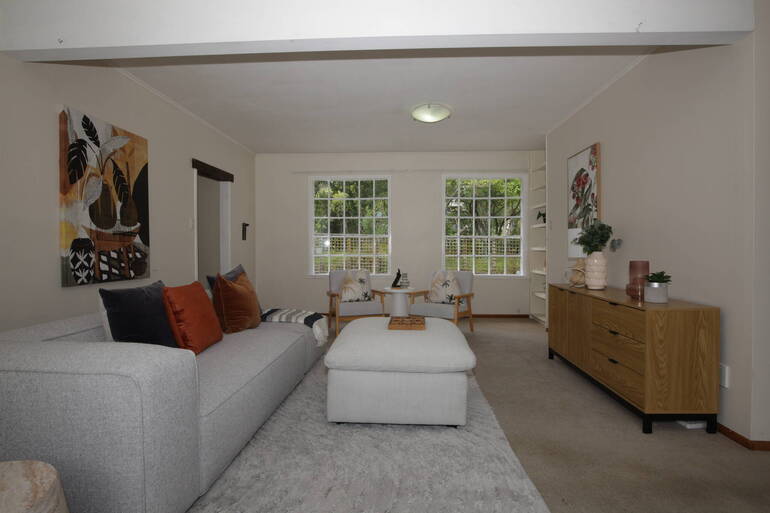
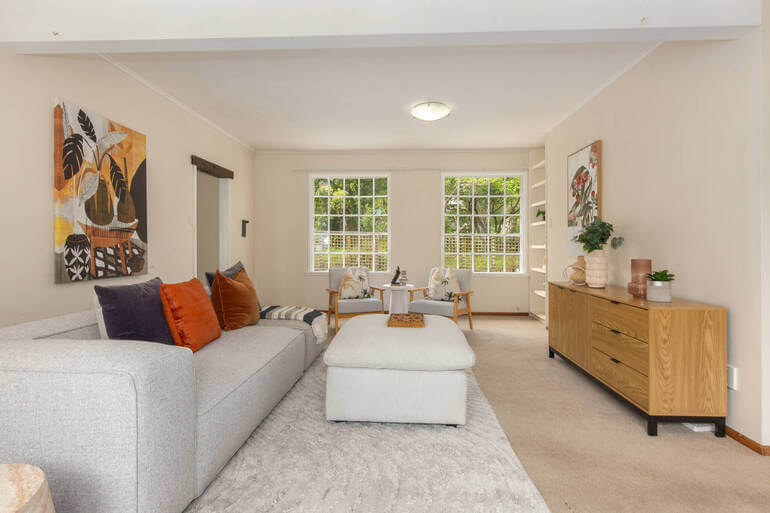
In real estate photography, lighting can make or break a listing. A beautifully designed living room or kitchen can appear dull, cramped, and uninviting if the interior photos are too dark.
Unfortunately, dark interiors are one of the most common challenges photographers face—especially when dealing with cloudy weather, poorly lit rooms, or mixed lighting sources.
Because 100% of buyers begin their home search online nowadays, the brightness and clarity of listing photos directly influence how long they engage with a property.
Let’s dive deeper into this topic.
Why Bright Interior Photos Matter in Real Estate
Studies consistently show that homes with high-quality images receive 118% more views and inquiries than those with poorly lit photos.
Bright interior photos do more than simply improve aesthetics—they influence how buyers perceive a property. When interiors appear dark or dull:
- Rooms feel smaller
- Design details disappear
- Buyers assume the property lacks natural light
- Dampens the mood and emotional appeal
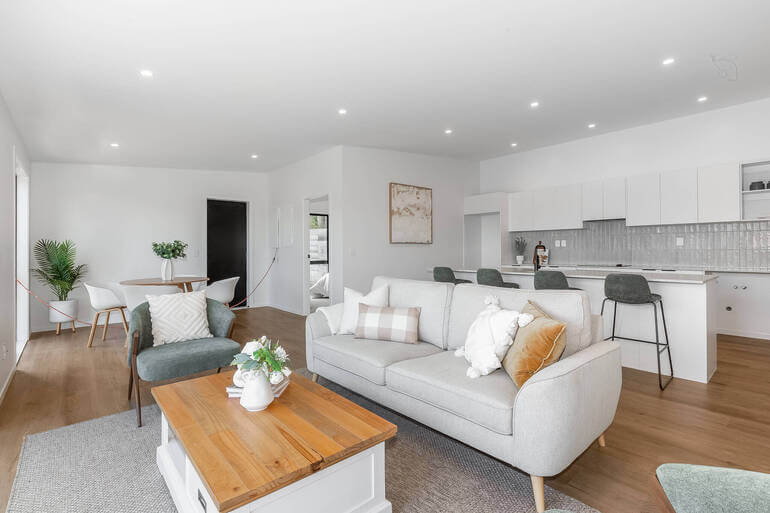
On the other hand, bright and balanced interior photos create a sense of openness, comfort, warmth, and value.
This psychological impact is why professional real estate photo editing has become standard practice in modern real estate marketing.
Overall, listings with polished photos attract more clicks, generate more showings, and ultimately help homes sell faster. They also sell for higher prices—listings with high-quality images receive a 47% price increase per square foot.
How to Fix Dark Interiors in Real Estate Photos
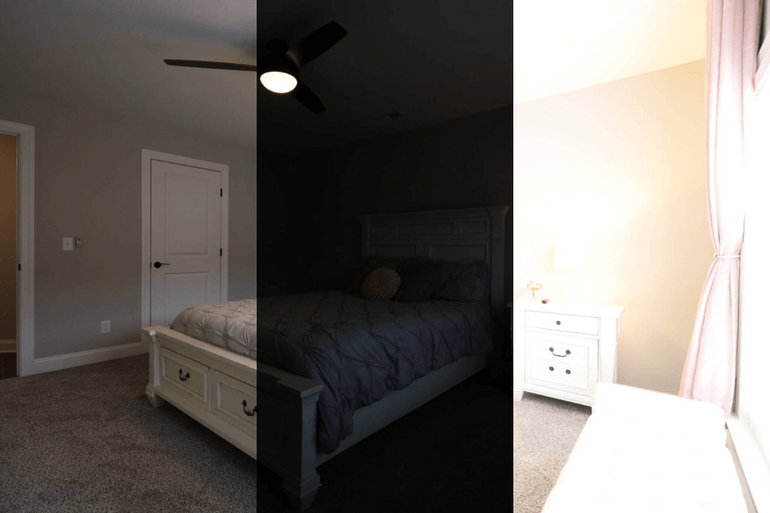
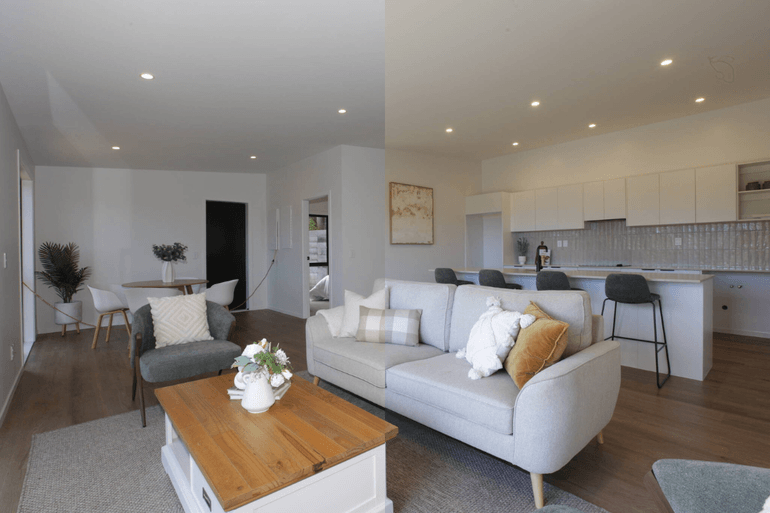
The good news is that dark interior images can often be transformed into bright, inviting visuals with the right shooting techniques and real estate photo editing workflow.
Here’s a step-by-step guide on how to fix dark interiors to create bright and inviting images:
📷 Step 1. Start With Proper Exposure Bracketing
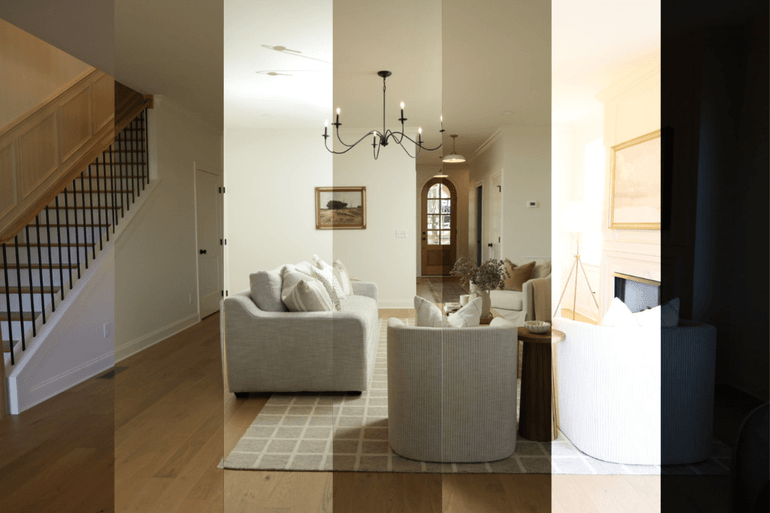
Before editing even begins, capturing the right source images is essential. One of the most effective techniques for handling dark interiors is exposure bracketing.
Bracketing means taking multiple photos of the same scene at different exposure levels. A typical bracket might include:
- One underexposed image (to capture bright windows)
- One balanced exposure
- One or two overexposed shots (to brighten darker areas)
These images can then be blended together during editing to produce a balanced photo that preserves both interior brightness and outdoor views.
Here are some key tips when bracketing interiors:
- Use a tripod to keep images aligned
- Shoot 3–5 bracketed exposures for each scene
- Avoid extreme ISO levels that introduce noise
- Keep the aperture consistent for a consistent depth of field
Bracketing provides editors with the information needed to recover details from both shadows and highlights.
For more details, you can check out our guide on best practices for shooting bracketed images for HDR.
In summary, bracketing captures multiple exposures of the same room, ensuring that dark corners and bright windows can be balanced later during editing.
Once you have strong source images, the next step is blending them properly.
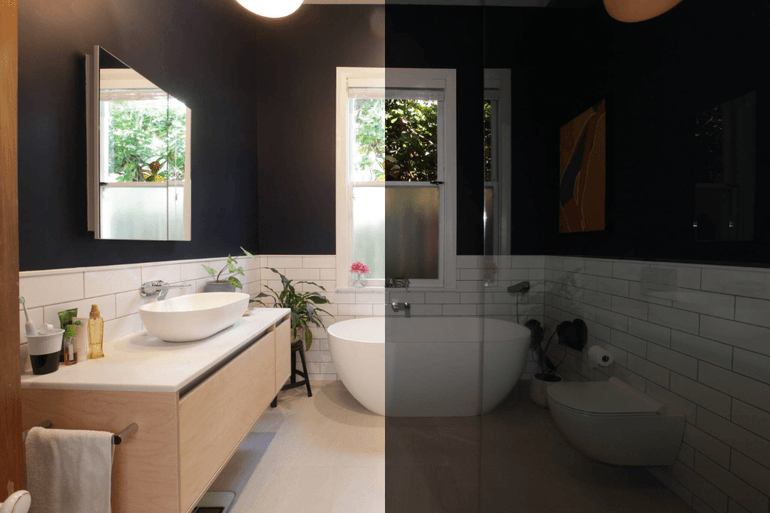
🧩 Step 2. Blend Exposures Using HDR or Manual Photo Editing Techniques
After capturing bracketed images, the next step is exposure blending. This process combines the best parts of each exposure into one balanced image.
Two common approaches include:
HDR (High Dynamic Range) Blending
HDR software automatically merges exposures to balance lighting throughout the scene. The advantages of HDR software are fast processing. It’s also good for large image batches and producing evenly lit interiors.
However, poorly configured HDR can create unrealistic colors or overly flat images.
Manual Blending

Professional real estate photo editors often manually blend exposures in software like Photoshop. This allows for:
- More natural lighting
- Controlled shadow recovery
- Accurate window views
- And balanced highlights
Manual blending is slower but produces more polished, magazine-quality results.
To learn how to manually blend your images, you can check out our guide on how to edit HDR photos for real estate photography (ultimate guide).
To recap, exposure blending combines multiple images to recover details from shadows and highlights, transforming dark interiors into evenly lit spaces.
Once the exposure is balanced, color temperature must be corrected to maintain natural-looking tones.
🎨 Step 3. Correct White Balance and Color Temperature to Remove Color Cast
Dark interiors often come with another challenge: mixed lighting sources. For example, a single room may contain the following issues:
- Warm incandescent bulbs
- Cool daylight from windows
- Or, LED lighting with different color temperatures
Without correction, this can create distracting color casts such as yellow walls, blue shadows, or green tints. Here are some easy yet powerful editing tips to fix this:
- Adjust white balance for neutral tones
- Use local adjustments to correct individual light sources
- Ensure walls and ceilings appear clean and natural
- Maintain consistent color across multiple listing photos
Consistency is especially important because buyers will flip through listing photos quickly. Sudden shifts in color tone between images can feel distracting or unprofessional.
Here are two tutorials that will help you correct white balance and color temperature:
Correcting white balance ensures that interior colors appear natural and consistent across the listing gallery. After fixing exposure and color, the next priority is recovering detail in shadows.
🌗 Step 4. Recover Shadow Details Without Overprocessing Your Photos
Brightening a dark photo isn’t just about increasing exposure. If shadows are lifted too aggressively, images can quickly look washed out or noisy.
Instead, real estate photo editors typically use targeted adjustments to recover detail while preserving natural contrast.
Effective shadow recovery editing techniques include:
- Selective shadow lifting
- Local brush adjustments
- Gradient filters for darker areas
- Noise reduction to remove grain
The goal is to reveal architectural features, such as cabinetry, textures, and flooring, without making the image look artificially bright.
Professional real estate photo editors also maintain contrast so the image retains depth and dimension. To learn how to recover shadow details, check out these guides:
- How to Remove Shadows in Photos (Photoshop + Lightroom Tutorial)
- How to Remove Flash Shadow in Photoshop
- How to Fix Pixelated Pictures in Photoshop
Controlled shadow recovery brightens dark areas while maintaining natural contrast and avoiding overprocessed results. With the interior brightness corrected, attention turns to the windows and exterior views.
Have You Ever Thought To
Outsource Photo Editing?
Try it today with 5 free edits from three professional photo editors.

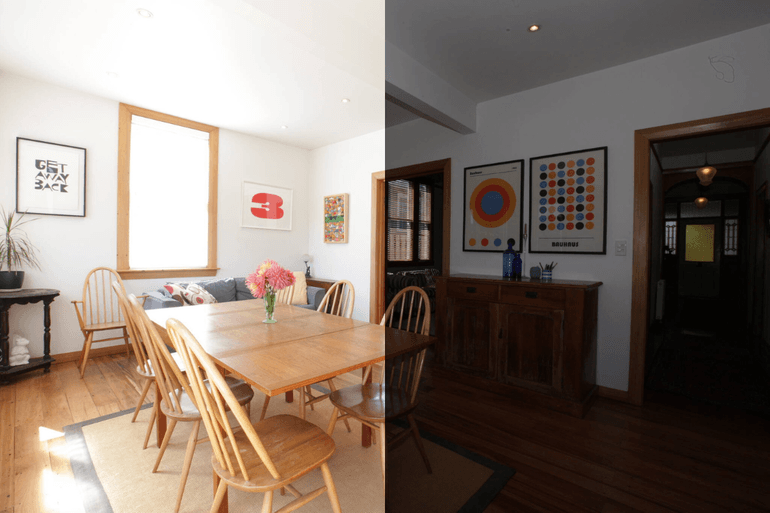
🪟 Step 5. Balance Window Light and Exterior Views With Window Masking
Windows often create one of the biggest lighting challenges in interior photography. Without correction, windows can appear:
- Completely blown out (pure white)
- Overly dark if exposed to the outside
To solve this, professional editors use window masking techniques that preserve both interior and exterior details. This process typically includes:
- Isolating window areas
- Replacing blown-out highlights with proper exposures
- Adjusting brightness and contrast
- Matching color temperature between indoor and outdoor light
When done correctly, window views look natural and help buyers visualize the property’s surroundings.
To learn how to create stunning views, check out our tutorial on a quick & easy way to mask windows in Photoshop.
In summary, window balancing restores outdoor views while maintaining bright interior lighting. Finally, finishing touches ensure the image feels polished and professional.
✨ Step 6: Apply Final Enhancements for a Polished Look
Once the major lighting issues are corrected, a few finishing adjustments can elevate the image even further. These final edits typically include:
- Straightening vertical lines
- Adjusting contrast and clarity
- Enhancing natural light gradients
- Correcting lens distortion
- And slight sharpening for crisp details
These subtle improvements ensure the photo feels professional and visually appealing without looking over-edited. These tutorials will help you create a polished look:
- How to Correct Perspective in Photoshop
- How to Change Exposure in Photoshop
- How to Brighten a Photo in Photoshop
- How to Do Lens Correction in Photoshop
- How to Sharpen an Image in Photoshop
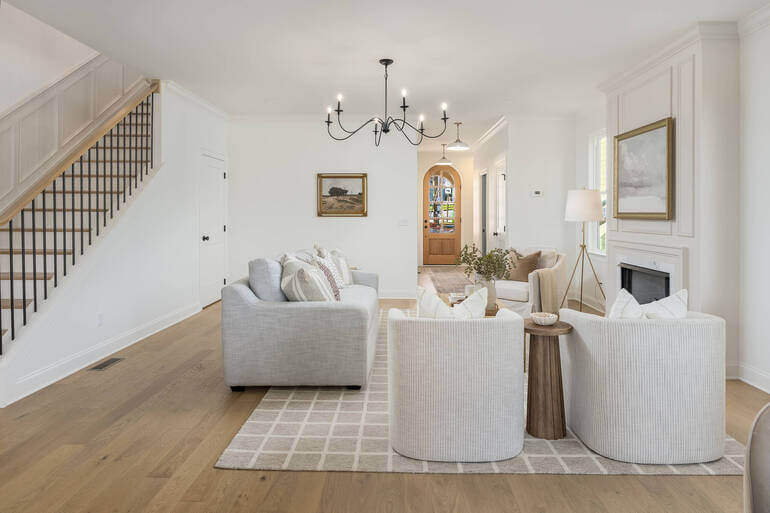
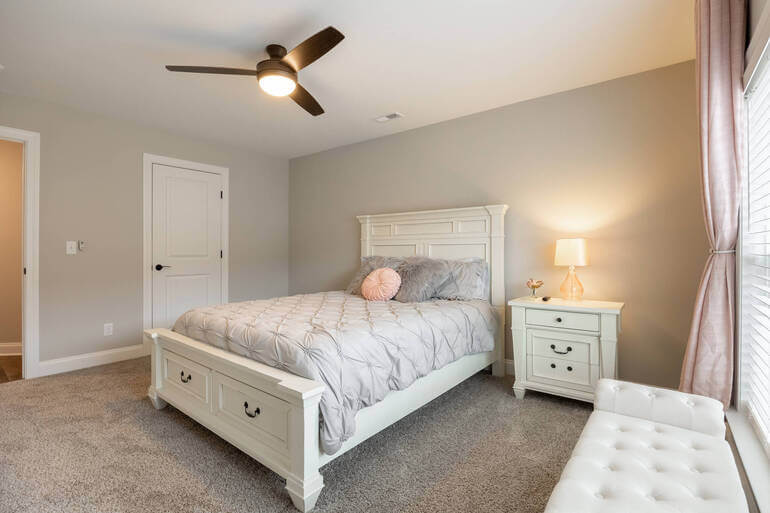
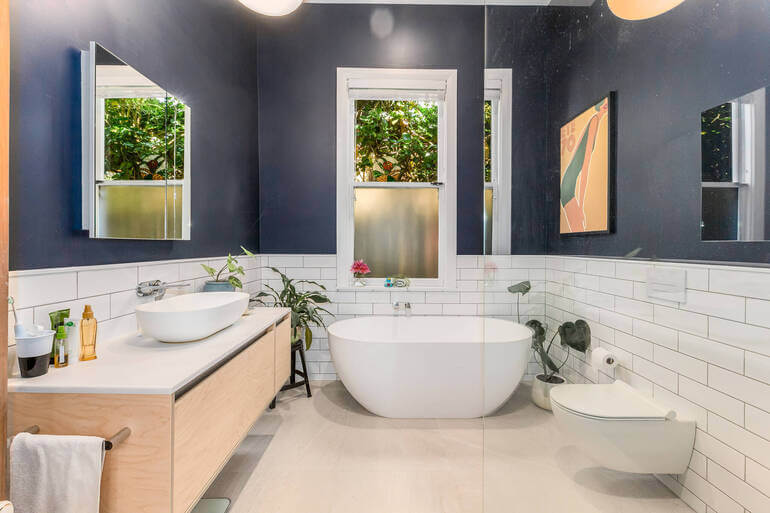
The final result should feel bright, balanced, and realistic—exactly how buyers would expect the home to look in person.
Final enhancements polish the image, ensuring the space looks clean, balanced, and inviting.
Editing Dark Interiors FAQ❓
Why do real estate interior photos often appear dark?
Interior real estate photos often appear dark because the camera struggles to balance bright window light with darker indoor spaces. When the camera exposes for the bright exterior, interior areas can look underexposed.
Other factors, such as poor lighting, cloudy weather, mixed light sources, or incorrect camera settings, can also contribute to dark images.
What is exposure bracketing in real estate photography?
Exposure bracketing is a technique where photographers capture multiple images of the same scene at different exposure levels. These images are later blended together during editing to create one balanced photo that preserves both interior brightness and outdoor window views.
Most photographers capture 3–5 bracketed exposures for each room to ensure enough detail is available for editing.
How does HDR help fix dark interiors?
HDR (High Dynamic Range) combines multiple bracketed exposures into a single image that balances highlights and shadows. This helps brighten darker areas of a room while keeping windows and bright areas from appearing blown out.
When used correctly, HDR creates evenly lit interior images that look natural and inviting.
Why is white balance important when brightening interiors?
White balance ensures that colors appear natural and accurate in a photo. Interior spaces often contain multiple light sources, such as daylight, warm bulbs, and LED lighting, which can create color casts.
Correcting white balance removes yellow, blue, or green tints so walls, furniture, and finishes look consistent and realistic.
Can you brighten dark photos without making them look unnatural?
Yes. Professional real estate photo editors use targeted shadow recovery and localized adjustments instead of simply increasing overall brightness.
This technique reveals details in darker areas while maintaining natural contrast and avoiding washed-out images. The goal is to create a bright yet realistic look that accurately represents the property.
How do editors fix blown-out windows in real estate photos?
Editors typically use window masking or exposure blending to restore outdoor views. This technique isolates window areas and blends them with properly exposed exterior images, allowing both the interior and the outside view to appear balanced.
This helps buyers see the surroundings while keeping the room bright and welcoming.
How long does professional real estate photo editing usually take?
Professional real estate photo editing services typically deliver finished images within 12–24 hours, depending on the provider and editing complexity. Fast turnaround times help photographers and agents publish listings quickly and maintain momentum in competitive markets.
Is outsourcing real estate photo editing expensive?
Not necessarily. Many professional editing services, like PhotoUp, offer affordable per-image pricing, often starting at just a few dollars per photo. This allows photographers to maintain high-quality results while saving hours of editing time.
Outsourcing editing can actually increase profitability by allowing photographers to focus on shooting more properties instead of spending hours behind a computer.
With that in mind, let’s take a look at how to quickly and easily outsource your post-processing to PhotoUp and grow your business.
Have You Ever Thought To
Outsource Photo Editing?
Try it today with 5 free edits from three professional photo editors.
How PhotoUp Helps Fix Dark Interiors Effortlessly🌌
While the editing techniques above are highly effective, they can also be time-consuming for photographers managing multiple shoots per week.
That’s where PhotoUp’s professional real estate photo editing service comes in.
PhotoUp’s expert editors specialize in transforming dark interiors into bright, natural-looking images using advanced techniques such as:
- HDR blending and manual exposure blending
- White balance and color correction
- Window masking
- Shadow recovery
- Perspective and lens correction
- Image sharpening and final enhancements
With affordable pricing starting at just $1.50 per image (for on-demand editing), photographers can outsource time-intensive editing while maintaining consistent quality across every listing.
Even better, PhotoUp delivers fast turnaround times—often within 24 hours or less—helping photographers keep up with demanding client schedules.
By outsourcing editing to PhotoUp, photographers can spend less time behind the computer and more time growing their business, booking shoots, and delivering stunning listing images.
Browse Top Dedicated
Real Estate Photo Editors
Ready-to-hire editors for real estate photo editing, and more.
A One-Stop Shop for Real Estate Marketing
Additionally, PhotoUp offers other powerful real estate marketing services like:
Adding these additional services to your toolkit will allow you to expand your product offerings and become more valuable to your agent clients.
Together with PhotoUp, you can quickly grow and scale your business!
How to Get Started
Here’s a step-by-step guide to using PhotoUp:
Step 1. Sign up for a free PhotoUp account.
Step 2. Upload your photos to our easy-to-use software.
Step 3. Choose the level of editing that you need and provide instructions (optional).
Step 4. Wait for PhotoUp professional editors to edit and return the photos in less than 24 hours.
Step 5. Download and start using your beautifully edited photos.
PhotoUp Real Estate Photo Editing Uploader Demo
Watch how easy it is to get started with PhotoUp in our real estate photo editing uploader demo:
As simple as that!
Sign up for a free PhotoUp account today and let our expert editors help you fix dark interiors or any type of issue in your real estate photos!
For a limited time, you’ll even get 5 free credits when signing up for an account you can apply to any of our services.
We hope this blog post helped you learn how to fix dark interiors in real estate photos. Before you go, you may also want to check out some related resources:
- How to Build Emotional Appeal With Sequencing in Real Estate Photo Editing
- A Complete Real Estate Photo Editing Tutorial for Beginners
- How to Quickly & Easily Edit Real Estate Photos on Your Phone
- The Hidden ROI of Real Estate Photo Editing: What the Data Says
- What Sets High-End Real Estate Photo Editing Apart? (9 Luxury Editing Tips)

