


Table of Contents
- What Does Manually Blending Photos Mean?
- Manual Blending Is Essential for Real Estate Photography
- How Does a Layer Mask Work?
- How to Manually Blend Multiple Exposures in Photoshop
- Leave the Manual Blending of Images to PhotoUp!
Are you looking into the best way to manually blend photos in Photoshop? Then, you’ve come to the right place!
When it comes to editing tasks in Adobe Photoshop, you’ll find numerous paths to achieve the desired outcome. However, not all approaches will perfectly suit your specific needs and some are easier than others.
In this guide, we’ll show you the best and easiest way to manually blend photos for real estate photography in Photoshop using a layer mask. This method can be used for all types of images, but we’ll use real estate photography as an example.
Let’s start by taking a look at what manual blending of photos really means.
What Does Manually Blending Photos Mean?
Manual blending is truly an art – the act of harmoniously blending various exposures together in Photoshop to achieve the ideal final image.
It goes beyond relying on software like HDR, as you have full creative control over your masterpiece.
Mastering the technique of manually blending images in Photoshop empowers you to shape your final product with precision and flair.
For example, manual blending is one of the most in-depth and detailed editing techniques that real estate photographers use to increase the quality of their work.
Why? Let’s answer that next.
Manual Blending Is Essential for Real Estate Photography
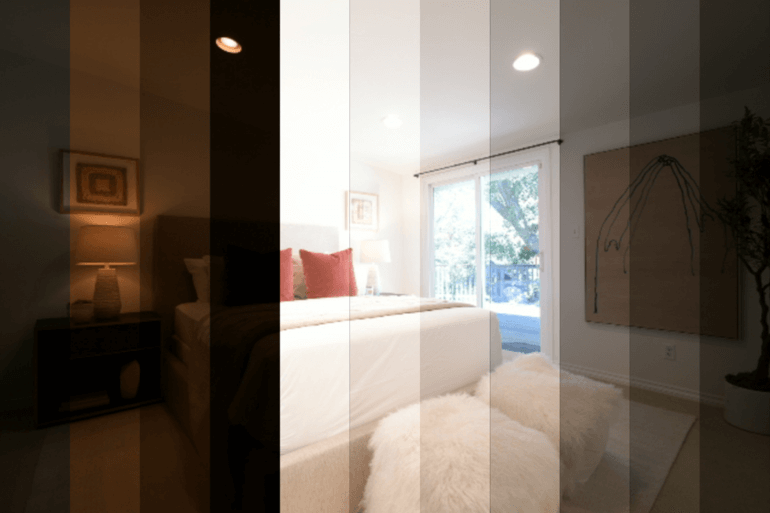
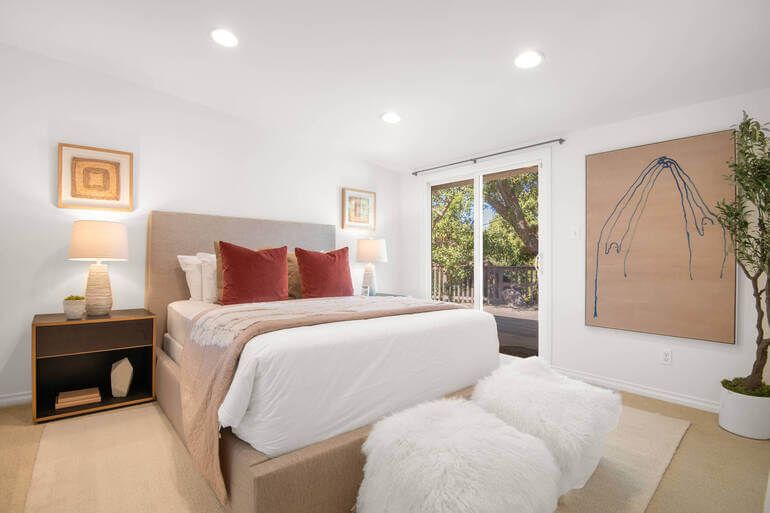
Manual blending is a common technique used to overcome the limitations of our camera’s dynamic range.
Dynamic range refers to the ability to capture both highlights and shadows in a single frame, ensuring no loss of detail.
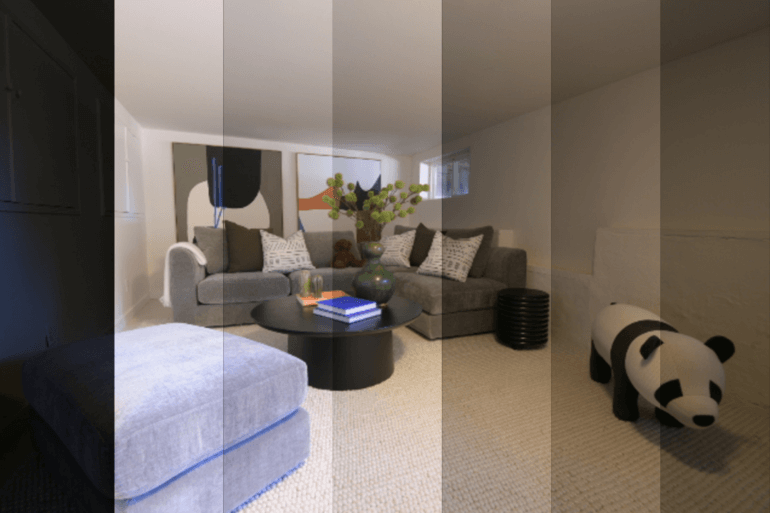
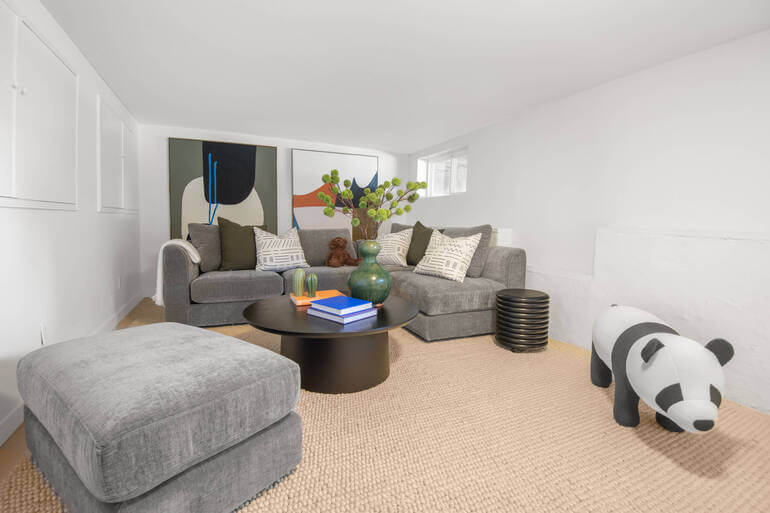
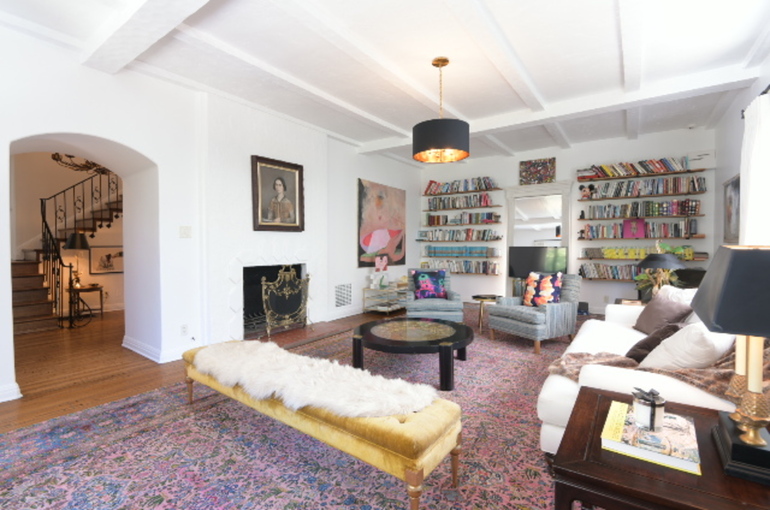
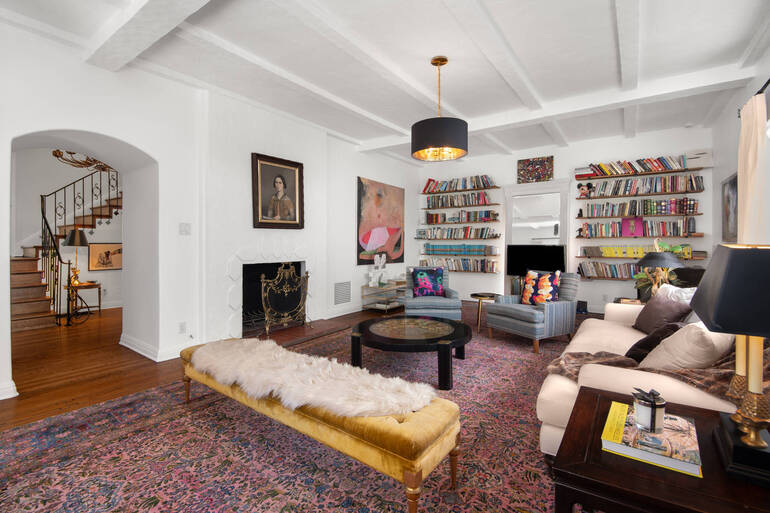
During real estate photography, manual blending plays a vital role in bringing back lost lighting, colors, and clarity that a regular HDR edit might miss.
It allows you to focus on essential room details and showcase the unique features of each image, making it an excellent choice for high-end luxury properties.
By incorporating off-camera flash during shooting and manual blending during post-production, you can achieve dynamic and well-balanced real estate photographs.
This approach ensures optimal results and creates visually engaging images that captivate potential buyers.
With that said, let’s take a closer look at the method we’ll use to manually blend photos in Photoshop, which is a layer mask.
How Does a Layer Mask Work?
Layer masks in Photoshop give us fine control over the transparency of a layer.
Think of them as a way to selectively reveal or hide parts of an image. It’s like having a magic brush that lets you blend images seamlessly.
Here’s how it works: Layer masks use black and white. When the mask is filled with white, that part of the layer is visible.
But when it’s filled with black, that part is hidden. This allows us to create amazing blending effects by painting on the layer mask.
So, if you want to add depth and make your real estate photos come alive, try experimenting with layer masks. They are an essential tool for any Photoshop enthusiast.
Let’s show you how!
Have You Ever Thought To
Outsource Photo Editing?
Try it today with 5 free edits from three professional photo editors.

How to Manually Blend Multiple Exposures in Photoshop
All right, let’s dive into the nitty-gritty of this tutorial and show you how to manually blend multiple exposures in Photoshop.
You can either watch the video tutorial or continue reading the text below:
Step 1. Start by importing your images in Lightroom. In our example, we have seven images containing four ambients and three flashes and we are going to move them to Photoshop, where we will do the manual blending.
Step 2. Select the seven images. Right-click and select Edit In, and then Select Open as Layers in Photoshop.
Step 3. Next, separate the flash and ambient photos, and group them accordingly. Use the ambient group as the main photo, and choose your middle exposure as a base to work from.
Recover the Blown-Out/Overexposed Areas
Step 4. Then, add Inverted Masking to each image except the base photo. Press ALT and click the Masking Button to mask all except your base photo. Start by recovering the blown-out/overexposed areas of your base photo.
Step 5. Now, click on the Brush tool, then set Opacity and Flow to 30% for easy control, then start brushing over the overexposed areas and tone them down.
Recover the Dark/Underexposed Areas
Step 6. Once you’re done recovering the blown-out areas, the next thing to recover is the dark/underexposed areas on the base photo. Select the brightest ambient image from your layers and start brushing slowly.
Step 7. Next, we’ll move on to the flash exposure. Unhide the folder and make the images visible. Same as what we did on the ambient, we will add Inverted Masking – press ALT and click the Masking Button.
Step 8. The darkest flash exposure will be used as the window view. Start masking it by selecting the window with the Lasso tool (L). The surrounding area of the window is a bit overexposed, so we are going to recover some of it, especially the curtains.
Recover the Lights
Step 19. The next thing to do is to recover the lights. We used the second exposure to recover it. In the example, we also recovered some on the ceiling floor and window area.
Just keep blending till everything is well blended.
Note: Just remember when doing manual blending to always make your brush opacity a minimal amount of 10 – 30%. This is to avoid a heavy brush stroke while blending.
Step 11. When you are done, click Save and admire your perfectly blended image.
And that’s it!
Have You Ever Thought To
Outsource Photo Editing?
Try it today with 5 free edits from three professional photo editors.
Leave the Manual Blending of Images to PhotoUp!
Don’t have the time or skills to manually blend your real estate photos? No worries!
Outsourcing your editing to a top-notch real estate photo editing service like PhotoUp is now easier than ever.
Our team of trained professionals is ready and waiting to cater to your unique style and editing preferences. We even offer manual blending for that perfect touch!
Browse Top Dedicated
Real Estate Photo Editors
Ready-to-hire editors for real estate photo editing, and more.
We can help you with editing services such as:
- Improper exposure levels
- Harsh shadows, lack of light, etc.
- Blurred images that were taken without a tripod
- Images that need cropping or other effects
- Lawn greening and sky replacements
- Twilight and day-to-dusk editing
- Manual blending and pano stitching
- Clutter and advanced object removal
- Line and angle corrections
- And much more!
On top of that, PhotoUp can also help you with more advanced editing services like:
Quick & Easy Order Process
Getting started is simple.
All you need to do is sign up for a free PhotoUp account, upload your images, provide us with your instructions, choose your export settings and turnaround time, and lastly, download your beautifully edited images!
Best yet, our real estate photo editing service is affordable, starting at the low cost of $1.10 per image depending on your subscription and complexity level.
PhotoUp Real Estate Photo Editing Uploader
To see how easy it is to get started with PhotoUp, check out our real estate photo editing uploader demo:
It’s really that simple to get beautifully edited images returned to you in less than 24 hours!
So, what are you waiting for?
Sign up for a free PhotoUp account today, and let us help you blend your real estate photos and enhance the overall quality of your images! For a limited time, we even offer you 5 free edits when signing up for an account.
We hope this blog post helped you learn how to manually blend photos in Photoshop using the layer mask method. If you found this guide useful, you may also want to check out the following resources:

