


Table of Contents
- Why Sequencing Matters in Real Estate Marketing
- How to Build Emotional Appeal With Sequencing
- How PhotoUp Helps You Build Emotional Appeal
In real estate marketing, great photos don’t just show a property—they guide a buyer through an experience. While editing techniques like color correction, window masking, and sky replacement often get the spotlight, one of the most overlooked “edits” happens after the pixels are polished: sequencing.
Sequencing is a skill you can learn, and it pairs beautifully with smart real estate photo editing.
In this article, we’ll break down how to use sequencing to build emotional appeal—and how your editing decisions can reinforce that story at every step, showcased by some powerful editing techniques.
Let’s dive in!
Why Sequencing Matters in Real Estate Marketing🎬🏡

Sequencing refers to the intentional order in which listing photos are presented.
Done well, it creates momentum, tells a story, and builds an emotional connection—helping buyers feel what it might be like to live there. Done poorly, even stunning images can feel disjointed, confusing, or forgettable.
Most buyers don’t view listing photos as a photographer does. They’re not analyzing vertical lines or noise reduction—they’re scanning for a feeling: Does this home fit my life?
Sequencing helps deliver that answer quickly. A strong photo order works like a guided tour:
- It reduces mental friction (buyers always know where they are in the home)
- It highlights key value points at the right time (not too early, not too late)
- It creates a rhythm that feels natural—like walking through the property
And here’s the key: emotional appeal is built through anticipation and payoff.
Sequencing sets up the anticipation; editing creates the payoff. When those two work together, your final gallery becomes a persuasive visual narrative instead of a random collection of angles.
How to Build Emotional Appeal With Sequencing (8 Tips)
With this in mind, let’s take a look at 8 key real estate photo editing tips on how to build emotional appeal through sequencing:
1. Start With the “Promise” Photo: Your Emotional Hook ✨🌅
Every great sequence begins with a compelling first impression, the so-called hero image.
This is the image that makes someone stop scrolling and click through the gallery. In most cases, that is a:
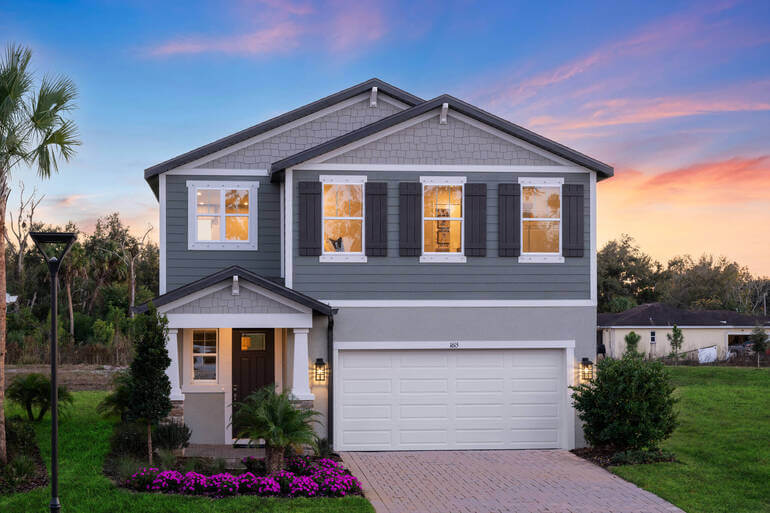
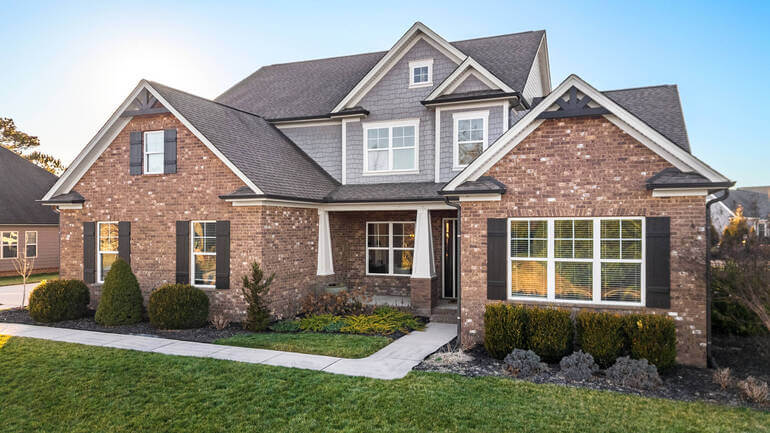
- Clean, bright hero exterior (front elevation)
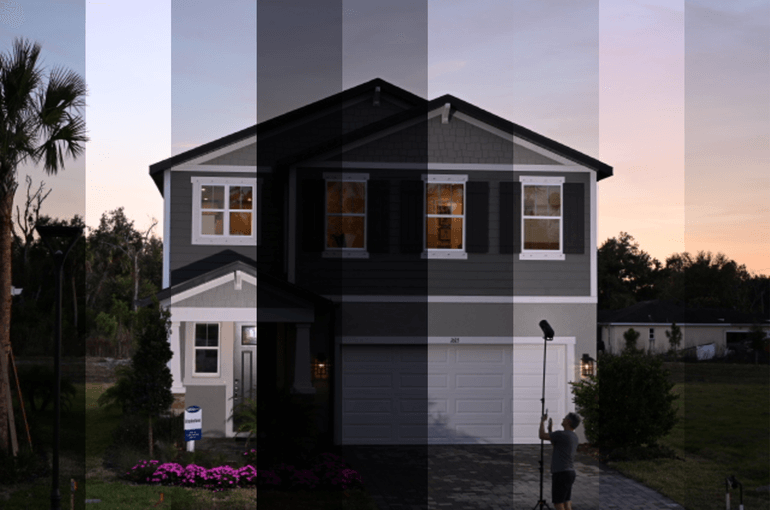
- Dramatic twilight shot (when available)
- Lifestyle-driven feature shot (pool, terrace, view, fireplace)
Here are some real estate photo editing tips to strengthen the hook:
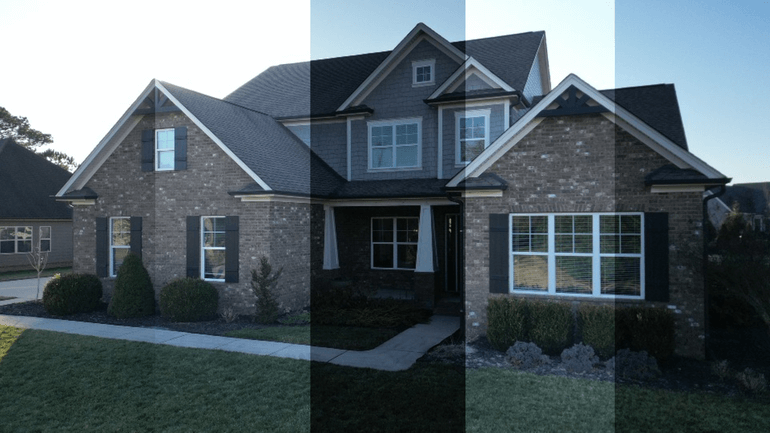
- Balance exposure so the home reads clearly in one glance
- Keep skies realistic (avoid oversaturated blues or fake-looking clouds)
- Enhance landscaping naturally—think “well-maintained,” not “neon green”
- Add warmth subtly (especially if the home’s vibe is cozy or family-oriented)
These tutorials will help you create your emotional hook or hero image:
- How to Change Exposure in Photoshop
- How to Brighten a Photo in Photoshop
- What’s Allowed When Making Sky Replacements in Photoshop?
- How to Create Stunning Twilight Photos Without an Evening Shoot
- How to Create a Lush Green Lawn in Photoshop and Boost Curb Appeal
Once you’ve grabbed attention, the transition is simple: you’re not just showing the home—you’re inviting the viewer inside.
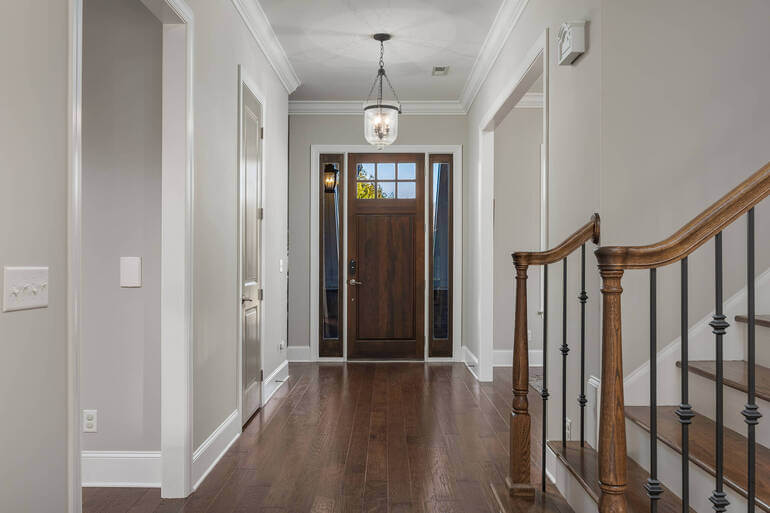
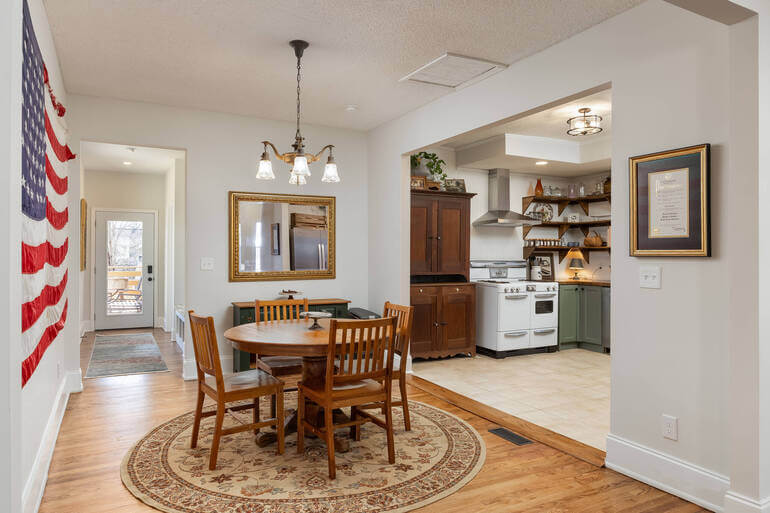
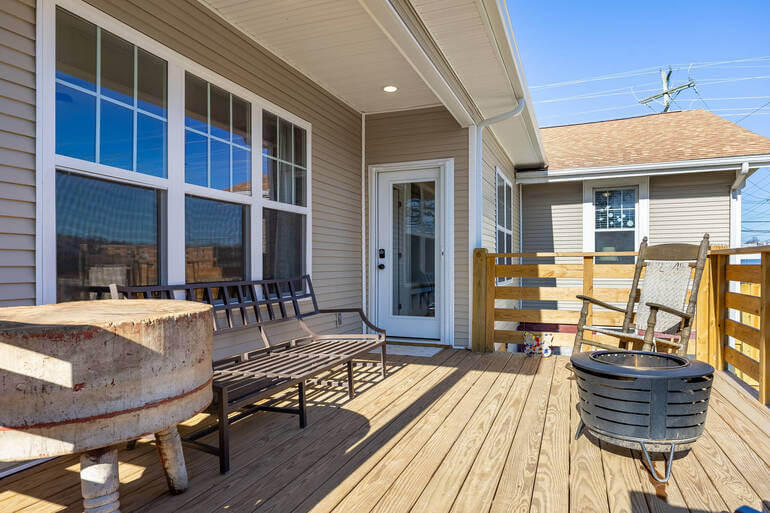
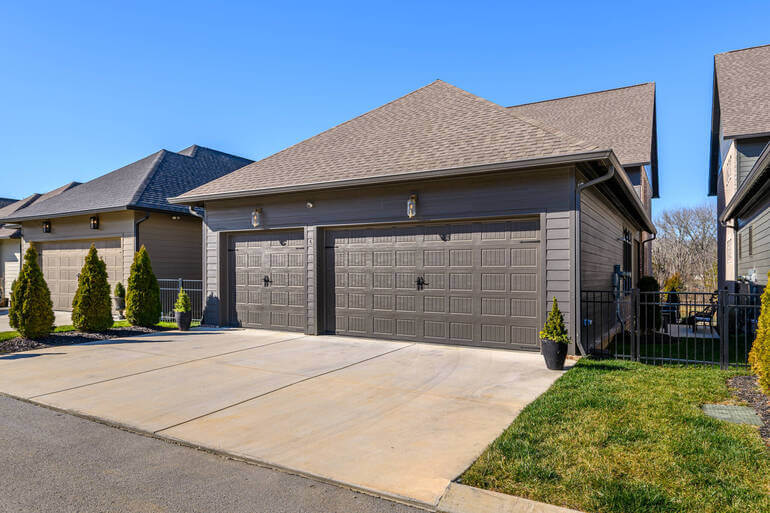
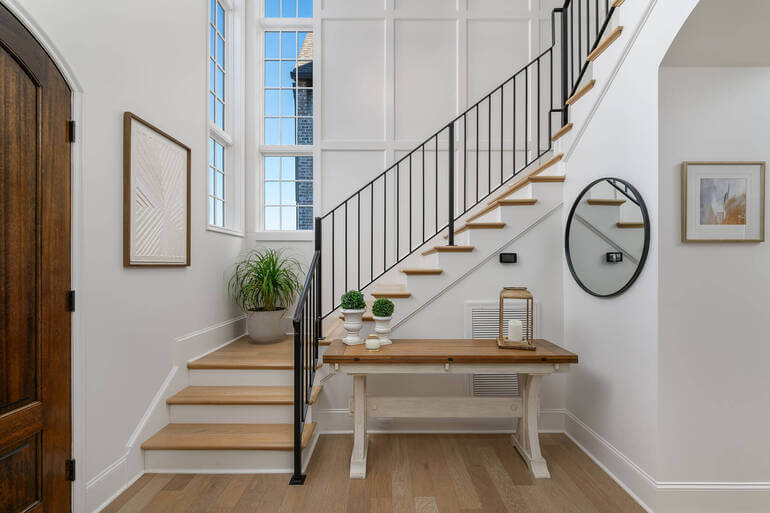
2. Build a Natural Walkthrough: Exterior → Entry → Main Living 🧭🚪
After the hook photo, the next images should orient the viewer. That means creating a sequence that mirrors how a person would experience the home in real life.
A reliable early flow is:
- Front exterior (hero)
- Alternate exterior angle (depth + context)
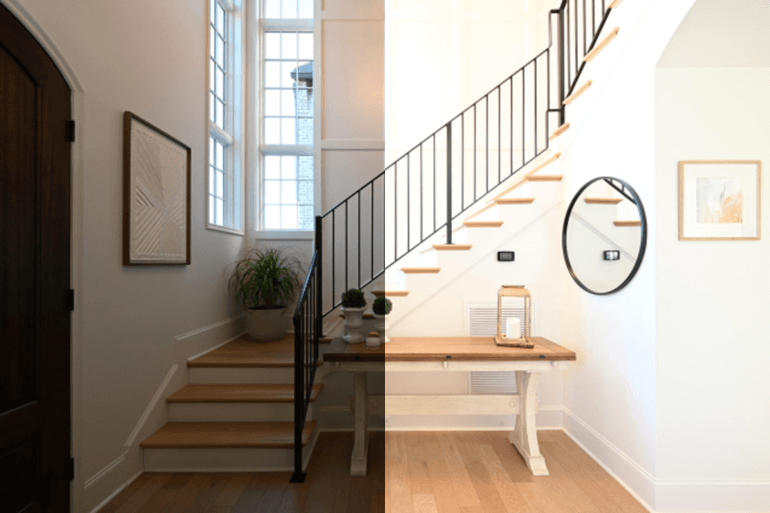
- Entry / foyer (welcome moment)
- Main living area (first interior “wow”)


This portion of the gallery should feel effortless. If you jump from the backyard to a bedroom to the kitchen and back to the driveway, buyers lose the sense of place—and emotional appeal drops fast.
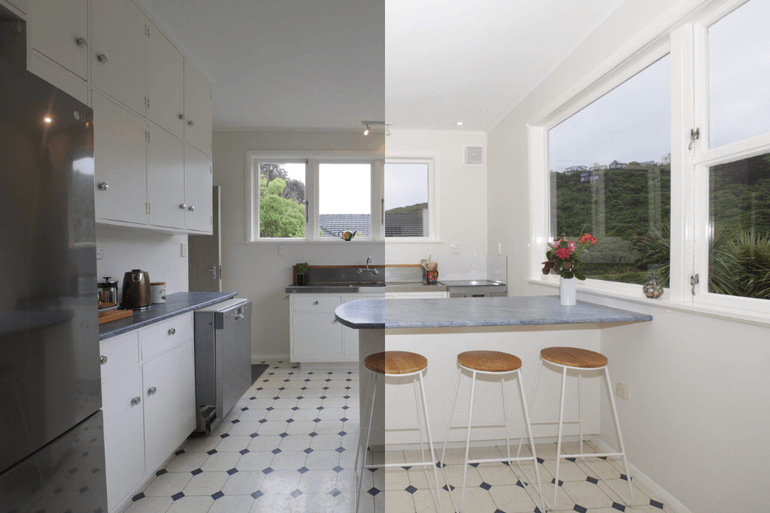
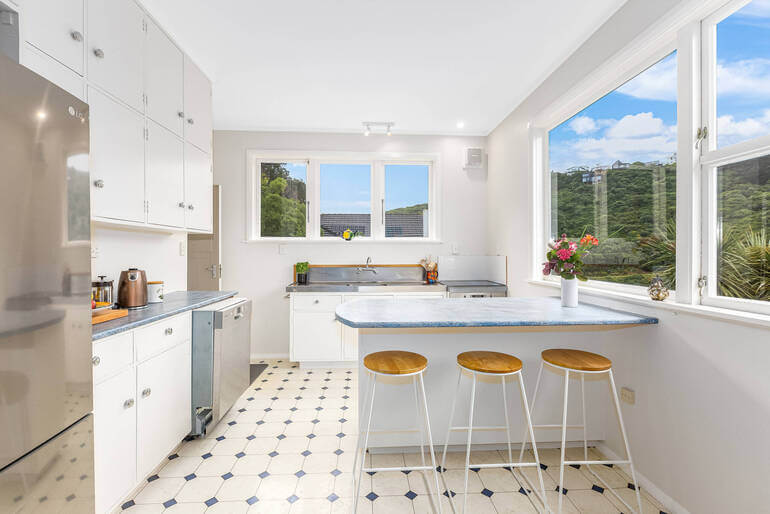
Editing tips that support this flow:
- Maintain consistent white balance from image to image
- Match vertical perspective so spaces feel stable and believable
- Keep window views consistent (don’t make one room look like noon and the next look like sunset unless that’s truly the case)
- Don’t over-HDR the early interior shots—make them inviting, not intense
To learn how to perform these techniques, you can check out these guides:
- How to Adjust White Balance in Photoshop
- How to Correct Perspective in Photoshop
- Quick & Easy Way to Mask Windows in Photoshop
- How to Easily Edit HDR Real Estate Photos
Now that the buyer feels grounded, you can lead them toward the heart of the home: the spaces where life happens.
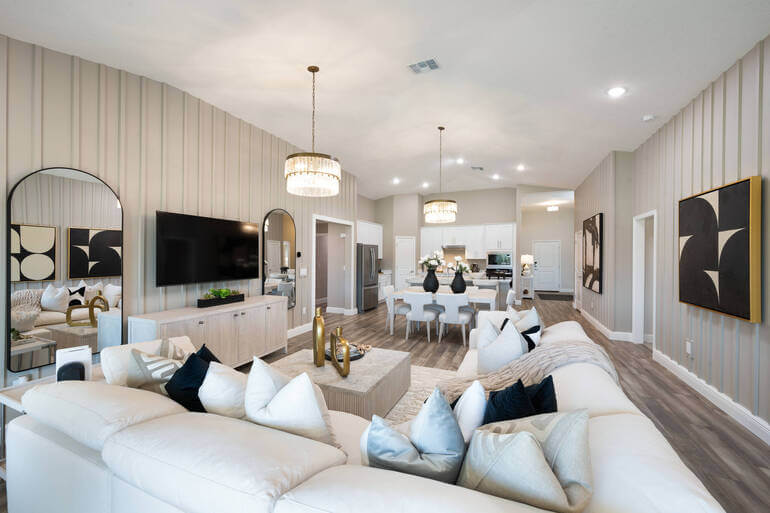
3. Create Momentum With “Lifestyle Anchors”
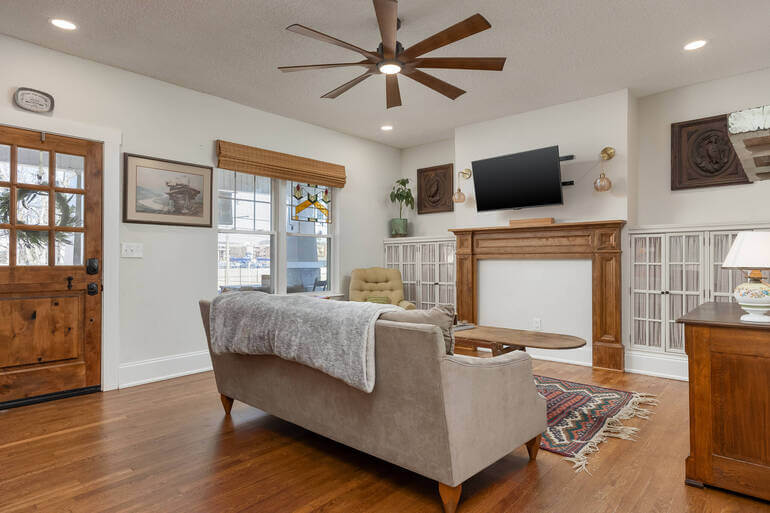
Emotional sequencing isn’t only about architecture—it’s about identity. Buyers imagine routines: morning coffee, family dinners, weekend gatherings🛋️🍽️.
To build that connection, place your strongest lifestyle spaces in a strategic order. Typically, the emotional core includes:
- Living room (comfort + social space)
- Kitchen (daily life + value)
- Dining area (gathering + hosting)
- Indoor/outdoor connection (patio, sliders, deck, view)


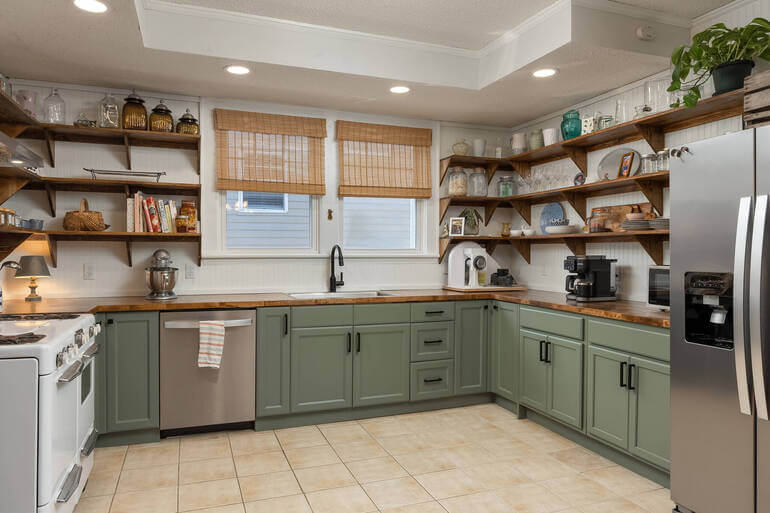
A strong approach is to group related spaces so the viewer feels like they’re moving naturally through the same zone.
For open concept homes, this is especially powerful: living → dining → kitchen works like a story arc.

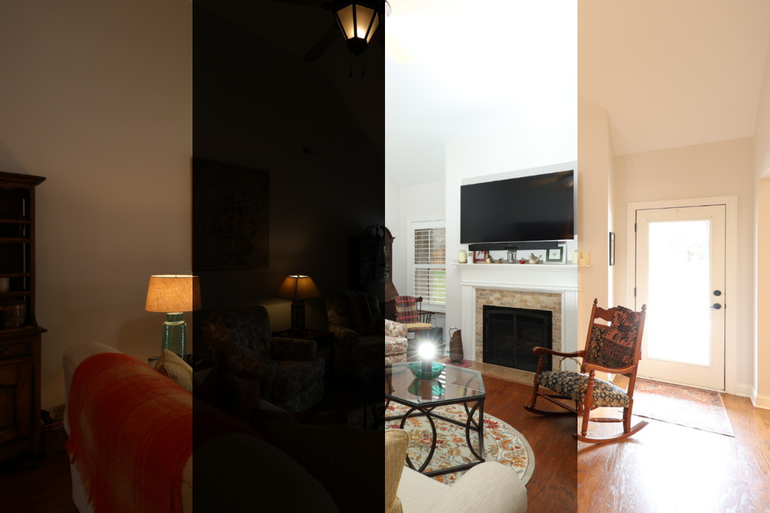
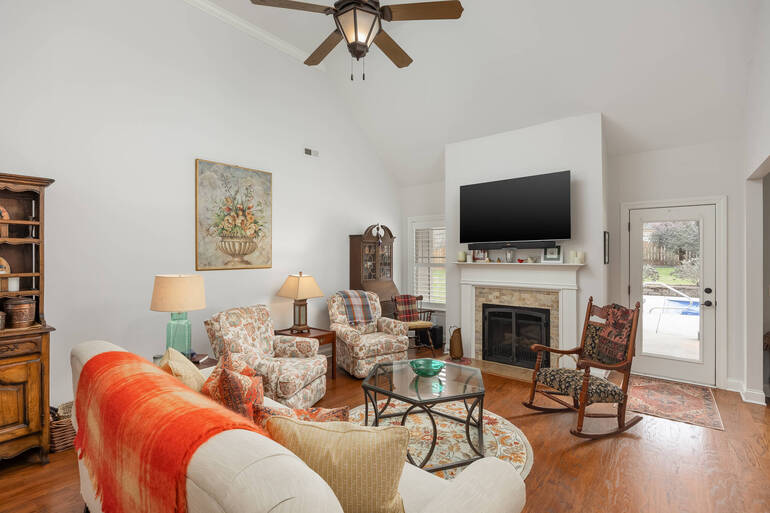
Leverage these real estate photo editing tips to heighten lifestyle appeal:
- Use gentle contrast so the space feels clean but soft
- Make color tones cohesive across the “core” set
- Avoid overly cool interiors unless the property is intentionally modern/minimalist
- Reduce distractions (cords, minor blemishes, small clutter) to keep the emotion focused
Apart from prior guides, you can also check out our tutorial on how to remove an object in Adobe Photoshop.
Once the gallery has built warmth and momentum, the next step is delivering the “payoff” shots that deepen desire.
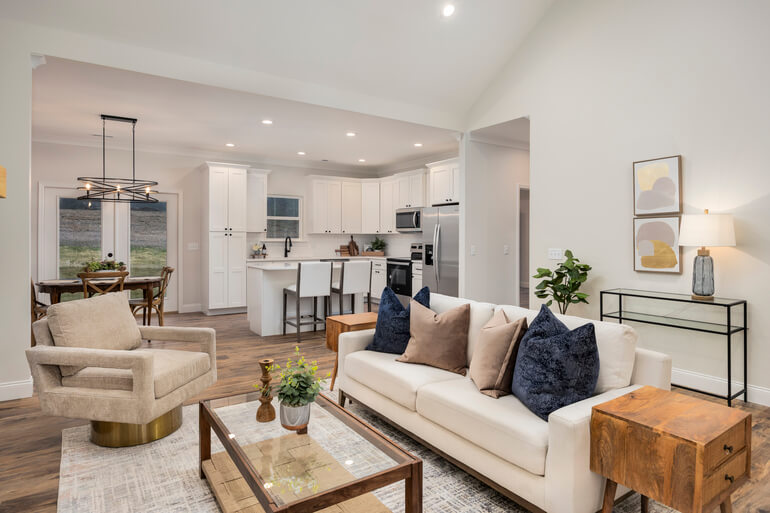
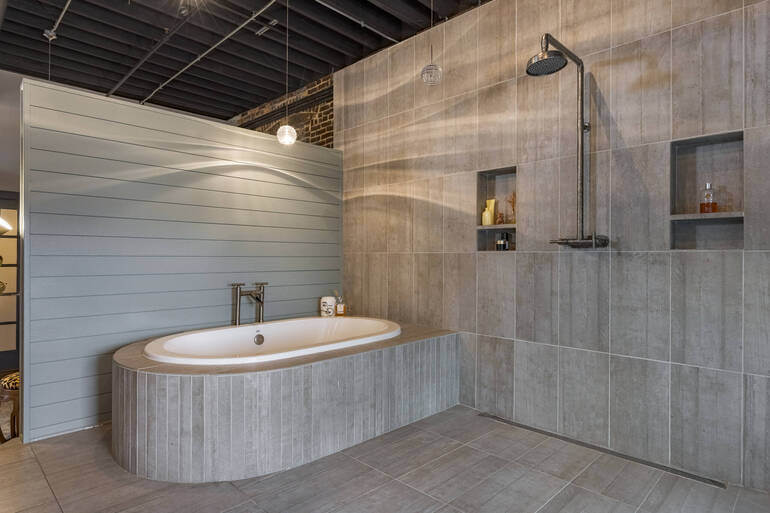
4. Use a “Wow Moment” Mid-Sequence: The Emotional Peak 🌟🏊♂️
Just like a movie, your photo sequence benefits from a high point—an image that feels like a reward for continuing.
The wow moment could be:
- Stunning kitchen angle (best composition and light)
- Dramatic vaulted living room shot
- Luxurious primary suite angle
- Pool + patio scene
- View shot (ocean, mountains, skyline)


Where should it go? Often, around 6–10 images in, once the viewer has context.
If you start with your best interior angle too early, you may “peak” too soon. If you bury it at the end, some buyers won’t get there.
Consider these editing tips to make the wow moment land:
- Prioritize clean window masking and believable exterior views
- Ensure highlight recovery and shadow detail look natural
- Remove small visual clutter that competes with the focal point
- Also, consider a subtle vignette or localized brightening to guide attention (tastefully—buyers should never notice the technique)
After the emotional peak, you don’t want the gallery to fall off a cliff. The next transition concerns maintaining interest as you move into private spaces.
Have You Ever Thought To
Outsource Photo Editing?
Try it today with 5 free edits from three professional photo editors.

5. Shift Into Private Spaces Smoothly: Bedrooms & Bathrooms 🛏️🛁


Now that the buyer is emotionally invested, they’re ready to explore the personal zones. The sequencing goal here is calm, clarity, and continuity.
A smooth flow might be:
- Primary bedroom → primary bath → closet
- Secondary bedrooms (grouped together)
- Secondary bathrooms (near the bedrooms they serve)

Try not to scatter bedrooms randomly between kitchen angles or exteriors. That can feel chaotic and reduce the “tour” effect.
Here are some powerful editing tips for emotional comfort:
- Keep bedroom tones soft and inviting—avoid aggressive sharpening
- Maintain consistent brightness so rooms don’t feel smaller than they are
- Watch color casts from lamps, TVs, or mixed lighting—clean WB matters here
- Bathrooms should feel fresh: neutral whites, clean reflections, and controlled highlights
To learn more, check out our guide on how to remove color cast in Photoshop.
At this point, your viewer feels like they understand the home. Now you can expand the story by showing what supports the lifestyle behind the scenes.
6. Don’t Skip Utility Spaces—Just Sequence Them Strategically 🧺🚗

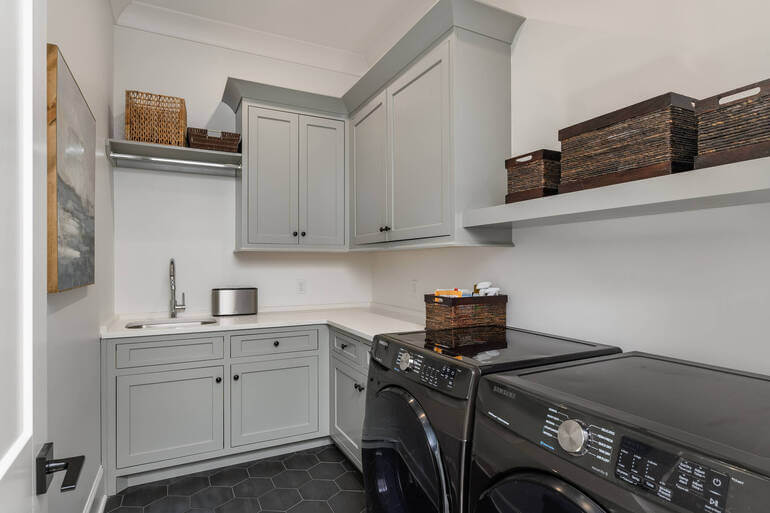
Laundry rooms, garages, storage areas, mudrooms, and mechanical spaces rarely drive emotion—but they do build confidence.
Buyers like seeing that a home is practical and well-maintained. The trick is placement:
- Add them after the emotional core and private spaces
- Keep them tight (1–2 images each, if they’re clean and relevant)
- But don’t let them interrupt the “dream” portion of the story

Real estate photo editing tips include:
- Correct verticals and brighten slightly for clarity
- Reduce harsh shadows
- Remove small distractions if they feel messy (within ethical listing standards)
Once the interior narrative is complete, your final act is about closing the loop—ending on a feeling, not a checklist.
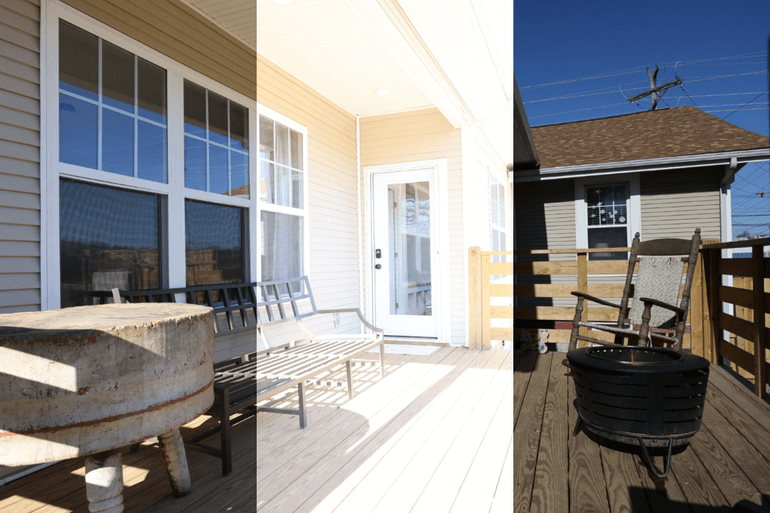
7. Finish With the “Lifestyle Finale”: Backyard, Amenities, Neighborhood 🌴🌇

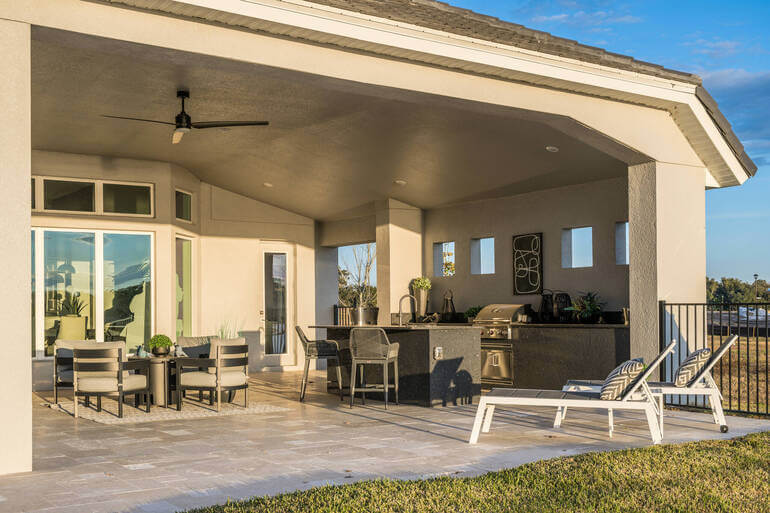
The closing images should leave the viewer with a sense of possibility. Depending on the property, your finale might include:
- Backyard/patio
- Pool and entertaining areas
- Sunset or twilight exterior
- Community amenities (if photographed)
- And proximity features (walkability, views, shared spaces)


Ending on lifestyle creates a lingering emotional impression—This is where weekends happen. This is the view they’ll wake up to. This is the place they’ll host friends.
Consider these real estate photo editing tips for a strong ending:
- Keep greens natural and skies believable
- Enhance water (pools/lakes) with clarity and clean tones—no neon
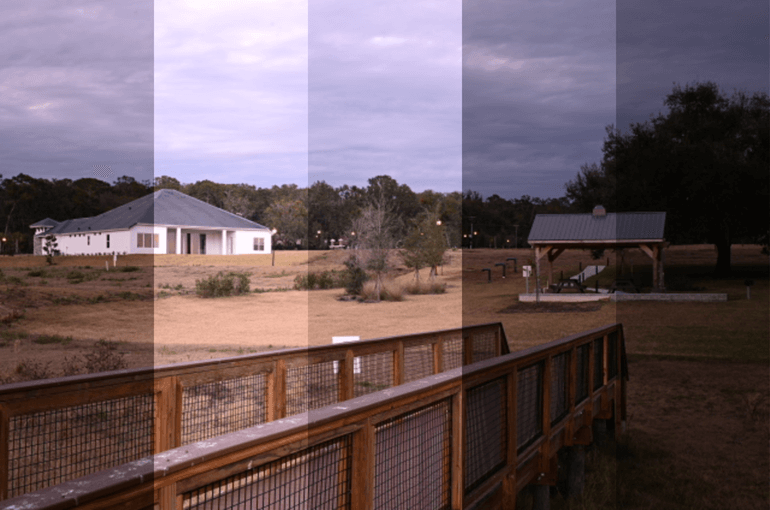
- Consider twilight editing to create a cinematic final image when appropriate
- Ensure all outdoor shots match the same season and lighting vibe as much as possible
These tutorials will help you when creating a lifestyle finale:
- How to Create a Lush Green Lawn in Photoshop and Boost Curb Appeal
- How to Create Stunning Twilight Photos Without an Evening Shoot
Now, let’s talk about the editing decisions that make sequencing feel seamless from start to finish.
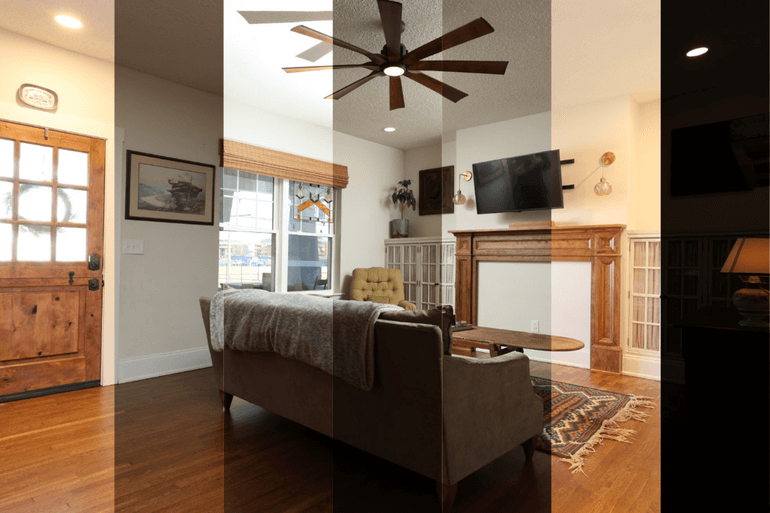
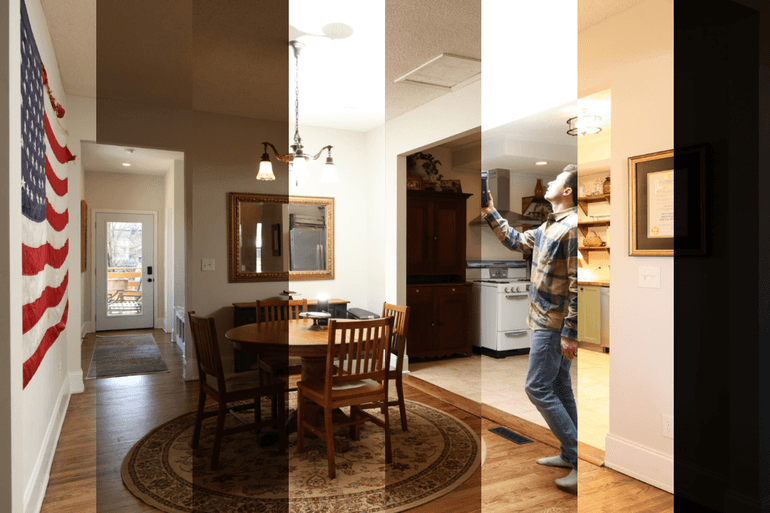
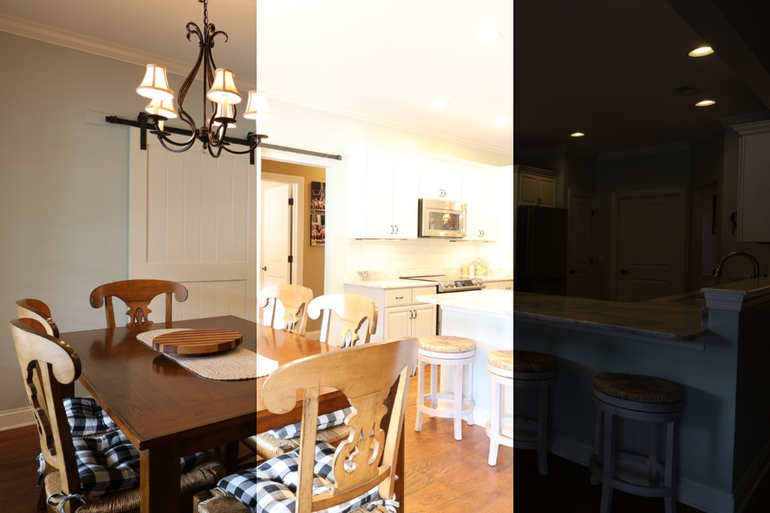
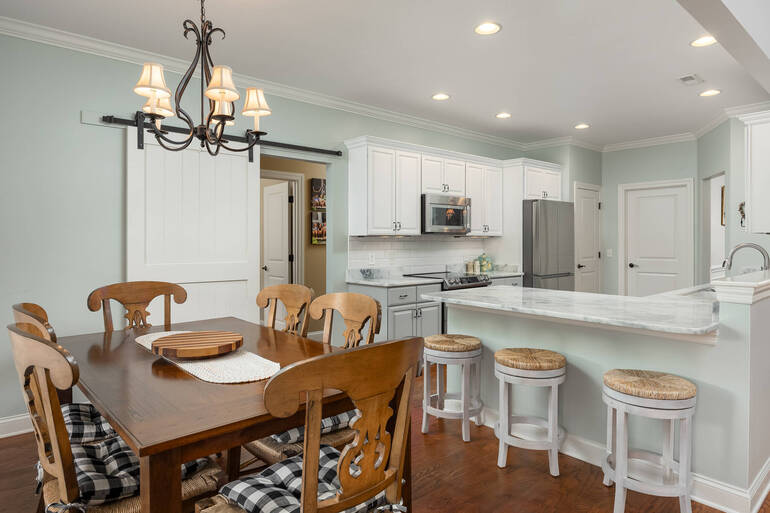
8. The Hidden Secret: Consistency Is What Makes Sequencing Emotional 🎯🎨


Sequencing can’t do its job if the edit style changes dramatically from image to image. Emotional appeal comes from continuity—when the gallery feels like one cohesive experience.
To support that, aim for:
- Consistent brightness across a set (avoid one image looking dark and the next looking overexposed)
- Unified color temperature (warmth vs coolness shouldn’t swing wildly)
- Stable verticals/perspective (so rooms feel coherent and professional)
- Matched window views (so the time-of-day feels believable)
- Controlled HDR (natural detail, not crunchy textures)
Think of it this way: if every photo feels like it belongs to a different property—or a different photographer—the emotional story breaks.
A Simple Sequencing Blueprint You Can Use Every Time📋
If you want an easy, repeatable framework, try this:
- Hero exterior (promise)
- Supporting exterior (context)
- Entry/foyer (welcome)
4–8. Main living + kitchen + dining (lifestyle core) - Wow moment (emotional peak)
10–14. Primary suite + key bedrooms/baths (personal connection)
15–17. Utility spaces (confidence)
18–Last. Backyard/amenities + twilight closer (final feeling)
You can adjust the count depending on the size of the listing, but the emotional arc stays the same: hook → tour → peak → intimacy → reassurance → lifestyle finish.
When your editing is consistent, and your sequencing is intentional, you don’t just present a property—you create a feeling buyers remember.
And with PhotoUp supporting your post-processing workflow, it becomes much easier to deliver that emotional impact on every listing, at scale. Let’s tell you more!
Have You Ever Thought To
Outsource Photo Editing?
Try it today with 5 free edits from three professional photo editors.
How PhotoUp Helps You Build Emotional Appeal🏠


Sequencing works best when the entire image set is cohesive—clean tones, consistent lighting, realistic details, and a polished style that doesn’t distract from the home’s story.
That’s exactly where PhotoUp can help.
With PhotoUp, real estate photographers can outsource the heavy lifting, like:
- Exposure balancing
- Color correction
- Window masking
- Object removal
- Sky replacement
- Lawn enhancement
- And even day-to-dusk conversion
This makes every image in the set feel like it belongs to the same cinematic walkthrough.
Instead of spending hours trying to match tones across 25–40 photos, you can focus on what actually drives bookings and buyer emotion:
Capturing strong compositions and delivering a gallery that flows like a guided tour.
A One-Stop Shop for Real Estate Marketing
Additionally, PhotoUp offers other powerful real estate marketing services like:
Adding these additional services to your toolkit will allow you to expand your product offerings and become more valuable to your agent clients.
Together with PhotoUp, you can quickly grow and scale your business!
How to Get Started
Here’s a step-by-step guide to using PhotoUp:
Step 1. Sign up for a free PhotoUp account.
Step 2. Upload your photos to our easy-to-use software.
Step 3. Choose the level of editing that you need and provide instructions (optional).
Step 4. Wait for PhotoUp professional editors to edit and return the photos in less than 24 hours.
Step 5. Download and start using your beautifully edited photos.
PhotoUp Real Estate Photo Editing Uploader Demo
Watch how easy it is to get started with PhotoUp in our real estate photo editing uploader demo:
It’s as simple as 1-2-3!
Sign up for a free PhotoUp account today and let our expert editors help you create emotionally appealing real estate photos that attract more buyers and close deals faster.
For a limited time, you’ll even get 10 free credits when signing up for an account, which you can apply to any of our services.
We hope this blog post helped you learn how to build emotional appeal with sequencing in real estate photo editing. Before you go, you may also want to check out some related resources:
- A Complete Real Estate Photo Editing Tutorial for Beginners
- How to Quickly & Easily Edit Real Estate Photos on Your Phone
- The Hidden ROI of Real Estate Photo Editing: What the Data Says
- The #1 Edit to Create Stunning Real Estate Photos
- What Sets High-End Real Estate Photo Editing Apart? (9 Luxury Editing Tips)

