


Are you wondering how to edit real estate photos like a professional editor?
The quality of the listing photos is crucial in real estate sales and marketing. Therefore, knowing how to best edit real estate photos is a must.
Most real estate photographers are familiar with and use Adobe Lightroom and Photoshop to do their editing.
In this article, we’ll show you 21 Photoshop and Lightroom tips for how to edit real estate photos like a professional.
21 Tips for How to Edit Real Estate Photos Like a Pro!
Here are our top 21 techniques on how to edit real estate photos in Lightroom and Photoshop.
1. How to Edit Real Estate Photos – First Get Everything Organized

When it comes to real estate photo editing, before you jump into editing your photos, you must get organized. This step is necessary if you hope to establish an efficient process and workflow.
Creating a storage system with proper labeling, and dating of photo collections will save you valuable time later.
First, create a folder structure to keep your original photos in some sort of logical order. It’s likely best to label the folders by property address or project name.
Second, you also want to date your original photos and the edited files as you go. This way the most recent images will appear in the right sequence when sifting through your folders.
If you’re just starting and don’t have that many images, the above steps may seem unnecessary. However, you’ll thank yourself later if you get organized now.
Don’t overly worry that you might want to organize things differently later on. The fact is, any system is better than no system!
2. Establish a Streamlined Editing Process

Establishing an easy-to-follow editing process, and then following it as you go, will also save you time and effort.
Once you start editing images, map out a step-by-step process. By following the same steps each time, you’ll develop a routine and rhythm for your editing.
For example, many photographers start by cropping their photos. This makes much sense. You don’t want to perform all sorts of editing steps only to crop them out of the image later.
After cropping, then move on to color adjustments, highlights, shadow correction, and so on. By repeating the same edits in the same order you’ll increase your speed over time.
Some photographers follow the Develop Module panel in Lightroom. They establish the settings in the Basic panel first, then go down the list.
Feel free to skip over the settings you don’t need or that don’t apply to your photographic style. After all, part of knowing how to edit real estate photos is knowing what you can skip.
3. Aim for Consistency

The consistency of your images matters both for the sake of your professional branding as well as for sustaining the quality of your work.
As you learn more about how to edit real estate photos your awareness of image preference will increase, contributing to the development of your unique style.
Maintaining a consistent editing approach is beneficial for achieving a polished and organized appearance across websites and social media posts, creating an overall sense of refinement.
Most editing software includes features to save your adjustments, such as contrast, shadows, highlights, and tone curves, as a template or preset. This allows you to efficiently apply the same edits to multiple images.
While presets are valuable for giving a cohesive feel to a batch of images, it’s important to note that they may not be a one-size-fits-all solution.
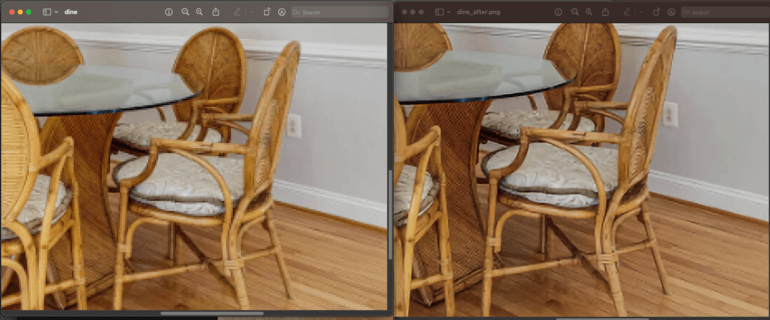
4. Color Adjustment and Correction

To begin, it’s likely best to start with brightness and color correction. These edits are foundational and are usually needed for every image.
Both Lightroom and Photoshop have easy-to-use correction tools, so this step should not be overly difficult. Even with proper lighting and using a flash, original real estate photos tend to appear on the darker side.
Yet with just a few clicks, these seemingly basic edits can elevate a photograph from appearing dull and unremarkable to a vibrant and visually appealing asset.
Remember, the goal is captivating images that grab the attention of potential buyers and help sell your clients’ listings.
5. Adjusting Saturation Levels

Managing color saturation is a crucial aspect of knowing how to edit real estate photos.
A photo may exhibit over- or under-saturation due to various factors, such as natural or artificial lighting, camera settings, and the potential use of flash.
Color plays a significant role in real estate photography. Buyers’ attention can be gained with stunning, rich colors. Still, you don’t want to overdo it.
Fortunately, most photo editing software programs offer a straightforward solution. With just a few clicks of the mouse, you can easily correct the color levels in any image, transforming them into vibrant and visually appealing compositions.
6. Avoid Over Sharpening
It’s undeniable that we’ve all made this mistake when starting out. Sharpening is a powerful tool to enhance an image and draw the audience’s attention.
However, overdoing it is a widespread photo editing error we’ve likely encountered or committed ourselves on the internet.
Here’s a pro tip: Once you’ve adjusted the sharpening to your liking, consider reducing it by approximately 10%. In this case, less is more.
Take a step back from your image and assess whether it still looks natural or starts to resemble something alien. If it maintains a natural appearance, congratulations – you’ve successfully mastered the art of sharpening your image.
For more details, check out our video tutorial on how to sharpen an image in Photoshop:
7. Be Careful With Contrast

Contrast and exposure serve as a valuable tools to add definition and a professional, attractive look to your images.
However, mishandling contrast adjustment can result in one of the most noticeable photo editing errors.
When you elevate contrast, you intensify the darkness in the image, potentially obscuring essential details. Overdoing it not only fails to enhance definition but may lead to the loss of all intricate details, resulting in a flat image.
It’s crucial to bear in mind that once details are lost, they cannot be recovered. Therefore, this is one of the most significant and irreversible photo editing mistakes to avoid.
8. Line Straightening and Horizon Correction

When photographing real estate, precision with lines is crucial. It’s essential to ensure that both horizontal and vertical lines align seamlessly.
One common challenge in real estate photography is the occurrence of non-converging vertical and horizontal lines. Distortions can arise due to factors such as lens curvature, room shape, furnishings, and camera positioning.
Fortunately, this issue can be rectified during post-processing through a straightforward retouch known as perspective correction.
This editing technique addresses distortions and aligns horizontal lines and perspectives with the image frame, resulting in a more natural-looking photo.
In Photoshop, you can employ the Free Transform Tool to perform this correction. Select the entire image and drag the corner opposite to the direction in which the lines are leaning.
For a demonstration of an alternative method for aligning verticals, take a look at our video tutorial on straightening verticals in Photoshop:
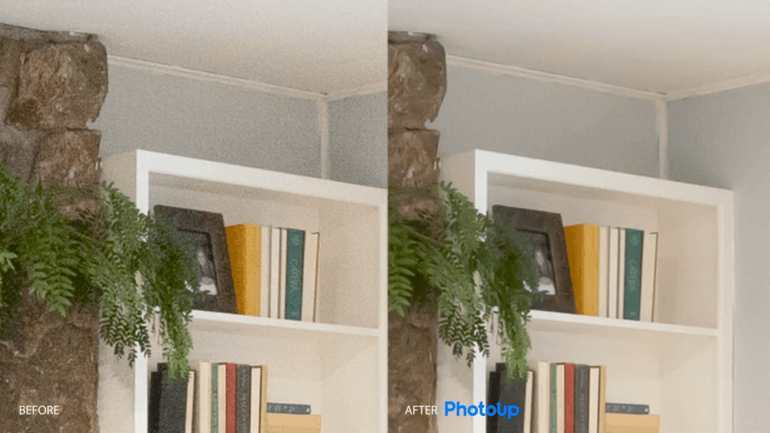
9. Remove Unwanted Objects


In real estate photography, it’s common to encounter unwanted objects that need to be removed to enhance the overall image.
Instances where object removal may be necessary include:
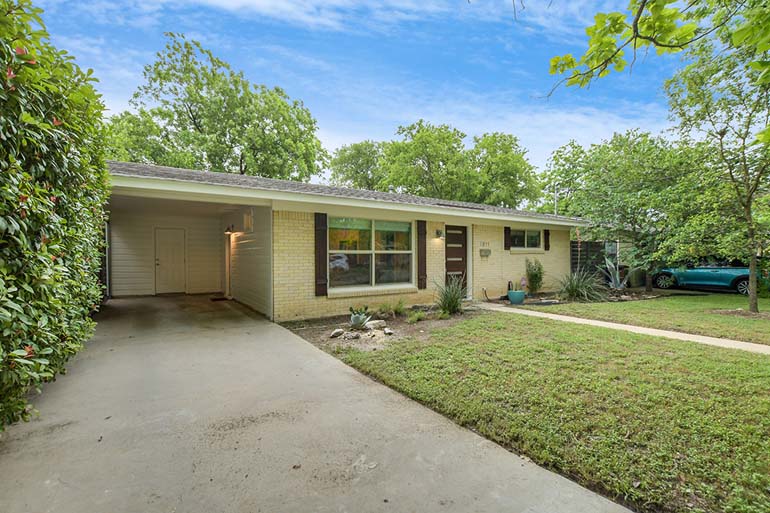
- A car blocking the scenic garden view in the driveway
- Exposed TV cords adding clutter to an image
- An overlooked old frying pan diminishing the appeal of an otherwise perfect granite counter
- Unsightly cracks in the bathtub or peeling wallpaper in the kitchen
- Unintended presence of individuals or pets passing by during the shot
Fortunately, addressing these issues is achievable through Photoshop, utilizing the Clone Stamp Tool.
Simply select the Clone Stamp Tool, press the Alt key to designate a source area, and proceed to clone and remove the unwanted object.
For more expert tips, refer to our video tutorial demonstrating how to remove a car from a driveway in Photoshop:
10. How to Edit Real Estate Photos – Adding Interesting Objects

When reviewing your real estate photos, you might spot opportunities to enhance the image by adding specific items.
Consider the following common examples:
- Adding a vase of flowers to a dining room table or kitchen counter
- Introducing a warm fire in the fireplace
- Placing a cozy bench on the front patio
- Enhancing outdoor furniture with colorful throw pillows
Be creative and feel free to explore various objects that will add drama and value to your photos.
For instance, here’s a video on how to add furniture and decor with the help of AI virtual staging:
Have You Ever Thought To
Outsource Photo Editing?
Try it today with 5 free edits from three professional photo editors.

11. Make Minor Repairs and Fixes

In real estate photography, the careful use of photo editing tools can work wonders in making minor repairs and improvements to property images.
Common issues like wrinkled bed covers, furniture scratches, and other small imperfections that may detract from a property’s appeal can be easily addressed through editing software.
The Healing Brush or Spot Healing Tool can quickly remove unsightly marks, while the Clone Stamp Tool allows for duplication of surrounding areas to cover imperfections.
By addressing minor repairs through photo editing, real estate professionals can present a polished and visually appealing representation of a property, capturing the attention of potential buyers.
12. Remove Color Cast

Color cast flaws can be a significant drawback, particularly in the real estate photography realm where captivating images of perfect color tone are paramount.
Put simply, a color cast issue is an undesired tint of a specific color in a photograph that can be distracting.
Various situations can contribute to improper color cast:
- Fluorescent bulbs may introduce a bluish tinge
- Tinted windows can alter the color of a beige-colored wall
- Overcast skies outside can dull the brightness of a room’s interior
- Camera color settings may impact the natural colors of a home
Fortunately, knowing how to edit real estate photos, it’s possible to restore the original color by employing two simple techniques that neutralize and remove unwanted tints.
Explore our video tutorial for detailed guidance on effortlessly removing color cast from real estate images in Photoshop:
13. Reduce Noise
The presence of noise or grain shows up as haze, small lines, and blurs, all compromising the clarity and appeal of an image.
This phenomenon causes otherwise beautiful photos to appear grainy and unattractive.
Various factors contribute to the occurrence of noise, including low light settings, errors in pixel density, exposure time, or sensor size.
Fortunately, rectifying this issue is relatively straightforward. In Photoshop, you can navigate to the Filter menu and select Noise > Reduce Noise.
The outcome is a photo that is clearer, richer, and more visually appealing, as the unwanted noise is effectively toned down.
To learn more, read our blog post about reducing noise in real estate photos or watch the tutorial video below:
14. How to Edit Real Estate Photos – HDR Editing
The high-dynamic range (HDR) technique is a popular method employed by many real estate photographers to improve exposure, lighting, and the range of depth and details in their images.
This technique involves capturing multiple images of the same subject at different exposures and subsequently merging them in post-processing to create a seamlessly blended final image.
To produce HDR images, it is recommended to shoot at least three bracketed images with varying exposures. The next step involves merging these photos to showcase a broader spectrum of highlights and shadows.
For a more comprehensive guide on editing HDR photos in Lightroom, we invite you to check out our video tutorial, where detailed instructions and insights are provided:
15. How to Edit Real Estate Photos – Adjusting Any Shadows


Photographing real estate interiors and exteriors often presents challenges with shadows and uneven lighting.
Although shadows can contribute to contrast and dimension, they may sometimes distract from the overall professionalism of your real estate photography.
To address this issue, Lightroom provides a solution. You can refine your images by adjusting settings such as shadows, highlights, whites, and blacks. Specifically, drag the Shadows Bar to the right to gently alleviate the impact of shadows.
For additional techniques, watch our brief video tutorial on removing flash shadows in Photoshop. It provides valuable tips to enhance your real estate photography by effectively managing shadows:
16. Window Masking


Excessive glare and unwanted blurring frequently arise when an abundance of natural light streams through a room’s windows.
Additionally, distractions may emerge from the presence of distracting blinds, or the windows themselves might be marred by dirt, smudges, or streaks.
In such instances, the technique of window masking becomes an invaluable tool in the realm of photo editing. This technique not only lessens the effects of glare and blurring but also offers the ability to entirely transform the view through the window.
By strategically employing window masking, photographers can enhance the visual appeal of their images, ensuring that the outside scenery complements the overall composition of the photograph.
Whether it’s moderating glare, addressing distractions, or altering the view, window masking stands as an effective solution to enhance the aesthetics of real estate photography.
Check out our video demo on how to quickly and easily do window masking:
17. How to Edit Real Estate Photos – Eliminating Ghosting Effects
Ghosting, often caused by moving objects such as swaying tree leaves or unwanted movement when shooting bracketed images for HDR photography, is a common challenge in real estate photography.
The result of ghosting is blurring, which can compromise the professional quality of the images.
With bracketed HDR images, the movement of something like tree branches from one exposure to the next can lead to a ghosting effect in the final blended image.
While this effect can enhance the mood of a photo in certain artistic contexts, in real estate marketing, it detracts from the polished and professional look of the picture.
Fortunately, when learning how to edit real estate photos addressing ghosting issues is a straightforward task in Photoshop for those familiar with the software.
Our video tutorial provides details on removing ghosting, ensuring that real estate photos maintain a polished and finished appearance, free from distracting blurs:
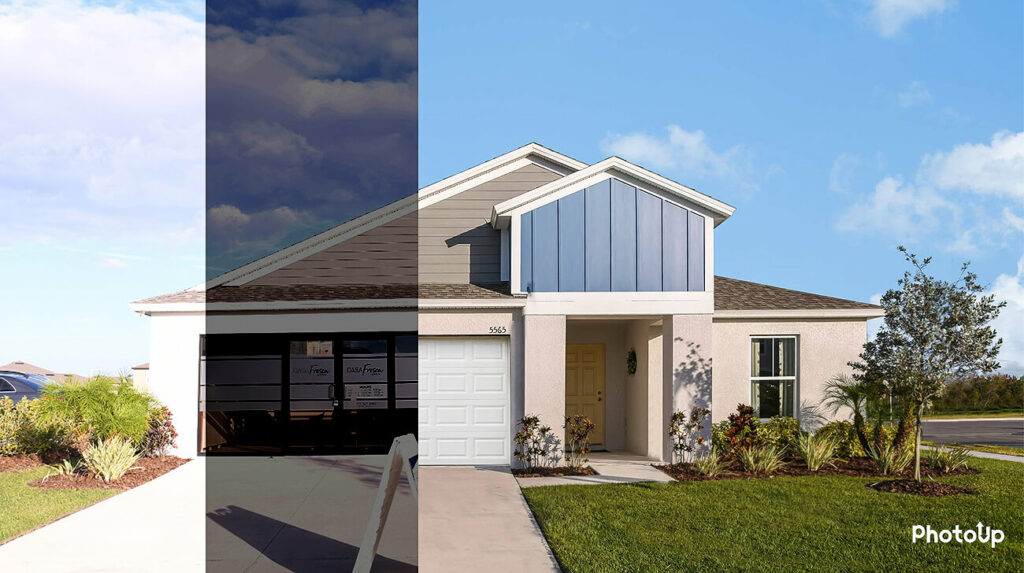
18. Enhance the Photo With a Sky Replacement


Colors come to life under the brilliance of the sun, while gloomy, overcast skies can make your real estate photography look drab.
Fortunately, employing a few simple editing techniques allows you to seamlessly replace a lackluster sky and transform it into a visually stunning backdrop.
A sky replacement in real estate photographs serves several purposes:
- Enhances the property’s visual appeal
- Adds a mood-boosting element to the image
- Provides flexibility by eliminating concerns about weather constraints during the photoshoot
With a handful of tricks, you can effortlessly substitute gray, cloudy, or overcast skies with the radiance of a summery, sunny atmosphere using Photoshop.
Explore our video tutorial for useful tips on sky replacement in Photoshop, helping you improve the overall aesthetic of your real estate photos:
19. How to Edit Real Estate Photos – the Drama of Twilight Effects

Similar to sky replacement, capturing a house at dawn or twilight can enhance the appeal of exterior photos.
However, achieving quality images in such lighting conditions can be challenging. Fortunately, photo editing software provides a solution once again!
Adding twilight effects is a straightforward process, offering several benefits:
- It adds sophistication to the overall look and feel of a property
- Introduces a touch of drama or serves as a mood booster for the scene
- Limits concerns about weather or the specific time of day for conducting the photoshoot
In just a few simple steps, you can effortlessly add twilight effects to your real estate photos, raising them to a new level of stunning visual appeal.
Our article on adding twilight effects will help you learn how to edit real estate photos using this technique. Or you can check out this video tutorial on how to edit a day to dusk image:
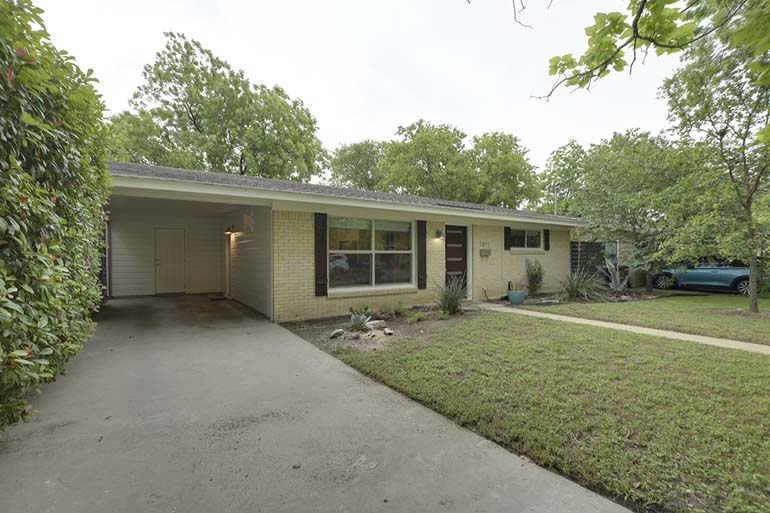
20. Exterior and Landscaping Enhancement


Few things are as inviting as a lush, green lawn surrounding a home.
However, from time to time you’ll find yourself taking photos during less favorable seasons or dry spells, revealing dead spots or dry, brown grass.
Despite such challenges, the positive news is that Lightroom and Photoshop offer effective tools to restore a healthy color to your lawn.
Check out our video tutorial on mastering the technique of making grass green in Photoshop.
The tutorial provides step-by-step advice on how to edit real estate photos adding visual appeal by using landscape-enhancing techniques:
21. Keep Your Images Realistic


A primary goal of real estate photography is to maintain the natural appearance of the property.
This means avoiding editing extremes and resisting the temptation to overly saturate or render your photos in a cartoonish style.
If you over-edit your photos, they’ll look fake. Oversaturated, color-augmented images are a mistake, because buyers want realistic, accurate images of listings.
When it comes to editing real estate photos, striking the right balance is key—ensuring that your photos remain realistic while still retaining an appealing quality.
Have You Ever Thought To
Outsource Photo Editing?
Try it today with 5 free edits from three professional photo editors.
How to Easily Edit Real Estate Photos With PhotoUp!
Even basic real estate photo editing techniques can be time-consuming. Sitting in front of your computer editing photos all day keeps you from meeting and securing new clients.
There is an effective alternative – you can always outsource your photo editing.
PhotoUp has a team of highly talented real estate photo editors who are ready to professionally edit and enhance your listing photos.
And it’s so easy to get started. Take a look at our photo uploader video tutorial to see how simple it is:
But even better than how easy it is, it’s also extremely affordable. Our photo editing services start at a low cost of $1.10 per image depending on the subscription.
Dedicated Photo Editing
We also offer dedicated photo editing services. A dedicated editor learns your style and approach and provides consistency while improving turnaround times.
You’ll also be surprised at how dedicated photo editing can save you money.
Consider this – on average, a dedicated editor outputs 1,800+ edits per month, at a final cost of $0.72 per edit. We have even seen $0.50 per edit.
Working with a dedicated photo editor is not only affordable, it will save you countless hours while also boosting your image quality!
Browse Top Dedicated
Real Estate Photo Editors
Ready-to-hire editors for real estate photo editing, and more.
Full-Service Real Estate Visual Marketing

And our services aren’t limited to just photo editing. PhotoUp is a full-service real estate marketing company offering all of the following:
So, take the next step and sign up for a free PhotoUp account, and let us help you grow your business.
We hope this post helped you learn how to edit real estate photos like a pro using our top 21 techniques. If you found this post useful, you should also check out the following resources:

