


Table of Contents
- Real Estate Photo Editing 101: Why Is It Important?
- Top 10 Real Estate Photo Editing Techniques
- What Types of Photo Edits Aren’t Allowed
- Let PhotoUp Enhance Your Real Estate Photography
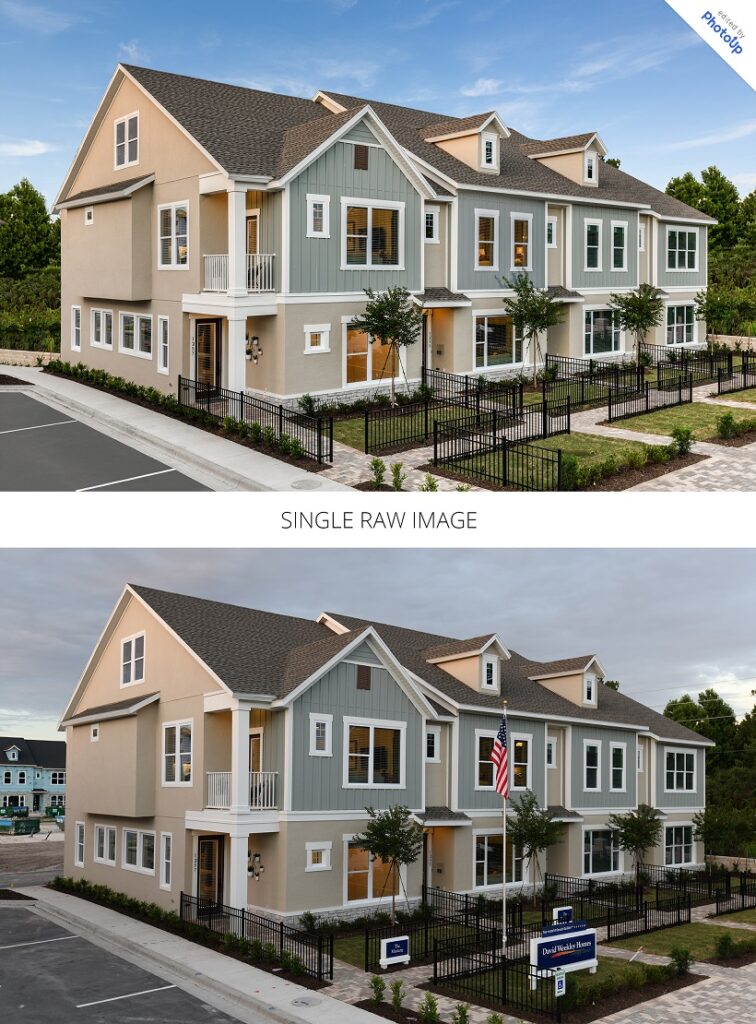
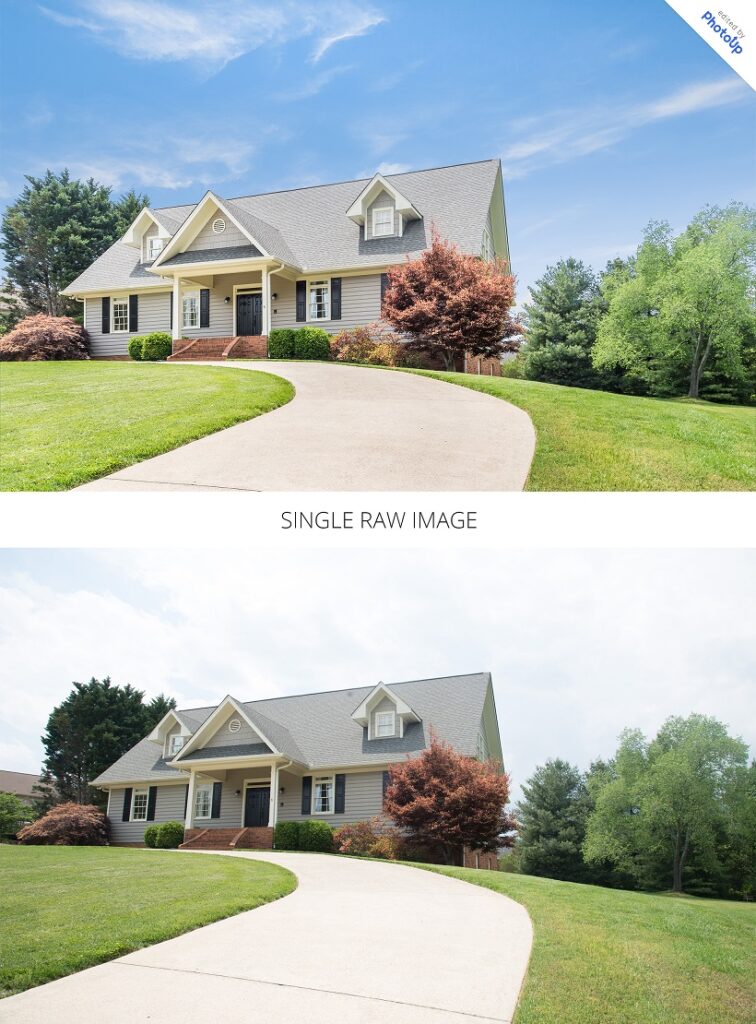
Are you wondering what the most commonly used real estate photo editing techniques are and how to execute these?
Even with the best camera equipment, the best skills and correct settings, your real estate photos sometimes won’t turn out perfect. Harsh shadows, lack of lighting, saturated colors, and unwanted clutter are just some of the imperfections that you’d want to get rid of to boost your image quality.
Luckily, there are different techniques that real estate photographers can use in order to retouch their photos and make them look top notch.
In this post, we’ll share our top 10 real estate photo editing techniques to help you enhance your property images. But first, let’s take a look at why photo editing is so important in real estate.
Real Estate Photo Editing 101: Why Is It Important?

In real estate photography, presenting high-quality images is imperative to attract buyers. So, not taking the extra time to make final edits that can boost image quality will shoot you in the foot in the long run and stop you from getting more clients.
Consider this…
…in 2021, 97% of people used the internet to search for a home and expected to see captivating photos of properties that’d fire up their interest before visiting the property. Or, even make them get in touch with the agent to request more information and schedule a viewing.
Your real estate photography is what will help get potential buyers in the door and sell the home, which means more satisfied and returning clients for your business.
This is why photo editing is a crucial aspect of any real estate photography business. It allows you to improve lightning, remove unflattering objects, enhance colors, align verticals, and more, so you can produce “picture perfect” photos.
By using Photoshop and Lightroom, you’ll find it possible to achieve that final look you are aiming for without going overboard. Let’s take a look at how to do that next.
Top 10 Real Estate Photo Editing Techniques
Here are our top 10 real estate photo editing techniques to enhance your images.
1. Color Correction

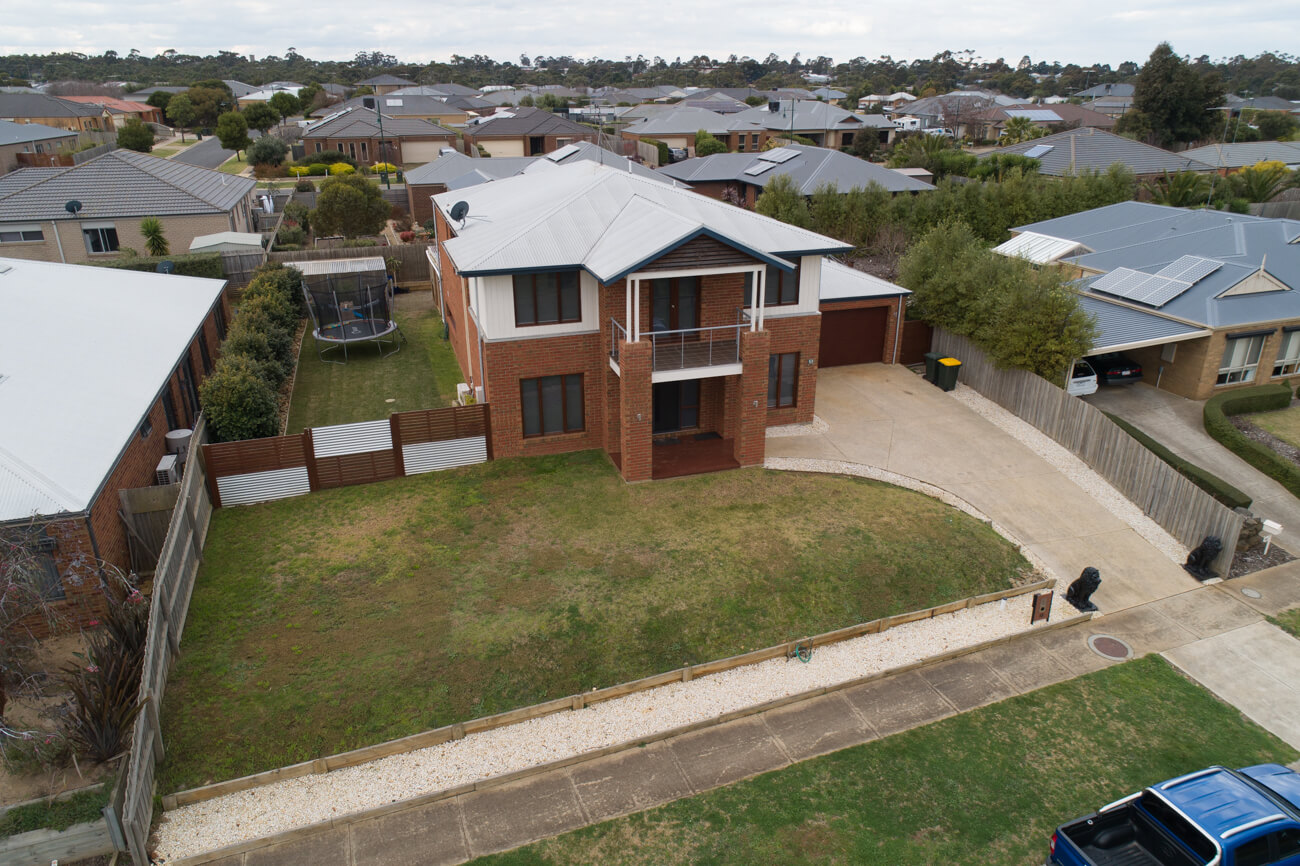
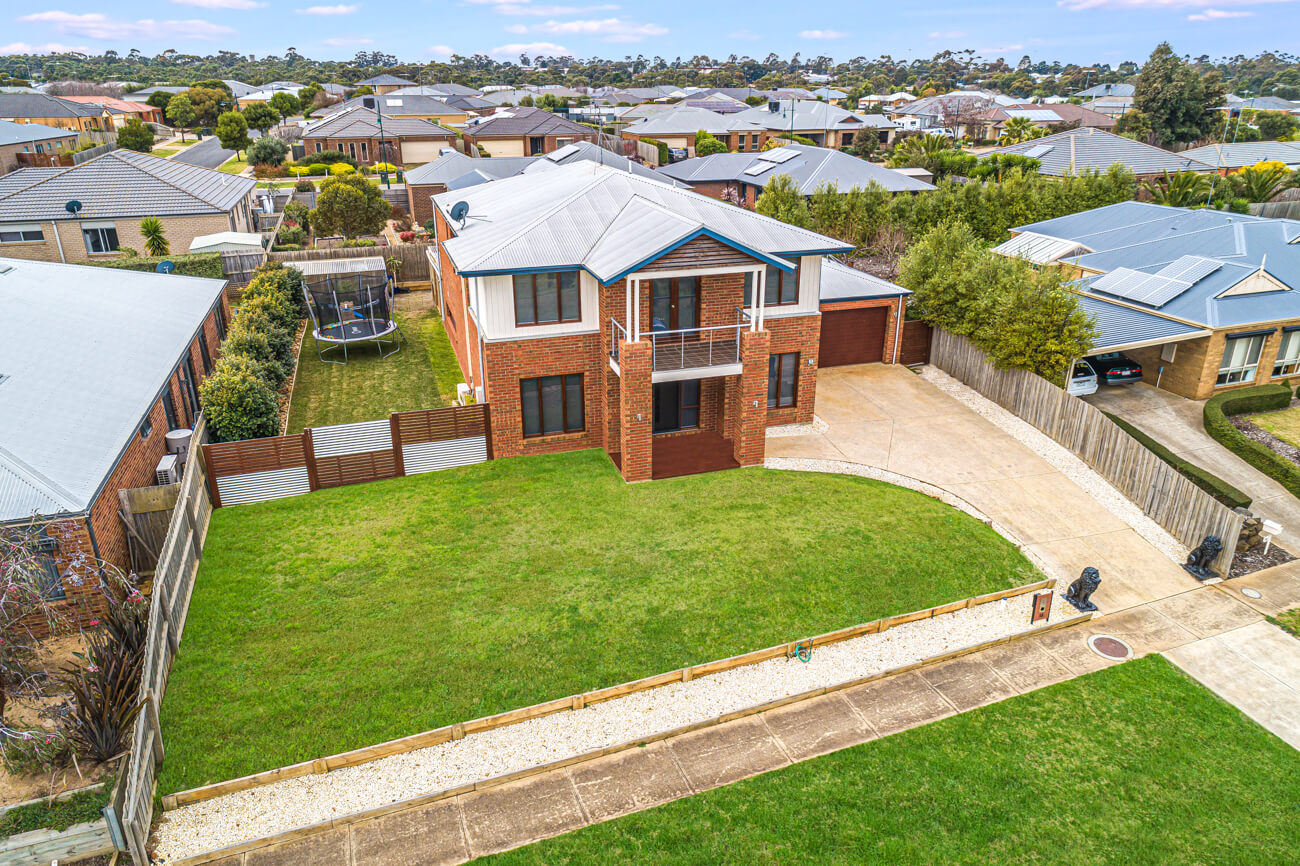
Adjusting the color and brightness is the backbone of all image enhancement. Interior lighting, window tint, outside weather conditions, camera settings, and other factors can affect the color of the property in the photo.
Color edits can be done in Lightroom and Photoshop. With a few clicks of a mouse, simple edits such as making adjustments to color, contrast, tone, and sharpness can transform an image from looking bland and boring into a bright and appealing image.
Note: Be wary not to drastically change the colors to the point that it is completely different from that of the actual property itself.
But if done within reason, these basic retouching techniques can turn a mediocre photo into a captivating one that will capture buyers’ attention and help your clients sell their listing.
2. Image Enhancement and Minor Additions


Even the best photographers often fail to capture the image they envision “in camera” with no need for post-processing.
Fortunately, they can safely enhance images by adjusting brightness, contrast, sharpness, white balance, along with other aspects in order to give the image a better overall look and feel.
One example of an image enhancement, also called photo manipulation is to make a dry and patched up lawn look green and fresh. This can significantly help to boost a property’s curb appeal.
To learn how to create a green beautiful lawn, check out our video tutorial on how to make grass green in Photoshop:
Additionally, other things you can do to enhance your photos are:
- Adding a warm and inviting fire to the fireplace
- Fresh modern furniture on the balcony
- Boosting curb appeal with a pool/patio area in the yard with the help of AI virtual staging
- And whatever you can think of to enhance and bring value to your photos


But don’t forget to also include the original photo or marking the image as being “virtually staged” to not mislead buyers. You can learn more about these disclosures in our blog post is virtual staging legal?
If this isn’t anything you want to spend time and effort in doing, you can always outsource your photo editing to PhotoUp’s professional real estate photo editors.
3. Cropping
While this basic edit may seem obvious, cropping the image can improve framing and change the aspect ratio. It can also help to bring more focus on the subject rather than the surrounding areas.
Be careful, however, not to crop out permanent fixtures such as electrical posts, water towers, or other objects that are permanent structures to the home or surrounding area.
High-Quality & Consistent
Real Estate Photo Editing
Hire a dedicated editor with performance metrics from $7/hour.

4. Vertical Correction
When shooting real estate, you need to be extra careful with your lines. Making sure that your images are vertically aligned can have a huge impact on the final look.
Factors such as the curvature of the lens, the shape of the room and items, and even the positioning of the camera can make these lines come out distorted.
Fortunately, you can easily make vertical corrections in Photoshop with a simple retouch called perspective correction.
This editing technique corrects the distortion and misalignment between the horizontal lines and perspective. That is to say, it aligns the lines with the image’s frame to make the photo more natural.
To see how to align verticals, you can check out our video tutorial on how to straighten verticals in Photoshop:
5. Remove Unwanted Objects
It’s rare that you shoot a real estate photo that doesn’t need to be decluttered in one way or another. More often than not, your photos will include unwanted objects that need to be removed to clean up the image.
Some common situations where you may want to remove objects include:
- There is a car in the driveway
- TV cords are all over the place and make the image appear cluttered and messy
- There is an ugly crack in the bathtub, or the wallpaper is coming off in the kitchen
- You failed to notice that someone passed by the property while making the shot
You get the point!
The good news is that these unwanted objects can be edited in Photoshop using the Clone Stamp Tool. For more details, check out this video tutorial on how to remove a car from a driveway in Photoshop:
Or, you can watch how to remove cords and wires from your real estate photos that is using the same technique:
6. Remove Color Cast

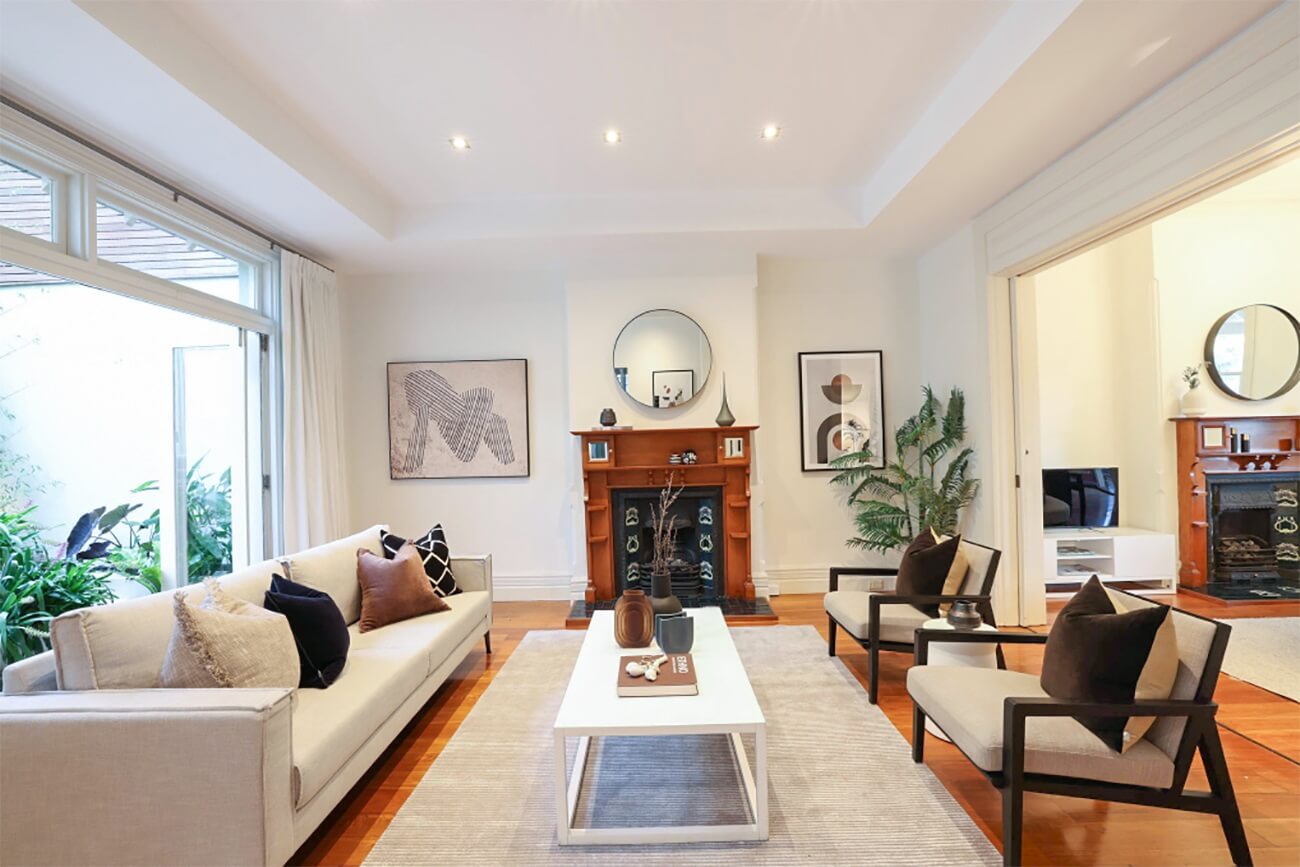
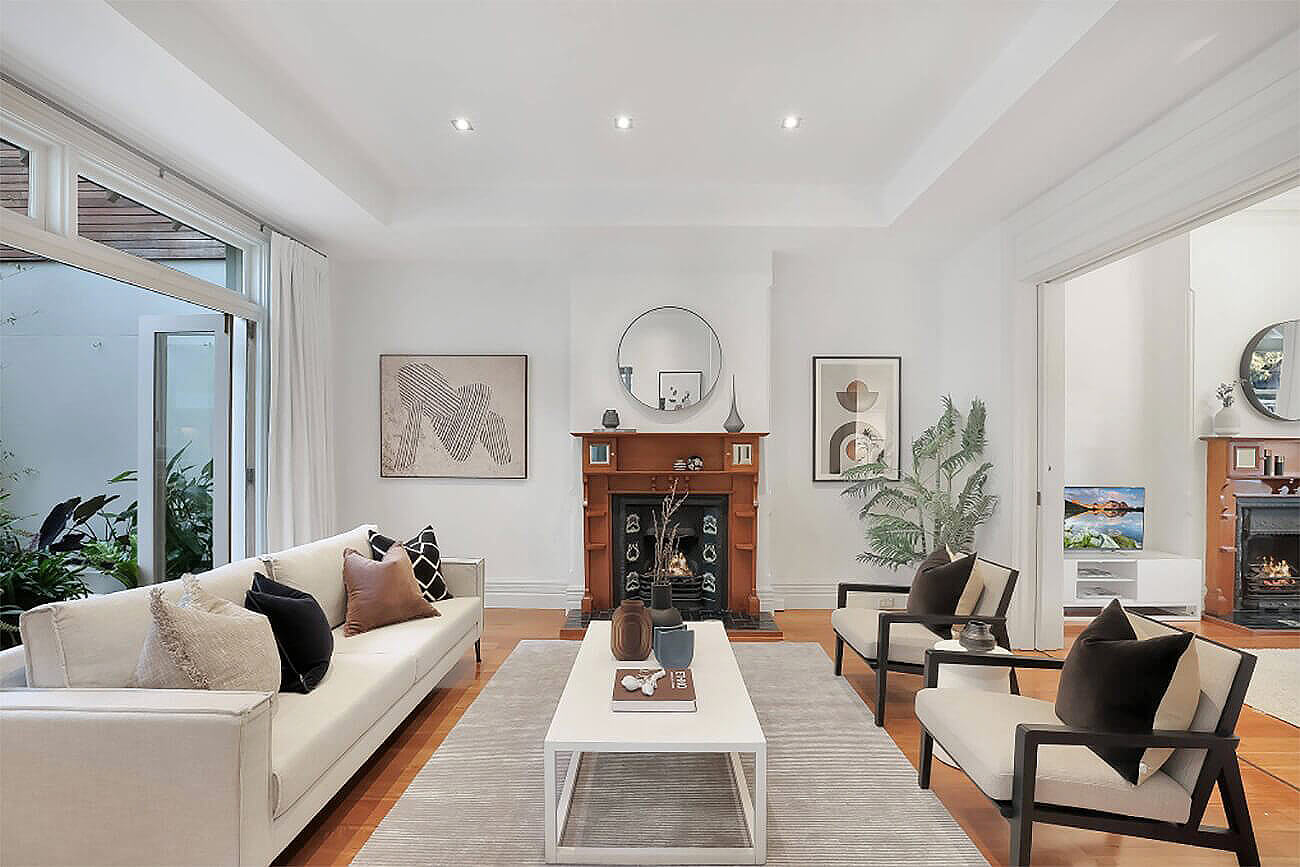
Color cast in a photo can be considered an eyesore, especially in the real estate photography industry, where images need to look extra captivating. It’s a tint of a specific color in a photo that’s unwanted and distracting.
Certain lighting can cause digital cameras and film to give off a certain color cast. Situations where color cast can appear include:
- When fluorescent bulbs are used, which can produce a bluish tinge
- Also, the use of dark window tint films can alter the color of a beige-colored wall
- And gray skies outside may dull an otherwise bright wall inside
- Even the color settings on the camera can affect the natural colors of the home
Fortunately, through editing, you can restore the original color of the subject using two simple techniques. These techniques neutralize and remove the unwanted tint that masks the actual colors.
To learn more, check out our video tutorial on how to easily remove color cast from real estate images in Photoshop:
More Than Industry Leading
Real Estate Photo Editing
PhotoUp is the end-to-end business platform for real estate photographers.
7. Sky Replacement
Making adjustments to the sky is more common than you’d think in real estate photography. That’s because a beautiful sky can make the photo come alive and change the whole mood of the photo.
While gloomy and overcast skies can make your real estate photography look dull, a bright and sunny sky can make it look “picture perfect.”
Overall, a sky replacement can:
- Make the property look more appealing
- Boost the mood of the viewer
- And more importantly, provide photographers more freedom when not having to worry about the weather or the time of day to do the photoshoot
To learn how to replace a gray, cloudy, or overcast winter sky with a bright and sunny one, you can check out our video tutorial on how to do a sky replacement in Photoshop:
8. Noise Reduction

Grain or more commonly called noise appears as millions of hazy dots, which decreases the image’s clarity and quality. Seeing that, makes otherwise beautiful photos look grainy and unappealing.
Noise can be a result of either errors in pixel density, low light settings, exposure time, or even sensor size.
Luckily, it’s an easy fix to adjust that!
In Photoshop, you simply click on the Filter Menu and choose Noise > Reduce Noise.
Additionally, PhotoUp’s professional photo editors can tone down noise through a variety of editing techniques to make your photos clearer, richer, and more appealing.
9. HDR Editing

High-Dynamic-Range or HDR is a technique that many real estate photographers use to create a greater dynamic range of luminosity.
This technique is used to blend multiple images, taken at different exposures, and later combine them in post-processing to create one perfectly blended image.
All you need to do is merge your 3 or more photos into one to create a perfect photo that brings out all the details in the image.
For more details, see our video tutorial on how to edit HDR photos in Lightroom:
10. Remove Flash Shadows
As with all types of photography, you may encounter problems with the shadows and uneven lighting when shooting interiors and exteriors. Especially when using flash.
While shadows can add contrast and dimension to an image, they can also be distracting and make your real estate photography look cheesy and unprofessional.
To remove flash shadows, you can use Lightroom to adjust the shadows and highlights, as well as the whites and blacks.
Check out our video tutorial on how to remove flash shadows in Photoshop to learn this simple technique:
What Types of Photo Edits Aren’t Allowed
Before we leave this topic, we want to share what types of real estate photo edits that aren’t allowed and can get you in trouble.
1. Removing Permanent Fixtures
Removing permanent fixtures such as fire hydrants, railroad tracks, telephone poles, and fences that are positioned along the property is prohibited.
In fact, if erasing such fixtures, you risk being filed with a case of material misrepresentation. To avoid any legal complications, you can shoot from positions and angles that will conceal or minimize these undesirable objects.
2. Providing Unfair Presentation
You are never allowed to mislead the buyer by covering up, for example, holes in the wall in a real estate photography.
Instead, what expert photographers suggest you do is to take a photo that shows the property’s present condition. Then, you can present a touched-up photograph without the hole to give the buyer a glimpse of what the repair would look like.
3. Changing the Background
You might want to change the entire background to make the photo more impressive. For instance, instead of a smog-filled city skyline, you might be tempted to alter it to a pristine seascape.
However, this is a big no no.
It would clearly misrepresent the property, and potential buyers want to see the actual property including its surroundings so that they can make an informed decision.
Just imagine the shock of the property buyer when he finds out that the condominium that supposedly offers a seaside view actually faces a forest of skyscrapers.
While editing images is an integral part of real estate photography, it’s essential to keep them natural-looking.
If you feel the urge to defend a particularly significant edit, then you have probably done more than needed. Remember to always preserve your positive reputation as a real estate photographer by staying clear of misrepresentation.
Have You Ever Thought To
Outsource Photo Editing?
Try it today with 5 free edits from three professional photo editors.
Let PhotoUp Enhance Your Real Estate Photography
When in doubt or if you want to focus your time on shooting more properties instead of making the post processing, PhotoUp’s team of professional real estate photo editors can help take the editing off your hands.
With more than 10 years in the business and several hundred skilled photo editors around the world, it’s hard to beat PhotoUp’s quality, service, and pricing.
Browse Top Dedicated
Real Estate Photo Editors
Ready-to-hire editors for real estate photo editing, and more.
Apart from the standard real estate photo editing services, PhotoUp also offers:
- Real estate photographer websites
- AI Virtual staging
- Single property websites
- Virtual house tours
- Property flyers
- And much more!
We offer quick turnaround time, plus our real estate photo editing services start at the low cost of $1.50.
When signing up for a free PhotoUp account, you’ll get access to our user-friendly photo management system where you can upload and receive photos, send instructions and feedback. As well as track and manage team members and clients, store final images, and more!
To see how easy it is to get started, have a look at our real estate photo editing uploader demo:
It’s really as quick and easy as that!
So, what are you waiting for?
Get started with PhotoUp today, and get 5 free credits that you can apply to any of our services!
We hope this post helped you learn our top 10 real estate photo editing techniques. Use these simple techniques and you’ll enhance your property images beyond expectation in no time.
If you found this post useful, you may also want to check out the following resources:

