


Table of Contents
- Why Good Lighting Matters in Real Estate Photography
- What to Consider When Editing Interior Real Estate Photos
- 7 Photo Editing Techniques for Poorly Lit Interiors
- Editing Poorly Lit Interiors FAQ
- How to Save Time and Money by Outsourcing to PhotoUp
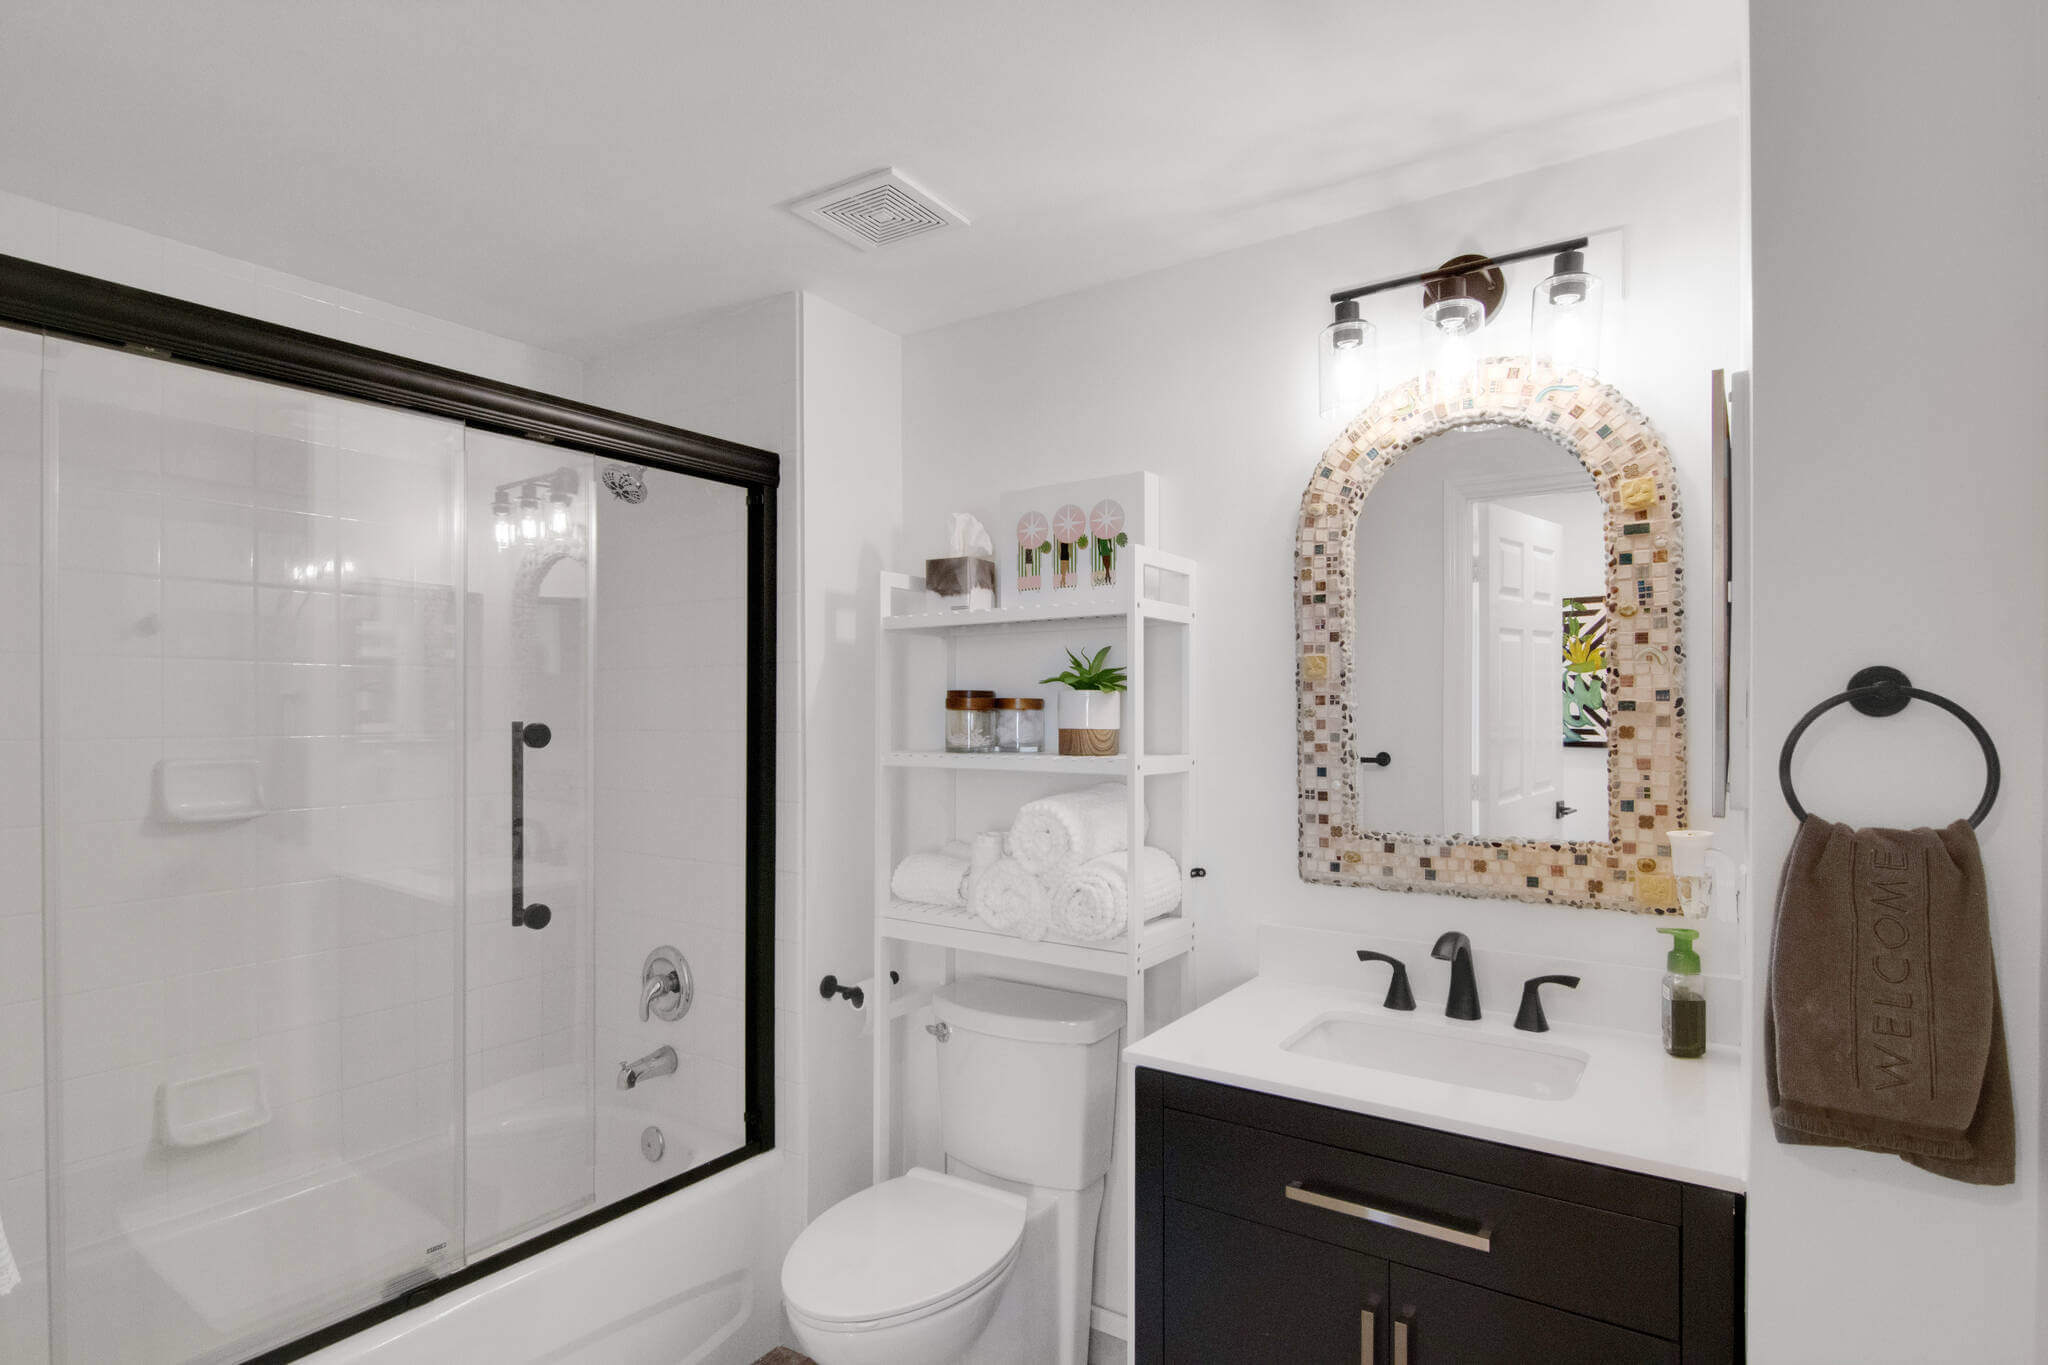
Poor lighting can make even the most stunning interiors look uninviting in real estate photography. Whether caused by dim conditions, awkward shadows, or mixed light sources, editing poorly lit interiors requires a careful balance between enhancement and realism.
In this blog post, we’ll share how to edit interior photos and brighten dark spaces—without making the final image look fake.
Let’s begin by taking a look at why good lighting matters in interior real estate photography.
Why Good Lighting Matters in Real Estate Photography 🔆
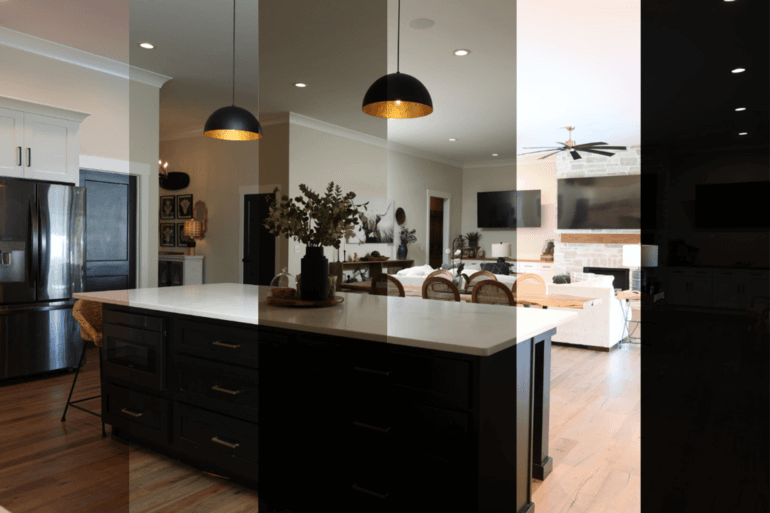
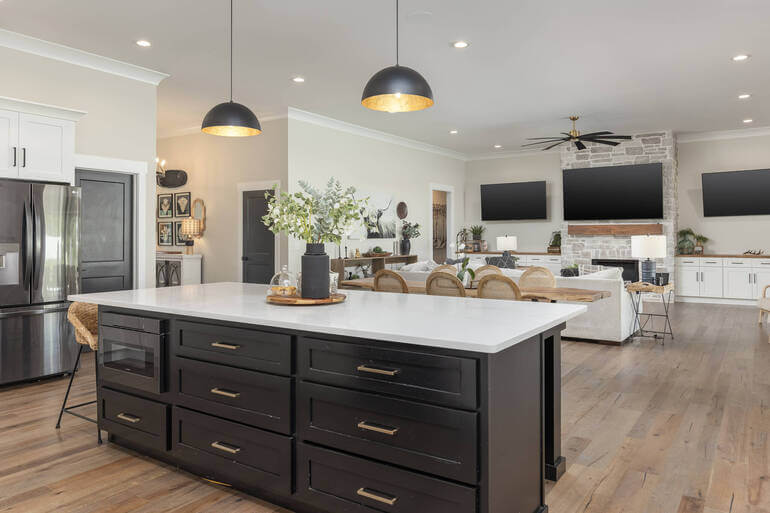
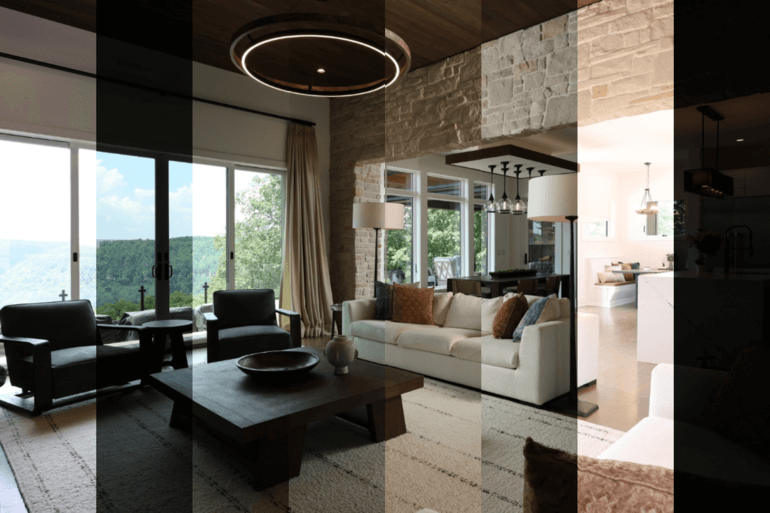
Lighting is the heartbeat of real estate interior photography. A well-lit room doesn’t just look better—it feels bigger, cleaner, and more inviting.
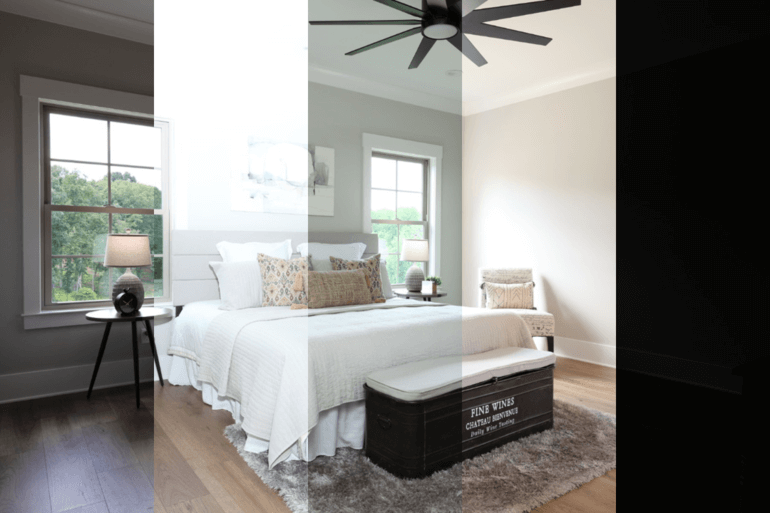
On the flip side, poorly lit interiors can make even the most stunning spaces seem gloomy, cramped, and unappealing to potential buyers.
Buyers browsing online listings make snap decisions. If your images are dark or lack vibrancy, you’re at risk of losing attention in just a few seconds.
Common Interior Lighting Issues
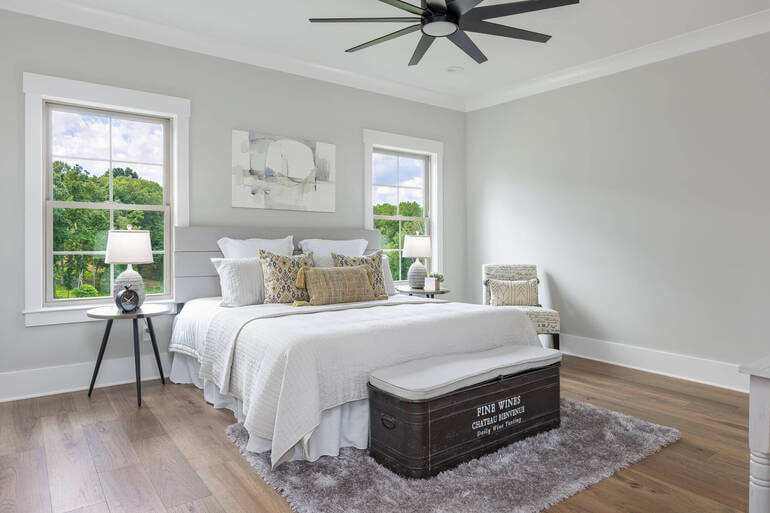
Lighting influences perception—making a modest room look spacious, a dated kitchen look modern, and a bare bedroom feel warm and livable.
However, shooting with perfect lighting isn’t always possible. Photographers often face low-light situations due to:
- North-facing windows
- Bad weather
- Night shoots
- Dim fixtures
- Or, limited access time during staging
This is where real estate photo editing comes into play, but with a caveat: over-editing can make interiors look unnatural, which leads to mistrust and disappointed buyers.
“The goal is to enhance while staying authentic.” says Devon Higgins, CMO and Managing Partner at PhotoUp.
With this in mind, let’s take a look at what to consider when editing interior property photos.
What to Consider When Editing Interior Real Estate Photos
Before diving into editing techniques, it’s essential to assess the image holistically. Consider these factors:
| Natural vs Artificial Light Sources: Identify light temperature and direction to correct color balance. |
| Window Exposure: Should the view be visible or blown out? Editing choices vary based on client preferences. |
| Color Consistency: Poor lighting may introduce yellow or blue tints that need correction. |
| Shadow and Highlight Balance: Harsh shadows can hide room details, while overexposure washes them out. |
| Perspective and Depth: Dark lighting can flatten an image, so enhancing dimensionality subtly is key. |
In essence, the mission is to illuminate without exaggerating, preserving the feel of the home while giving it its best digital presentation.
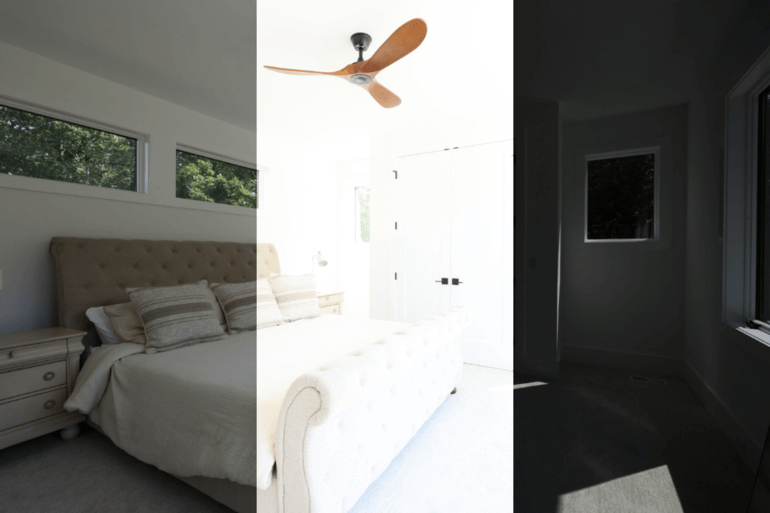
7 Photo Editing Techniques for Poorly Lit Interiors 🛠️
Let’s now explore 7 proven techniques for enhancing low-light interior shots without compromising realism:
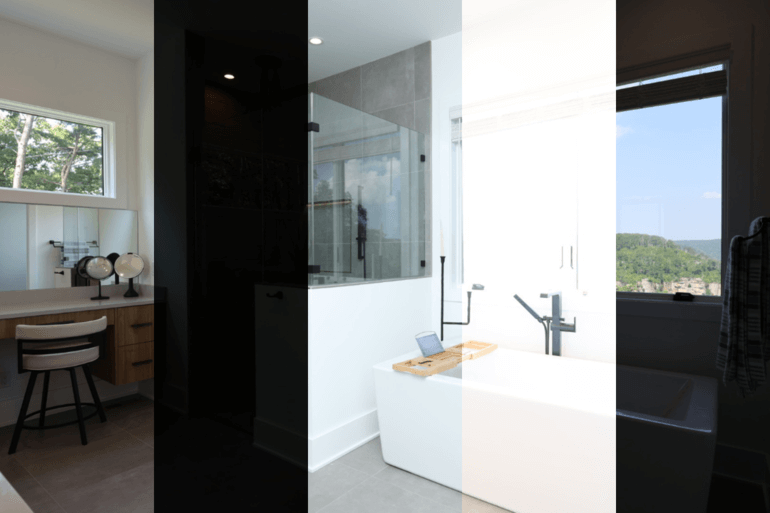
1. Exposure & Brightness Adjustment
Slight tweaks in exposure can bring dark rooms to life. But here’s the trick—go slow. Overexposing can cause windows and white walls to lose texture.
Instead:
- Use local adjustments (e.g., lightening just a shadowed corner)
- Avoid blowing out highlights in brighter areas like ceiling lights or windows
For more details, check out our tutorial on:
2. White Balance Correction

In poorly lit interiors, color temperatures often clash. A tungsten lamp might throw an orange cast, while a small window could inject cool daylight.
To adjust this:
- Use the White Balance Selector Tool in Lightroom or Photoshop
- Adjust temperature and tint to maintain a neutral yet warm tone that mimics daylight
To learn how to do this simple edit, check out our tutorial on how to adjust white balance in Photoshop.
This ensures walls look true to color and flooring doesn’t appear off-hue.
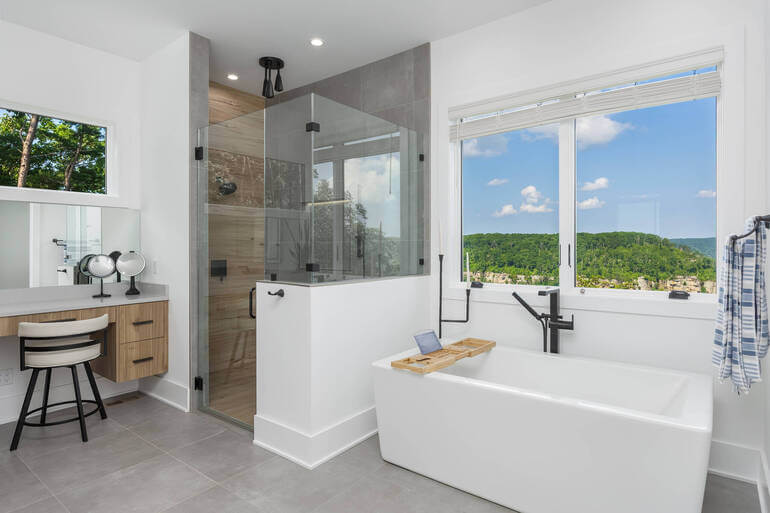
3. Shadow and Highlight Recovery

Dark interiors often contain hidden detail in the shadows, and slight highlight adjustments can reduce harsh light spots.
To combat this, you can:
- Increase shadows to reveal detail in furniture and wall textures
- And decrease highlights to prevent blown-out windows and overhead lighting
This balancing act maintains detail across the entire exposure range.
To learn a powerful trick to make interiors look amazing while also capturing good window views, check out our guide on how to mask windows in Photoshop.
4. HDR Blending
High Dynamic Range (HDR) involves blending multiple exposures (often three or more exposures) to retain detail in both dark and bright areas.
- HDR is ideal for interiors with large windows or tricky lighting conditions
- Remember to ensure that the tone mapping is realistic—avoid surreal glowing effects that distort reality
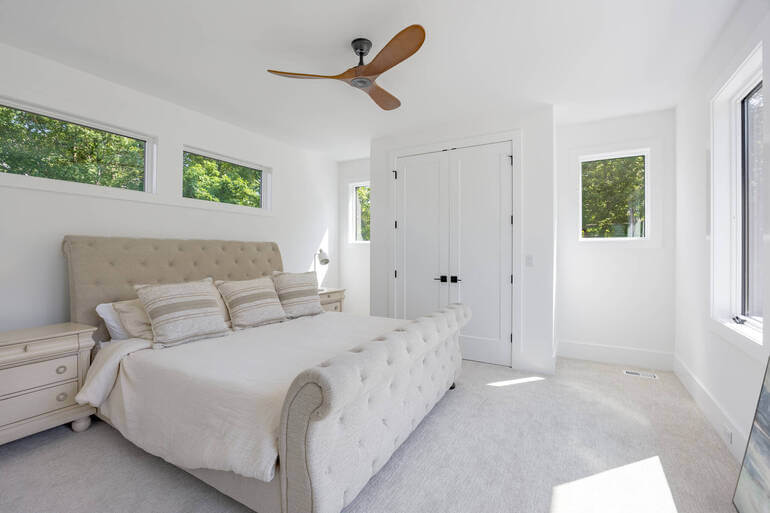
A properly blended HDR image should look like what the human eye would see when standing in the room.
To get an introduction to HDR blending, you can check out our tutorial on how to edit HDR photos in Lightroom.
Have You Ever Thought To
Outsource Photo Editing?
Try it today with 5 free edits from three professional photo editors.

5. Color Cast Removal

A color cast is an unwanted hue that can distort the natural appearance of a photo and lower its overall quality.
Various lighting scenarios can cause these discolorations, such as:
- Fluorescent lighting, which often adds a cool blue tint to interiors
- Dark window tints that can make a beige wall appear oddly tinted—almost like a diluted fruit smoothie
- Overcast skies filtering in through windows, muting the vibrancy of an otherwise bright room
To bring back the image’s true-to-life tones, do these simple adjustments:
- Use Hue/Saturation and Color Balance tools to neutralize specific color ranges
- Target only affected areas using masks to retain natural skin tones or wood textures
To learn how to do this edit, check out our guide on removing color cast in Photoshop.
This maintains color integrity while making the image more vibrant and professional.
6. Contrast and Clarity Boost
Low-light photos tend to feel flat. Carefully increasing contrast and clarity:
- Adds depth and visual interest
- Enhances textures in furniture, carpets, or woodwork
Avoid pushing clarity too far—overdoing it can lead to a gritty or unnatural look.
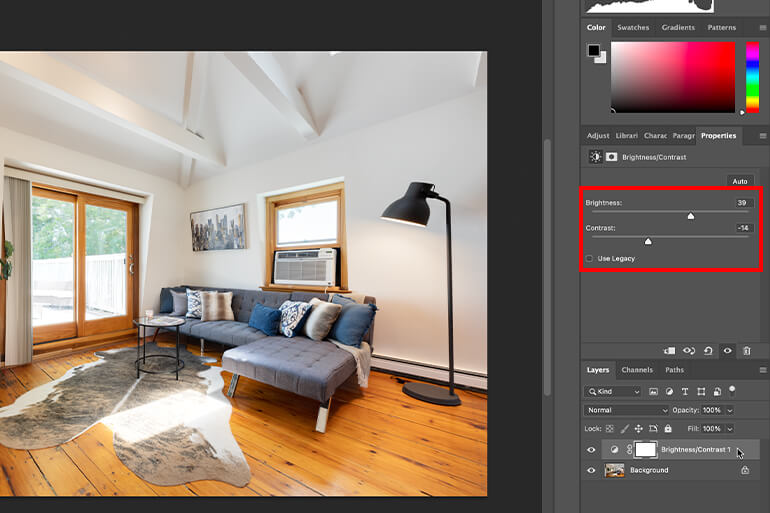
The easiest way to adjust the contrast and brightness of a photo in Photoshop is to create a new Brightness/Contrast adjustment layer in the Adjustments tab.
You can also go to Layer and then click on New Adjustment Layer > Brightness/Contrast. Or, you can simply click on the Create new fill or adjustment layer icon in the bottom menu and then click Brightness/Contrast.
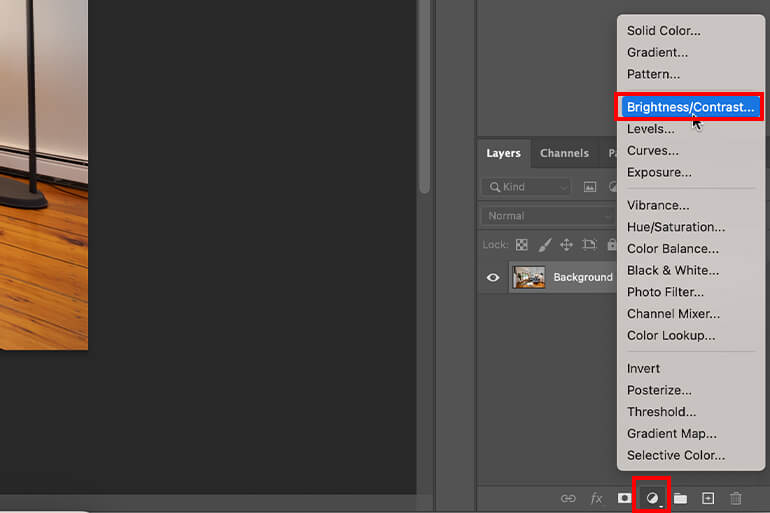
And in the Brightness/Contrast window, you can now adjust the brightness slider left or right to darken or lighten the photo.
7. Noise Reduction
Raising exposure or editing shadows can introduce noise, especially in darker parts of the image.
To fix this, you can:
- Apply noise reduction selectively to shadow areas, walls, or ceilings
- Use sharpening on key focal points to balance the image and keep detail
Check out these guides to learn how to reduce noise in interior photos:
This ensures the photo stays clean and professional even after heavy adjustments.
And there you have 7 effective real estate photo editing techniques to help you edit poorly lit interiors without compromising realism.
It’s all about balance—bringing in the light while staying faithful to the room’s natural appearance.
Whether you’re a DIY editor or ready to outsource, the key is subtlety, precision, and an understanding of how light shapes perception in real estate.
Editing Poorly Lit Interiors FAQ
Is it okay to use flash indoors when shooting poorly lit interiors?
Yes, but be cautious. On-camera flash can create harsh shadows and reflections. If possible, use off-camera flash or natural light supplemented with long exposure.
How do I know if my image has a color cast?
A color cast can usually be spotted when whites or neutral tones in your photo appear tinted, such as white walls looking slightly blue, yellow, or green. Comparing the edited photo to how the room looks in real life can also help identify unwanted shifts in color.
Is it better to fix color cast during the shoot or in post-processing?
Ideally, it’s best to minimize color cast during the shoot by using proper white balance settings and natural lighting.
However, post-processing provides powerful tools to correct any remaining tints, ensuring professional-looking results even in challenging lighting conditions.
Can Lightroom alone fix most poorly lit interiors?
Lightroom is powerful, especially for global adjustments like exposure and white balance. However, for advanced edits like window masking or HDR blending, Photoshop might be necessary.
What’s the biggest mistake in editing low-light interiors?
Over-editing. Pushing brightness and clarity too far can make images look fake, which breaks trust with potential buyers.
Fortunately, you don’t have to worry about fake-looking interiors when outsourcing your editing to PhotoUp. This can save you time and money and help you grow your real estate photography business.
Have You Ever Thought To
Outsource Photo Editing?
Try it today with 5 free edits from three professional photo editors.
How to Save Time and Money by Outsourcing to PhotoUp 🕒
If you’re a busy real estate photographer juggling shoots, edits, client calls, and marketing, spending hours perfecting exposure and color balance can hold you back.
That’s where PhotoUp comes in!
PhotoUp is a professional real estate photo editing service trusted by photographers worldwide.
Our expert editors are trained to enhance interiors in a way that:
- Improves lighting and color while maintaining realism
- Delivers fast turnarounds (under 24 hours)
- And follows your preferred editing style and instructions
Instead of getting stuck in Lightroom for hours, you can upload your batch to PhotoUp’s user-friendly platform and focus on growing your business or booking more clients.
Best of all, our editing services are affordable, starting at $1.50 per image and lower depending on your subscription level.
Browse Top Dedicated
Real Estate Photo Editors
Ready-to-hire editors for real estate photo editing, and more.
A One-Stop Shop for Real Estate Marketing


Additionally, PhotoUp is a complete one-stop shop for real estate marketing and also offers other powerful services such as:
We have everything you need to enhance and market real estate photography in one user-friendly software!
How to Get Started
Getting started using PhotoUp’s real estate photo editing service is super easy.
This is all you need to do:
Step 1. Sign up for a free PhotoUp account.
Step 2. Upload your photos to our easy-to-use software.
Step 3. Choose the level of editing that you need and provide instructions (optional).
Step 4. Wait for PhotoUp professional editors to edit and return the photos in less than 24 hours (48 hours for virtual staging).
Step 5. Download and start using your beautifully edited photos.
PhotoUp Real Estate Photo Editing Uploader Tutorial
For more details, have a look at our real estate photo editing uploader tutorial:
As simple as that!
Sign up for a free PhotoUp account today and elevate your interior and exterior real estate photography without lifting a finger.
For a limited time, you even get 10 free credits you can use on any of our services when signing up for an account.
We hope this post helped you learn how to edit poorly lit interiors without compromising realism. If you found this post useful, you may also want to check out the following resources:

