


Table of Contents
- The Importance of Accuracy in Real Estate Photography
- 10 Advanced Photoshop Techniques for Stunning Photos
- FAQ
- Outsource Your Real Estate Photo Editing to PhotoUp
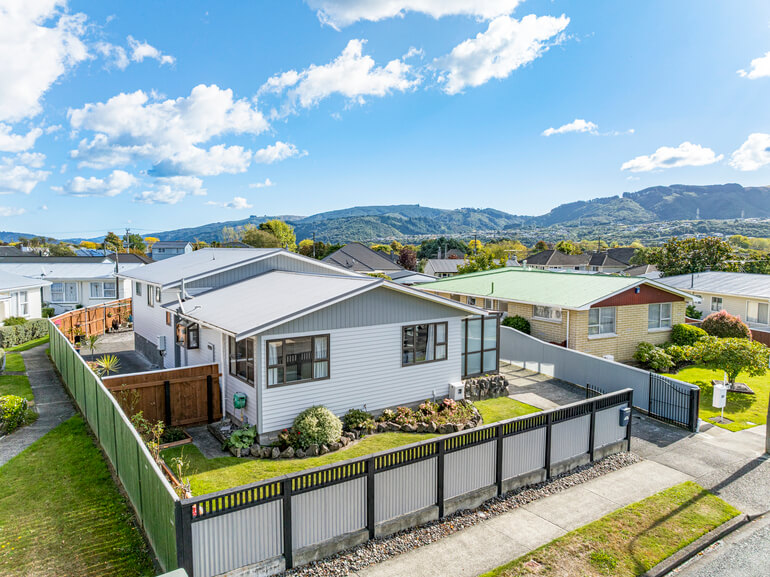
High-quality photos can be the deciding factor between a property that sells quickly and one that lingers on the market. Recent studies show that professional visuals can help homes sell 32% faster and at higher prices.
While basic photo editing can improve images, advanced Photoshop techniques allow real estate photographers to take visuals to the next level—creating photos that are both realistic and visually captivating.
Before we show you our selection of the top 10 most powerful and advanced Photoshop techniques, let’s take a look at the importance of accuracy in real estate photography.
The Importance of Accuracy in Real Estate Photography


In real estate photography, quality goes beyond visual appeal — it’s also about authenticity.
While it’s tempting to present a picture-perfect version of a property, staying true to its actual look builds trust with clients and their potential buyers.
Striking the right balance between enhancement and honesty is key to producing effective, professional real estate images.
High-quality editing should enhance a property’s best features without compromising its authenticity.
How to Maintain Professional Standards in Real Estate Photo Editing
Meeting high-quality standards in real estate photo editing requires a strategic and disciplined approach. Here are key practices to follow:
| Maintain visual consistency across all images in terms of color, brightness, and tone to create a cohesive presentation. |
| Leverage natural light thoughtfully, as it significantly impacts the mood and realism of a photo. |
| Focus on fine details during retouching to ensure edits are subtle and natural — avoiding the artificial look of over-processed images. |
| Stay within realistic boundaries, ensuring your edits reflect the true characteristics of the property. |
By following these principles, you can produce stunning real estate images that not only attract attention but also build credibility and trust.
Common Mistakes That Will Make Your Photos Look Unprofessional
Avoiding common pitfalls can drastically improve your final output. Here are some mistakes to avoid when editing or retouching real estate photos:
- Over-saturation of colors can lead to gaudy images that detract from the property’s true look
- Excessive exposure adjustments might wash out details or create unnaturally dark areas
- Ignoring vertical and horizontal lines can result in a skewed perspective, making the property appear distorted
- Overuse of HDR can lead to halos around edges and an overall unnatural feel
- Being tempted to remove structures and other solid elements can lead to legal repercussions
In the end, mastering real estate photo editing is about finding that sweet spot – where artistic enhancement meets the transparent revelation of a property’s best features.
With this in mind, let’s take a look at some advanced Photoshop techniques for stunning listing photos that will impress potential buyers.
10 Advanced Photoshop Techniques for Stunning Photos
Here are 10 advanced Photoshop techniques to dramatically enhance your real estate photography and make your listings so captivating that buyers will stop and take an extra look.
All these techniques are presented with educational video tutorials to help you improve your editing and retouching skills.
1. Sky Replacement


A dull or overcast sky can make an otherwise beautiful property feel uninviting.
Photoshop’s AI-powered Sky Replacement tool allows you to replace the sky with a bright blue or sunset background in seconds, adding drama and warmth to the scene without needing a reshoot.
Additionally, the groundbreaking AgentUp Editing AI app offers free sky replacements and can edit your real estate photography on the go in as little as 5 minutes.
If you prefer manual editing, check out this video tutorial on how to replace a summer sky in Photoshop:
2. Day-to-Dusk Conversion


Turning daytime photos into beautiful twilight scenes using advanced blending, sky replacement, and color grading is super powerful to boost views and showings.
Using a twilight image as the listing’s main photo averages 76% more views and increases showings by 3x times than listings without the use of twilight images.
By adding a dusk sky, adjusting lighting, and warming up interiors, you can produce cozy, luxurious visuals that highlight exterior lighting and ambiance.
To learn how to do this effectively, check out our video tutorial on how to edit a day to dusk image:
3. Perspective Correction


Wide-angle lenses often introduce distortion that makes walls and buildings lean unnaturally. This can make your real estate photos look unprofessional.
You can align the lines in Photoshop using the Free Transform Tool to straighten lines and restore architectural integrity, making interiors and exteriors look balanced and professional.
To see how to do this, you can check out our video tutorial on how to straighten verticals in Photoshop:
4. Flambient Blending


The flambient technique combines flash and ambient exposures for natural yet vibrant lighting.
Flambient editing merges the precision of flash with the softness and depth of ambient light to create realistic interior photos.
Photoshop allows editors to blend these exposures using luminosity masks and gradient masks, delivering crisp interiors with perfect lighting balance.
To learn how to perform this editing technique, check out our video tutorial on how to edit flambient real estate photos:
5. Object Removal & Decluttering


Using the Content-Aware Fill, Clone Stamp, or Healing Brush, you can remove unwanted items like cords, signs, trash cans, or even entire furniture pieces.
This technique helps create clean, distraction-free images that focus buyers’ attention on the space itself.
To learn how to declutter your property photos, watch this video tutorial on how to remove cords in Photoshop:
For more advanced editing techniques, check out this video tutorial on how to remove a car from a driveway in Photoshop:
Have You Ever Thought To
Outsource Photo Editing?
Try it today with 5 free edits from three professional photo editors.

6. Color Cast Removal


Mixed lighting can create unsightly color casts, especially near windows or artificial lights.
Color cast in a photo can be considered an eyesore, especially in the real estate photography industry, where images need to look extra captivating.
Using Selective Color Adjustments, Curves, and Hue/Saturation layers, Photoshop allows you to neutralize those tints and ensure color consistency across the image.
To learn more, check out our video tutorial on how to easily remove color cast from real estate images in Photoshop:
7. Window Masking


In bright interior shots, windows often appear blown out.
With window masking, you can blend in a well-exposed window layer to retain exterior views while maintaining properly lit interiors.
This technique gives a polished, professional look that potential buyers will love.
To learn this powerful edit, check out our video tutorial on how to make windows in Photoshop:
8. Detail Enhancement & Sharpening


You can bring your visuals to life by experimenting with image sharpening in Photoshop—add dimension, depth, and contrast along the edges of any object.
Highlight textures and architectural features with High Pass Sharpening or Clarity Adjustments via layers.
This helps draw attention to premium features like hardwood floors, granite countertops, or custom finishes—making the property pop on listings.
In this video tutorial, we’ll show you how to sharpen an image in Photoshop:
9. Virtual Staging of Empty or Outdated Rooms

Empty rooms can feel soulless and uninviting. AI Virtual staging breathes life into these spaces by digitally inserting furniture and decor.
Empty or outdated spaces can be redecorated with modern, beautiful furniture in seconds to help prospective buyers see the home’s possibilities.
This allows clients to visualize the property as a home and can generate interest and excitement for what otherwise might seem like an uninspired space.
“Virtual staging can help you stage faster than traditional staging and is up to 97% cheaper than traditional staging. What’s not to love!?” Devon Higgins, Head of Sales & Marketing at PhotoUp, Realtor at Hello Homes GR
With the help of PhotoUp’s professional CAD designers, you can get your images digitally staged and returned to you in less than 48 hours for the low cost of $5.00 per image.
All you need to do is take photos of your property, upload your images, select furniture and export settings, and then sit back and wait for your staged images to be delivered.
PhotoUp AI Virtual Staging Uploader
To illustrate how easy it is to get your images virtually staged, have a look at our virtual staging tutorial:
For a more detailed tutorial, you can visit our blog post on how to virtually stage a room in less than 5 minutes.
10. Grass Greening and Lawn Enhancements


First impressions matter — and a healthy, green lawn can dramatically boost a property’s visual appeal.
Using grass enhancement techniques in photo editing helps outdoor areas appear fresh, lively, and well-cared-for, highlighting the landscape in its most attractive state.
Even a small adjustment like this can greatly enhance curb appeal and make the property more enticing to prospective buyers.
To learn how to create a beautiful green lawn, check out our video tutorial on how to make grass green in Photoshop:
And there you have 10 advanced Photoshops techniques to help you create captivating, head-turning listing photos!
Final Thoughts
These advanced Photoshop techniques can transform ordinary real estate photos into visually stunning marketing assets.
Mastering them takes time, but the payoff is worth it—higher engagement, faster sales, and happier clients.
If editing isn’t your strong suit, consider outsourcing to professional real estate photo editing services like PhotoUp, which offers fast and affordable solutions tailored to the real estate industry. We’ll show you how to easily do that below.
FAQ
Is Photoshop better than Lightroom for real estate photo editing?
Photoshop offers more advanced editing capabilities, such as object removal, sky replacement, and manual blending. Lightroom is excellent for bulk edits and global adjustments. Many professionals use both in tandem.
How do I learn advanced Photoshop techniques for real estate?
You can learn through online courses (like those on Udemy or Skillshare), YouTube tutorials, or by practicing with real estate images using sample files and guided walkthroughs.
Can I automate any of these Photoshop processes?
Yes! Actions, presets, and scripts can help automate repetitive tasks like resizing, sharpening, and watermarking. However, advanced techniques like manual HDR blending often require hands-on work.
How long does it take to edit a real estate photo using these advanced techniques?
Depending on the complexity, advanced edits like flambient blending or day-to-dusk conversions can take anywhere from 10 to 30 minutes per image.
Should I outsource real estate photo editing?
If you’re managing a high volume of properties or want to save time, outsourcing to a service like PhotoUp can be a smart move. They provide expert editing with fast turnarounds, allowing you to focus on shooting and growing your business.
Let’s now present the perfect solution to take the time-consuming editing off your plate – outsourcing to PhotoUp!
Have You Ever Thought To
Outsource Photo Editing?
Try it today with 5 free edits from three professional photo editors.
Outsource Your Real Estate Photo Editing to PhotoUp


As we all know, editing real estate photos can take many hours. That’s why outsourcing your post-processing to PhotoUp is a game changer!
PhotoUp delivers budget-friendly editing services designed to simplify your workflow while producing top-notch, tailored images and videos—without the high expense of hiring in-house staff.
Our experienced editors can enhance your real estate photos by addressing a wide range of common issues, including:
- Poor lighting and exposure problems
- Heavy shadows or insufficient illumination
- Blurry shots due to camera shake
- Images needing precise cropping or stylistic adjustments
- Lawn enhancement and realistic sky replacements
- Stunning twilight and day-to-dusk conversions
- Manual image blending and panorama stitching
- Removal of clutter and unwanted objects
- Perspective and line corrections
- And a whole lot more!
What sets PhotoUp apart?
Exceptional quality, reliable service, and competitive pricing — with most edits ranging from just $1.50 to $9.00 per image, based on your plan and the complexity of the edits.
But we’re doing more than just photo editing…
Browse Top Dedicated
Real Estate Photo Editors
Ready-to-hire editors for real estate photo editing, and more.
Your All-in-One Real Estate Marketing Partner

PhotoUp is a complete real estate marketing partner and also offers additional services such as:
We have everything you need to create impressive real estate photography that will impress clients and sell listings faster at higher rates!
How to Get Started
Getting started using PhotoUp’s real estate photo editing service is super easy. This is how to do it:
Step 1. Sign up for a free PhotoUp account.
Step 2. Upload your photos to our easy-to-use software.
Step 3. Choose the level of editing that you need and provide instructions (optional).
Step 4. Wait for PhotoUp professional editors to edit and return the photos in less than 24 hours (48 hours for virtual staging).
Step 5. Download and start using your beautifully edited photos.
PhotoUp Real Estate Photo Editing Uploader
Have a look at the real estate photo editing uploader tutorial to see how easy it is to get started with PhotoUp:
As simple as that!
Sign up for a free PhotoUp account today and let our expert editors help you create stunning real estate photos while saving you time and money.
For a limited time, we even offer you 10 free credits when signing up for an account that you can use on any of our services.
We hope this guide helped you learn 10 advanced Photoshop techniques for stunning listing photos. Before you go, you might want to check out the following resources:

