


Table of Contents
- Top 5 Photo Editing Tips for 360° Tours & Panoramas
- Why Professional Editing Makes All the Difference
- Outsource Your 360° Editing and Save Time and Money
Are you working on 360° tours and panoramas, and want some powerful real estate photo editing tips?
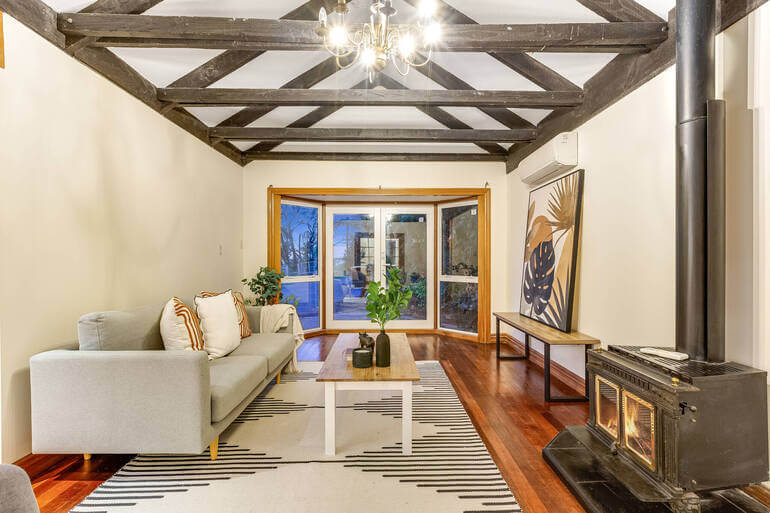
360° tours and panoramic images are transforming real estate marketing—offering buyers an immersive experience that static photos can’t match. But behind every impressive virtual tour lies meticulous editing work that blends artistry with technical precision.
In this blog post, we’ll share 5 simple yet effective real estate photo editing tips to help you create impressive 360° tours and panoramas. We’ll also cover why outsourcing your editing might be the best option to ensure top-notch quality virtual tours and images.
Let’s get started!
Top 5 Photo Editing Tips for 360° Tours & Panoramas
Here are our top 5 real estate photo editing tips that will make your 360° tours and panoramas truly shine.
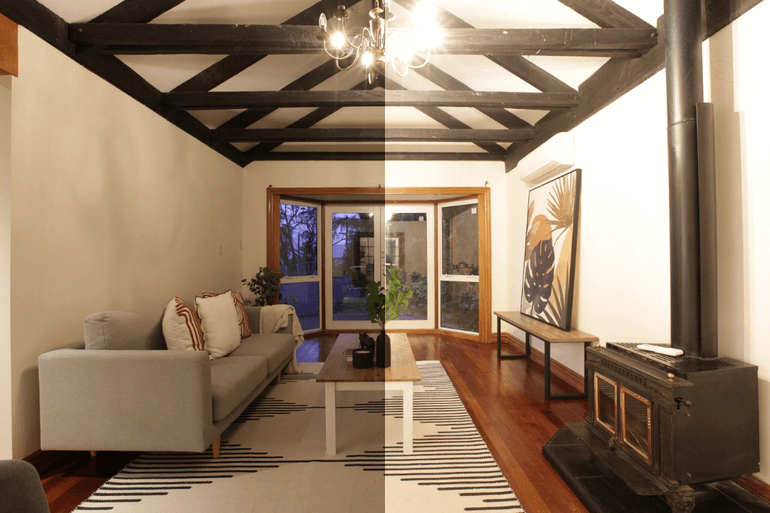
1. Perfect the Exposure and Dynamic Range
Interior lighting can vary dramatically—from bright windows to dark hallways—and in a 360° image, exposure inconsistencies are instantly noticeable.

A well-balanced High Dynamic Range (HDR) image ensures every angle looks clear and natural, preserving both highlights and shadows for a true-to-life feel.
How to achieve this:
- Shoot in brackets (typically three to five exposures) to capture the full range of brightness
- Use HDR blending techniques that avoid halos and unnatural lighting transitions
- Manually refine the tone mapping in post-production to maintain a balanced look
- Pay special attention to window areas since viewers often look there first. Ensure outside views are visible without overexposing interiors
Pro tip: Always favor realistic lighting. A slightly underexposed highlight is far better than an over-processed, glowing one. Natural lighting keeps the 360° experience believable and inviting.
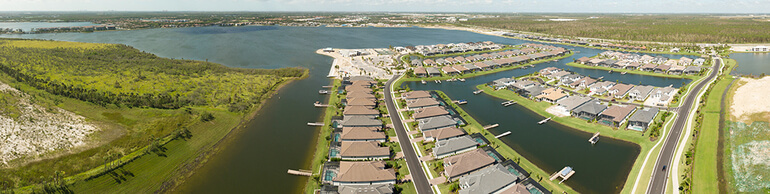
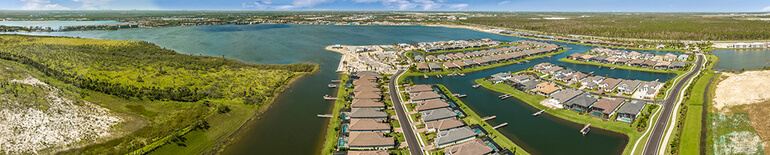
2. Ensure Seamless Stitching
Nothing disrupts immersion faster than visible stitching errors, such as bent doorframes, ghosted furniture, or misaligned walls.
In panoramic imagery, perfect alignment is key to preserving spatial accuracy and viewer trust.
How to achieve this:
- Use a level tripod and panoramic head to minimize parallax issues
- Maintain consistent overlap (25–50%) between shots for reliable stitching
- Use professional stitching software like PTGui or Hugin that allows manual control points for fine-tuning
- Correct the horizon line and vertical alignment after stitching to ensure the viewer doesn’t feel “tilted” while exploring
Pro tip: Zoom in and inspect seams closely before export. Even a small misalignment can become glaring in an interactive viewer—especially around strong lines like countertops or window frames.
3. Remove Ghosts and Motion Artifacts
Movement between frames, such as that caused by pets, people, curtains, or trees, can result in ghosting or blurred patches once stitched together.

These artifacts can make a 360° tour look sloppy or distract buyers from key property features.
Do this to avoid ghosting and blurred patches:
- Identify moving elements before stitching and exclude frames where motion occurred
- Use content-aware fill or clone tools to remove ghosted areas cleanly
- For complex movements (like ceiling fans or drapes), blend frames selectively to preserve realism
- Blur or remove unwanted reflections and shadows that appear inconsistently across angles
Pro tip: Prioritize retouching the main living areas and entry points, where buyers spend the most time viewing. Background details can be refined later if needed.
Have You Ever Thought To
Outsource Photo Editing?
Try it today with 5 free edits from three professional photo editors.

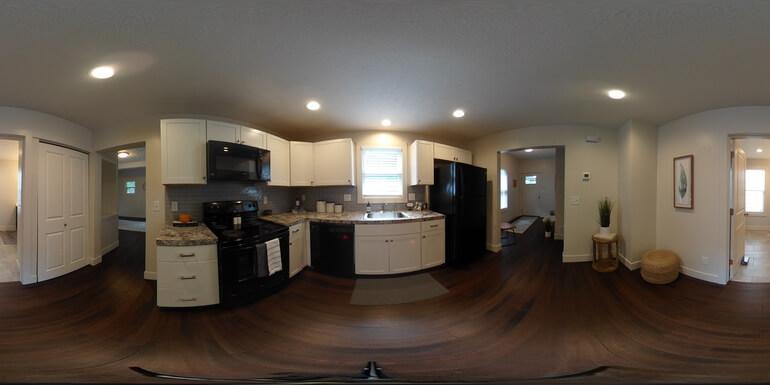
4. Maintain Consistent White Balance and Natural Colors
360° panoramas often include multiple light sources—daylight through windows, warm indoor bulbs, and reflective surfaces—all of which can throw off color balance.


A professional color grade ensures consistent tones and true-to-life finishes that accurately represent the property.
How to achieve this:
- Start by setting a neutral white balance using gray cards or neutral tones in post-processing
- Adjust global color correction first, then refine locally for problem areas
- Keep saturation moderate—the goal is to enhance realism, not exaggerate it
- Apply selective color grading to create atmosphere: slightly warmer tones for cozy interiors or cooler hues for sleek, modern homes
Pro tip: Use the same calibrated monitor throughout editing. Color perception varies between screens, so consistency during editing ensures accurate representation once uploaded online.
5. Optimize for Web Performance

A stunning 360° tour won’t make an impact if it takes forever to load.
Large, unoptimized panoramas can frustrate viewers and reduce engagement, especially on mobile devices.
Proper optimization balances clarity and speed for the best user experience.
Do this to optimize your images:
- Resize Intelligently: 8K width (8192px) is ideal for desktop tours; 4K (4096px) works well for mobile
- Compress Efficiently: Use WebP or progressive JPEGs to maintain quality with smaller file sizes
- Export in Tiled Formats When Supported: This allows only visible areas to load at full resolution
- Test Across Devices: Test across devices to confirm smooth performance before publishing
Pro tip: Always keep a master file (TIFF or PSD) before compressing. This allows you to re-export in different resolutions or formats for future projects without quality loss.
Bonus Tip: Add Some Finishing Touches

Sometimes, small details make the biggest difference in the overall presentation of your 360° tours.
Consider these finishing enhancements:
- Add subtle vignetting to focus attention toward key room features
- Make sure to use window masking techniques for clear window views
- Brighten shadows slightly to reveal more texture and depth
- Use consistent hotspot icons and navigation labels for a professional, branded appearance
- Double-check lens distortion at the edges—subtle correction keeps vertical lines straight and natural
These refinements enhance immersion and guide the viewer’s eyes naturally through the property.
Common Mistakes to Avoid
When editing 360° photos and panoramas, it’s easy to make a few critical mistakes that hurt the final product.
Watch out for these common mistakes:
- Overdone HDR: Overly bright or saturated images feel fake and deter buyers
- Visible Stitching Seams: Even small misalignments can ruin realism
- Inconsistent Lighting: Different exposure zones between frames break immersion
- Heavy Compression: Over-compressed files may load fast but lose critical detail
- No Mobile Testing: Most buyers browse on phones — always preview your tour on smaller screens
Avoiding these pitfalls ensures that your virtual tours feel smooth, natural, and professional—just like walking through the home in person.
Why Professional Editing Makes All the Difference
In today’s digital real estate market, 360° tours and panoramic images have become indispensable marketing tools.
They allow potential buyers to experience properties virtually—walking through rooms, viewing details from every angle, and getting a genuine feel for the home’s flow and layout.
However, creating high-quality 360° visuals is not as simple as shooting a few photos and stitching them together.
It requires meticulous attention to lighting, color, stitching accuracy, and overall image harmony, something that even skilled photographers may find time-consuming or technically challenging.
That’s why many real estate photographers and agents turn to professional photo editing services like PhotoUp.
The Benefits of Professional Real Estate Photo Editing Services
Expert editors can transform standard 360° images into stunning, seamless virtual tours that showcase every property in its best light.
Professional real estate photo editing services bring three key benefits:
- Consistency: Every frame blends smoothly with the next, with no visible seams or tonal shifts
- Time efficiency: You can focus on shooting and selling while the editing experts handle the technical work
- Visual excellence: Professional editing ensures natural lighting, perfect color balance, and optimized image quality for web display — helping your listings stand out
In short, partnering with professional editors guarantees that every 360° image not only looks flawless but also delivers a smooth, engaging experience that captures buyers’ attention and drives more successful property viewings.
Final Thoughts
360° tours and panoramic images are transforming real estate marketing, offering buyers an immersive experience that static photos can’t match.
But behind every impressive virtual tour lies meticulous editing work that blends artistry with technical precision.
From perfecting exposure and alignment to maintaining consistent color and optimizing performance, professional editing can make the difference between a casual viewer and an engaged buyer ready to take the next step.
If you want your 360° property tours to stand out, consider outsourcing your editing to a professional service that delivers polished, captivating results with fast turnaround times and affordable pricing.
Have You Ever Thought To
Outsource Photo Editing?
Try it today with 5 free edits from three professional photo editors.
Outsource Your 360° Editing and Save Time and Money
Real estate photographers already juggle multiple tasks, from scheduling shoots to managing clients and delivering projects on time.

Adding the complex process of HDR blending, stitching, color correction, and optimization for virtual tours can quickly become overwhelming.
By outsourcing 360° editing to a specialized real estate photo editing service, you gain:
- Professional Consistency: Every image meets MLS standards and matches across rooms
- Time Savings: Spend more time capturing new listings instead of getting lost in post-production
- Access to Experts: Skilled editors with experience in real estate know how to make each property look its best
- Scalability: Whether you need five panoramas or fifty, professional teams can handle the workload efficiently
If you want to elevate your real estate marketing with immersive 360° visuals, PhotoUp is your go-to editing partner.
Here’s what makes PhotoUp stand out:
| Expert Editing Team: PhotoUp’s editors are trained in advanced stitching, ghost removal, HDR blending, and natural color correction specifically for real estate photography. |
| Fast Turnaround: With streamlined workflows, PhotoUp delivers professional 360° in as little as 5 minutes and panoramic in 12-24 hours—helping agents post listings faster and gain a competitive edge. |
| Affordable Pricing: Flexible plans make professional-grade editing accessible for both solo photographers and large real estate agencies. |
| Seamless Integration: PhotoUp provides platform-ready exports optimized for web, VR, and MLS requirements. |
| Consistent Quality: Whether editing one image or an entire tour, every deliverable maintains crisp clarity, balanced lighting, and smooth stitching. |
With PhotoUp, photographers and agents can focus on what they do best—capturing stunning photos and selling homes—while ensuring every 360° tour looks flawless, loads fast, and converts viewers into buyers.
And there’s more…
A Complete Real Estate Marketing Partner
On top of that, PhotoUp is a complete real estate marketing partner and also offers additional services such as:
We have everything you need to enhance and market real estate photography on one user-friendly platform.
So, sign up for a free PhotoUp account and let PhotoUp bring your 360° and panoramic vision to life!
We hope this blog post provided you with 5 real estate photo editing tips to create immersive, top-notch 360° tours and panoramas. Before you go, you may also want to check out these related resources:

