


Table of Contents
- Why Is Professional Real Estate Photography Crucial Right Now?
- What Equipment Do You Need?
- Preparation & Shooting Tactics
- Outsource Your Real Estate Photo Editing
Are you looking into how to improve your real estate photography? Whether you need tips on the best gear, camera settings, or preparations to proper lighting, we got you covered!
Professional real estate photography can be the difference between a listing that stands out from the competition and one that blends in. Quality photos take potential buyers on an immersive journey to their new home, allowing them to envision the life they could create within its walls!
In this post, we’ll share how to improve your real estate photography from start to finish to help you create captivating images. We’ll start by explaining why professional real estate photography is vital to selling a property in today’s market.
Let’s get started!
Why Is Professional Real Estate Photography Crucial Right Now?

With the slowing housing market, real estate photography is becoming an essential service for many home sellers.
For starters, it requires more marketing to sell a home with today’s increasing mortgage rates and volatile market.
It’s no longer as easy as snapping a simple photo with your cellphone camera, posting your home, and viola – it’s sold!
That’s where professional real estate photography plays a crucial role to capture buyers’ attention and get homebuyers to pay premium rates for the property.
An experienced real estate photographer can capture a property in its best light – literally!
From exterior to interior shots, these photographers use tried-and-true techniques that make your house stand out from all of the other listings out there.
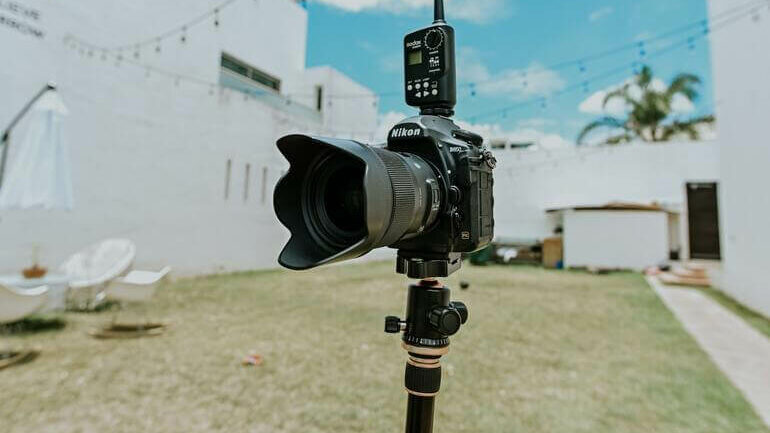
What Equipment Do You Need?

Before getting started, there’s basic equipment any real estate photographer will want to consider to ensure top-notch photography:
- DSLR camera: As a real estate photographer, having the right camera — one that produces stunning results — is a necessity for real estate photography. Your digital camera should be your #1 priority and an investment in quality will pay dividends with crystal clear HDR images or professional-grade DSLRs giving you precise control over exposure bracketing and remote flashes. Our top picks are Canon EOS Rebel SL3, Nikon D3500, and Nikon D850.
- Wide-angle lens: A wide-angle lens allows you to get creative and capture a larger area. A wide-angle lens will allow you to capture more of the room in a single shot, making the space appear larger and more open. For more information, you can visit our blog post on the best lens for real estate photography (top 15 picks).
- A tripod: Using a good tripod is crucial for the quality of your real estate photography. A tripod provides excellent stability for every photo and this stability allows you the option of using a slower shutter speed that can handle various lighting levels. Using a tripod means you’re never sacrificing depth of field or ISO to get the shot.
- Lighting: It’s always best to take advantage of natural lighting coming in from windows, but if you can’t shoot during the golden hours, most cameras come with a built-in flash to help you still capture good shots of poorly-lit homes. It can also be beneficial to invest in a remote flash to help eliminate any shadows in your photos. Our top 5 picks of remote flashes are Godox V850II, Yongnuo YN560 IV, Canon Speedlite 430EX III-RT Flash, Neewer 750 II TTL Flash Speedlite, and Profoto 901025 D1 Air 1000.
Additional Equipment
- Remote trigger: When shooting with slow shutter speeds, the best way to achieve a sharp image is by using remote triggers for camera operation. You should try to avoid touching the camera at all costs so that you don’t introduce unwanted blur from any unintended shake.
- Light modifiers: Bare flash often creates unappealing results in real estate photography. Instead of pointing the light toward the ceiling for a softer effect and risking not having high enough ceilings or getting enough light bounce, you can use umbrellas with your lighting modifier setup. Lightweight yet powerful – they won’t get in the way when shooting tight spaces either – you can easily create an even-toned atmosphere that will make any room look inviting.
- Light stands: Lastly, when setting up for the perfect shot, bringing along some light stands is key to support those flashy monolights. For small heads, a regular stand will do just fine, but heavier pieces may require something more stable like a C-stand – so figure out how many you’ll need based on your photoshoot location and get creative with lighting.
This basic equipment will help to ensure great-looking and crisp real estate photos without shakes, blur, and harsh shadows.
Have You Ever Thought To
Outsource Photo Editing?
Try it today with 5 free edits from three professional photo editors.

Preparation & Shooting Tactics
Now, that you know what equipment you need to get started shooting properties, let’s take a look at how to prepare and shoot awesome real estate photography.
1. Create a Shot List for Each Property

To capture incredible real estate shots, it pays to know what should be photographed for each property. Creating a standard shot list is a great way to plan your shoot and ensure you don’t forget any important rooms.
A standard shot list should include:
- Two wide-angle views of each bedroom, kitchen, and living room
- One shot of the bathroom (unless it’s special and you need more photos to showcase its unique features)
- 1-3 backyard snaps including any unique features. Additionally, make sure you hit the curb appeal with a photo or two of the front of the property
- Don’t forget bonus photos like those for the laundry area, garage, and pantry too
Also, it’s always good to give your list to the real estate agent so they know what to expect.
2. Prepare Your Gear
Real estate photography demands meticulous preparation—the last thing you want is to show up for a shoot and find yourself missing something crucial.
To make sure every gig goes off without a hitch, always remember your charger (a dead battery means the shoot’s over). A second camera might also come in handy depending on what shots are needed, so don’t forget that either.
As far as prepping equipment, consider the following:
- Charge all batteries
- Format memory cards and pack extras if you have them
- Before heading out, take note of the address ahead of time – it’ll help prevent any inconvenient delays or traffic jams along the way
Armed with these tips in tow – plus some creative lighting and shooting techniques – you’ll be able to capture stunning real estate photos.
For more helpful tips, you can download our Preparing for a Real Estate Photoshoot PDF:
3. Adjust the Camera Settings

Real estate photography requires good lighting. If lighting is a problem, you can try these real estate photography tips for camera settings to keep the quality of your photos high:
- Aperture – use an aperture value from f/7.1 to f/9. If you want to focus on a particular object, you can try a shallow depth of field
- Shutter speed — aim for between 1/60 and 1/2 a second. Of course, this value depends on the amount of light in the room
Also, higher shutter speeds require increasing the ISO value. Too high ISO can add digital noise to your photos. So, try to set ISO below 400 and know your camera — find the perfect value that delivers quality pictures.
4. Declutter the Space
Decluttering is essential to making any home look its best. A cluttered space with too many personal belongings can be off-putting to buyers and they can have a difficult time visualizing themselves living in the home.
So, start by removing personal photos and other personal belongings. Also, avoid having too many items on surfaces like countertops and coffee tables as they’re sure to stand out in photos.
Closets are also usually off-limits unless they’ve been upgraded or offer plenty of extra space. Overall, it’s normal for a professional real estate photographer to spend up to an hour constructing the scene for one perfect shot.
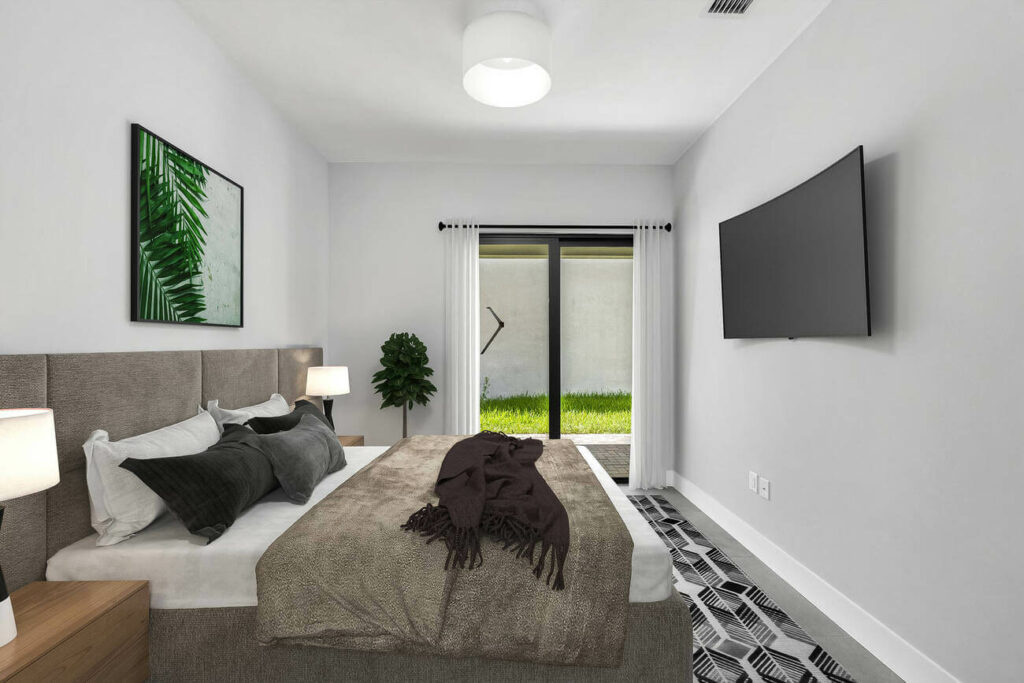
If there’s no time to stage the home or if the property is vacant, you can use AI virtual staging to create a warm and inviting home with lots of modern and fresh design styles.


And remember that removing any potential exterior distractions is key in real estate photography. Make sure those telephone cables, trash bins, cars in the driveway, and passersby are gone.
Create an unobstructed view of the property, so your audience can truly envision making this space their own!
5. Walk Through the Home

Before you even pick up the camera, it’s essential to take some time to get a feel for your photoshoot location.
Consider angles that will show off the property’s charm, and as mentioned earlier, make sure there are no items of clutter in your shot.
Remember that creating beautiful real estate shots is about highlighting architectural features rather than creating nice interiors.
Moreover, taking notes can help if you’re having trouble keeping track of which rooms need tidying or tweaking before shooting begins for optimum results.
6. Choose Natural Lights First If Available

Capturing a home in its best light can be tricky. Should you just use natural lighting? Or turn on the lights or leave them off?
It all depends on the time of the day for your shoot and what each property needs. Luckily, this is something that’s easy to assess when shooting.
First of all, you should try and plan your shoot in either the early morning or evening, during the so-called golden hour. The natural light will be the softest at this time which will create stunning and romantic-looking exterior shots.
When it comes to interior photography, turning on the lights will give you warm and welcoming vibes but introduces various temperatures, which need adjusting in post-processing.
On the other hand, if they’re left off there might be slight coldness coming through. However, it’ll give an even temperature throughout your images, creating less hassle with color correction later down the line.
Our tip: find out whether natural sunlight streams into any of your rooms via large windows then open those up for nature’s most flattering lighting at no extra cost!
If you’re stuck with low lighting or a lack of windows – don’t worry! Simply turn off any color temperatures and use flash instead if necessary, or add a subtle effect by turning on desktop lamps without casting shadows.
Ultimately though, be sure your approach is consistent throughout the entire house for optimal results.
7. Adjust Your Tripod Hight
Capturing perfect interiors requires precision and an eye for detail. You’d want to capture lifelike images of a property so that buyers won’t feel confused when they see the house in person.
To do this, make sure your tripod is set to the right angle, about 5.5 feet from the ground. That way, you can keep those straight vertical lines perfectly in focus and avoid camera shakes.
In addition, try to balance the distance between the floor and the ceiling. Take your time choosing the right perspective.
8. Use a Drone for a Bird’s Eye Perspective

Real estate photography has taken flight! (*pun intended)
With the help of drones, getting a truly breathtaking shot is no longer something only available to those with deep pockets.
By capturing shots that highlight incredible angles, property boundaries, and neighborhoods, drone photography will take your business to new heights.
Nowadays you don’t just stick to still images — with a drone you can shoot mesmerizing videos too; it’s one surefire way to make your services stand out from the competition!
9. Showcase a Property’s Best Features

Remember to showcase a property’s best features. Highlight the home’s unique features – whether it be a sparkling pool, brand-new countertops, an inviting fireplace, or sunlit windows.
Lastly, snap away to your heart’s content! When you have a wide selection of shots, taken from different angles and exposures, it allows for more creative freedom when post-processing.
Don’t be shy—with a professional real estate photo editing service at your fingertips, the possibilities are endless in turning those photos into something truly extraordinary.
10. Never Skip Editing Your Photos!


Now to the most crucial aspect of improving your real estate photography – photo editing!
Photo editing is essential to create high-quality real estate photos that will present the property in its best possible light. It can also help to highlight the home’s best features, replace a dull sky with a shiny beautiful one, and downplay any possible imperfections.
Professionally edited real estate images can be the difference between a quick sale and getting stuck on the market – making them an absolute must for homeowners looking to make top dollar.
With tasteful edits, potential buyers will fall in love with your property before even setting foot inside!
For example, consider these statistics:
- Statistics by the National Association of Realtors show that 87% of homebuyers on the internet found images to be among the most useful features of listing websites when looking for new homes they might like
- 83% of buyers said pictures as very important in helping them choose which homes they will visit
- 61.3% of brokers believe high-quality photography is ‘crucial’ for selling homes
- About 32% of homes with high-quality photographs sell faster than those without visuals
- Listings with professional photos earn a 1,200% increase in social media shares
- And 68% of potential buyers say that great photos made them want to visit the home
These stats show how important high-quality real estate photos are to captivate potential buyers and get them to want to visit the home. In summary, editing allows us to turn any photo from blah into beautiful.
High-Quality & Consistent
Real Estate Photo Editing
Hire a dedicated editor with performance metrics from $7/hour.
Outsource Your Real Estate Photo Editing


Outsourcing your photo editing to a professional real estate photo editing company like PhotoUp is a smart choice if you’re looking to free up time to grow and scale your business.
The work-life balance is essential to increase productivity and build a profitable photography business.
Let PhotoUp’s team of expert editors take the post-processing off your plate so that you can focus on other high-impact tasks and spend more time with your family and loved ones instead of doing tedious editing all night.
Browse Top Dedicated
Real Estate Photo Editors
Ready-to-hire editors for real estate photo editing, and more.
What Is PhotoUp?
PhotoUp has more than 10 years of experience in the business and employs several hundred photo editors around the world, making it hard to match our quality, service, and pricing.
We have a team of highly talented real estate photo editors who are ready and eagerly waiting to take the editing off your plate and can help with for example:
- Image brightness and exposure correction
- Color and tone adjustments
- Window masking and glare reduction
- Clutter and advanced object removal
- Line and angle corrections
- HDR editing and manual blending
- Harsh shadows and lack of light
- Sky replacements
- Twilight and day-to-dusk editing
- And much more!
Best yet, you’ll also get access to our user-friendly software, so you can upload and receive photos, and send instructions and feedback. As well as track and manage team members and clients, store final images, and more!
Offer Your Clients More Value
The more services you can provide your clients, the more valuable you get!
PhotoUp is a complete one-stop shop for all your real estate marketing needs and also offers additional services such as:
Take advantage of these services and offer them to your clients to add value. Before you know it, your real estate photography business will take off to new heights.
PhotoUp Real Estate Photo Editing Uploader
For more details, have a look at the real estate photo editing uploader demo to see how easy it is to get started:
It’s as easy as 1-2-3!
Did we say that our photo editing starts at the low cost of $1.15 per image depending on your subscription… And for a limited time, you even get 5 free edits when you sign up for a PhotoUp account!
Sign up for a free PhotoUp account today, and let our expert photo editors help you make your real estate photos look simply stunning!
We hope this post helped you learn how to improve your real estate photography with everything from choosing the right gear, making preparations, and following some simple shooting tips.
If you found this post useful, you may also want to check out the following related resources:

