


Table of Contents
- Why Replace the Sky in Real Estate Photos?
- How to Replace the Sky in Lightroom (4 Simple Steps)
- Let PhotoUp Help You Enhance Your Real Estate Photography
Do you want to learn how to easily replace the sky in Lightroom?
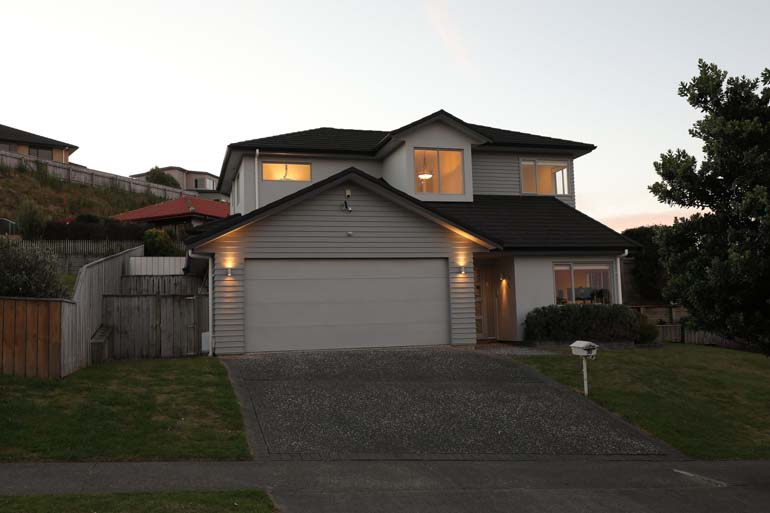
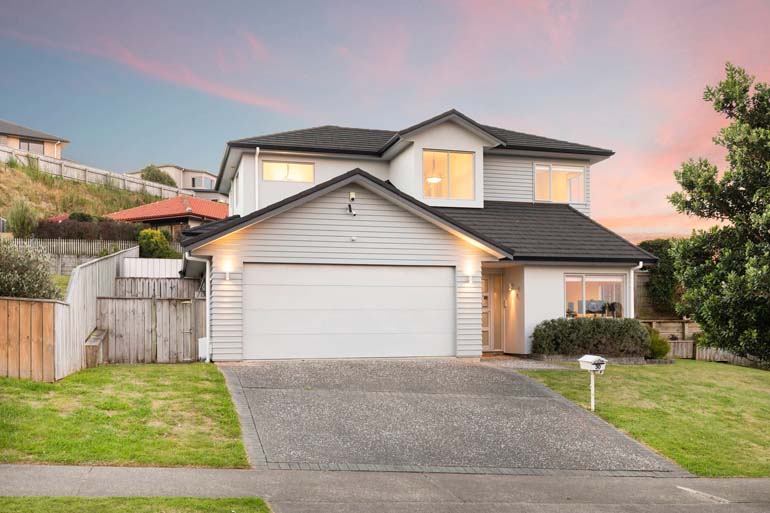
Is the cloudy sky in your real estate photos ruining your “hero shot”? By following these simple steps in Adobe Lightroom, you can make your skies pop.
In this post, we’ll show you how to replace or enhance the sky in Lightroom in 4 simple steps to create stunning real estate photography that will capture buyers’ attention.
Let’s begin by explaining why the sky replacement technique is so beneficial for creating inviting and captivating real estate photos.
Why Replace the Sky in Real Estate Photos?🌄
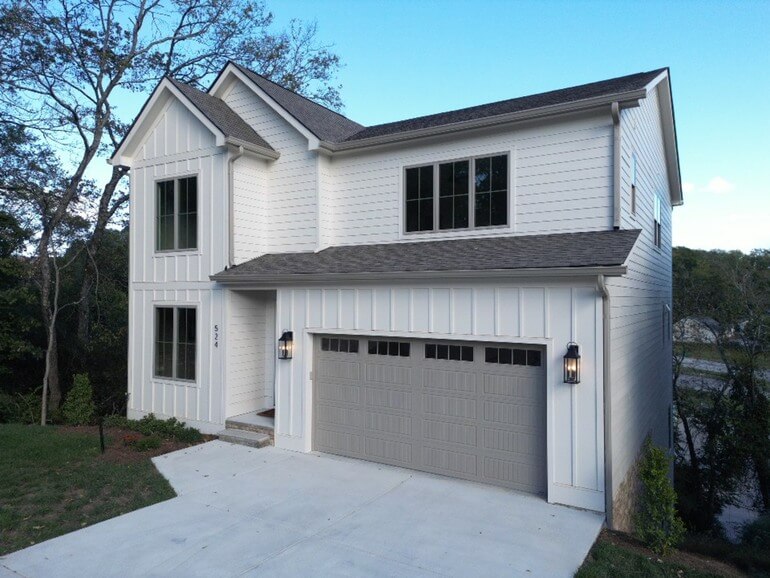
Sky replacement is a powerful editing technique that transforms real estate photos by adding elements such as clouds, birds, rainbows, airplanes, or even dramatic lighting effects to create the perfect atmosphere.
Here are some of the top advantages of using sky replacement in property photography:
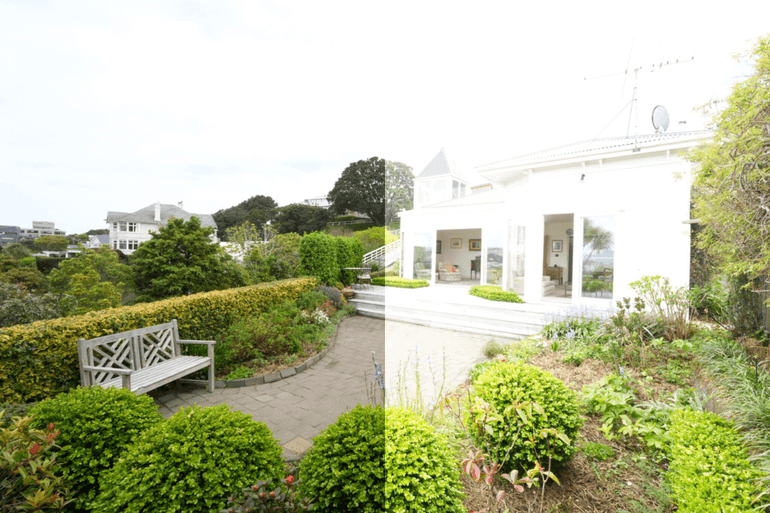
| Enhances Visual Appeal: Replacing a dull or overcast sky with a bright, vivid one instantly makes a property photo more inviting and attractive to potential buyers. |
| Gives Photographers Greater Flexibility: Weather conditions and lighting no longer have to dictate your shooting schedule. With sky replacement, you can photograph a property anytime and later adjust the sky to suit your ideal look and feel. |
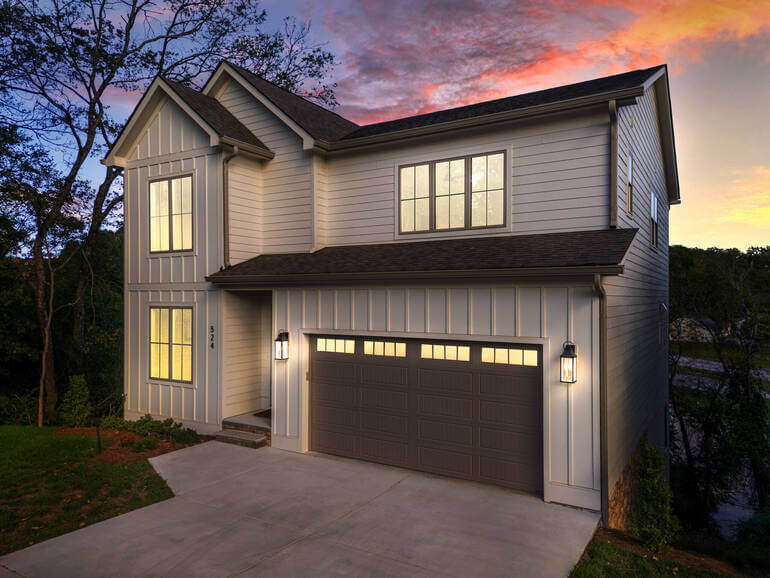
| Creates the Right Mood: The sky sets the emotional tone of an image. A clear, sunny sky can make viewers feel energized and optimistic, while a dramatic sunset can add warmth and sophistication to your listing photos. |
| Offers Endless Creative Options: From soft morning hues to golden-hour glows or even nighttime skies, the possibilities are limitless. Photoshop allows real estate editors to choose or design the perfect sky to match the property’s style and atmosphere. |
Ultimately, sky replacement puts you in full creative control—letting you craft stunning, professional-grade real estate images regardless of weather or timing.
With the benefits of sky replacements in mind, let’s take a look at how to do them in Lightroom.
How to Replace the Sky in Lightroom (4 Simple Steps)🏞️

To get started creating beautiful and vibrant skies that will enhance your real estate photography and hopefully accelerate sales, you can use these 4 simple steps:
Step 1. Import an exterior photo of a property in Adobe Lightroom. The sky should be prominent in the image.
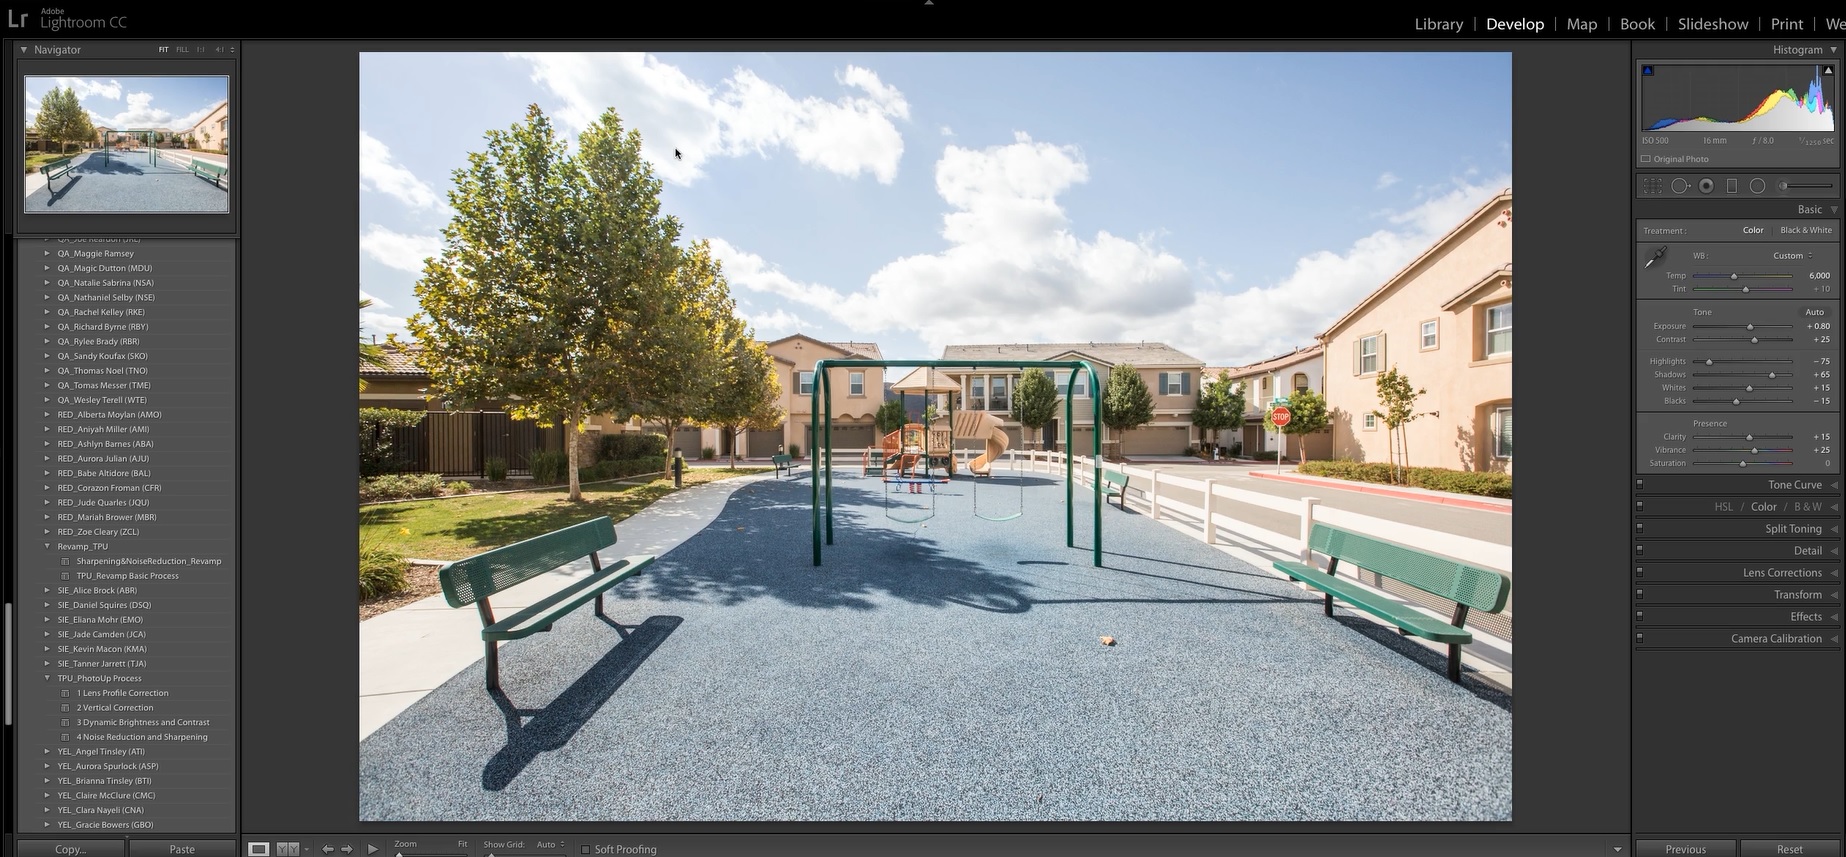
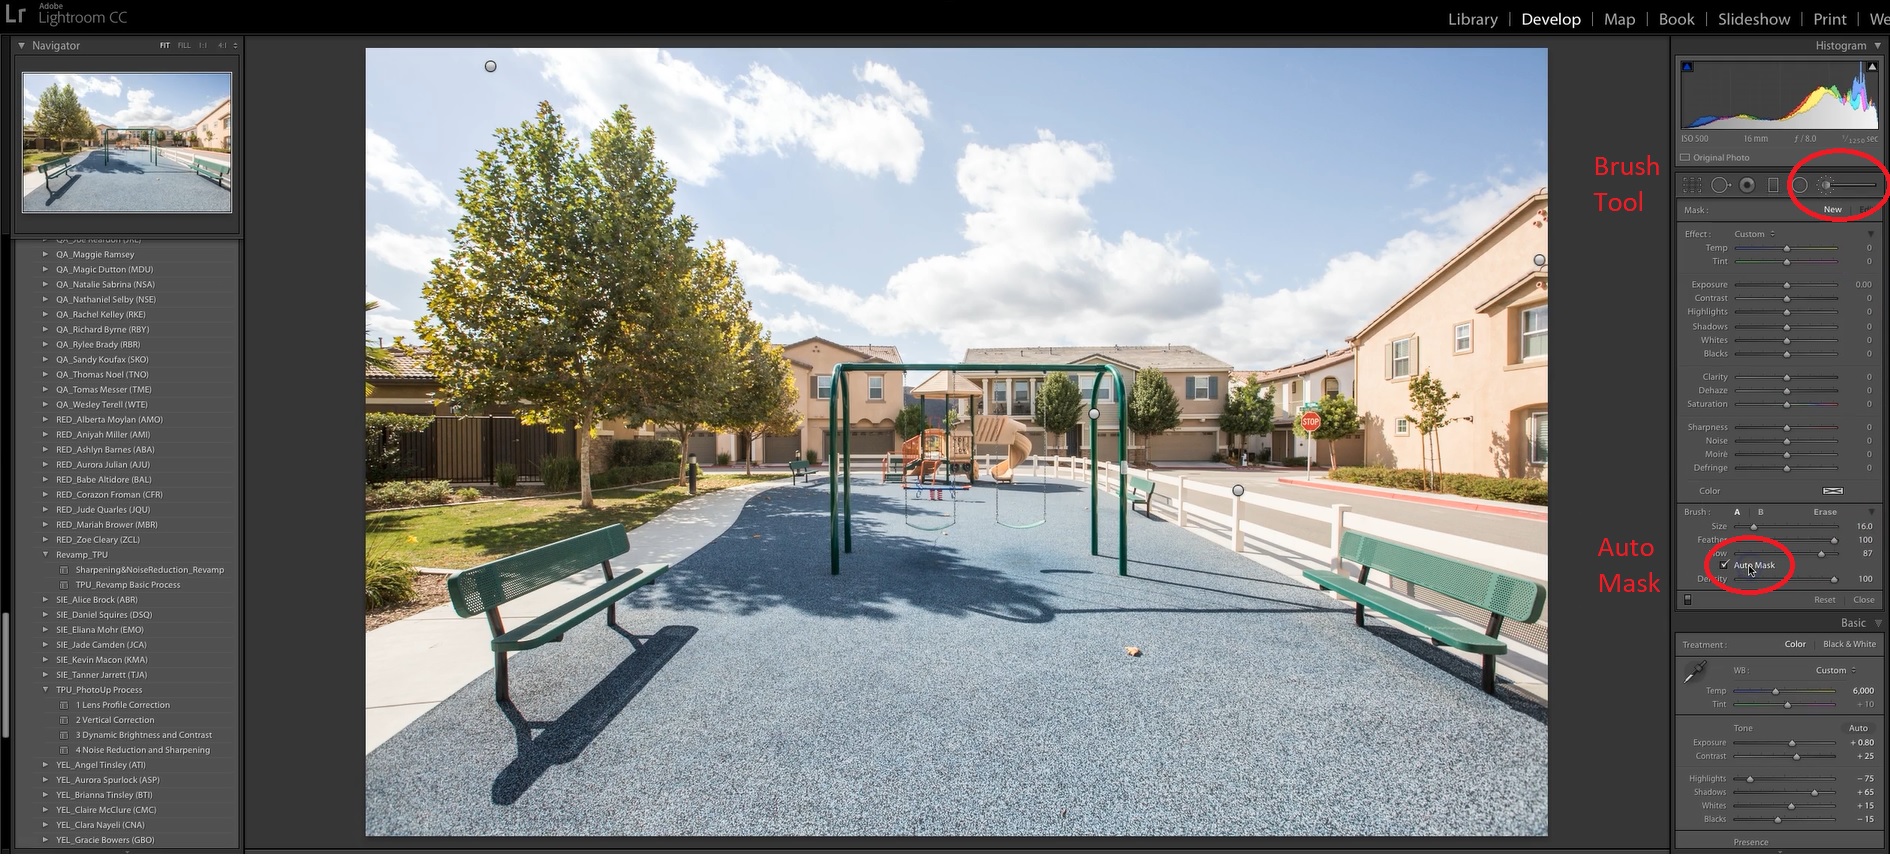
Step 2. Select the Brush Tool at the upper right corner of the sidebar, just below the Histogram. Then click the Auto Mask box further below.
High-Quality & Consistent
Real Estate Photo Editing
Hire a dedicated editor with performance metrics from $7/hour.

Step 3. Adjust the Temp to blue by moving the pointer to the left.
Step 4. Brush over the sky. Make sure that the encircled crosshair at the center of the brush won’t touch the areas below the sky.
And that’s it! It’s really that easy to enhance skies and create impressive listing photos.
The best part is that you don’t have to do this yourself—let PhotoUp do the heavy lifting and save you hours in post-processing.
Let PhotoUp Help You Enhance Your Real Estate Photography🏘️
PhotoUp’s team of expert real estate photo editors can replace or enhance skies, remove cords, and process your photos based on your custom preferences.
With a team of experienced editors and a streamlined process, we can transform ordinary shots into extraordinary marketing assets.
Why Choose PhotoUp?
Here are some compelling reasons to choose PhotoUp’s editing services:
- Expert sky replacement and HDR blending
- Precision window masking for natural, sharp window views
- Fast turnaround times of 12-24 hours to keep listings moving
- Affordable pricing, starting at $1.50 per image for agents and photographers
- Dedicated Editors to maximize image consistency and productivity
- US-based support 24/6 to ensure client satisfaction
- We can help with any real estate photo editing issues
Whether you’re a solo photographer or a large real estate firm, PhotoUp offers scalable solutions to fit your needs.
Browse Top Dedicated
Real Estate Photo Editors
Ready-to-hire editors for real estate photo editing, and more.
More Than Just Real Estate Photo Editing
Additionally, PhotoUp is a complete one-stop shop for real estate marketing and also offers services, such as:
- Virtual staging
- Virtual house tours
- Single property websites
- Property flyers
- House portraits
- And more!
We have everything you need to enhance and market real estate photography in one user-friendly software!
How to Get Started
Getting started using PhotoUp’s real estate photo editing service is super easy.
This is all you need to do:
Step 1. Sign up for a free PhotoUp account.
Step 2. Upload your photos to our easy-to-use software.
Step 3. Choose the level of editing that you need and provide instructions (optional).
Step 4. Wait for PhotoUp professional editors to edit and return the photos in less than 24 hours (48 hours for virtual staging).
Step 5. Download and start using your beautifully edited photos.
PhotoUp Real Estate Photo Editing Uploader Demo
Check out how easy it is to get started using PhotoUp’s software in this real estate photo editing uploader demo:
It’s really as easy as 1-2-3!
Sign up for a free PhotoUp account today, and let our expert editors take the post-processing off your plate!
For a limited time, you even get 10 free credits you can use on any of our services when signing up for an account.
We hope this blog post helped you learn how to replace the sky in Lightroom. If you found this guide useful, you may also want to check out the following resources:
- Real Estate Editing on a Budget: Top Services Under $2 Per Image
- 9 Proven Exterior Real Estate Photo Editing Techniques
- The #1 Edit to Create Stunning Real Estate Photos
- How to Replicate Professional Real Estate Photo Editing (10 Expert Tips)
- Why Real Estate Photo Editing Matters in a Competitive Market

