


Lesson Overview
In this lesson, I’ll cover the foundational gear needed to launch your career in real estate photography.
Table of Contents (Quick Links)
In this lesson you will learn about:
- The Best Cameras to Buy
- A Few Great Lens Options
- The Tripod and Heads You Will Need
- A Simple Lighting Setup
- Carrying Equipment
- Accessories You Didn’t Know You Needed
- Entry Level Options for 360º Photography
- Aerial Drone Photography
- Your Real Estate Photography Gear Budget

This is the third lesson in the How To Become A Real Estate Photographer course. A premium (and completely free) course written by the Kristian Pettyjohn, CEO of PhotoUp, the leading provider of software, services, and systems for real estate photographers.
Real Estate Photography Gear – Everyone Has an Opinion

While real estate photography gear is one of my favorite topics, I realize it can also be a hotly debated topic as well.
As such, my goal is to give you a starting point, a template if you will, from which you can modify to your heart’s content. Prefer Nikon to Canon? You do you boo.
I always recommend you do your own research on gear, read customer reviews, and shop around for the best pricing.
With that disclaimer, and true to my ‘no nonsense’ title, I’m not going to give you the ‘17 best cameras for real estate photography’.
No, there really are just two serious contenders…
The 2 Best Cameras for Real Estate Photography
There are two work horses in the industry and which one you choose largely depends on if you fall in the Canon or Nixon camp.
I’m a Canon guy, but others swear by Nixon, both are battle tested and will serve you well.
There are less expensive options, and if you are unsure if you will make real estate photography a full-time business, you can definitely start out with alternatives.
However, be aware that if you buy a less expensive cropped sensor camera, your lenses will not fit a full-frame camera body if you upgrade in the future.
A camera body is the foundation of your setup, so expect it to be your most expensive gear purchase.
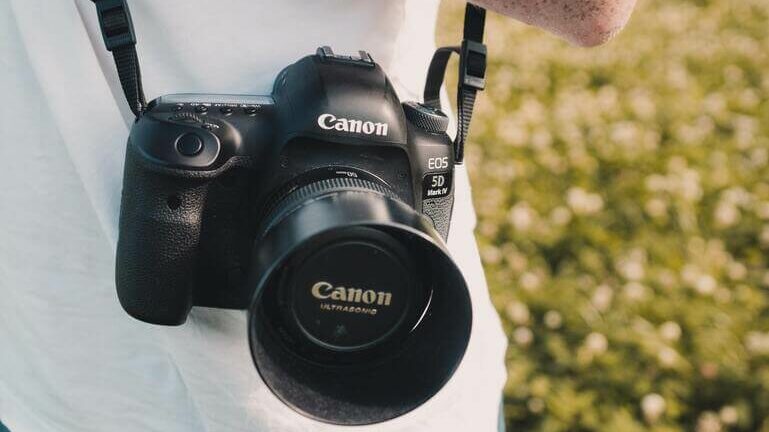
1. Canon 5D Mark IV
If you are in the Canon corner, you can’t go wrong with the 5D Mark IV. Updated in late 2016, it has been a crowd pleaser much as its predecessor, the Mark III, was, but with notable improvements when shooting in low light among others.
A cool feature of this camera is that it can shoot in Dual Pixel Raw format. Translation: you can make slight focus adjustments in post-production and it helps correct ghosting. Fancy.
The 5D Mark IV is also wi-fi enabled, pushes 30.6 megapixels (more than enough) and shoots 4K video. In short, it checks all the boxes and then some.
2. Nikon D850
Nikon’s answer to Canon’s 5D Mark IV was the D850, released in late 2017. In similar fashion, it provided improvements across the board and garnished high-praise by critics and photographers alike.
The D850 is notable for its higher resolution sensor clocking in at 45.6 megapixel (translation: much larger files, which is not always desirable) and excellent performance in low-light conditions.
It also introduced a new sensor that helped bring more sharpness at the edges of the image where they typically become more soft.
The D850 is also wi-fi enabled (but requires the Nikon app that enables wi-fi via Bluetooth, not ideal) and shoots 4K video.
The Investment
Either camera will set you back about $2,800 as of 2022 and you can buy directly from either company on Amazon or B&H PhotoVideo is always a trusted source as well.
The Ultimate All-in-One
Real Estate Photographer Business Platform
Grow a successful real estate photography business with PhotoUp.

What Are the Best Lens for Real Estate Photography?

When it comes to lenses the sweet spot in regards to focal length is right around 18-20mm, but given the range of spaces you will shoot, a zoom lens is a must.
For brevity I’m just going to discuss the best lenses for Canon and Nikon.
The Best Canon Lenses
For the Canon shooters, I don’t think you can go wrong with the Canon EF 16-35mm f/2.8L III USM Lens. I love the fixed aperture. It’s sharp, quick, sturdy, and reliable.
Furthermore, it has a near perfect focal length range and performs well in low-light. Perhaps the one downside is the price, which sits on the higher end at $2,199 as of 2022.
On the more budget friendly spectrum we have the Canon EF 16-35mm f/4L IS USM Lens or Sigma 18-35mm f/1.8 lens, which can pull their weight if you aren’t ready to throw down $2K for a lens just yet.
Some argue the Canon EF 11-24mm f/4L USM Lens is the hot dog of the day, but I can’t find a situation where I ever need a lens that wide and find a focal length of 35mm more useful at times.
Also on the fringe is Canon’s 17mm tilt shift, a beaut in its own regard, but unless you are shooting high end luxury shoots every day, it is neither practical, nor cheap (and I think I would be stressed out of my mind without a protective UV lens filter on the front personally).
While it could be tempting to purchase the standard stock 24-105mm lens (and it’s a great lens), I rarely pull it out when shooting homes.
The Best Nikon Lenses
Admittedly I have less direct experience with Nikon lenses, however, the Nikon AF-S NIKKOR 14-24mm f/2.8G ED Lens is a popular and top-rated choice for Nikon shooters and a good place to start.
A plus of Nikon is the lenses tend to be a bit more affordable than Cannon. Though Sigma is certainly the cost leader, with the Sigma 14-24mm f/2.8 lens being a popular option for Nikon shooters.
The Investment
My advice is get the right camera body and if you need to save money, go with a Sigma lens.
Canon and Nikon both offer several top-notch zoom lenses surrounding the 20mm sweet-spot that you can choose from. Expect to spend 50-70% of your budget on your camera body and lens.
Tripods & Heads

When it comes to tripod legs and heads, there are a myriad of options, from absurdly cheap to obscenely expensive. My strong recommendation above all is to pick a reputable manufacturer.
The clear leader in this space has long been Manfrotto, and I’m a big fan. They are rock solid and can easily withstand the wear real estate photography demands of gear.
There are three things you will likely want in your arsenal:
- A solid set of tripod legs
- A geared or pistol grip head for photography
- A fluid head for video
Nice Legs
For me the bromance started with Manfrotto’s MT190XPRO4, and is my go-to leg choice that balances quality, durability, height, weight and price. At just $279 at the time of this writing, it’s hard to go wrong.
Some swear by carbon fiber legs. They are lighter, but at the expense of durability and nearly twice the price. If you are keen, there is a carbon fiber version of the MT190, the MT190CXPRO4 coming in around $429.
On the budget end there is Manfrotto’s MT190X3 at just $159 is a good option if you’re not quite sure if real estate photography is right for you.
Geared, Ball, and Fluid Tripod Heads
If you shoot on a tripod (the answer is yes if you plan to shoot HDR or Flambient), you will likely need to purchase two heads, either a geared or ball head for photography, plus a fluid head for video.
Geared Heads
Many real estate photographers who shoot on a tripod shoot with a geared head to really dial in the angle of each frame. If you are in this camp, I’ve been pleased with Manfrotto’s 410 Junior Geared Head, which will run you about $249.
Ball Heads
While I find a geared head helpful on high-end shoots where every degree matters, more times than not I opt for a pistol grip ball head as it’s much faster to frame, albeit not as precise.
Manfrotto’s 322RC2 grip action ball head is a great place to start at $219. Remember, you’ll be shooting disposable real estate photos of cluttered homes more times than not, so be practical.
Fluid Heads
Finally, if you plan to offer video services you will need a fluid head, which does exactly what it sounds like, allows you to capture smooth, that is fluid, plan and tilt video footage.
Manfrotto’s 502 series fluid head’s are the perfect place to start. Designed with DSLRs in mind, the 502 is the perfect intro into fluid heads at a very approachable price.
Video Sliders & Shoulder Mounts

Here is a little extra credit for you. If you plan to shoot video (and you should), one of the best ways to elevate your shoot is with a video slider.
Neewer offers a compelling and affordable option with their basic 4-bearing and carbon fiber 6-bearing 80cm video sliders, both priced below $100. Both sliders attach to any standard tripod mount.
For video walk-through videos, while a slider can do the heavy lifting, sometimes actually walking with your camera is needed.
For those shots, you can greatly increase stability with this shoulder mount system also by Neewer for under $140.
Get Your Time Back
Real Estate Video Editing
If you thought photo editing took time... we're here to help.
Lighting Gear Made Simple

If you are new to lighting spaces with speedlites and triggers, they can be confusing. I find many posts go way down the rabbit hole which can quickly make it an intimidating subject.
Let’s cut through the noise shall we?
Single Shot Lighting Setup
You will need at least two Yongnuo YN560 IV Speedlites, but I’d recommend picking up 4-6 as a full set at some point, they run $85 each. Not bad.
You can control up to six of the YN560s remotely from your camera with Yongnuo’s YN560-TX II flash trigger remote controller (only $45 bucks!) that just clicks into the hot shoe top mount of your camera (note these are Canon and Nikon specific!).
Read the manual for both. Initial setup can take a few minutes and be slightly frustrating to figure out (so don’t do this on-site!), but once done, shooting is a breeze.
For stands, you will want at least two tall main stands. Manfrotto 367B basic light stand get’s the job done well with 9’ extension. You may also consider a three-pack of Manfrotto’s 7.7’ air cushioned compact stands for $291.
Finally, having at least one of Manfrotto’s 6.2’ 5001B Nano can come in handy in tight spaces like bathrooms for $70. Or shop Amazon for a myriad of options half the price.
That’s it!
Over time you may find in larger spaces (and especially if shooting flambient) having a more powerful 300W or 600W strobe can be helpful, but you can get by without these to start.
Flambient Lighting Setup
Your light setup for shooting in the flambient style can be similar to a single shot setup, but you can usually simplify down to 1-2 speedlights and 1-2 strobes.
As such, this can be less expensive on gear, but comes with more advanced and timely post-processing.
HDR Lighting
Lighting is not typically used in HDR shooting, so you can just skip lighting if you plan to only shoot HDR. Not a bad place to start, but most industry veterans will tell you single shot or flambient is the way to go.
Personally, I shoot all three methods depending on the job. I go with HDR for cheap condo shots that I want to spend very little time and effort on.
I shoot single shot for my standard homes as it’s fast and cheaper to edit and shoot flambient for higher end portfolio homes.
Video Lighting
Video lighting can get spendy, and for home-walkthroughs I don’t typically recommend it.
However, if you think you will be doing agent promo videos, you will want a basic 3-point lighting kit like this entry level 3-point light kit by Neewer.
Lighten Your Load

Don’t make the mistake of overlooking your carrying and protective systems for your gear.
At a minimum you’ll want a bag or backpack for your camera and lenses and if you shoot with multiple lights, likely a larger bag for stands and a dedicated hip bag for your speedlites.
Backpacks
Lowepro’s Fastpack is a solid mid-priced option for the quick grab-and-go demands of real estate photography.
Want a little more style? Peak Design’s Everyday V2 30L bags are amazing. I personally use this bag for my camera, lens, and accessories, but they run about double the price as Lowepro.
Speedlite Bags
Here it really depends if you shoot with just 1-3 flashes or 4-6. For 1-3 lights, Mountainsmith makes the TAN Kit Cube that is both rugged and affordable, or for more style check out Peak Design’s Everyday Messenger 13L bags.
If you are lugging around 4-6+ lights (like me), it’s hard to beat Mountainsmith’s Boarding Pass FX roller bag.
Stand Bags
Cut through the bulk and clutter of lighting stands and tripods with Neewer’s 30x10x10in carrying case. It’s not fancy, but it gets the job done under budget.
Or if a roller is more your style Neewer makes a solid 40x12x12 roller case as well.
Have You Ever Thought To
Outsource Photo Editing?
Try it today with 5 free edits from three professional photo editors.
Accessories You Didn’t Know You Needed

Speedlight Mini-Stands
If you shoot with speedlights you will find quick use for these mini-stands, perfect for placing lights on top of doors, cabinets, and all sorts of tight spaces.
Hot-Shoe to ¼” Screw Mounts
How do you put your speedlites on your cool new stands? The easiest way is with a simple hot shoe to ¼” mount.
Screw Adapters
Make sure your ¼” screws adapters fit your ⅜” light stand mounts though. That’s cheap and easy with these adapters.
Flash Cards & Case
Easy to overlook, impossible to shoot without. I always carry at least two SanDisk Extreme Pro 128GB compact flash cards.
Oh, and this little $10 water resistant case is your best friend.
Back It Up
Call me old school, but I still back everything up on a hard drive, but gone are the days of LaCie hard drives that could be mistaken as boat anchors.
The new school is the SanDisk 2TB Extreme Portable SSD. It’s outrageously cool.
360º Camera Options

If you want to jump into the world of virtual tours you will need a 360º camera. If you are just starting out it is unlikely you will want to drop $3K+ on a new Matterport Pro2 (plus pay at least $69/month), ouch!
Ricoh is leading the 360º camera field with their entry line Theta SC2 or higher end Z1 model.
I recommend Ricoh over others like Insta360 because the Theta Z1 is compatible with all the major virtual tour providers, including Matterport, iGuide, and of course PhotoUp.
Aerial Drone Photography
If you are going to offer aerial photography, there are two things you need to know.
First, you must have a commercial drone license, commonly known as your Section 107 license.
Second, you should buy a DJI Mavic 3 drone, they are simply the best (and easiest to fly) drones for aerial photography and videography. Enough said.
Putting It All Together – Your Real Estate Photography Gear Budget
If you’re like most of us, you probably already have some of this real estate photography gear and just need to add a few new pieces to your arsenal.
But if you are starting your business from the ground up expect to pay $5-10K depending on if you start with a full-frame vs cropped sensor camera body and if you decide to offer video and 360º virtual tours.
Add another $4K if you plan to get into the aerial photography game in any serious way.
| Gear | Price |
| Camera Body | ~2,800 |
| Camera Lens | ~$2,200 |
| Tripod w/ Photo and Video Heads | ~$900 |
| Speedlites (3X Plus Controller) | ~$300 |
| Carrying Cases | ~$250 |
| Misc. Accessories | ~$100 |
| Theta Z1 360º Camera | ~1,000 |
| Total | $7,850 |
A Quick Recap
While you can (and probably will) spend hours pouring over real estate photography gear reviews, watching YouTube videos, and staring a little too long at your shopping cart, it really isn’t all that complicated.
Find a good camera, snag a wide angle lens, and get out there!
Up Next – How Much Does It Cost to Start a Real Estate Photography Business
While getting your shooting rig purchased is the bulk of your investment to launch a real estate photography business, there are more costs you need to consider.
Besides your gear you need to be thinking about the costs of setting up your business entity, acquiring insurance, subscribing to the right software, and more. We explore the full investment in our next lesson.

