


Table of Contents
- Why Editing Small Spaces to Look Spacious Is Crucial
- 5 Real Estate Photo Editing Tips to Edit Small Spaces
- Let PhotoUp Handle the Editing So You Can Grow
Do you have a small space you want to edit to look bigger and more expensive? Then, you’ve come to the right place!
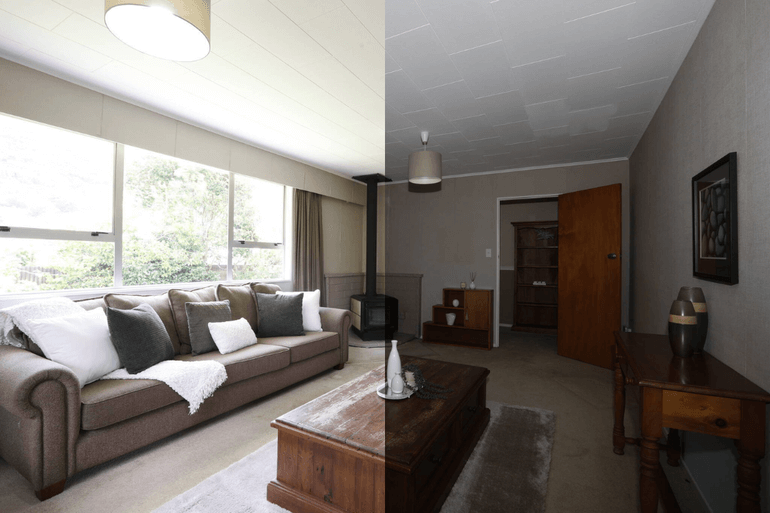
When small spaces look dark, cluttered, or distorted, buyers subconsciously assign lower value. But when those same rooms feel bright, open, and thoughtfully styled, they signal comfort, care, and even luxury. And that’s where proper real estate photo editing makes all the difference!
In this guide, we’ll show you how to edit small spaces to feel spacious and expensive without misleading buyers.
Let’s begin by taking a look at why editing small spaces to look more spacious is crucial in real estate marketing.
Why Editing Small Spaces to Look Spacious Is Crucial🏘️
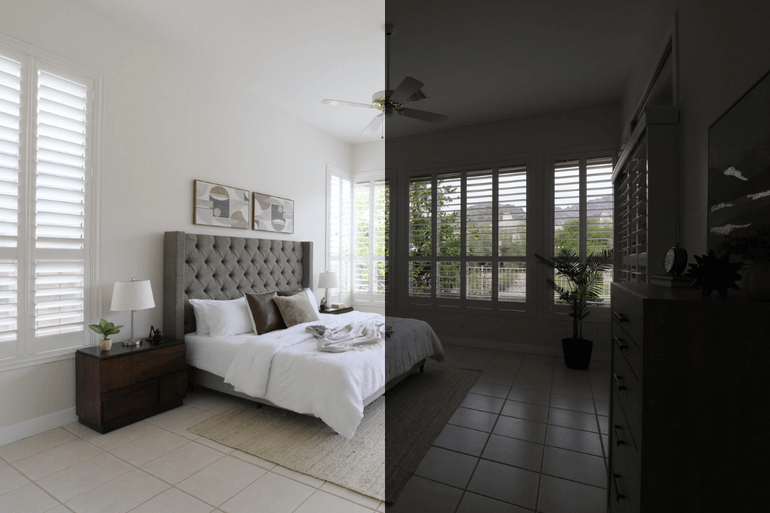
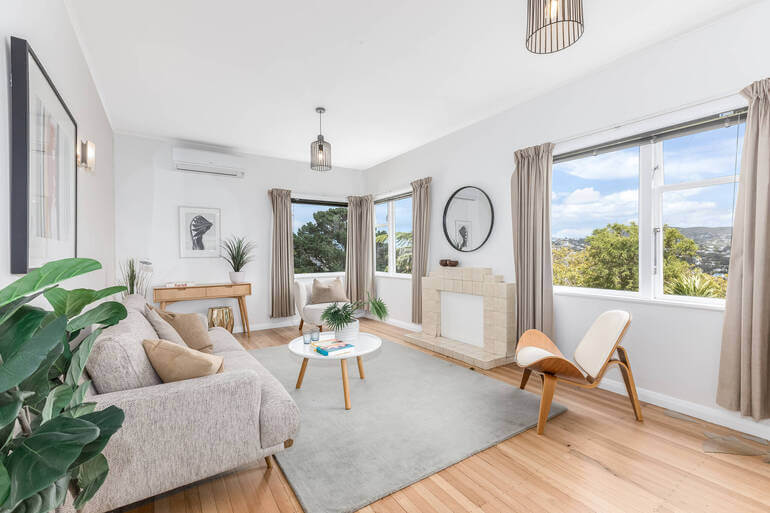
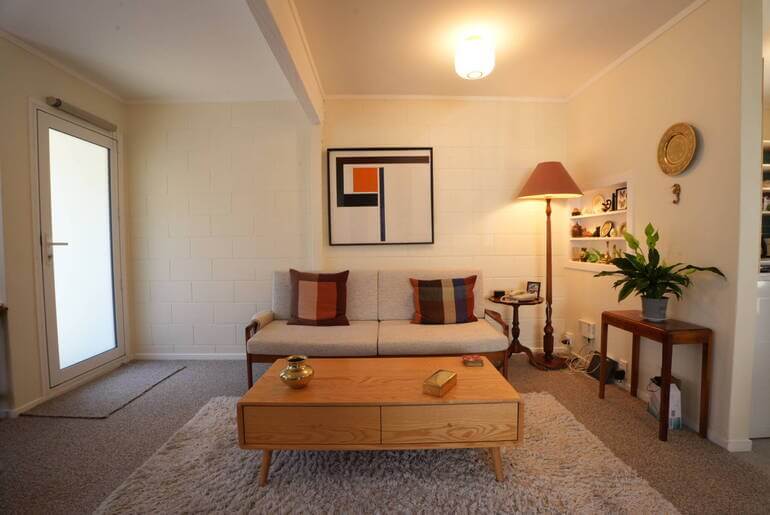
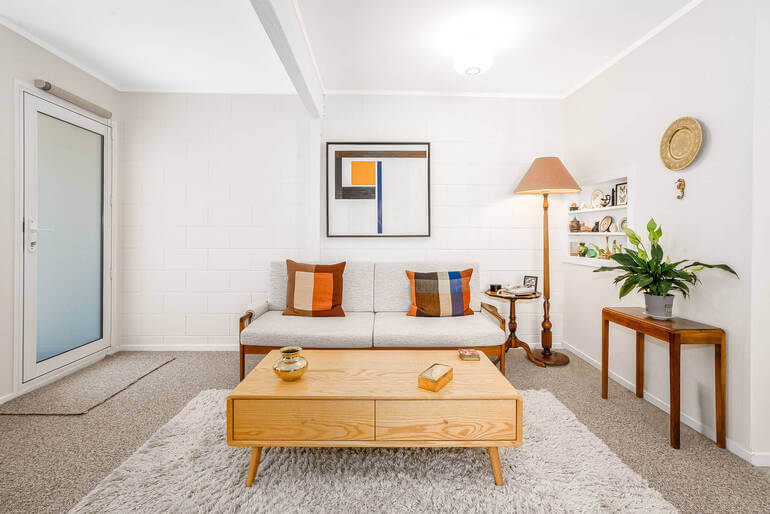
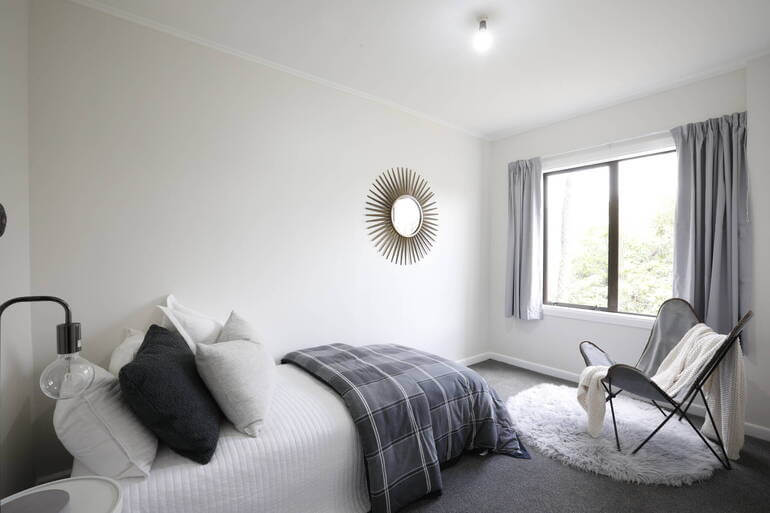
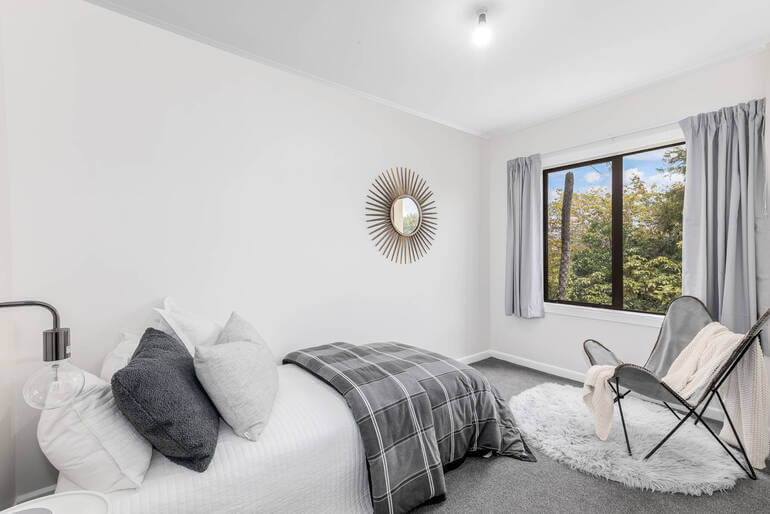
In real estate marketing, perception is everything. A small bedroom can feel like a cozy retreat—or a cramped afterthought.
A compact kitchen can read as “efficient and charming”—or “tight and outdated.” The difference often isn’t the square footage. It’s the presentation.
Since 100% of buyers begin their home search online, listing photos shape their first impression long before a showing is scheduled.
When compact rooms appear dim, crowded, or visually unbalanced, buyers often perceive them as less valuable without even realizing it.
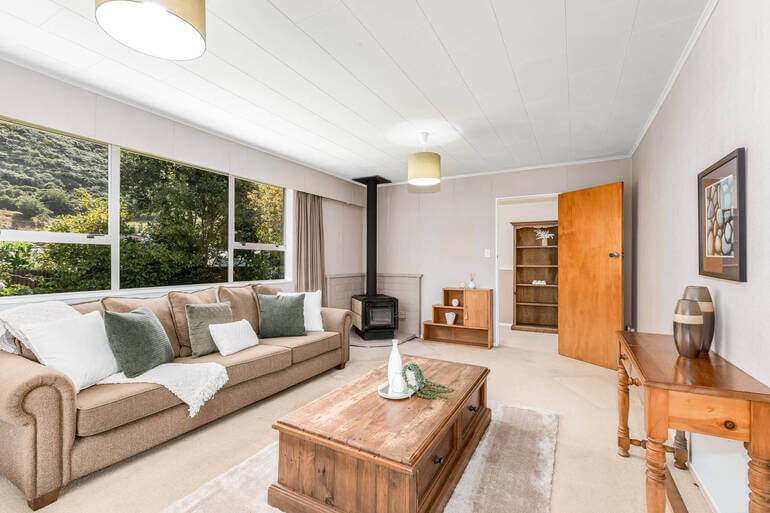
However, when those very spaces are presented as bright, airy, and intentionally designed, they convey a sense of warmth, attention to detail, and elevated quality—even a touch of luxury.
The good news? You don’t need to change the property to elevate its appeal.
Strategic real estate photo editing can transform modest square footage into imagery that feels polished, spacious, and high-end—without misleading buyers.
5 Real Estate Photo Editing Tips to Edit Small Spaces
Now, let’s show you 5 professional real estate photo editing techniques to help small spaces look bigger, brighter, and more expensive:
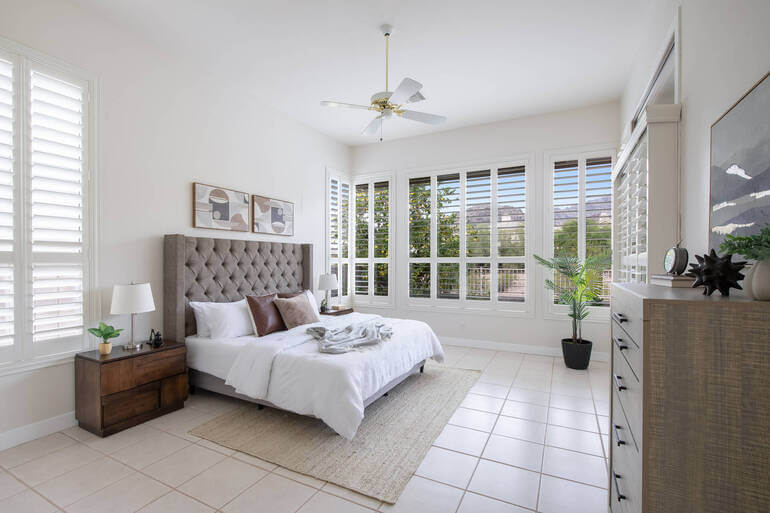
1. Perfect Vertical & Perspective Corrections📐

Nothing makes a room feel smaller (and cheaper) than leaning walls and warped lines.
Wide-angle lenses—often necessary in tight spaces—can create distortion that exaggerates corners and makes ceilings tilt inward. Even subtle perspective errors can make a space feel unstable and cramped.
Here are some real estate photo editing tips to consider:
- Correct vertical lines so walls appear straight
- Adjust lens distortion
- Balance proportions so furniture doesn’t stretch unnaturally
- And maintain realistic geometry
When verticals are clean and symmetrical, the room instantly feels more refined. Straight lines signal professionalism and architectural integrity—two subtle cues that elevate perceived value.
To learn how to perfect perspectives, you can check out our tutorials on:
Avoid over-correcting to the point where the image looks flattened. The goal is natural elegance, not artificial stretching.
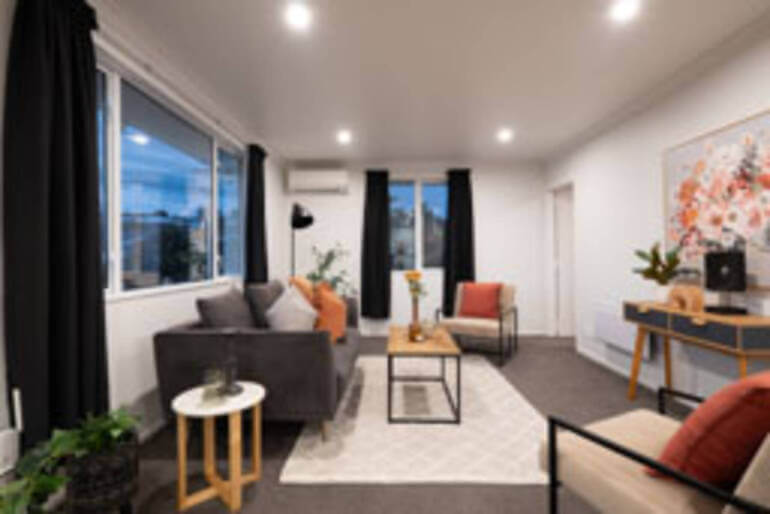
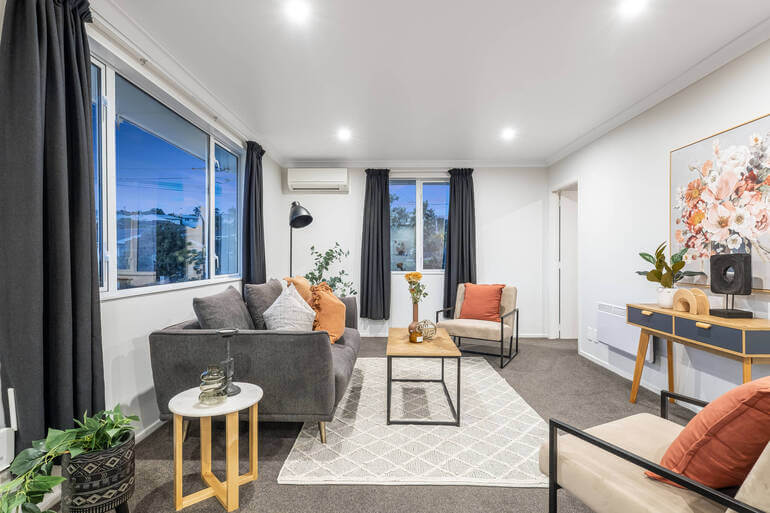
2. Brighten With Natural, Balanced Exposure🌟
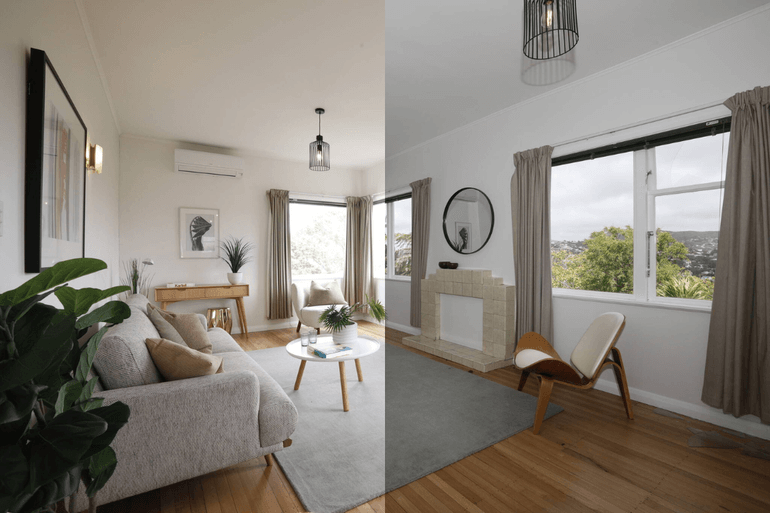
Darkness shrinks a room. Light expands it. Small spaces benefit tremendously from balanced exposure and tonal correction.
Underexposed corners, blown-out windows, and uneven lighting create visual noise that makes rooms feel tight and unfinished.
Consider doing these editing fixes:
- Use HDR blending for even light distribution
- Recover shadow detail without introducing noise
- Tone down highlights while preserving window views
- Add subtle brightness for an airy feel
When light flows evenly across walls and ceilings, the room appears more open and inviting. Soft, natural brightness also communicates cleanliness and care—key elements in creating a high-end feel.
The trick is subtlety. Over-brightening can wash out texture and reduce depth. The goal is luminous, not flat.
These tutorials will help you brighten your images with natural, balanced exposure:
- How to Change Exposure in Photoshop
- How and When You Should Use HDR in Real Estate Photo Editing
- How to Mask Windows for Real Estate Photography in Photoshop
3. Refine Color Temperature for a Luxury Feel🎨
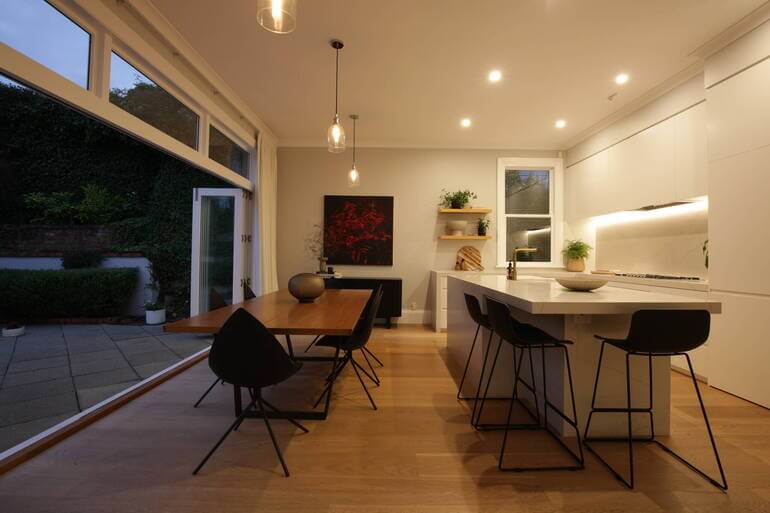
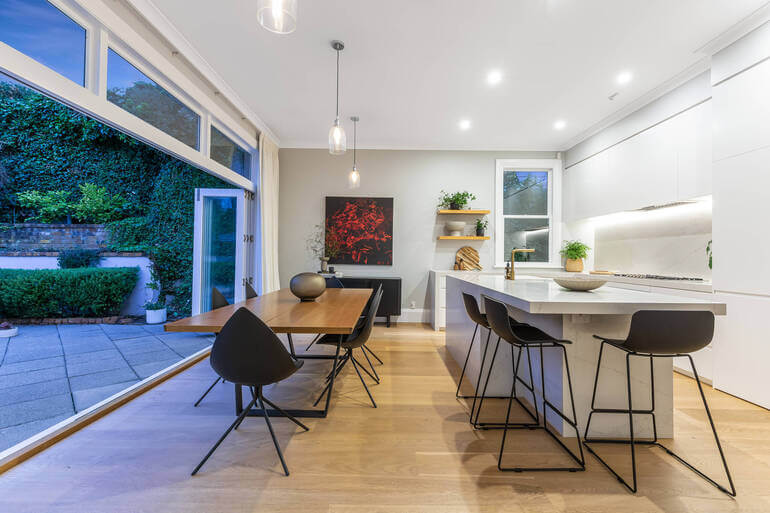
Color psychology plays a powerful role in perceived luxury. Small spaces often suffer from mixed lighting—overhead bulbs, window light, and lamps all pulling color in different directions.
The result? Yellow walls, blue shadows, and inconsistent tones that feel chaotic.
To adjust chaotic colors, here are some real estate photo editing tips to consider:
- Correct white balance
- Neutralize unwanted color casts
- Choose a slightly warm tone for cozy residential spaces
- And use cooler tones for modern, minimal interiors
Warm, balanced tones make a room feel inviting and upscale. Cool tones can emphasize modernity and sophistication. Either way, consistency is what creates polish.
When color feels intentional, the space feels curated—and curated equals expensive.
These tutorials will help you refine color temperature for a luxury feel:
Have You Ever Thought To
Outsource Photo Editing?
Try it today with 5 free edits from three professional photo editors.

4. Declutter Digitally for Visual Breathing Room
Luxury is often defined by simplicity. In small rooms, even minor clutter—visible cords, countertop appliances, trash bins, toiletries—can dominate the frame and shrink the perceived space.🧹
Here are some editing fixes:
- Remove distracting small objects
- Clean up cords and wall marks
- Simplify surfaces
- And reduce visual noise without altering permanent features
The key is restraint. Remove distractions while preserving authenticity. When surfaces are clean and minimal, the room feels styled, breathable, and higher-end.
This doesn’t mean misrepresenting the property. It means presenting it at its best—similar to tidying before a showing.
To learn how to digitally clean up your images, check out our guide on how to declutter photos.
5. Enhance Depth With Subtle Contrast & Sharpness to Make the Space Appear Bigger✨
A flat image makes a room feel smaller. Carefully applied contrast and clarity create depth and separation between foreground and background elements.
When textures are crisp and edges defined, the eye travels naturally through the space—making it feel larger.
Consider doing these editing fixes:
- Add subtle midtone contrast
- Apply controlled sharpening
- Enhance textures (wood grain, fabrics, stone)
- Also, avoid oversharpening, which creates harsh edges
This final polish gives small spaces dimension. Instead of feeling boxed in, they feel layered and thoughtfully designed.
Depth creates the illusion of scale—and scale suggests value.
To learn how to enhance depth in your images, you can check out our guides:
And there you have it! By leveraging these 5 real estate photo editing techniques, you’ll be able to make small spaces feel spacious and luxurious.
Let’s bring it all together in a brief recap.
Bringing It All Together: Small Spaces Can Still Feel Luxurious👑
When you combine:
- Clean vertical lines
- Balanced lighting
- Cohesive color tones
- Minimal distractions
- Controlled depth and clarity
…a small room can feel refined, intentional, and even upscale.
And here’s the important part: none of these techniques mislead buyers. They simply remove distractions and present the property in its best, most flattering light.
In competitive markets—especially condos, townhomes, and starter homes—this can dramatically impact clicks, showings, and perceived price point.
Have You Ever Thought To
Outsource Photo Editing?
Try it today with 5 free edits from three professional photo editors.
Let PhotoUp Handle the Editing So You Can Grow🚀
As a real estate photographer, your time is best spent shooting, marketing, and building client relationships—not fine-tuning perspective lines for hours in post-production.
That’s where PhotoUp comes in!
PhotoUp’s professional real estate photo editors specialize in:
- Perspective and lens correction
- HDR blending and exposure balancing
- Color temperature refinement
- Object removal and decluttering
- Contrast and detail enhancement
- Sky replacement and lawn enhancement
- Day-to-dusk conversion
- And much more!
Whether you need on-demand edits starting at affordable per-image rates or a dedicated editor for consistent style and fast turnaround, PhotoUp helps you deliver polished, luxury-level images—without adding to your workload.
By outsourcing your editing, you can:
- Increase turnaround speed
- Take on more shoots
- Offer premium-quality results
- And scale your photography business confidently
Small spaces don’t have to limit your listings—or your growth. With strategic editing and the right editing partner, even the most compact room can feel bright, expansive, and undeniably expensive.
Browse Top Dedicated
Real Estate Photo Editors
Ready-to-hire editors for real estate photo editing, and more.
Why Choose PhotoUp?
Here are some benefits of using PhotoUp’s editing service to help you create stunning images:
| High-Quality, Realistic Editing: Professional-level enhancements that create seamless and natural-looking twilight effects. |
| Fast Turnaround Time: Receive beautifully edited images in as little as 12-24 hours, ensuring quick updates to listings. |
| Affordable Pricing: Get premium editing services at budget-friendly rates, making it an excellent investment for real estate professionals. |
| User-Friendly Platform: Easily upload, manage, and receive edited photos through PhotoUp’s intuitive online system. |
| Customizable Edits: Request specific adjustments, such as sky styles, light intensities, and color grading, to match your vision. |
Whether you’re an agent or a real estate photographer, leveraging PhotoUp’s expert editing services ensures that your twilight images are stunning, professional, and impactful.
A Complete Real Estate Marketing Partner
PhotoUp offers more than just editing! We are a complete real estate marketing partner that provides additional services, including:
We have everything you need to enhance and market real estate photography in one user-friendly platform!
How to Get Started
Getting started using PhotoUp’s photo editing service is super easy.
This is all you need to do:
Step 1. Sign up for a free PhotoUp account.
Step 2. Upload your photos to our easy-to-use software.
Step 3. Choose the level of editing that you need and provide instructions (optional).
Step 4. Wait for PhotoUp professional editors to edit and return the photos in less than 24 hours.
Step 5. Download and start using your beautifully edited photos.
PhotoUp Real Estate Photo Editing Uploader Tutorial
Have a look at the real estate photo editing uploader tutorial to see how easy it is to get started with PhotoUp:
As simple as that….so don’t wait!
Sign up for a free PhotoUp account today, and we’ll help you edit small spaces to feel large and luxurious!
Did we mention that you get 10 free credits when you sign up for an account that you can use for any of our services?!
We hope this guide helped you learn how to edit small spaces to feel spacious and expensive. Before you go, you may also want to check out the following resources:
- How to Best Create a Consistent Look in Real Estate Photo Editing
- 9 Proven Reasons Why You Should Use Real Estate Twilight Photos
- How to Use Virtual Landscaping to Upgrade Your Backyard
- Professional Real Estate Photo Editing (Top 10 Services): A 2026 Review
- How to Scale Real Estate Photo Editing Without Losing Soul (AI + Human Editing)

