


Table of Contents
- Understanding the Exposure Triangle for Light Settings
- What Is Exposure?
- Shoot in RAW
- Camera Setting for Interior Real Estate Photography
- Camera Setting for Exterior Real Estate Photography
- Additional Real Estate Photography Tips
- Leverage a Professional Real Estate Photo Editing Service
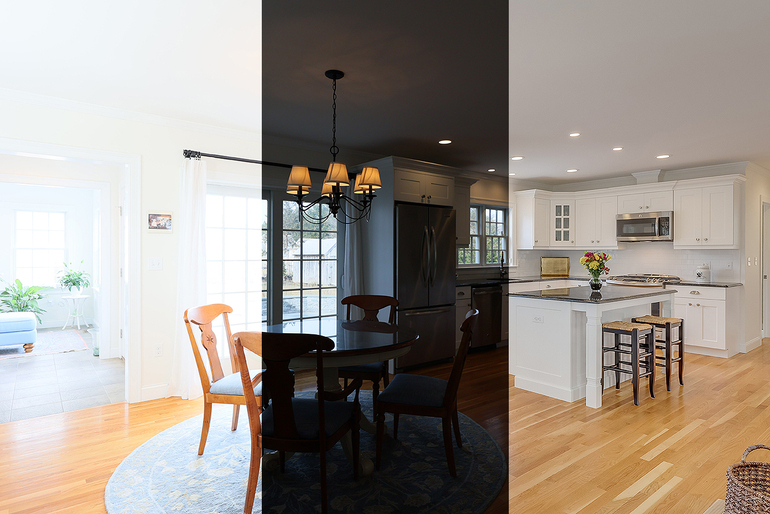
Showcasing a home in its best possible light is essential to making it stand out among other listings and attract potential buyers. This can be difficult without the right camera setup.
Take control of your camera settings with our guide for capturing stunning interior and exterior real estate photos even in less-than-ideal lighting conditions.
Let’s get started!
Understanding the Exposure Triangle for Light Settings
Before we go deeper into the topic of the best camera settings for indoor and outdoor real estate photography, you’ll need to first familiarize yourself with the exposure triangle.

Aperture
Aperture is your photographer’s best friend. It’s the size of the opening that lets light pour into a lens and create beautiful, well-exposed photos. For example, use F1.4 when you need lots of illumination and consider F11 if medium brightness will do just fine. Or select an ultra-small aperture like F22 for those dimly lit shots.
In addition to the amount of light that is allowed to strike the sensor, aperture also dictates the depth of field of an image. The shallower the depth of field is, the more precise the focus point is with everything closer or further away from that point being more and more out of focus and less and less bright. The lower the aperture value (as low as 1.4 on some lenses) the shallower the depth of field.
On the other hand, a high aperture value such as F22 means the lens is open less than a pinhole. This allows very little light in and creates such a deep depth of field that everything is in focus, including every spot of dust and debris on your sensor and lens.
Typically, in real estate photography, you should aim for an aperture of between F8 and F11 with F5.6. And F16 as acceptable but not ideal outside edges of the range.
Shutter Speed

Image Source: fixthephoto.com
When it comes to capturing a photo, having the right shutter speed is essential. Shutter speed is what ultimately determines how much light your shots will have so if you want to experiment with changing up bright vs darker hues in your photos, start by playing around with different levels of shutter speeds like 1 sec., 5 secs., and even fractions of seconds.
If your shutter speed dips below 1/100 of a second (as it most assuredly will on occasion) you will want to remember the suggestion about using a tripod or risk creating a blurry image. When using a tripod there is really no danger of having a long shutter speed (or 1/10 of a second or more).
However, the longer the shutter is open the more the variances in light and color there could be and therefore you could run the risk of unwanted color casts. Shutter speeds faster than 1/2000 of a second can give your images a compressed look but not in all cases.
ISO
ISO (sensitivity) refers to the sensitivity of the camera’s sensor to light. ISO is indicated by numbers like 100, 200, 400, 800, and so on, with lower numbers indicating less sensitivity to light and higher numbers indicating greater sensitivity to light.
Increasing the ISO value makes the sensor more sensitive allowing more light to be captured by it. Most cameras start at around 100 ISO and may go up to about 4000 ISO or higher.
While a more sensitive sensor does allow you to capture more light information even in low light, the trade-off is that the information it captures is not as crisp, and therefore noise or grain will appear in the final image.
This detracts from the overall sharpness – for this reason, your ISO value should be kept as low as possible starting at 200 ISO as a base and going no higher than 400 ISO unless you absolutely have to.
It’s important to remember that all three of these settings work together to give you the final exposure of the image.
For example, start by setting your ISO and aperture at a comfortable level (try 200/F8) then use either M or Av mode on manual settings so that you can let the camera adjust shutter speed based on what works for those two and then tweak it if necessary.
What Is Exposure?

Exposure is the amount of light that the camera is allowed to capture in a given scenario.
We control the exposure using these three unique settings of the exposure triangle to work in tandem to create the exposure of the final image: aperture, shutter speed, and sensitivity.
Different Exposure Modes
Furthermore, here are exposure modes to consider for real estate photography:
- Automatic: Automatic mode is a photographer’s lifesaver when you need to capture an image in the blink of an eye. It lets your camera do all the work, selecting just the right aperture and shutter speed settings, ISO sensitivity level, and flash balance for whatever scene is thrown at it.
- Manual: This exposure mode is ideal for shooting real estate photos, especially when you need to capture bracketed images.
- Aperture Priority: When shooting real estate, aperture is key! Setting Aperture Priority mode on your camera allows you to choose an aperture and let it adjust the shutter speed as you’re clicking away. Giving you greater control of lighting conditions for superior images every time.
- Shutter Priority: Being the exact opposite of Aperture Priority, Shutter Priority allows you to control shutter speed while the camera manages the aperture.
Overall, using the right exposure mode depends on the level of control you want.
Shoot in RAW


If you’re looking to get granular in post-processing, RAW files are your go-to option.
With uncompressed data and all the detail from the imaging sensor intact, it’ll give you more control over the image’s exposure, highlights and shadows, white balance, contrast, and more.
But know that these images have a very large file size and aren’t ready for sharing right away. For easy uploads on your online portfolio and social media platforms, you should go for JPEGs.
Camera Setting for Interior Real Estate Photography

Taking the perfect interior real estate photography requires more than just an eye for detail- you’ll need to have a comprehensive grip on photography’s exposure triangle.
If facing tricky lighting scenarios, like dark rooms or deep focus areas, use these guidelines as your foundation and let your creativity take it from there:
- Exposure Mode – Set your camera to Aperture Priority
- Aperture – For interior real estate photography, f/8 is usually the perfect setting to capture an entire room in crisp focus. From wide-open interiors like lobbies and atriums to more cozy rooms with greater depth, you may want to bump up your aperture a bit closer to f/16 for optimal sharpness
- Shutter speed – Capturing the perfect interior photo can be a struggle in low-light conditions, but with some clever shutter speed adjustments you can easily let more light into your shot! Slow it down between 1/60 and 1/2 of a second for brighter pictures full of detail. Don’t forget to use a good tripod and preferably also a remote shutter release to avoid camera shakes
- ISO – Try to keep your ISO below 400; closer to 100 is even better for keeping out noise in your photos. A slower shutter speed will allow you to set your ISO closer to 100
- Focus Mode – Single-Shot Autofocus
- Metering Mode – Matrix
Using these settings when shooting interiors will result in crisp and clear images.
But like all types of photography, shooting great indoor photos takes time and practice, so have patience and go out and shoot as many properties as you can!
Camera Setting for Exterior Real Estate Photography

When taking exterior real estate photography, it’s important to consider the time of day of your shots. That being the case, we’ll provide you with settings for both daytime and nighttime exterior photography.
Daytime Exterior Shots
You can take advantage of all that bright, sunny goodness with a smaller aperture and lower ISO to create picturesque depth without worry.
The following settings are a good place to start on a sunny day:
- Exposure Mode – Aperture Priority
- Aperture – f/11
- ISO – 100
- Shutter Speed – Determined by Camera
- Focus Mode – Single-Shot Autofocus
- Metering Mode – Matrix
Not satisfied with the brightness of your photo? Try stepping down the aperture to f/13 or 14 for a slightly darker image, perfect for some moodier shots.
Or, if you need more light in the shot, increase it by opening up the aperture to f/10 or f/9 to brighten the image. For an even brighter look without widening your lens’ eye too much, bumping up the ISO to 200 or 400 can be just as effective.
Nighttime Exterior Shots


Evenings call for a little extra finesse when taking photos since we’re working with different and sometimes trickier light. Make sure to adjust your exposure settings so you can capture the perfect shot come sundown.
If you can, try to use the golden hour to your advantage – the 30 minutes or so before sunset and after sunrise. This will offer a romantic soft, warm light that is perfect for exterior real estate photos.
Don’t worry if you can’t fit this short window into your schedule, you can just edit this in post-processing later.
For evening exterior shots, try these settings:
- Exposure Mode – Aperture Priority
- Aperture – f/8
- ISO – 200
- Shutter Speed – Determined by Camera
- Focus Mode – Single-Shot Autofocus
- Metering Mode – Matrix
For an extra dose of light, we’ve now widened the aperture and upped the ISO to 200. Don’t be afraid to experiment further – it may require a bigger opening (f/7.1 or f/6.3) and potentially higher sensitivity at ISO 400-800 for the perfect final shot!
Have You Ever Thought To
Outsource Photo Editing?
Try it today with 5 free edits from three professional photo editors.

Additional Real Estate Photography Tips

Now that you know what camera settings to use, let’s take a look at some additional tips to help you capture stunning real estate photography.
1. Photography Is About Capturing Light
In order to capture a property in the best possible way, we as photographers have to play around with the light at our disposal to create dynamic images that attract potential buyers even though they are looking at flat, non-adaptive images.
We can do this by increasing the dynamic range of our images through shooting in brackets or better yet, shooting in RAW – a photographic medium that captures millions of versions of the same image and is therefore as close to capturing what your eye sees as a tool like a camera can get.
With a few simple exposure and framing adjustments, you can make your images come alive. You can showcase part of an image while keeping others in silhouette or use lighting to draw attention to desired details – the possibilities are endless.
So experiment away and let those creative juices flow; photography isn’t about exactly replicating what we see but rather transforming it into something stunningly unique for our viewers.
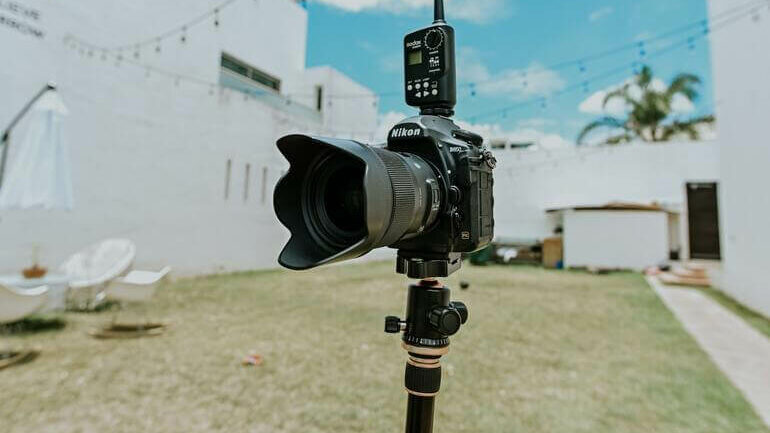
2. Invest in a DSLR Camera

DSLR cameras are a must-have for real estate photographers, as they offer high-quality photos that can’t be matched by any cellphone camera.
DSLRs allow you to capture stunning property photos with greater depth and detail, meaning your work will stand out from the crowd. Plus, DSLRs give you the flexibility to customize settings like exposure and aperture to achieve the perfect shot in any given environment.
So if you’re serious about real estate photography and want to take your portfolio to the next level, investing in a good DSLR camera will pay off.
Check out our recommendation for DSLR cameras in our blog post on the best cameras for real estate photography.
3. Use a Tripod
When you’re shooting with a fixed subject, using a tripod is the best way to go for capturing stunning photos.
With a tripod, you’ll be able to experiment with slower shutter speeds without worrying about camera shakes. You can also get shots from all different angles – chest level, eye level, knee level, or above your head.
And if you want even more flexibility in how you show off beautiful interiors, then try bracketed images or window masking which requires identical framing each time. Getting perfect results is easy peasy when using a tripod.
Check out our recommendation for tripods in our blog post on the best tripods for real estate photography.
4. Get a Wide-Angle Lens

Investing in a wide-angle lens is one of the best investments that photographers can make. Taking wide shots captures the whole room, from corner to corner and ceiling to floor with ease.
Shooting wide also works great for portrait and landscape photography, as well as live events with larger groups.
Wide-angle lenses are an invaluable tool for capturing great interior shoots where you need to capture the whole room. You can find some great options in our blog post on the best lens for real estate photography.
5. Add an External Flash to Your Toolkit

Also, you should consider adding external flashes to your residential real estate photography equipment toolkit.
Why? As a rule, the standard flashes are too weak. Using them, you can’t take professional images with even lighting, so using an external flash will help you take better images.
For example, the Canon Speedlite 430EX III-RT offers powerful on-performance shots but is yet pocket-sized when packing up for shoots. For more excellent options, visit our blog post on the best flashes for real estate photography.
6. Take Aerial Photography
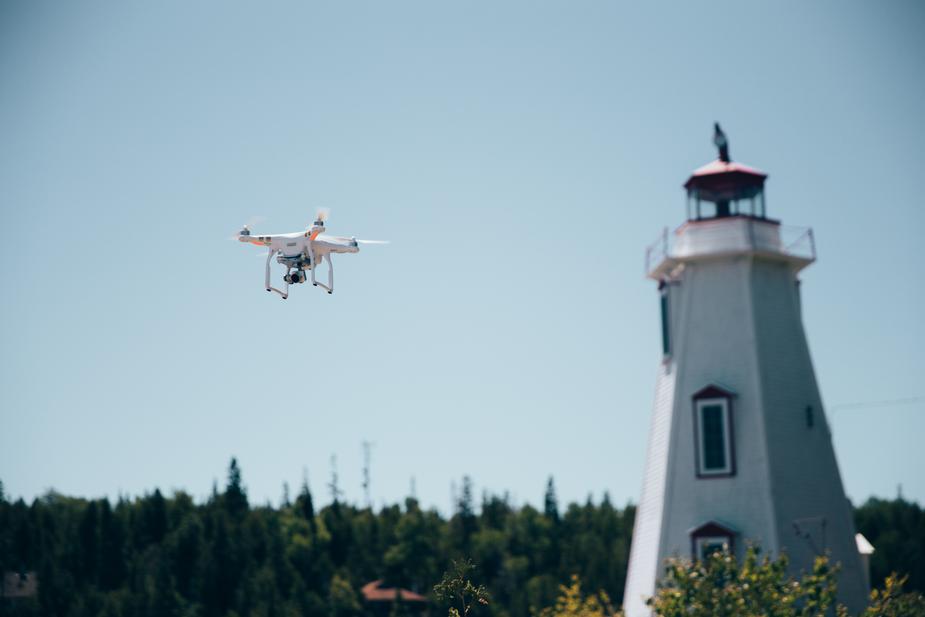
Drones are the perfect way to snap stunning aerial images for real estate photography.
Not only do they help to capture the property from unique and interesting angles but they can also provide clients with a bird’s eye view of the neighborhood.
To ensure safety while flying drones over buildings or residential areas make sure that area isn’t restricted by downloading an app like B4UFLY which will detect airspace restrictions based on your location information.
For more valuable tips, you can visit our blog post on 12 real estate photography tips to help sell a home faster.
The Ultimate All-in-One
Real Estate Photographer Business Platform
Grow a successful real estate photography business with PhotoUp.
Leverage a Professional Real Estate Photo Editing Service


As a real estate photographer, you know that post-processing is a large, necessary, and time-consuming part of your business. More so, if your client demands a timely turnaround on your images.
By using a professional photo editing company like PhotoUp, you can free yourself to focus on more important things like:
- Getting more clients
- Shooting more properties
- Replying to client inquiries
- Implementing your marketing strategies
- And simply spending more time with the people you love
Best of all, we work for you while you sleep with editors working around the clock. This will help you grow your photography business a lot faster!
Our team of editors has all the skills necessary to edit your photo in order to match your style as closely as possible and offer services such as:
- Improper exposure levels
- Harsh shadows, lack of light, etc.
- Blurred images that were taken without a tripod
- Images that need cropping or other effects
- Lawn greening and sky replacements
- Twilight editing
- Clutter and object removal
- Line and angle corrections
- And much more!
Browse Top Dedicated
Real Estate Photo Editors
Ready-to-hire editors for real estate photo editing, and more.
The good news is that our real estate photo editing service is affordable, starting at the low cost of $1.15 per image.
Additionally, PhotoUp also offers an ecosystem of services such as:


Best of all, it’s super easy to get started using our services!
All you need to do is to sign up for a free PhotoUp account, upload your photos, add instructions, and choose export settings, and your images will be delivered back to you in 24 hours or less.
PhotoUp Real Estate Photo Editing Uploader
To see how quick and easy it is to get started, check out our real estate photo editing uploader demo:
As simple as that!
Sign up for a free account today, and let PhotoUp add the final touches to help you create top-notch quality real estate photos!
We hope this blog post helped you learn the best camera settings for real estate photography. If you found this post useful, you may also want to check out the following resources:

