


The quality of your real estate photography makes a tremendous difference in how quickly a home sells. And better quality real estate photos result in higher offers, too. So, learning all the real estate photography tips you can, helps.
Gorgeous photos capture a buyer’s interest, leading to showings and sales.
So, today, we’re going to discuss 25 tips for superb real estate photography.
25 Real Estate Photography Tips for Amazing Photos

So much in the real estate market depends on a captivating visual representation of the property. Here are 25 real estate photography tips to get the absolute best results.
1. Try to Visit the Property in Advance
Every home is different and each one has its quirks and attractive features. The more familiar you are with a property, the easier it will be to take amazing photos.
Consider these advantages:
- Even a brief visit ahead of the shoot will prompt your creative imagination
- And, this way, you can ensure that the property is ready for shooting
2. Consult the Seller About the Home
Typically, sellers know, better than anyone, the home’s strong features and selling points.
An important real estate photography tip is ask them for the following:
- Their opinion of the home’s best selling features
- Rooms or areas to photograph that might not be immediately visible
- Best angles or perspectives for each room
3. Ask the Sellers to Help Prepare the Home
The less you have to do when you arrive to take the photos, the more you can focus on outstanding results.
So, ask the seller to do the following:
- Clean the entire home thoroughly
- This includes the exterior – the lawn, walkways, and roof
- Store away clutter and unneeded items
Having the above done before your arrival will save you time and effort. You can find even more tips in our blog post how to prepare your home for real estate photography.
The Real Estate Photography
Business Systems You Need
PhotoUp is the ultimate real estate photographer business platform.

4. Select a Time to Get the Most Natural Light
If possible, schedule the photoshoot in the daytime. Natural light leads to vibrant colors in your pictures.
That said, here are some real estate photography tips:
- Always check the weather conditions before and plan your photoshoot properly
- If the weather is cloudy, you might need to choose another day for shooting
- One more tip, when shooting on a bright, sunny day — the sun should be behind the house. This will get you better shots of the front exterior as well as good lighting inside
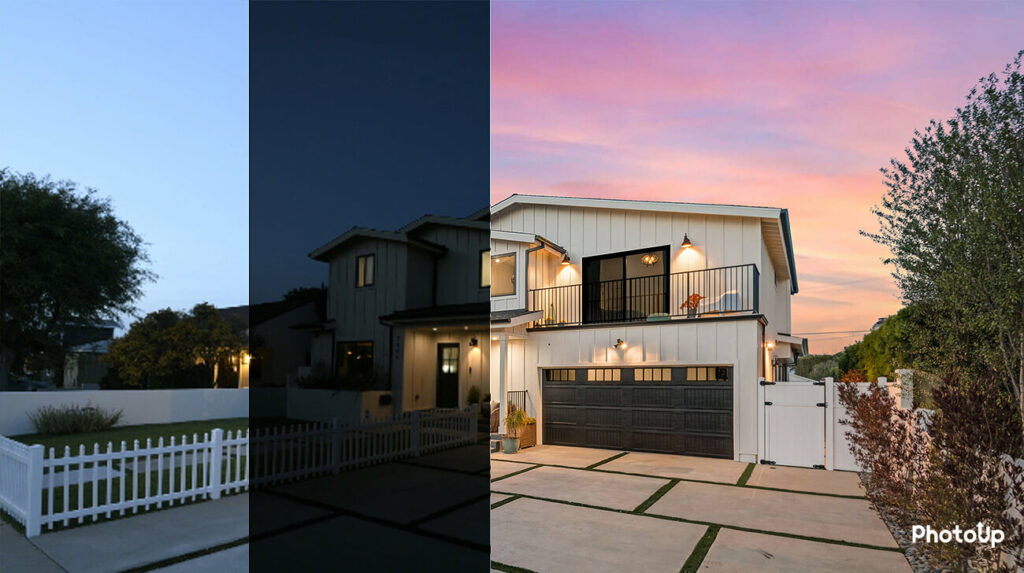
5. Consider Shooting at Twilight for Awe-Inspiring Results
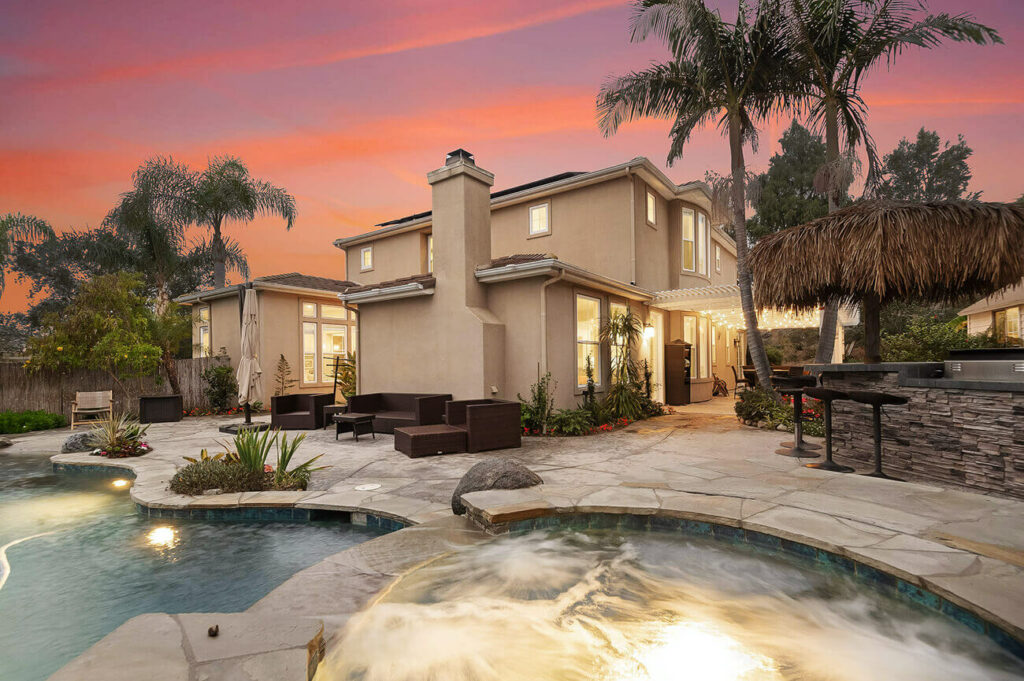
A house acquires a different, often more dramatic look at night or twilight, and such photos are becoming popular among potential buyers.
Try the following:
- You can take images from various angles with exterior and interior lights on and off
- If possible, include distant city lights in the frame for a truly amazing look
6. Shoot at Eye Level for Proper Perspective
Your want to capture lifelike images of a property so that buyers won’t feel confused when they see the house in person.
Keep these real estate photography tips in mind:
- Keep the camera at eye level, avoiding strange tilting angles
- Try to balance the distance between the floor and the ceiling
- Take your time choosing the right perspective
C7. Adjust Camera Settings for Better Quality Images

Real estate photography requires good lighting. If lighting is a problem, you can try these real estate photography tips for camera settings to keep the quality of your photos high:
- Aperture – use an aperture value from f/7.1 to f/9. If you want to focus on a particular object, you can try a shallow depth of field
- Shutter speed — aim for between 1/60 and 1/2 a second. Of course, this value depends on the amount of light in the room
8. Be Aware of ISO Settings to Eliminate Noise
Higher shutter speeds require increasing the ISO value. Too high ISO can add digital noise to your photos.
So, try to set ISO below 400 and know your camera — find the perfect value that delivers quality pictures
9. Keep the Lines Straight When Photographing Rooms
During the shooting, you need to pay attention to the vertical and horizontal lines. It is vital to keep them straight and avoid bending or curving.
If you run into problems, don’t despair, keep in mind these tips:
- If your lines aren’t straight, you can retouch them in Photoshop or similar programs
- One more tip — there is a special Free Transform tool in Photoshop, which you can use to straighten the lines
For more details, check out our blog post on how to fix verticals in Photoshop.
10. Open Blinds to Let In More Light
In real estate photography, natural light is your best friend. Using natural light, you can get beautiful, saturated colors and tones.
Two quick tips:
- Enhance natural light with LED panels and reflectors
- Remember, natural light will make your photos as realistic as possible
Have You Ever Thought To
Outsource Photo Editing?
Try it today with 5 free edits from three professional photo editors.
11. Turn On All of the Lights

By experimenting with turning the lights on and off, you can achieve different image effects:
- For example, artificial light generally adds warmth to your pictures
- Alternatively, working with the lights off will bring you a cooler temperature, but avoid pictures that will look cold
- Again, light temperatures can be balanced and adjusted during photo editing
12. Adjust Color Temperatures for Best Results
Learn how to correct light temperature differences. For example, artificial lighting in a bathroom or kitchen can give an unpleasant yellow tint.
To eliminate this issue, try the following:
- Adjust the yellow (or orange) slider until the yellow shade becomes more of a plain white light
- Also, try combining daylight with LED, CFL, and/or halogen lamps
Check out our post on real estate photo editing techniques to improve property images or how to remove color cast in Photoshop to learn more.
13. Correct Lens Distortion
Perspective distortion is a relatively common problem in real estate photography, often, because of the use of ultra-wide-angle lenses and zooms.
The results tend to be curved lines near the edge of an image instead of straight ones.
Here are some possible solutions:
- Use the proper wide-angle lens
- Eliminate the distortion in photo editing
Another tip to remember — ultra-wide lenses are usually best used for landscapes and wildlife photography — not kitchens.
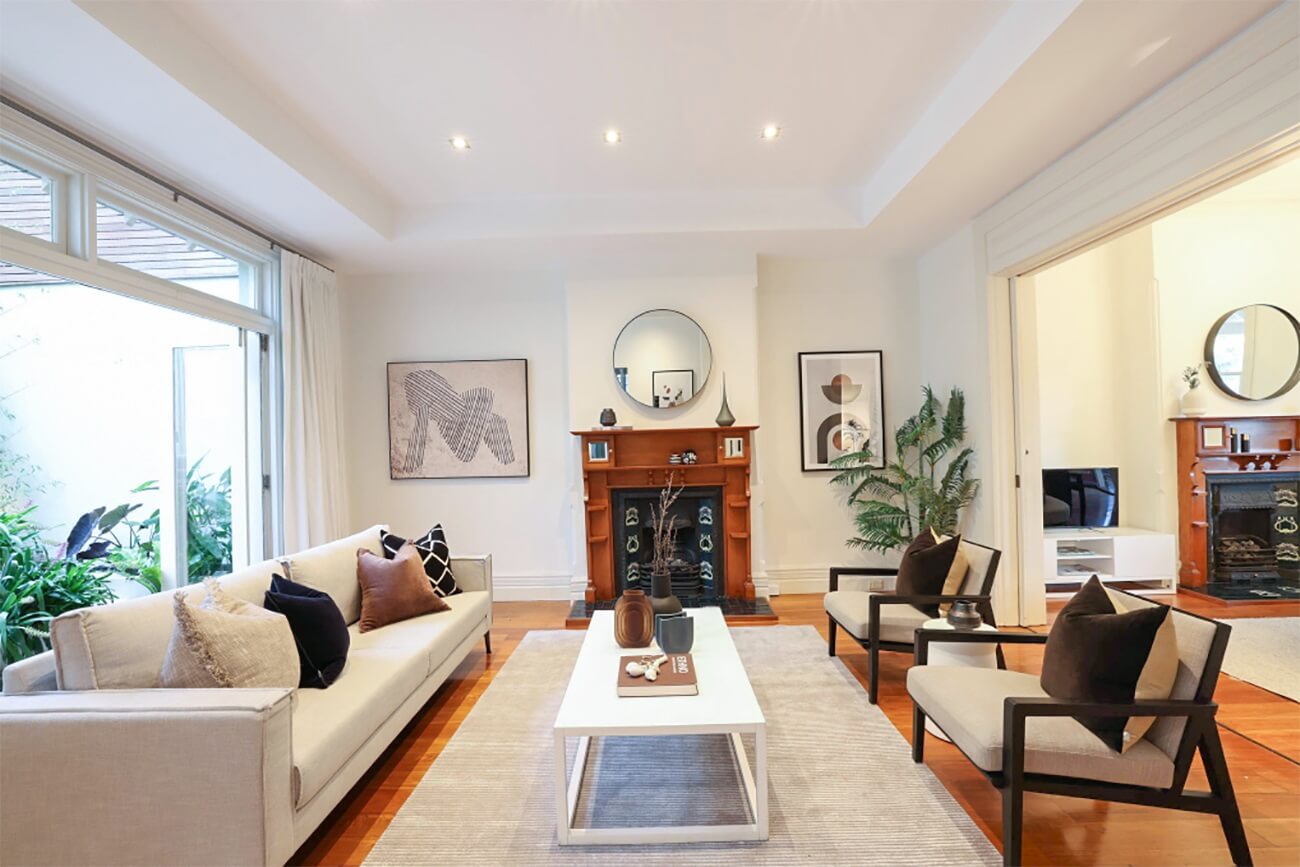
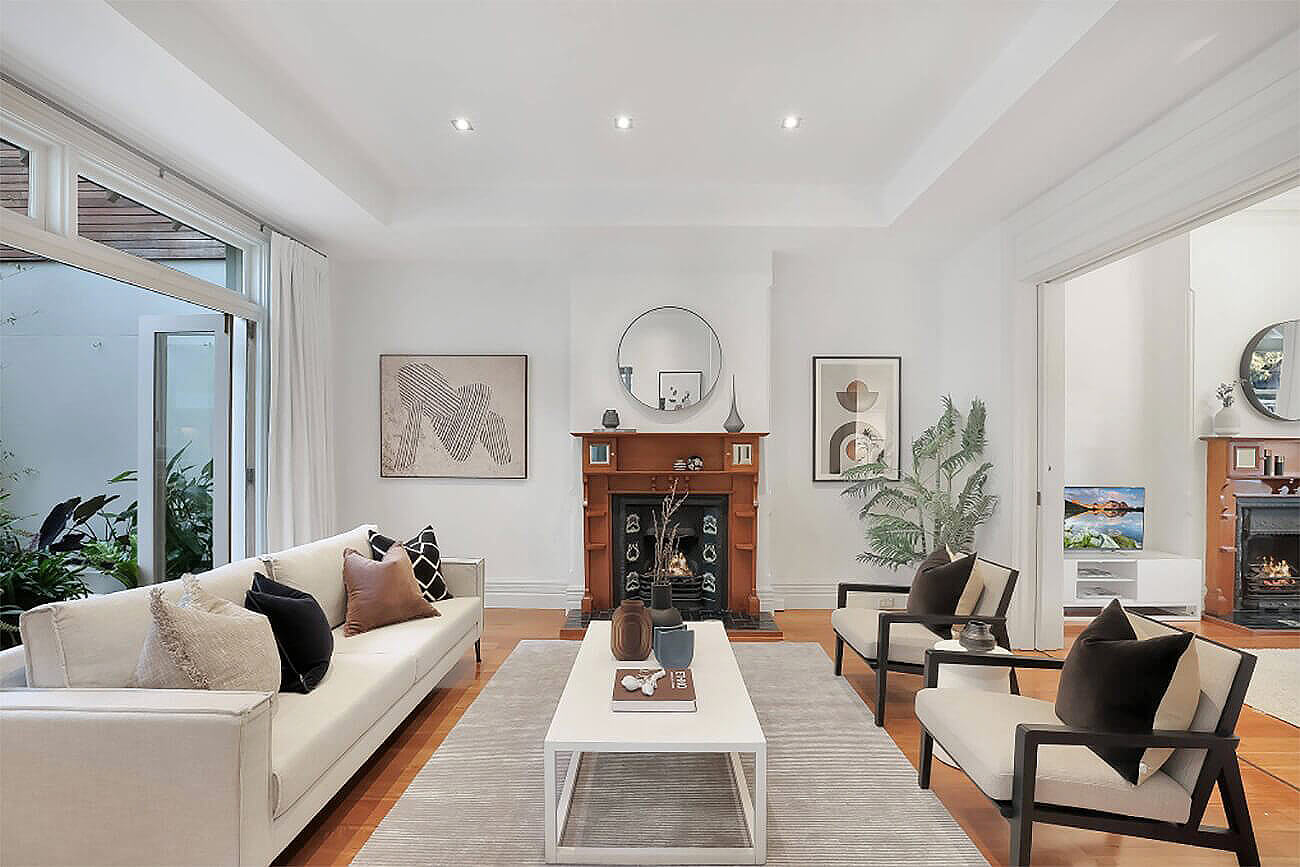
14. Don’t Hesitate to Rearrange the Furniture
The furniture in each room should be positioned to achieve an open and roomy look.
Don’t be afraid to try the following:
- Experiment with different layouts and move items and furniture around
- Even minor staging can help a photographer bring out the personality of a home
15. The Value of White Balance
You’ll want to avoid photos that have strange color hues.
You can balance white lighting in a few ways:
- By using a flash, blending artificial and natural light
- Or through photo editing
Give each option a try, but you want everything to look natural.
16. Eliminate Clutter
Too many items in a room can be distracting. Cluttered rooms tend to look cramped.
What should you do in these cases?
Follow these smart real estate photography tips:
- You can work with your client to remove unwanted items ahead of time
- Items also can be removed during photo editing
- Or you can have a designer virtually stage your images and declutter the space
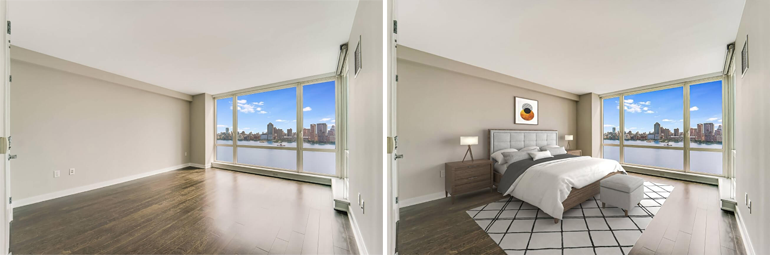
Remember, less is more.
17. Depersonalize the Space
Potential buyers must be able to see themselves living in the home and making it theirs.
Remove highly personal items such as:
- Family photos and portraits
- Vacation memorabilia
- Children’s refrigerator art
The space should look appealing, but also a bit generic.
18. Consider Replacing the Sky to Get More Dramatic Results

Clear skies and sunny weather tend to result in better images.
However, dark and cloudy days happen, which isn’t good for real estate photographers.
Here are two considerations:
- A skilled photo editor can retouch and replace any sky and adjust the colors for a balanced picture
- And, think about varying some photos to feature sunset, sunrise, or evening sky
As you’re starting to see, photo editing plays a significant role in getting stunning results.
19. Make the Most of the Season
An interesting real estate photography tip is to include hints of the season you are shooting to add charm and depth to your photos.
For example:
- If it’s spring, include flowers in a vase or pots
- In summer, have a pitcher of lemonade, beach towels, or aim for warmer tones
- Shooting in the fall? Include colored leaves, a bowl of apples, or some pumpkins
- For winter, capture pleasant snow scenes, burning candles, a fireplace, and even holiday decorations
Just remember, your main objective is to showcase the house, not the season.
High-Quality & Consistent
Real Estate Photo Editing
Hire a dedicated editor with performance metrics from $7/hour.
20. Use a Full-Frame Camera for Top-Quality Photos
Full-frame cameras have an advantage in real estate photography.
Typically, a cropped sensor camera can’t get a lot of light while full-frame cameras handle this task perfectly.
A possible solution?
If a full-frame camera is out of your price range, try using interchangeable lenses. This way you can make even a simple camera produce more professional results
Your gear matters, learn more about essential real estate photography equipment.
21. Get Wide-Angle Lenses to Cover the Maximum Space

High-quality real estate photos require that you use good lenses that can be detached.
Here’s an easy real estate photography tip, perhaps the most important lens to have:
- A wide-angle lens will help you visually enlarge a room and create a more comfortable and inviting look
- However, don’t overdo it, there’s rarely a need for an ultra-wide lens
22. Flashes Are Essential
Shadows, uneven light, and mixed lighting colors are a challenge in interior photography.
Here are some tips:
- In general, a standard flash is too weak, so use an external flash instead
- Include several external flashes in your photography equipment toolkit
23. A Tripod Helps to Stabilize the Camera

A camera shake will distort your photos. How to avoid this, you may ask?
The simple solution is to use a tripod to stabilize the camera and eliminate shakes
24. Experiment With Polarizing Filters
Polarizing filters can reduce the negative effects of glare and harsh lighting.
Here are three key real estate photography tips:
- First, use the right size filter for your particular lens
- Make sure it’s a circular polarizing filter
- When exploring filter use, try starting with a filter that blocks off around 50% to 75% of your light
Check the results, and adjust from there.
25. Get the Angle Right
Avoid taking photos from the corner of a room as these tend to skew perspective. Instead, seek out an interesting angle to better capture the size of a room.
For example:
- You can shoot a room from a doorway
- Try to find an angle that captures the maximum amount of space and shows all the features of the room
PhotoUp – Your Partner in High-Quality Real Estate Photography
If you walk away from this post with only one real estate photography tip, it’s this — that high-quality photo editing is crucial to amazing results.
Image editing is an integral part of interior photography. And the skill and quality of your editing service matter a great deal.
A skilled photo editor can help with the following issues:
- Improper exposure levels
- Harsh shadows, lack of light, etc.
- Color adjustments
- Blurred images that were taken without a tripod
- Images that need cropping or other effects
Here at PhotoUp, our skilled and experienced photo editors and virtual staging experts help you produce amazing real estate photography.
Browse Top Dedicated
Real Estate Photo Editors
Ready-to-hire editors for real estate photo editing, and more.
PhotoUp specializes in expert photo editing and photorealist, affordable virtual staging with fast turn-around times.
Our photo editing services include:
- Image correction and enhancement
- Color and tone adjustments
- Lawn greening and sky replacements
- Clutter and object removal
- Line and angle corrections
- And much more!
PhotoUp’s AI virtual staging services make any room look spectacular, and include:
- Staging vacant rooms with your choice of design styled furnishings
- Repairs and remodeling editing
- Fixture and decor updates and replacements
- And more!

Open a free PhotoUp account today, and let us help you make your real estate photography truly amazing!
We hope you’ve benefited from learning 25 important real estate photography tips for outstanding photos.
If you enjoyed reading this post, you may also want to check out the following resources:

