


Table of Contents
- Why Editing Outdoor Amenities Boosts Curb Appeal & Sales
- Top 10 Photo Editing Tips for Outdoor Amenities
- Outdoor Amenities Editing FAQ
- Ensure Captivating Outdoor Photos With PhotoUp
When it comes to selling homes, first impressions matter most. A property’s exterior and outdoor amenities—such as pools, patios, gardens, and backyards—often determine whether potential buyers click on your listing or scroll past it.
That’s why real estate photo editing plays such a vital role in showcasing these features in the best light possible.
In this guide, we’ll explore why editing outdoor amenities can dramatically boost a home’s curb appeal and value, then share 10 professional editing tips that help listings attract more buyers and sell faster.
Let’s begin by taking a look at why editing outdoor amenities is essential for boosting views, showings, and sales.
Why Editing Outdoor Amenities Boosts Curb Appeal & Sales🌿
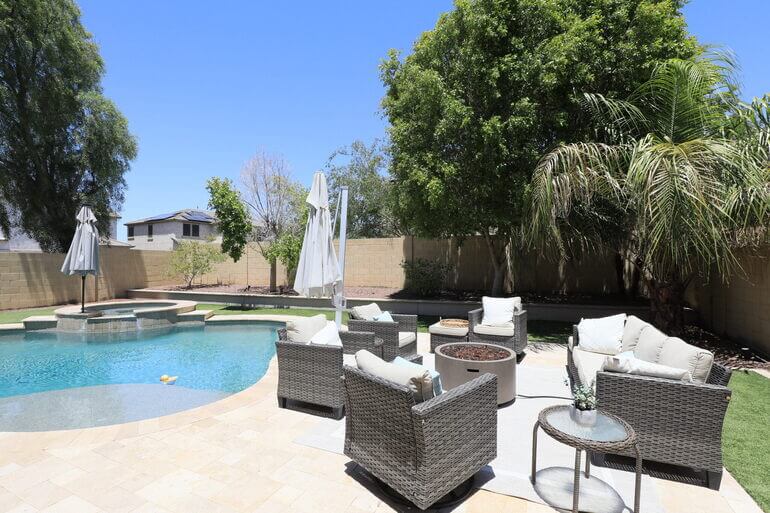
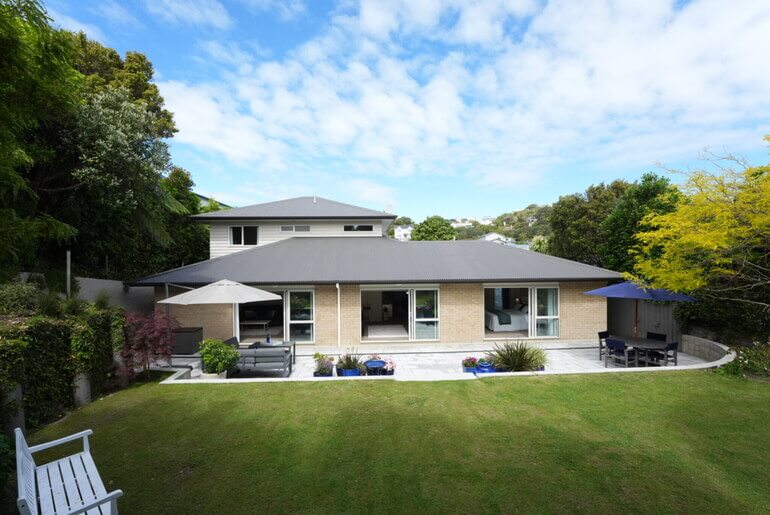
Outdoor amenities are powerful selling points. From a sparkling pool to a cozy firepit or lush backyard, these spaces convey a lifestyle that buyers aspire to have. It adds to the overall curb appeal of the property, which has an emotional impact.
But even the most beautiful yard can appear dull in raw photos due to lighting, weather, or camera limitations.
Here’s why outdoor photo editing makes such a difference:
| Curb Appeal Creates Emotional Impact: Buyers often decide within seconds whether they like a property. Professionally edited exterior photos create a positive emotional connection, encouraging them to explore the listing further. |
| Compensates for Imperfect Shooting Conditions: Overcast skies, harsh sunlight, or dull grass can make outdoor amenities look uninspiring. Editing allows you to balance colors, enhance lighting, and highlight textures regardless of shooting conditions. |
| Showcases a Lifestyle, Not Just a Property: Clean, bright, and inviting outdoor visuals help buyers imagine themselves enjoying that space—hosting BBQs, relaxing by the pool, or reading on the porch. |
| Increases Click-Through Rates (CTR): Listings with stunning outdoor photos can receive up to 118% more online views, according to real estate marketing studies. |
In short, thoughtful outdoor photo editing transforms simple property shots into compelling visual stories that capture attention, evoke emotion, and inspire buyers to take the next step toward making a home their own.
Top 10 Photo Editing Tips for Outdoor Amenities🏡
Editing ensures your photos stand out among thousands of competing listings.
Let’s show you 10 proven real estate photo editing techniques to make exterior and outdoor spaces look irresistible.
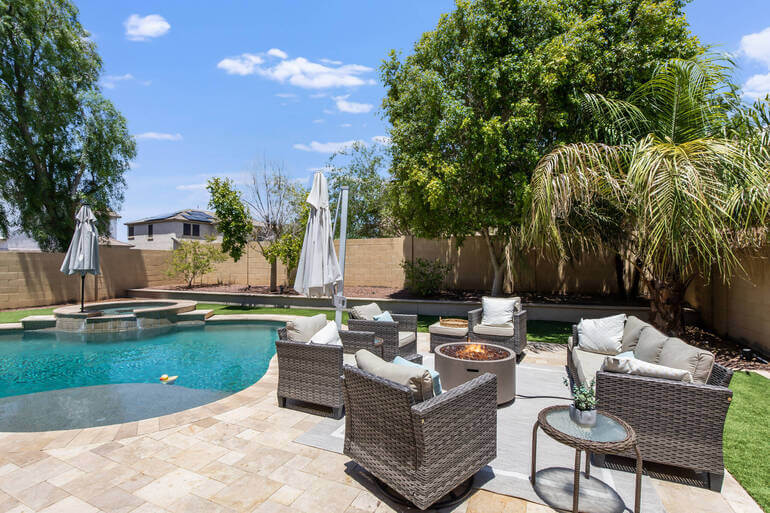
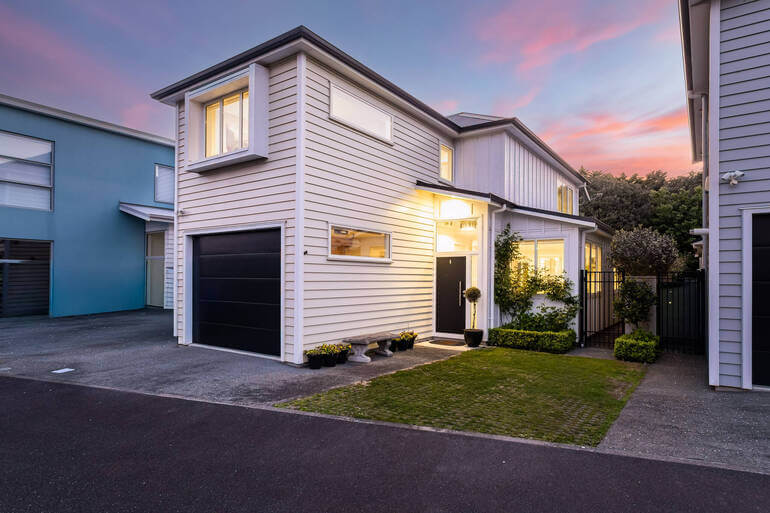
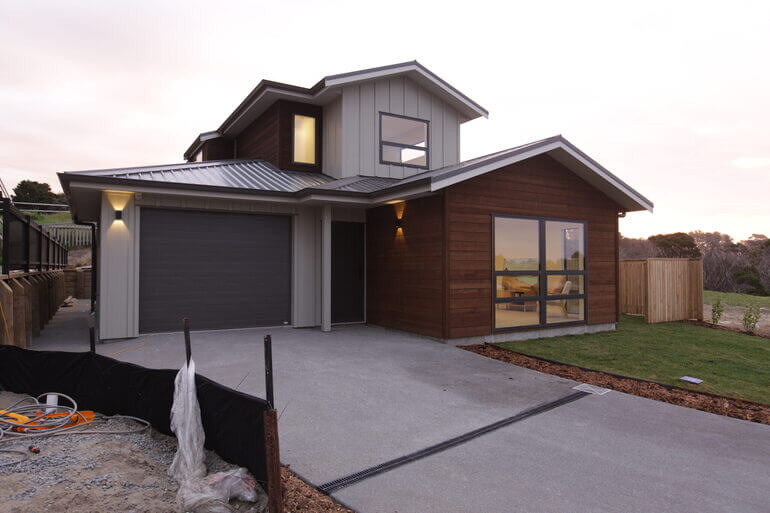
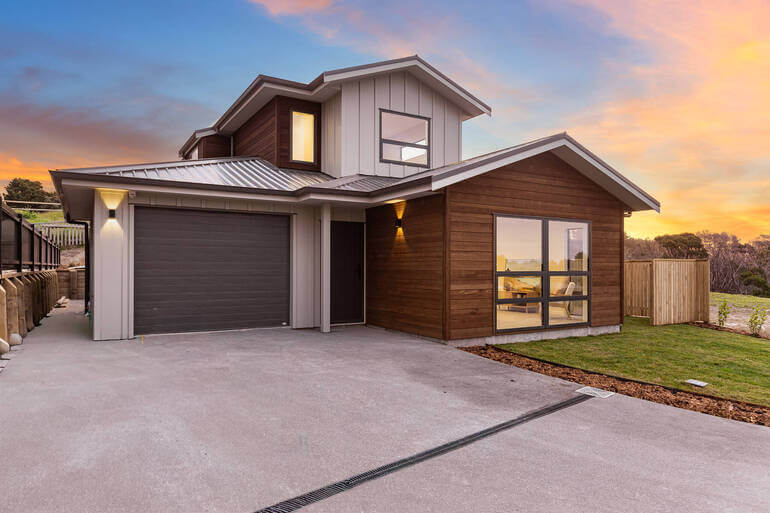
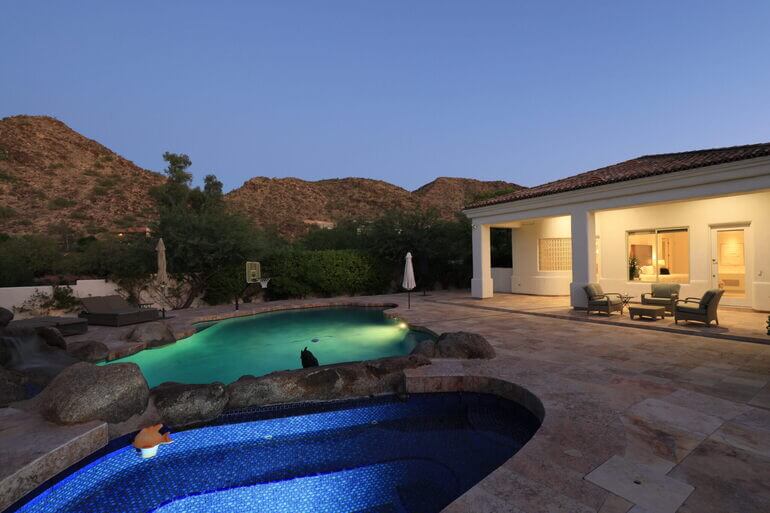
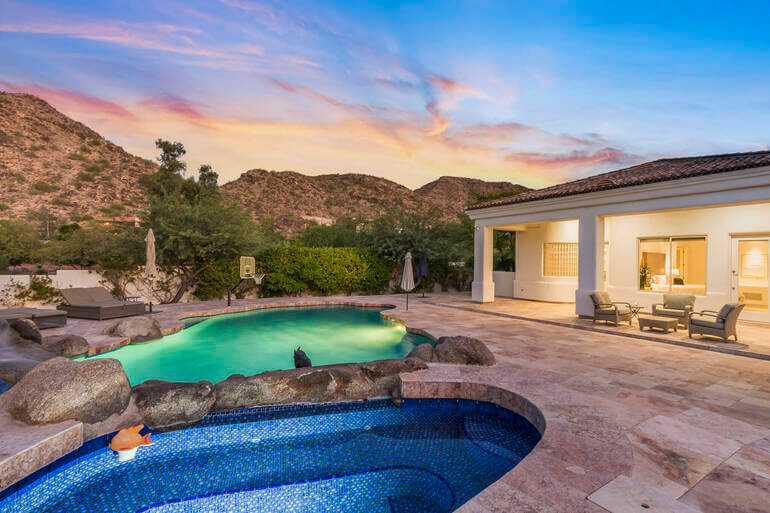
1. Enhance the Sky for a Mood Booster🌤️
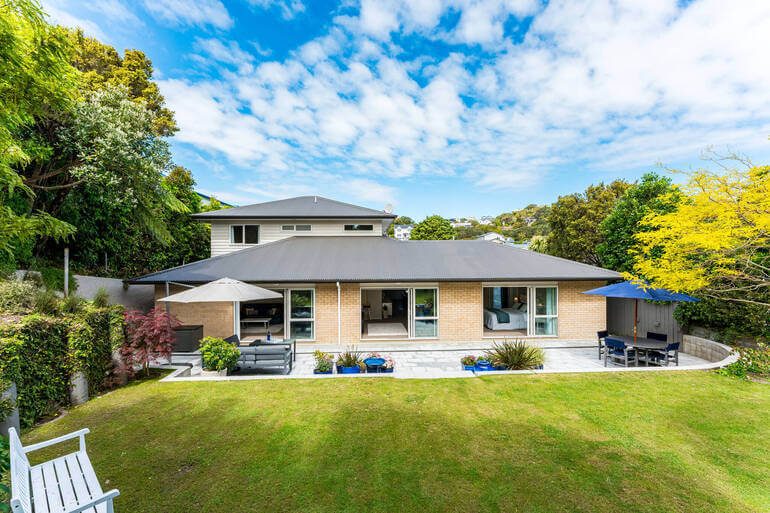
A flat or gray sky can instantly make an image feel lifeless. Replacing it with a bright blue sky or a warm sunset can completely transform the mood.
This is so effective because the human brain associates clear skies with good weather and positivity.
Adding a vibrant sky creates an uplifting, welcoming atmosphere—making the home feel more desirable.
To learn how to do this sunny edit, visit our tutorial on how to replace a summer sky in Photoshop.
Pro tip: Use subtle gradients and realistic cloud textures. Avoid overly dramatic skies that look fake or mismatched with the lighting direction.
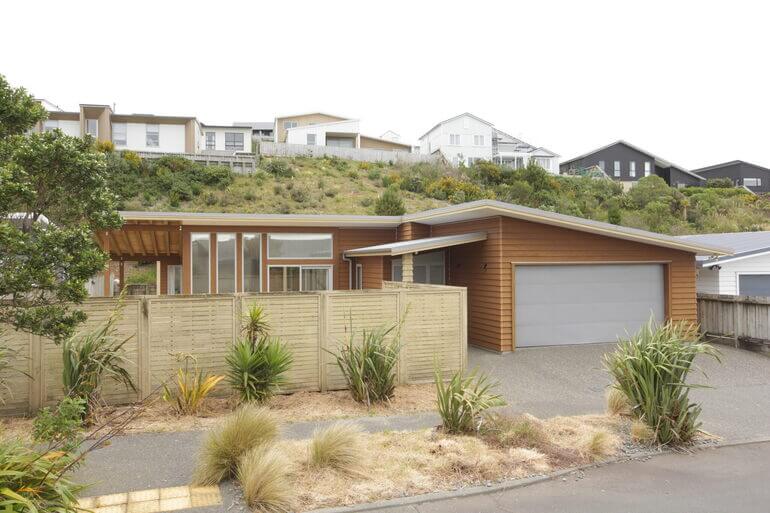
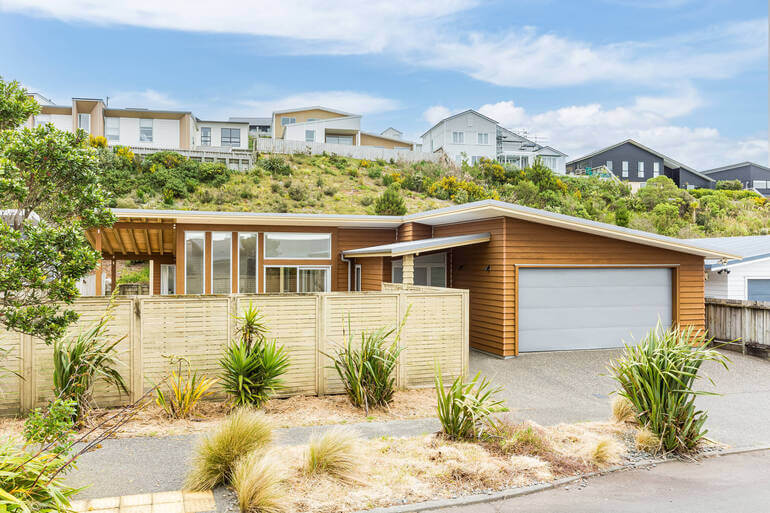
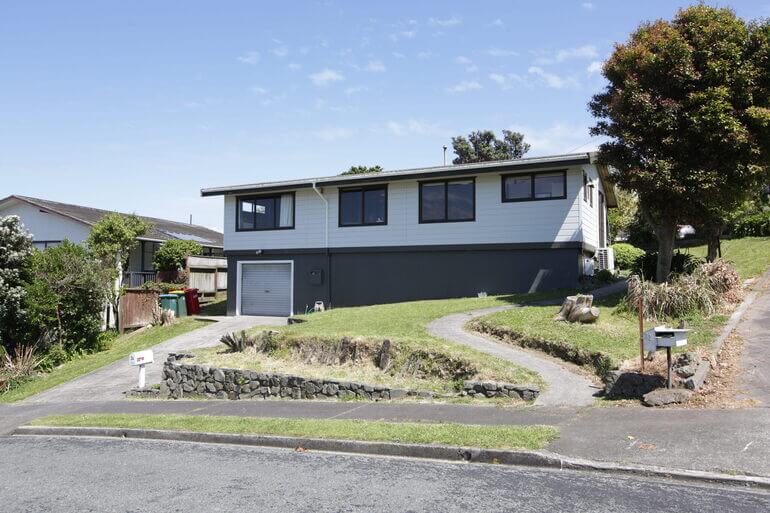
2. Green Up the Lawn to Show the Property Is Cared For🌱
Patchy or brown grass can distract buyers and make the property seem neglected. Through selective color correction and hue adjustments, you can bring dull lawns back to life.
This works because green symbolizes freshness, vitality, and care. A lush lawn signals that the home has been well-maintained, increasing perceived value and appeal.
To learn how to create a beautiful lawn, visit our guide on how to create a green, lush lawn in Photoshop and boost curb appeal.
Pro tip: Balance the greens to avoid oversaturation—aim for natural vibrancy rather than neon tones.
3. Clean the Pool and Water Features to Create a Luxury-Feel 💦
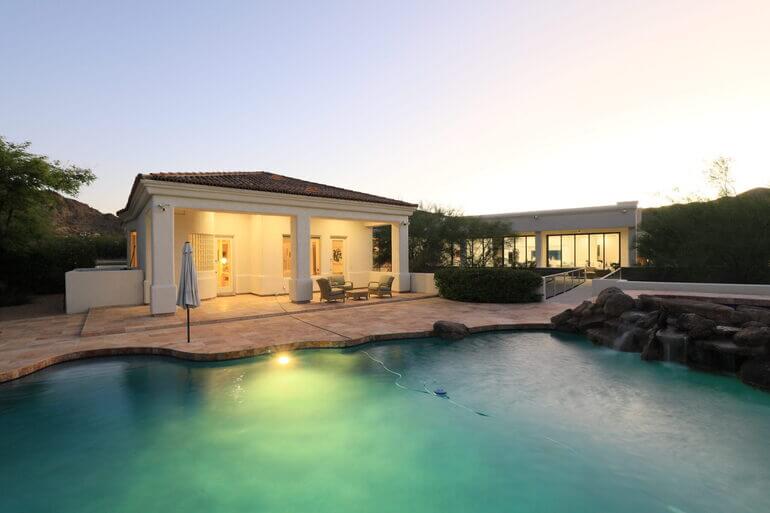
If a property has a pool, fountain, or pond, ensure the water looks crystal-clear and inviting. Remove leaves or debris, correct reflections, and enhance the blue tones.
Why? Sparkling water adds a sense of luxury and relaxation. Buyers are more drawn to listings that evoke a vacation-like feel.
If the property has a very outdated pool or none at all, you can use PhotoUp’s AI virtual staging service to update it or add an inviting pool in the backyard.
Pro tip: Adjust brightness and clarity sliders, add gentle highlights for surface reflections, and desaturate unwanted murky tones.
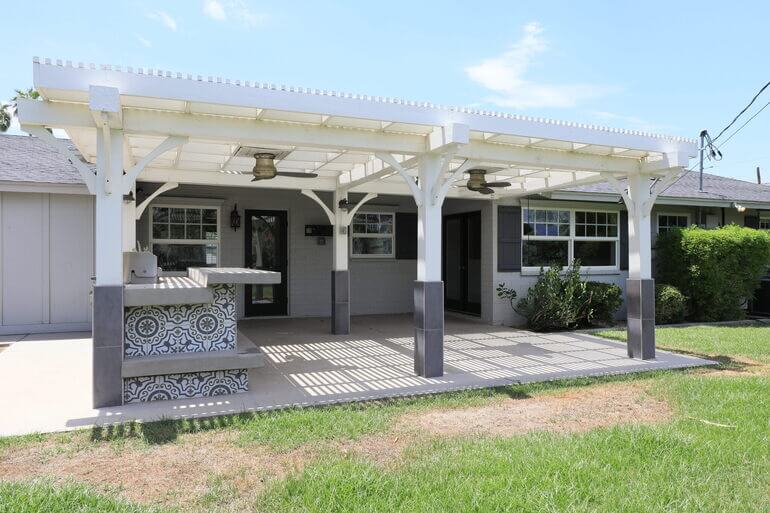
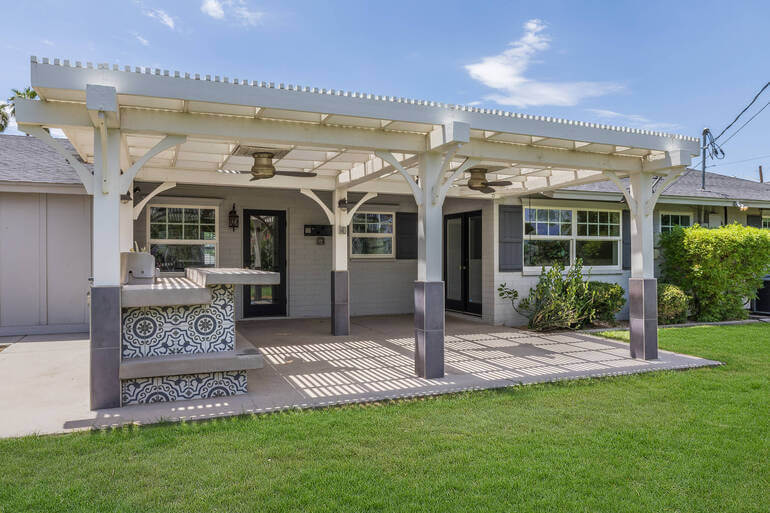
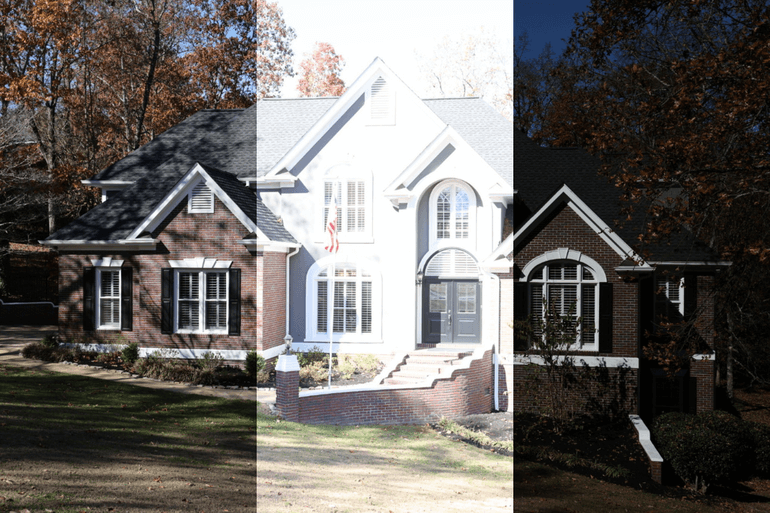
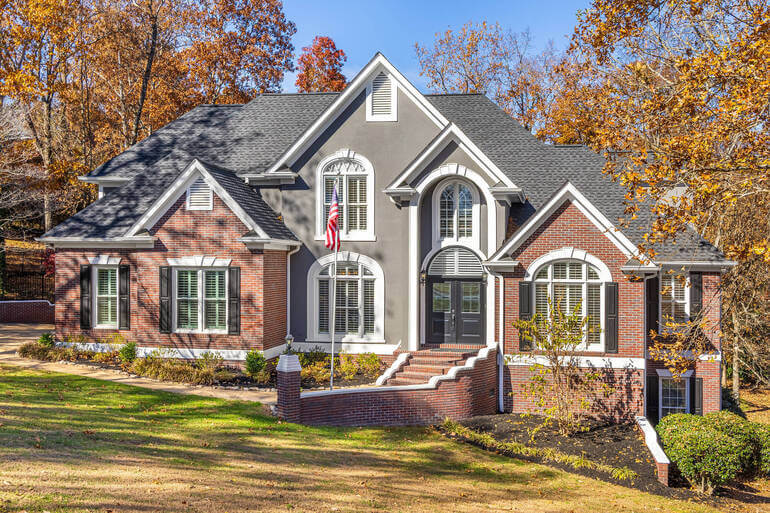
4. Brighten and Balance Lighting to Boost Visual Appeal and Focus☀️
Outdoor shots often have strong shadows or uneven lighting, especially around patios, pergolas, or garden areas.
Balanced lighting ensures every part of the image is visible and pleasant to the eye. It helps viewers focus on the property’s design rather than lighting flaws.
You can use HDR blending or dodge-and-burn techniques to balance the exposure. To learn how to perform this edit, you can check out our guide on mastering HDR blending – how to achieve natural-looking real estate photos.
Pro tip: Blend multiple exposures or use local adjustments to lift shadows while preserving highlights.
Have You Ever Thought To
Outsource Photo Editing?
Try it today with 5 free edits from three professional photo editors.

5. Remove Clutter for Distraction-Free Images🚫
Cars in the driveway, trash bins, hoses, or neighboring homes can draw attention away from the main property. Use object removal tools to clean up the composition.
Decluttering is crucial since minimalist, distraction-free exteriors look more professional and help buyers envision the home’s full potential.
To learn how to declutter your images, you can visit our tutorial on how to remove unwanted objects using Photoshop. Or, how to remove a car from the driveway.
Pro tip: Zoom in on reflective surfaces like windows and water to ensure unwanted objects aren’t subtly mirrored.
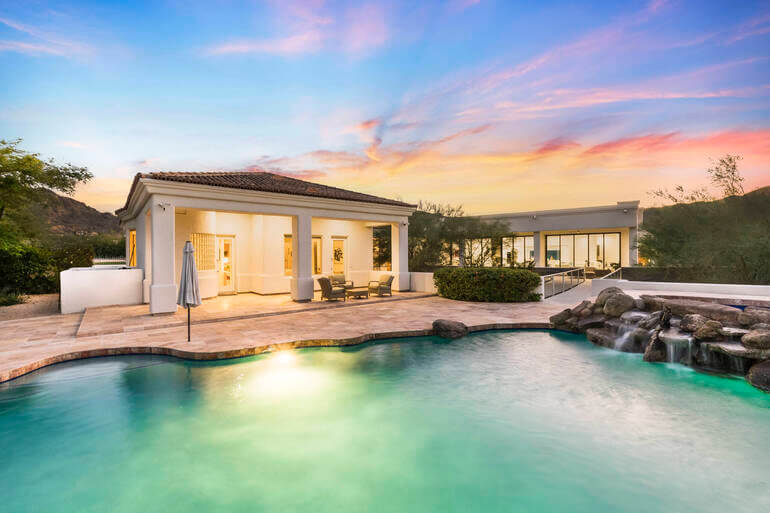
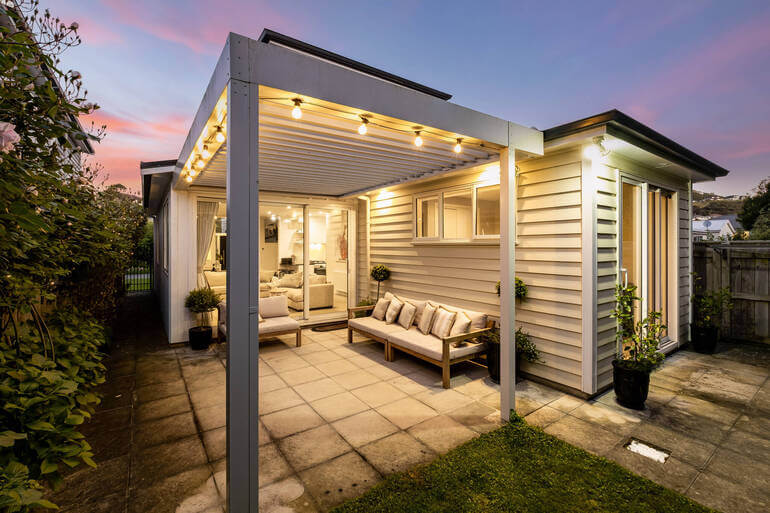
6. Add Twilight or Virtual Dusk Effects to Create That Cozy Magic🌇
Turning a daytime photo into a dusk scene—where the home’s interior and exterior lights glow warmly—can significantly elevate its visual appeal.
In fact, using a twilight image as the listing’s main photo averaged 76% more views and boosted showings by 3x times than listings without the use of twilight images.
Twilight photos are emotionally engaging. The soft lighting and warm tones create a cozy, luxurious feel that draws attention on real estate websites and social media feeds.
To learn how to perform this powerful editing technique, you can check out our guide on how to create stunning twilight photos without an evening shoot.
Pro tip: Add subtle orange glows to windows and ensure the sky gradient transitions smoothly into the horizon.
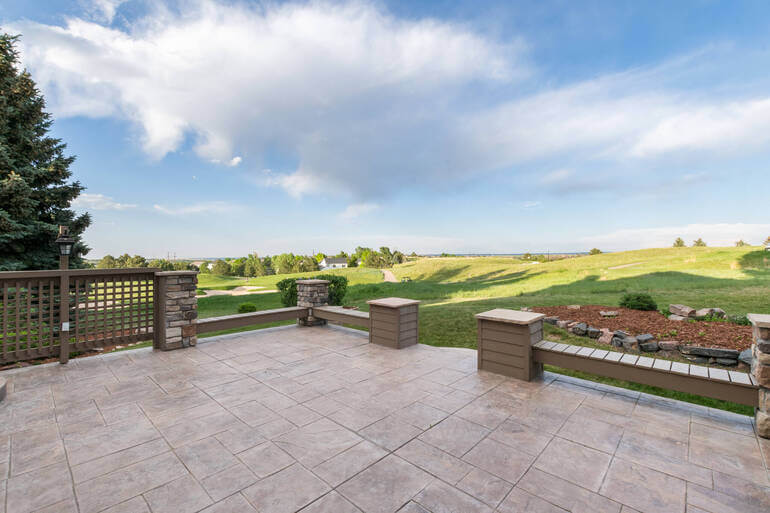
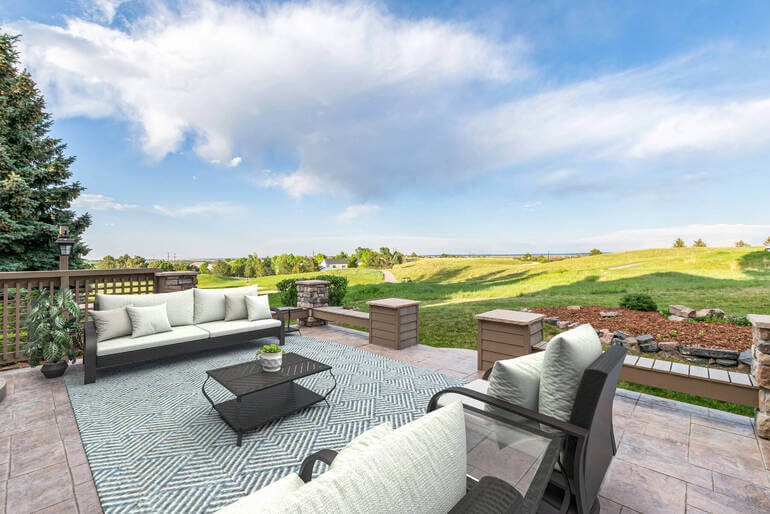
7. Highlight Outdoor Amenities to Enhance Different Lifestyles🌻
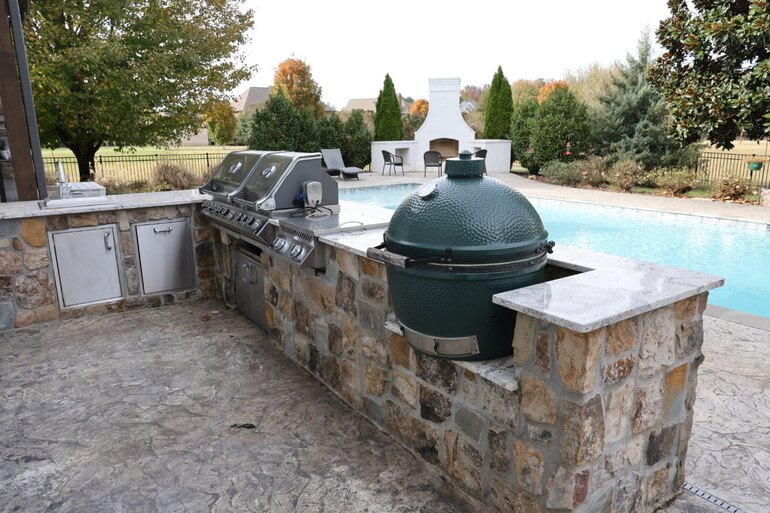

If the property has unique features like a patio, garden, BBQ area, or gazebo, make them focal points.
Additionally, adjust contrast and saturation selectively to emphasize these amenities.
Why this works? People buy homes that fit their lifestyle. Emphasizing outdoor comfort zones appeals to families and buyers looking for entertainment spaces.
Pro tip: Use vignette or depth-of-field adjustments to subtly direct the viewer’s eye toward the feature you want to highlight.
8. Correct Lens Distortion and Perspective to Ensure Professionalism📸

Wide-angle lenses can warp lines, making fences or roofs appear bent. Use geometry correction tools to fix vertical and horizontal distortions.
Straight lines subconsciously communicate stability and professionalism. Distortion-free images look more natural and trustworthy to potential buyers.
To learn how to perform these edits, check out our tutorials on:
Pro tip: Use the lens correction or transform tools in Lightroom or Photoshop to straighten vertical and horizontal lines—especially for fences, walls, and rooflines—to maintain a natural, professional-looking perspective.
9. Adjust White Balance for Natural Tones⚖️
Outdoor lighting often has color casts—blue from the sky or orange from the sun. Correcting white balance ensures realistic tones for walls, decks, and furniture.
True-to-life colors help buyers accurately perceive materials and finishes, avoiding misleading impressions in listing photos.
To learn how to ensure realistic tones, check out our guide on how to adjust white balance in Photoshop.
Pro tip: Use the White Balance Eyedropper Tool in Lightroom or Photoshop to neutralize color casts and ensure whites appear truly white—this helps achieve natural, true-to-life tones across your outdoor images.
10. Enhance Seasonal Appeal to Create Fresh, Year-Round Listings🌺❄️
You can adjust foliage colors to match seasons—lush greens for summer, golden tones for fall, or snowy effects for winter.
Seasonally edited photos help listings stay fresh year-round, making them relevant for different marketing campaigns.
And there you have it! We hope these real estate photo editing tips will help you create inviting and captivating outdoor amenities that will help boost views and sales.
Whether you’re a real estate photographer or agent, leveraging these techniques can help your listings stand out, sell faster, and sell for more.
Now, let’s answer some common questions about editing outdoor amenities.
Outdoor Amenities Editing FAQ
Why is outdoor photo editing important for real estate?
Outdoor photos often form a buyer’s first impression. Editing enhances lighting, colors, and overall presentation, making listings look more professional and appealing.
Can over-editing hurt a listing?
Yes, excessive editing can make photos appear fake or misleading. Always aim for natural, realistic enhancements that reflect the property’s true condition.
What’s the best software for outdoor photo editing?
Popular options include Adobe Photoshop, Lightroom, and specialized AI tools like AgentUp Editing AI or PhotoUp’s professional editing platform.
How much does it cost to have outdoor photos professionally edited?
Professional real estate photo editing typically costs between $1 to $5 per image, depending on complexity and turnaround time.
How can I ensure my outdoor edits look consistent with interior shots?
Follow the same color grading style and lighting balance across all images to create a cohesive listing presentation.
To learn how to ensure image consistency, you can visit our blog post on how to edit photos consistently.
Before we leave this topic, let’s show you how to ensure impressive, head-turning real estate photos with the help of PhotoUp.
Have You Ever Thought To
Outsource Photo Editing?
Try it today with 5 free edits from three professional photo editors.
Ensure Captivating Outdoor Photos With PhotoUp🌱
If you’re a real estate photographer or agent, partnering with PhotoUp can save you time and elevate your property marketing.
Headquartered in the U.S., with offices in the Philippines, PhotoUp has offered professional real estate photo editing and marketing services for over a decade.
With the help of our expert team of editors, we offer:
- Professional outdoor and interior photo editing (HDR, object removal, lawn greening, sky replacement, perspective correction, and more)
- AI Virtual staging and twilight conversions to bring spaces to life
- Dedicated Editors for consistent results, brand awareness, and faster delivery
- Free sign-up and 10 free credits to try any service risk-free
- A fast turnaround time of 12-24 hours to get listings live quickly
PhotoUp’s blend of human expertise and AI-powered precision ensures your listings stand out—helping homes sell faster and for higher prices.
By outsourcing your editing needs, you can focus on what you do best—capturing stunning images and growing your business—while PhotoUp ensures every photo is polished and market-ready.
And there’s more…
Browse Top Dedicated
Real Estate Photo Editors
Ready-to-hire editors for real estate photo editing, and more.
We Do More Than Just Photo Editing
We do more than just real estate photo editing! PhotoUp is a complete real estate marketing partner and also offers other powerful services like:
We have everything you need to enhance and market real estate photography in one user-friendly software!
Adding these marketing services to your toolkit can also help you be more useful to your clients and ultimately grow your business.
How to Get Started
Getting started using PhotoUp’s real estate photo editing service is super easy.
This is all you need to do:
Step 1. Sign up for a free PhotoUp account.
Step 2. Upload your photos to our user-friendly software.
Step 3. Choose the level of editing that you need and provide instructions (optional).
Step 4. Wait for PhotoUp professional editors to edit and return the photos in less than 24 hours (48 hours for virtual staging).
Step 5. Download and start using your beautifully edited photos.
PhotoUp Real Estate Photo Editing Uploader Demo
To see how easy it is to get started with PhotoUp, check out our real estate photo editing uploader demo:
As simple as that! So, what are you waiting for?
Sign up for a free PhotoUp account today and transform your real estate photos with professional outdoor editing that boosts curb appeal and attracts more buyers!
For a limited time, you even get 10 free credits you can use on any of our services when signing up for an account.
We hope this post helped you learn 10 proven real estate photo editing techniques to create head-turning outdoor amenities. Before you go, you may also want to check out the following resources:

