


Table of Contents
- Dynamic Composition Matters in Real Estate Photography
- 7 Essential Editing Techniques for Dynamic Composition
- Why These Techniques Are So Effective in Real Estate
- Dynamic Composition FAQ
- How PhotoUp Ensures Eye-Catching Dynamic Composition
In the world of real estate photography, first impressions are everything. A well-composed photo can instantly capture a buyer’s attention, create emotional appeal, and motivate them to schedule a showing.
Dynamic composition is at the heart of this process—it’s what transforms ordinary listing images into powerful marketing tools that sell homes faster and for higher prices.
In this article, we’ll share why dynamic composition matters in real estate photography and show you 7 effective editing techniques that will help you ensure perfect composition.
Let’s begin by taking a look at why dynamic composition matters in real estate photography.
Dynamic Composition Matters in Real Estate Photography🏠
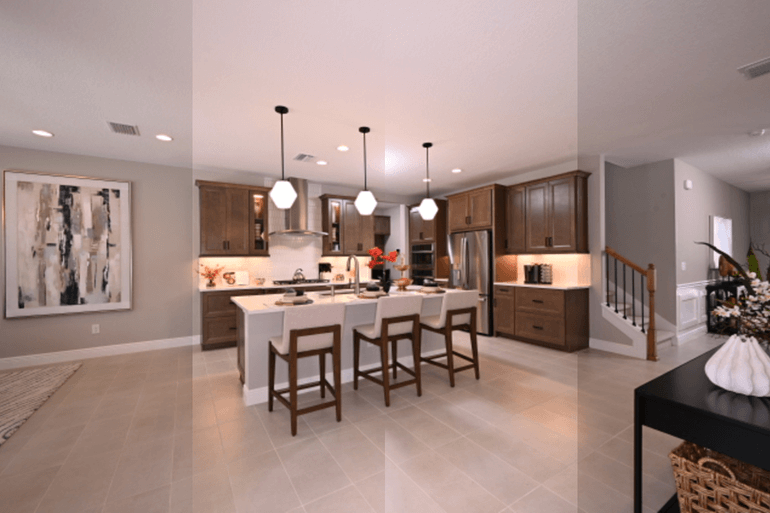
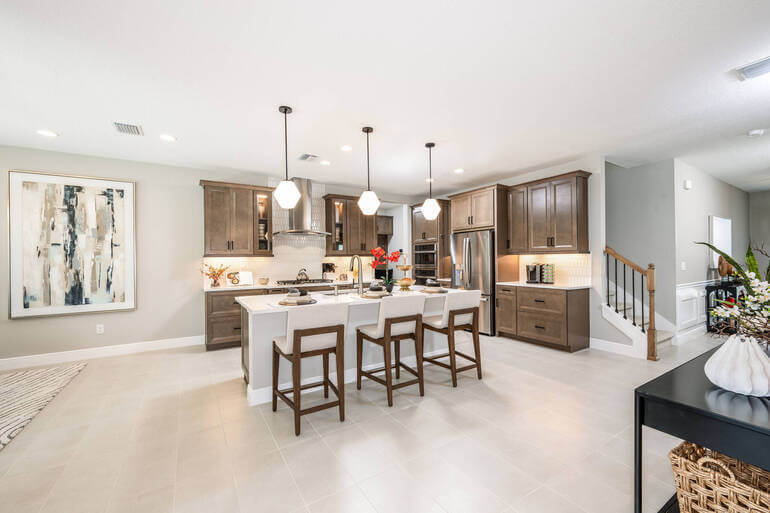
Dynamic composition refers to how visual elements are arranged in a photograph to create balance, depth, and flow.
In real estate, composition isn’t just about aesthetics—it’s about storytelling.
A well-composed photo guides the viewer’s eye naturally through a space, helping them imagine themselves living there.
For instance, an image that uses leading lines to draw the viewer toward a beautiful kitchen island or a panoramic view can make the property feel inviting and spacious.
Without proper composition, even the most luxurious home can appear dull or cramped. This is where real estate photo editing plays a vital role.
With the help of some simple yet effective editing techniques, real estate photographers can enhance composition, correct perspective, and ensure every image feels vibrant, balanced, and professionally crafted.
With this in mind, let’s take a look at some effective editing techniques for dynamic composition.
7 Essential Editing Techniques for Dynamic Composition🧭
Here are 7 essential real estate photo editing techniques to ensure dynamic composition in your listing photos:
1. Cropping and Straightening✨
Sometimes the key to great composition is removing unnecessary distractions.
Cropping helps refocus attention on the most appealing parts of the scene—whether it’s a stunning window view or the symmetry of an open-plan living area.
Additionally, straightening lines, such as correcting a tilted horizon or adjusting verticals, gives the image a more professional look.
Real estate photos with perfect alignment subconsciously convey stability and quality—qualities buyers associate with well-built homes.
Example: A photo of a beachfront condo slightly tilted to one side can feel disorienting. Straightening the horizon instantly makes the image calmer, more balanced, and visually trustworthy.


These tutorials will help you with cropping and straightening horizontal and vertical lines:
2. Perspective Correction🪟
Wide-angle lenses are popular in real estate photography for capturing entire rooms, but they can distort vertical lines—especially near the edges.
Perspective correction ensures that walls, windows, and door frames appear straight and natural.
This technique helps maintain architectural integrity and prevents rooms from looking warped or unnatural.
Example: A tall living room with vaulted ceilings can appear like it’s leaning inward if perspective isn’t corrected. Proper adjustment restores the grandeur and openness of the space.


To learn how to perform this editing technique, check out our guide on how to correct perspective in Photoshop.
3. Sky Replacement🌅
A dull or overexposed sky can throw off the visual balance of an exterior photo.
Sky replacement enhances the overall composition by adding depth, contrast, and emotional warmth.
A vibrant blue sky or soft twilight tone can completely change the mood, making the home appear more inviting and picturesque.
Example: Replacing a washed-out sky with a sunset scene adds golden light that complements the property’s exterior tones and improves the image’s symmetry and depth.


To learn how to do this powerful editing technique, check out our tutorial on how to do a sky replacement in Photoshop.
The Real Estate Photography
Business Systems You Need
PhotoUp is the ultimate real estate photographer business platform.

4. Decluttering and Object Removal🌿
Unwanted objects—like garbage bins, cords, or parked cars—can clutter a composition and distract from the home’s best features.
Through careful object removal, editors can create a clean, harmonious frame that draws the viewer’s attention where it matters most.
Example: Removing a bright red car from a driveway photo instantly restores focus to the home’s façade and landscaping, creating a stronger composition overall.
These tutorials will help you declutter your real estate photos:
5. Color Correction and White Balance💡
Color correction is key to achieving visual harmony in real estate images.
Balancing color tones and correcting lighting inconsistencies ensures the composition feels natural and cohesive.
Warm, even lighting throughout a set of listing photos enhances flow and makes spaces feel more connected, which is essential for visual storytelling.
Example: A living room shot with yellow-tinted lighting can make walls look dull. Adjusting white balance to a neutral tone creates clarity and consistency across the property’s gallery.


To learn how to ensure accurate colors in your images, you can check out these tutorials:
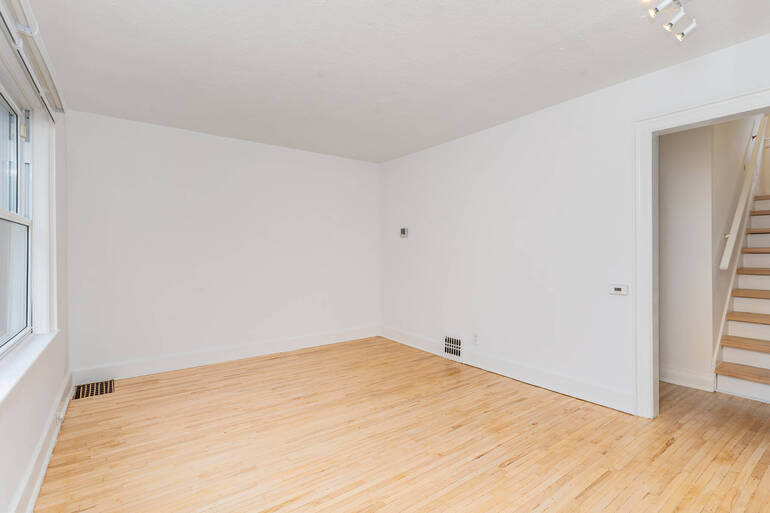
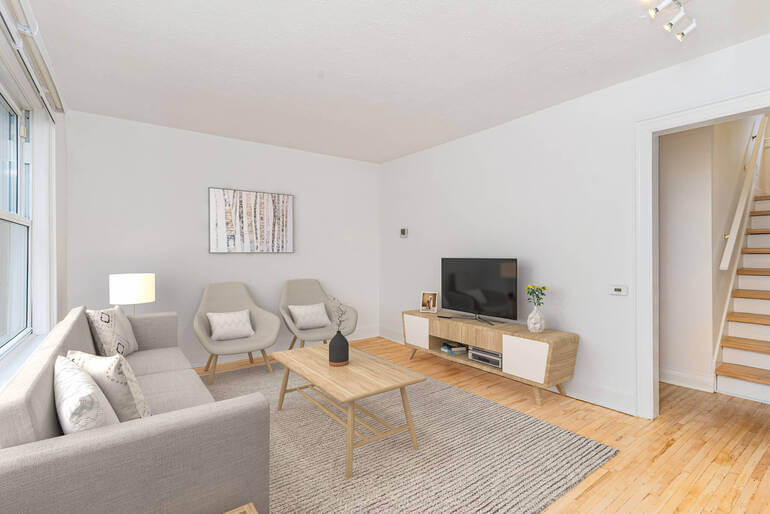
6. Virtual Staging for Balance and Depth🌇
AI Virtual staging goes beyond adding furniture—it’s a compositional tool. Strategically placed décor and furnishings establish focal points, improve visual flow, and give scale to empty rooms.
When used thoughtfully, virtual staging turns empty or awkwardly shaped spaces into balanced, appealing environments that highlight the home’s potential.
Example: Placing a sofa and rug in an open living area helps anchor the space, creating symmetry and guiding the viewer’s eye naturally through the image.
To learn how to get started, check out our guide on how to virtually stage a room in less than 5 minutes.
7. Cropping for the Rule of Thirds🪞
Applying the rule of thirds ensures your composition feels dynamic rather than static.
By aligning key elements—such as windows, artwork, or furniture—along imaginary grid lines, you create movement and interest.
Real estate photo editors often re-crop images post-shoot to better adhere to this rule and enhance visual engagement.
Example: Positioning a fireplace slightly off-center rather than directly in the middle adds a natural flow and draws attention more effectively.


And there you have it! By applying these powerful editing techniques, you can quickly enhance the dynamic composition in your real estate photos and create captivating listing images.
Why These Techniques Are So Effective in Real Estate💬
Real estate listings compete in fast-paced online marketplaces where buyers scroll through dozens of homes in seconds.
According to studies, 85% of homebuyers consider photos the most critical factor when evaluating a property online.
Here are more compelling real estate photography statistics to consider regarding how high-quality photos boost views, sales, and prices:
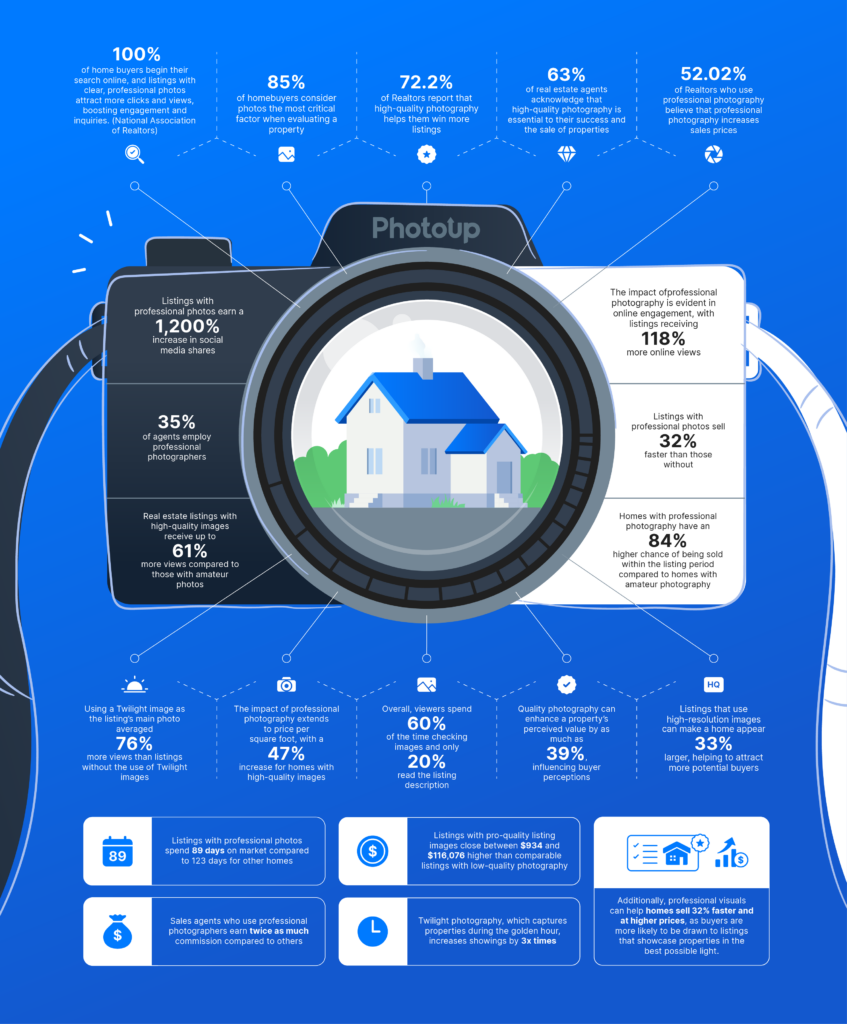
Eye-catching composition makes a photo stop the scroll.
When images feature balance, depth, and a clear focal point, they feel more immersive.
Buyers don’t just see a property—they experience it. Proper composition also communicates professionalism and care, building trust with potential clients and reinforcing the property’s value.
A home that looks well-presented online is perceived as more desirable and well-maintained, often leading to faster sales and higher offers.
Dynamic Composition FAQ❓
What makes a real estate photo “dynamic”?
A dynamic photo has visual energy—it guides the viewer’s attention, shows depth, and feels natural yet captivating. Editing helps enhance this effect through color, lighting, and alignment adjustments.
Can composition really affect how quickly a home sells?
Yes. Studies show that listings with professional, well-composed photos receive significantly more views and sell faster than those without.
Is dynamic composition achieved during shooting or editing?
Both. Skilled photographers frame shots intentionally, while editors refine composition through cropping, straightening, and color correction to achieve the final polished look.
Can I apply these editing techniques myself?
If you have editing experience, you can very well apply basic corrections.
However, professional editing services like PhotoUp have specialized tools and trained editors who ensure each image meets real estate marketing standards. This also helps you save time and money.
Let’s take a look at how outsourcing your real estate photo editing to PhotoUp will take editing off your plate and allow you to spend time where it matters—shooting more properties.
Have You Ever Thought To
Outsource Photo Editing?
Try it today with 5 free edits from three professional photo editors.
How PhotoUp Ensures Eye-Catching Dynamic Composition
At PhotoUp, we understand that dynamic composition is more than just editing—it’s storytelling🖼️.


Our expert team of real estate photo editors uses advanced tools and proven techniques to balance every frame, enhance visual flow, and highlight your property’s most attractive features.
From precise perspective correction and flawless sky replacement to decluttering and virtual staging, we transform raw photos into compelling visuals that captivate buyers and drive results.
We can help you with:
- Image correction and enhancement
- Color and tone adjustments
- Window masking and glare reduction
- Clutter and object removal
- Line and angle corrections
- Improper exposure levels
- HDR editing
- Harsh shadows, lack of light, etc.
- And much more!
We will handle all types of issues – from basic to complex editing! And the best part? It’s affordable, fast, and utterly worth it.
Browse Top Dedicated
Real Estate Photo Editors
Ready-to-hire editors for real estate photo editing, and more.
A Complete Real Estate Marketing Partner
PhotoUp offers so much more than just real estate photo editing!
You can find everything you need for your real estate marketing needs under one roof, as we also offer additional services such as:
Adding these additional services to your toolkit will allow you to expand your product offerings and become more valuable to your clients.
Together with PhotoUp, you can quickly grow and scale your business!
How to Get Started
Getting started with PhotoUp is super easy. Here’s all you need to do:
Step 1. Sign up for a free PhotoUp account.
Step 2. Upload your photos to our easy-to-use software.
Step 3. Choose the level of editing that you need and provide instructions (optional).
Step 4. Wait for PhotoUp professional editors to edit and return the photos in less than 24 hours (48 hours for virtual staging).
Step 5. Download and start using your beautifully edited photos.
PhotoUp Real Estate Photo Editing Uploader Tutorial
To see how easy it is to get started, have a look at our real estate photo editing uploader tutorial:
As simple as that!
With PhotoUp, your listings don’t just look better—they feel better, capturing the attention of potential buyers from the very first glance.
Sign up for a free PhotoUp account today and let our team of expert editors help you ensure dynamic composition in your real estate photography!
For a limited time, you’ll even get 10 free credits when signing up for an account you can apply to any of our services.
We hope this guide helped you learn 7 effective real estate photo editing techniques to enhance the dynamic composition of your listing photos. Before you go, you may also want to check out some related resources:

