


Table of Contents
- Why Post-Processing Matters in Real Estate Marketing
- What Is Color Grading in Real Estate Photo Editing?
- Top 5 Color Grading Tips for Luxury vs Budget Listings
- Comparing the Two Styles Side by Side
- How PhotoUp Elevates Your Real Estate Photos
In the world of real estate marketing, visuals are everything. According to the National Association of Realtors (NAR), 100% of home buyers begin their search online, and listings with clear, professional photos attract more clicks and views, boosting engagement and inquiries.
85% of homebuyers consider photos the most critical factor when searching for homes, so the right image can make a potential buyer stop scrolling, click on your listing, and imagine themselves living in the home.
However, achieving that perfect image doesn’t just happen in-camera—it’s the result of skillful real estate photo editing, especially when it comes to color grading.
In this article, we’ll share our top 5 color grading tips for luxury vs budget real estate listings.
Let’s begin by taking a look at why real estate photographers and agents can’t skip post-processing.
Why Post-Processing Matters in Real Estate Marketing🏡
Real estate photography aims to sell not just spaces, but lifestyles.
A well-edited photo does more than enhance exposure or remove imperfections—it helps convey a mood that aligns with the property’s value and target demographic.

Post-processing allows editors to:
- Adjust lighting and shadows to highlight architectural features
- Create color balance that evokes warmth, sophistication, or comfort
- Ensure consistency across multiple images for a cohesive presentation
- Correct distortions, remove distractions, and enhance textures
- And reinforce the emotional tone the listing is meant to project
In short, real estate photo editing bridges the gap between a raw photo and a market-ready image. Without it, even the most well-composed shot can feel flat or uninspiring.
Luxury and budget listings have distinct marketing goals. Luxury homes focus on elegance, depth, and aspiration, while budget listings highlight comfort, practicality, and brightness.
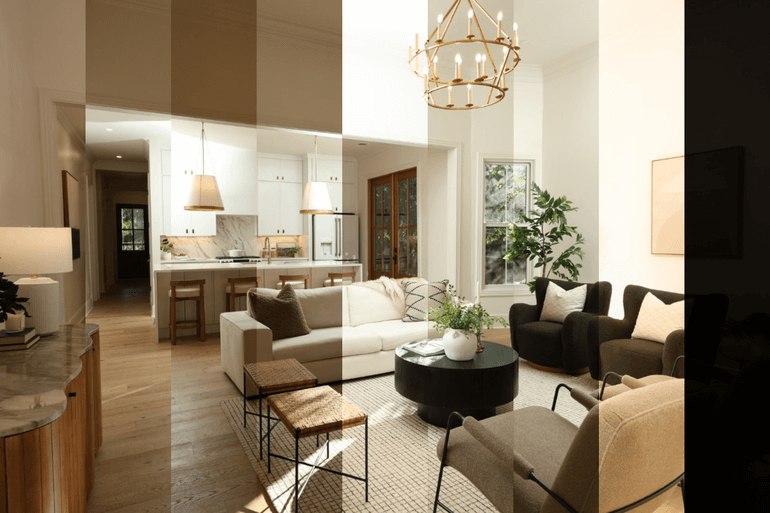
This difference directly informs how editors approach color grading, the art of controlling tone, saturation, and color balance to create a specific emotional effect.
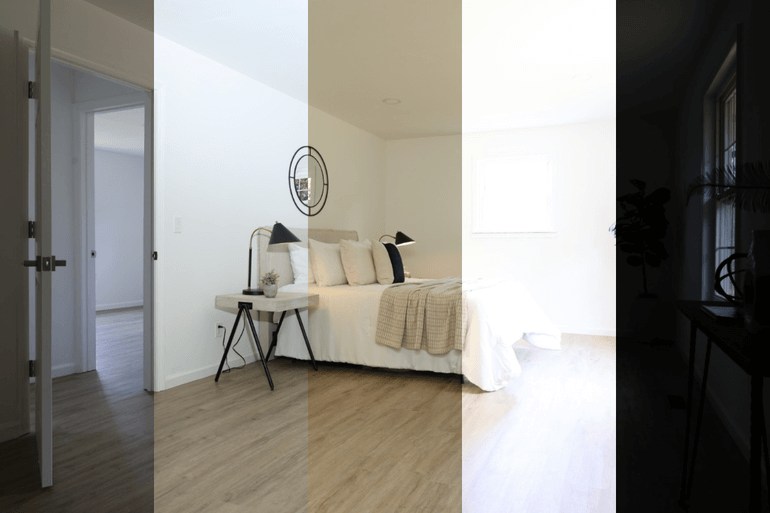
What Is Color Grading in Real Estate Photo Editing?🎨
Color grading in real estate photo editing is the process of adjusting and enhancing the colors, tones, and overall mood of an image to create a specific visual impression or emotional response.
It goes beyond basic color correction (which simply fixes inaccuracies in white balance or exposure).
Instead, color grading is about styling the photo—making it look more inviting, luxurious, cozy, or vibrant depending on the property’s character and target market.
It’s not just about aesthetics—it’s about emotion. The way colors, shadows, and tones interact in your photos directly shapes how buyers perceive a property.
Luxury listings demand subtlety, warmth, and sophistication, while budget listings thrive on brightness, vibrance, and approachability.
Each requires a different artistic touch, but both share one goal: to captivate potential buyers at first glance.
Top 5 Color Grading Tips for Luxury vs Budget Listings🌄

Whether you’re showcasing a multimillion-dollar penthouse or a cozy starter home, your approach to post-processing can make or break the emotional connection a buyer feels.
Interestingly, color grading for luxury vs budget listings follows different principles.
Each has its own unique aesthetic, emotional appeal, and target audience—and understanding these distinctions is key to marketing success.
Let’s start by taking a look at 5 color grading tips for luxury listings, followed by budget listings.
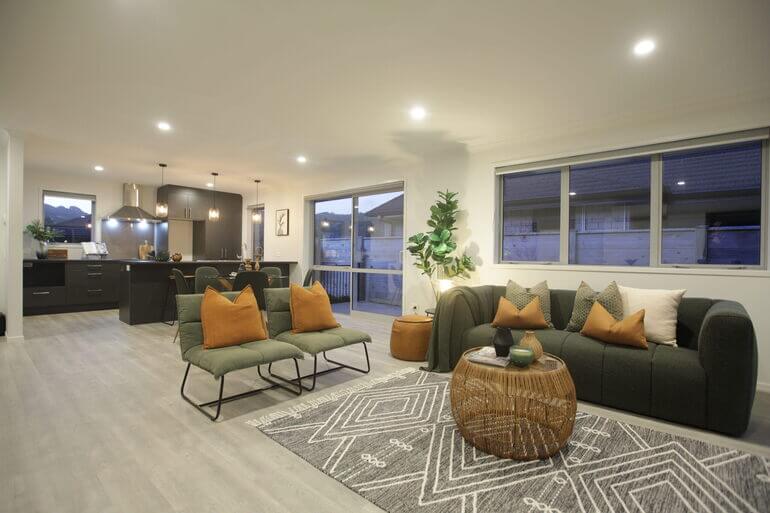
Color Grading for Luxury Listings💎
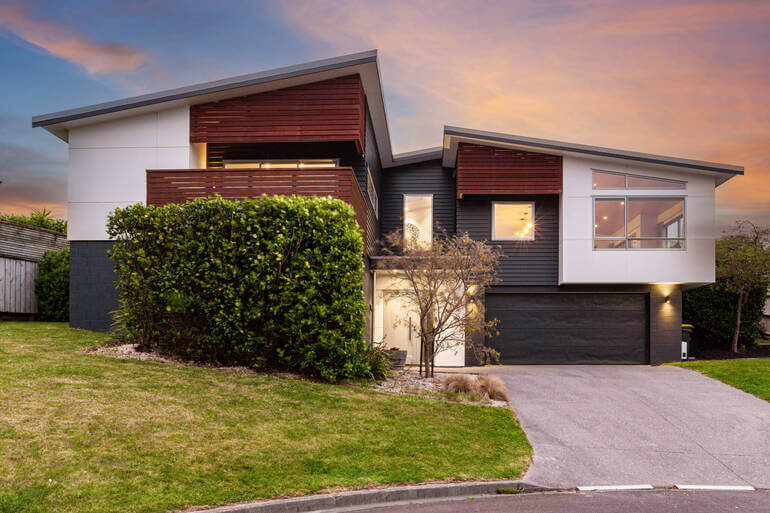
Luxury properties are all about visual storytelling that communicates exclusivity and sophistication.
The color grading process for these listings aims to make each image feel cinematic, atmospheric, and meticulously crafted, using these techniques:
1. Warm, Golden Tones for Inviting Elegance
Luxury listings often use soft golden tones to evoke a sense of warmth and affluence.
Think sunset lighting streaming across polished marble floors or the gentle glow of ambient interior lighting.
Editors can achieve this through:
- Temperature Adjustments: Slightly warming up the image to create a golden hue
- Selective Saturation: Enhancing yellows, ambers, and soft oranges while muting cooler colors
- White Balance Control: Ensuring whites stay creamy rather than stark to maintain a high-end feel
These subtle adjustments lend photos a “glow of luxury”, often associated with designer interiors and elegant finishes.
For more information, you can check out these tutorials:
2. Shadow Depth for a Cinematic Feel
Luxury images benefit from deep, rich shadows that create contrast and dimension.
Unlike budget listings where brightness dominates, luxury photos thrive on drama and depth.
You can use these techniques to create a cinematic feel:
- Curves and levels adjustments to enhance dark areas without losing detail
- Dodging and burning to emphasize textures like wood grain, marble veins, or velvet fabric
- Contrast layering to make high-end materials pop
The result is a mood that feels exclusive—inviting viewers to experience sophistication rather than just observe it.
3. Neutral Color Palettes With Refined Accents
Luxury homes typically feature neutral, desaturated color palettes—whites, creams, taupes, grays—with subtle hints of color from decor or natural elements.
Professional real estate photo editors can enhance this look by:
- Desaturating dominant colors slightly for a more polished appearance
- Boosting micro-contrast to make fine details stand out
- Using gradient filters to direct attention toward focal points
These techniques give the image a clean, editorial finish reminiscent of interior design magazines.
4. Controlled Highlights and Soft Light
Harsh lighting can cheapen an otherwise luxurious space. To combat this, editors can soften highlights and maintain a consistent exposure throughout the photo.
By reducing highlights and using soft light adjustments, the final image feels balanced, calm, and timeless—a look that aligns perfectly with luxury branding.
For more details and editing tips, you can check our blog post on mastering interior photo editing: 10 powerful techniques.
5. Blue-Hour and Twilight Enhancements
Luxury exteriors often benefit from twilight editing—a technique that transforms daytime shots into dramatic dusk scenes.
Adding a deep blue sky, warm glowing windows, and rich exterior lighting instantly makes the home appear more desirable and high-end.
To learn how to perform this powerful edit, check out our tutorial on how to edit twilight real estate photos in Photoshop.
With the luxury listing editing techniques in mind, let’s take a look at how to perform color grading for budget listings.
Have You Ever Thought To
Outsource Photo Editing?
Try it today with 5 free edits from three professional photo editors.

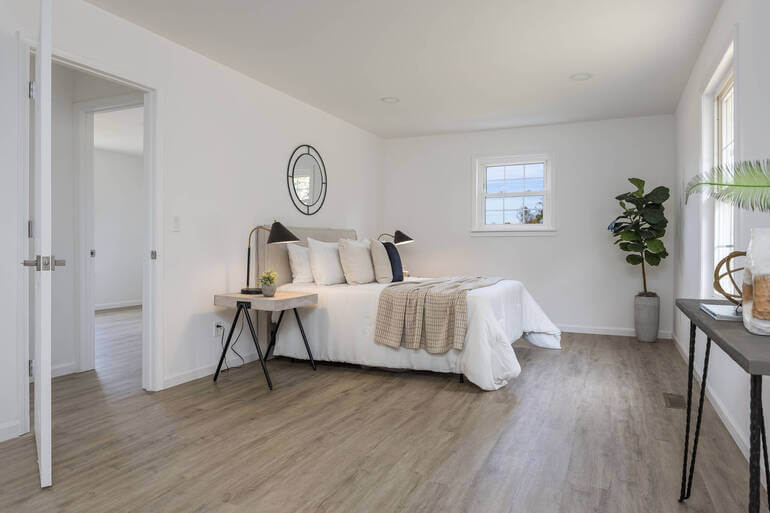
Color Grading for Budget Listings💰
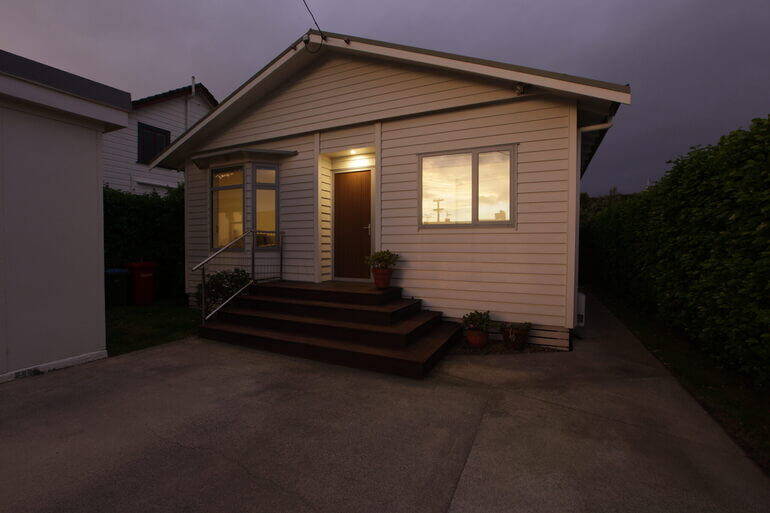
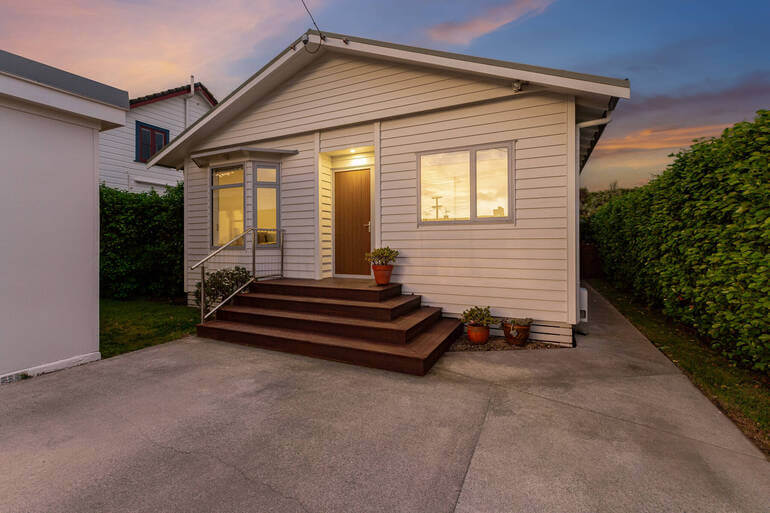
Budget or mid-range listings require a completely different approach.
Here, the goal isn’t to impress with opulence—it’s to create a sense of comfort, space, and livability. Buyers want to envision an affordable, bright, and welcoming environment.
1. Bright and Airy Exposure
While luxury photos lean toward mood and contrast, budget listings thrive on brightness and clarity.
Editors can focus on maximizing available light and ensuring every corner of the room feels open and accessible.
Techniques include:
- Exposure and brightness boosts to counteract dim interiors
- Highlight recovery to prevent blown-out windows
- Shadow lifting to reveal more of the space
- Clarity and texture adjustments for crisp details
These tutorials below can help you learn these editing techniques:
- How to change exposure in Photoshop
- How to brighten a photo in Photoshop
- How to remove shadows in photos (Lightroom & Photoshop tutorial)
- How to perform noise reduction in Lightroom & Photoshop
These techniques make rooms appear more spacious and cheerful, a key selling factor for budget-conscious buyers.
2. Vibrant but Natural Colors
Budget homes often benefit from lively yet realistic color grading. While saturation is increased slightly to make the image pop, it should still look natural.
Real estate photo editors can achieve this by:
- Increase vibrance rather than saturation for a subtle enhancement
- Adjust individual color channels to make whites whiter and blues bluer
- Maintain consistent tones throughout the listing to avoid visual disconnect
The overall effect is bright, friendly, and trustworthy—perfect for first-time homebuyers.
3. Cooler Tones for Cleanliness
While warm tones work for luxury listings, cooler tones tend to feel cleaner and fresher in budget listings.
Adding a slight blue or neutral tint can make small spaces feel crisp and inviting, especially in kitchens and bathrooms.
Editors can achieve this through:
- White balance correction to remove yellow color casts
- Blue and cyan tone adjustments for clarity
- Sharpening edges to enhance cleanliness and definition
This approach subtly communicates maintenance, hygiene, and move-in readiness.
4. Simplified Composition and Minimal Retouching
For budget listings, simplicity sells. Overediting can make affordable homes appear artificial or misleading.
The focus should remain on realistic enhancement rather than dramatic transformation. Common real estate photo editing techniques include:
- Basic blemish removal (small stains, marks, or cords)
- Lens correction for perspective balance
- Minor sky replacements for outdoor consistency
- Minimal vignette use to keep the image straightforward and honest
Check out these tutorials for more details:
- How to remove unwanted objects using Photoshop
- How to do lens correction in Photoshop
- How to do sky replacement in Photoshop
Buyers in this segment value accuracy and transparency, so photo editing should enhance reality—not reinvent it.
5. Emphasizing Functionality and Comfort
Where luxury editing emphasizes exclusivity, budget photo editing highlights everyday usability.
Editors may subtly brighten kitchen counters, enhance green lawns, or soften harsh lines to make the home appear friendlier.
A slightly boosted warmth can make interiors feel homier, while maintaining natural tones ensures authenticity. The goal is to make the buyer feel like this could be their next comfortable home.
And that’s it! By using these editing techniques, you’ll be able to create impressive listing photos for both luxury and budget homes.
Comparing the Two Styles Side by Side✨
| Feature | Luxury Listings | Budget Listings |
| Overall Mood | Dramatic, elegant, refined | Bright, cheerful, approachable |
| Lighting | Soft, warm, balanced | Bright, clear, even |
| Color Palette | Neutral tones with depth | Natural tones with vibrance |
| Contrast | Strong shadows for dimension | Soft contrast for openness |
| Editing Approach | Cinematic and detailed | Practical and realistic |
| Emotional Impact | Aspiration and exclusivity | Comfort and accessibility |
While both approaches aim to make the property look its best, luxury editing sells dreams—and budget editing sells possibilities.
The art lies in understanding the psychology behind each market and applying photo editing techniques that connect emotionally with the intended audience.
Before we leave this topic, let’s present a solution that can help you quickly and easily ensure your real estate photos are up to par for luxury vs budget listings.
Have You Ever Thought To
Outsource Photo Editing?
Try it today with 5 free edits from three professional photo editors.
How PhotoUp Elevates Your Real Estate Photos🚀
Whether you’re marketing high-end estates or entry-level homes, professional editing is the key to consistency and impact.
That’s where PhotoUp comes in!
PhotoUp’s team of expert real estate photo editors understands that every listing has its own story and audience.
We specialize in customizing edits to match the property’s identity—delivering perfectly color-graded images that inspire confidence and interest.
Why Choose PhotoUp?
Here are some key reasons to consider outsourcing your editing to PhotoUp:
| Tailored Editing Styles: From warm, cinematic tones for luxury homes to bright, vibrant colors for budget listings, PhotoUp adapts to your brand and property type. |
| Expert Color Grading Techniques: Our editors apply precise tone mapping, contrast balancing, and hue correction to make every photo look naturally stunning. |
| Consistent, On-Brand Results: PhotoUp ensures all your listings maintain visual harmony—whether you’re a boutique agent or a large brokerage. |
| Fast Turnaround: Receive professionally edited photos in as little as 12–24 hours, helping you shoot more properties and stay ahead of competitors. |
| Affordable Pricing: With editing starting at just $1.50 per image for on-demand editing, PhotoUp offers premium results at budget-friendly rates—so you can save time and money without compromising quality. |
| Additional Editing Services: Beyond color grading, we also offer AI virtual staging, twilight conversions, sky replacements, lawn enhancements, advanced object removal, and HDR editing—everything you need to make your listings shine. |
By partnering with PhotoUp, you can rest assured that every photo—from a lavish mansion to a modest starter home—will reflect the story you want to tell.
Browse Top Dedicated
Real Estate Photo Editors
Ready-to-hire editors for real estate photo editing, and more.
More Than Just Real Estate Photo Editing

PhotoUp offers so much more than just editing! We are a complete real estate marketing partner and also offer other powerful services like:
We have everything you need to enhance and market real estate photography in one user-friendly software!
How to Get Started
Getting started using PhotoUp’s real estate photo editing service is super easy.
This is all you need to do:
Step 1. Sign up for a free PhotoUp account.
Step 2. Upload your photos to our easy-to-use software.
Step 3. Choose the level of editing that you need and provide instructions (optional).
Step 4. Wait for PhotoUp professional editors to edit and return the photos in less than 24 hours (48 hours for virtual staging).
Step 5. Download and start using your beautifully edited photos.
PhotoUp Real Estate Photo Editing Uploader Tutorial
Have a look at the real estate photo editing uploader tutorial to see how easy it is to get started with PhotoUp:
As simple as that!
Sign up for a free PhotoUp account today and let our expert editors help you create stunning listing photos for luxury and budget homes!
For a limited time, you’ll receive a bonus of 10 free credits you can use on any of our services when signing up for an account.
We hope this guide provided you with 5 powerful color grading tips for luxury vs budget real estate listings. Before you go, you may also want to check out the following resources:
- Real Estate Editing on a Budget: Top Services Under $2 Per Image
- 9 Proven Exterior Real Estate Photo Editing Techniques
- The #1 Edit to Create Stunning Real Estate Photos
- How to Replicate Professional Real Estate Photo Editing (10 Expert Tips)
- Why Real Estate Photo Editing Matters in a Competitive Market

