


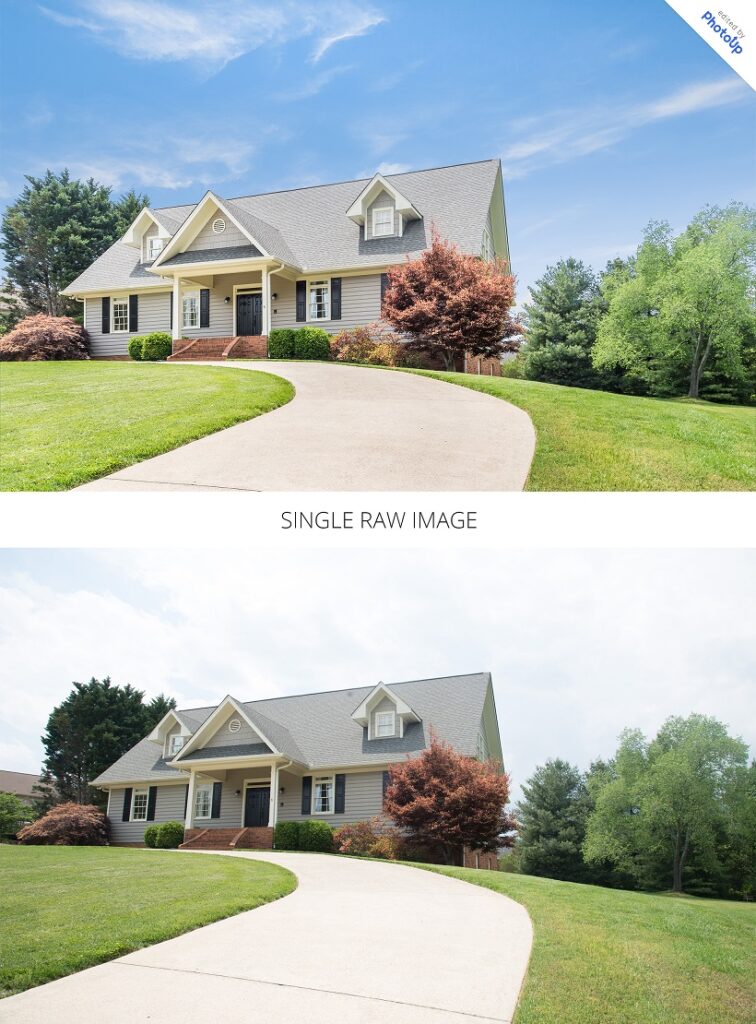
Today, real estate photo editing plays a significant role in selling houses. The vast majority of home buyers start their search for a new home, online.
Therefore, the photos of the home in the listing make a huge difference in motivating buyers to visit and make offers on a property.
To get buyers’ attention, the photos must be impressive and you’ll want to work with a good real estate editing software.
So, today, in this post, we’ll share some simple yet powerful real estate photo editing techniques to enhance your photos.
6+ Real Estate Photography Editing Techniques
Let’s now review photo editing techniques in real estate and how you can use some or all of them to gain an advantage over your competition.
1. Noise Reduction

Grain or noise refers to the millions of hazy dots that affect the clarity of an image. Because of noise, an otherwise beautiful photo can look unappealing and “grainy.”
Noise can be caused by such factors as:
- Low-light settings
- Errors in sensor size
- Wrong exposure time
- Or pixel density
Professional real estate photo editing can reduce this noise through various editing techniques, making the image more vibrant and appealing. For more details, you can check out our blog post on how to reduce noise in your real estate images.
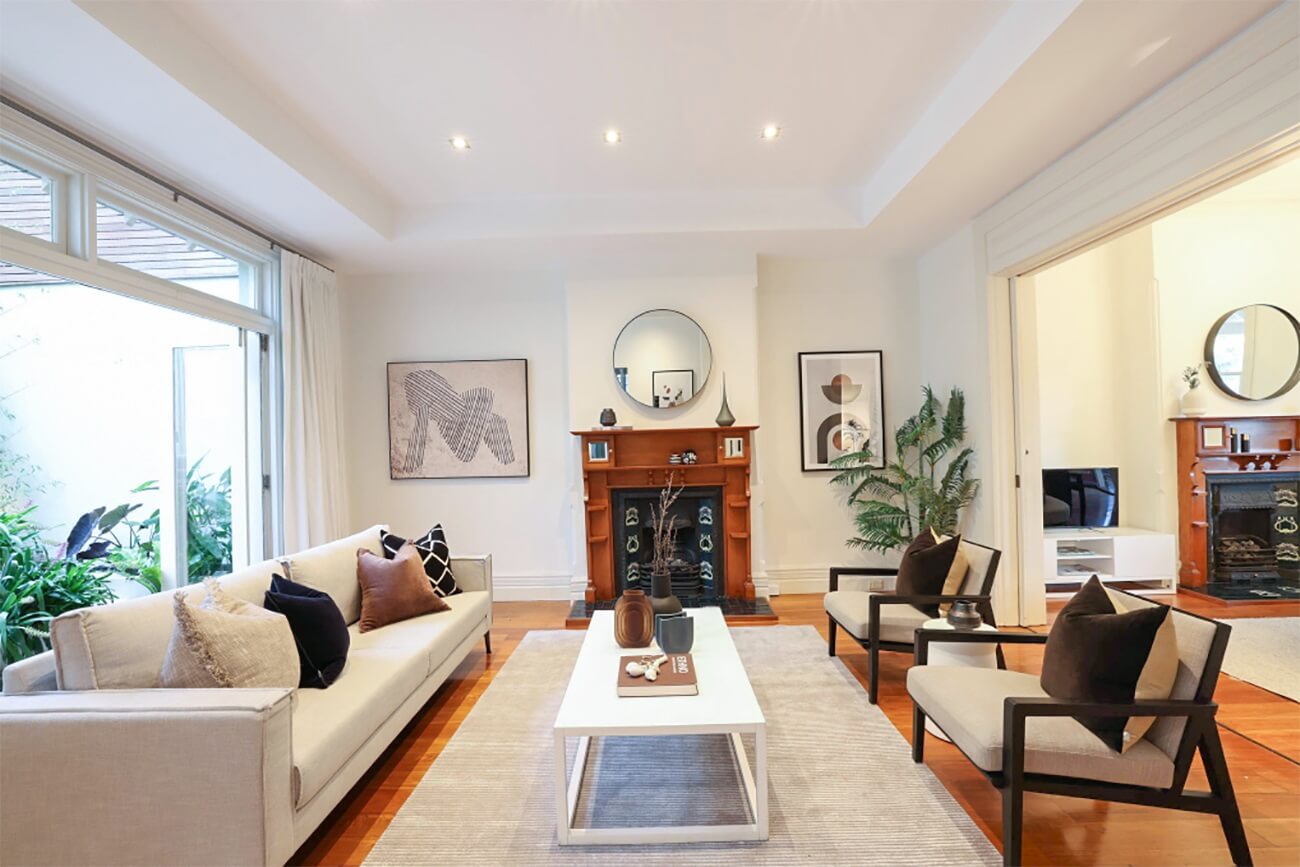
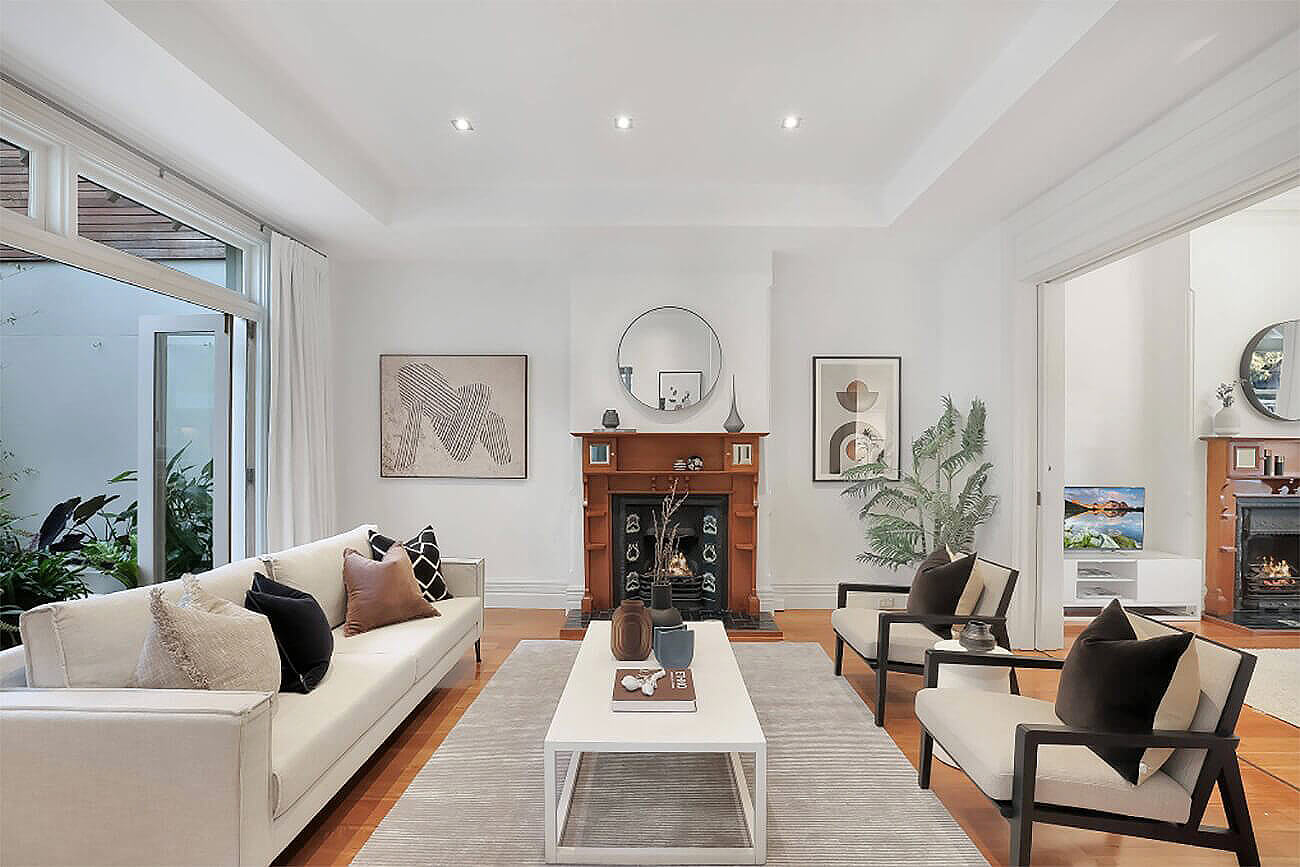
2. Brightness and Color Correction

These next real estate photo editing techniques are foundational to image enhancement. Making the following adjustments can make a huge difference to photo quality:
- Adjusting the color
- Altering contrast
- Increasing sharpness
- Balancing tone
In a few, easy steps, an otherwise dull image can be made stunning and attractive. Without a doubt, these simple techniques can make your pictures look remarkable and professional.
3. Color Cast Removal

The type and intensity of light in a scene affect how the colors are rendered in a photograph. Let’s consider a few examples:
- Cloudy, gray skies can make a lively yellow wall inside a house look dull
- A beige-colored wall will look different in direct or indirect light
- And a fluorescent light tends to cast a cold, bluish effect on an image
Even the color settings on a camera can alter the natural colors of a scene. But color cast removal can bring back the property’s original colors.
Additionally, this real estate photo editing technique will neutralize and/or remove the undesired tint that obscures the actual colors.
To learn more, check out our video tutorial on how to easily remove color cast from real estate images in Photoshop:
Have You Ever Thought To
Outsource Photo Editing?
Try it today with 5 free edits from three professional photo editors.

4. Perspective Correction in Real Estate Photos
Next, real estate and architectural photography aim for straight horizontal and vertical lines that don’t converge.
However, lines can be distorted in several ways, such as:
- The positioning of the camera
- An irregular-shaped room
- Also, the curvature of some camera lenses
The real estate photo editing technique that corrects such misalignment and distortion is called a perspective correction.
So to render a more natural photo, the distorted lines are aligned with the image’s frame, causing the image to appear to be more compact and cohesive.
To see how to align verticals using an alternative method, you can check out our video tutorial on how to straighten verticals in Photoshop:
5. Photo Manipulation
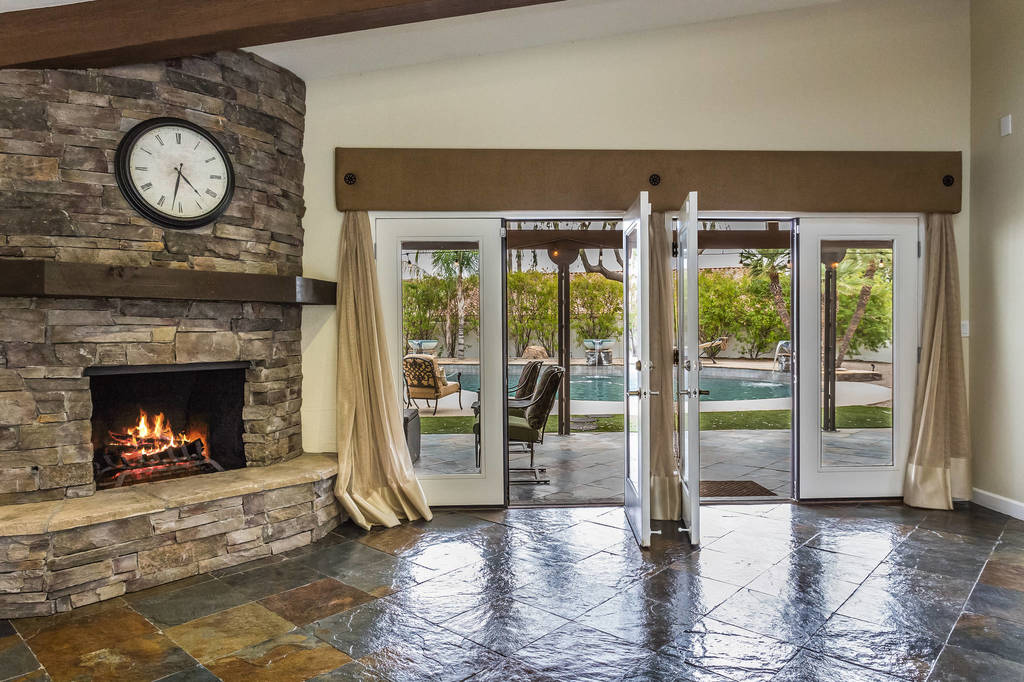
Sometimes, a photo of a room or space looks less appealing than the room itself. Some examples are:
- A simply decorated den with an unlit fireplace that looks cold or dull
- And barren earth or browned grass outside a property
Luckily, photo manipulation can easily address these, and similar issues. And a skilled photo editor can add some flames to the fireplace, making the room look warmer and inviting.
Also, the same real estate photo editing professional can add green grass to cover the brown patch, resulting in a beautiful lawn.
To learn how to create a green beautiful lawn, check out our video tutorial on how to make grass green in Photoshop:
6. Object Removal Through Photo Editing
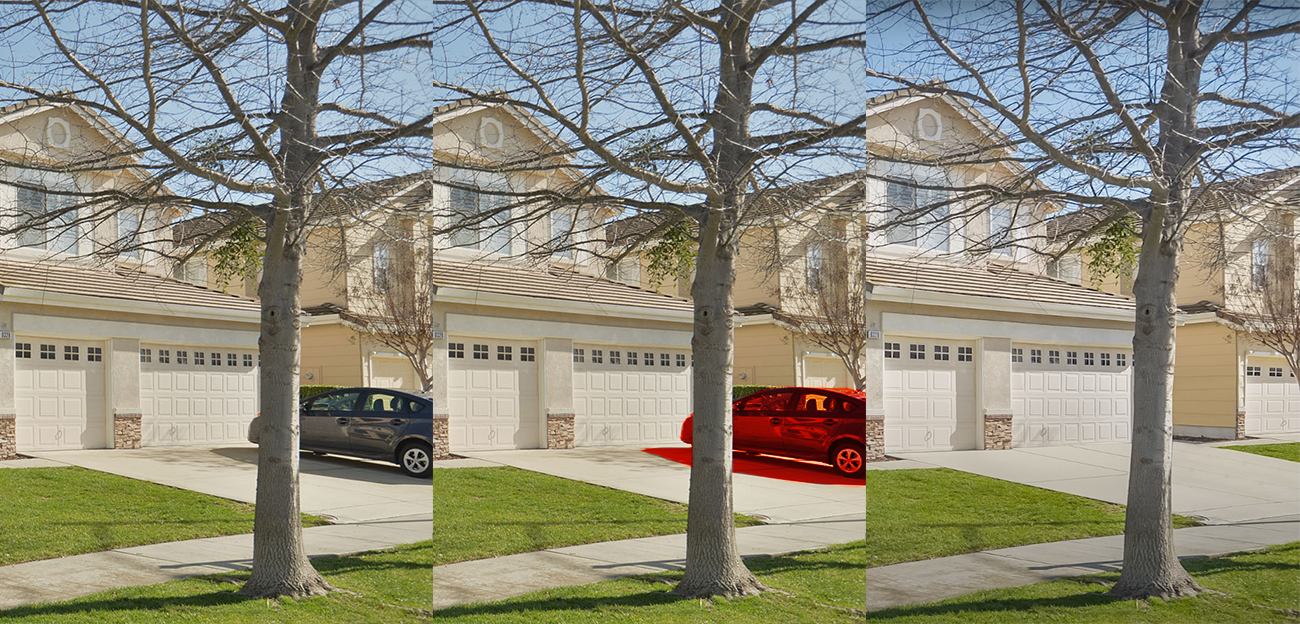
Sometimes a photo ends up with too many, unwanted objects in it.
For example, consider these situations:
- Too many items on a beautiful granite countertop
- Power cords under a dining table or desk
- Children’s toys scattered about
- Or, a parked car interfering with the view of the house
In these, and similar instances, whatever object is in the way can be digitally removed.
An experienced photo editor can use blending and retouching techniques to fill in the spot where the unwanted item was previously located.
For more details, check out this video tutorial on how to remove a car from a driveway in Photoshop:
7. Sky Replacement
Colors tend to look their best on bright and sunny days. And gray skies over even the most beautiful house make that house appear less attractive.
Regardless, sky replacement is a useful photo-editing technique that can:
- Swap out a cloudy, gray sky with a vibrant blue one
- Make it appear the photo was taken at twilight
- Or, Add a lovely sunrise or sunset
With the right image enhancements, any property can be made to look like it would on a fine summer or winter day. Check out our video tutorial on how to do a sky replacement in Photoshop:
8. Keep It Natural – Realistic Real Estate Photo Editing


Our last real estate photo editing technique isn’t a matter of technology. Rather, it’s the ability of an experienced photo editor at making every image they edit still look natural.
For example, it can be easy to over-edit a photo by:
- Over-saturating the colors
- Excessive sharpness
- Overdone shadowing
Natural-looking photos are more believable. The goal of real estate photography is to help sell the property. Always aim for natural-looking edited photos.
Your images should look stunning, not fake.
Want to dive in deeper? Read this article on how to edit real estate photos (top 11 techniques).
High-Quality & Consistent
Real Estate Photo Editing
Hire a dedicated editor with performance metrics from $7/hour.
The Bottom Line – Partner With the Best!


So, here’s the bottom line: Proper real estate photo editing helps showcase the property, drawing out its best features.
The truth is that professional photo editing isn’t optional, but essential for every listing.
Therefore, if you’re looking for simply the best photo editing possible, PhotoUp should be your first choice.
With more than 10 years in the business and several hundred skilled photo editors around the world, it’s hard to beat PhotoUp’s quality, service, and pricing.
Browse Top Dedicated
Real Estate Photo Editors
Ready-to-hire editors for real estate photo editing, and more.
Additionally, PhotoUp’s expert team can handle any photo editing job — big or small. Our skilled real estate photo editors can help with the following:
- Image correction and enhancement
- Color and tone adjustments
- Lawn greening and sky replacements
- Clutter and object removal
- Line and angle corrections
- AI Virtual staging
- And much more!
Besides, our pricing is affordable, too, with most photo editing services costing $1.50 to $9.00 per image.
Have a look at the real estate photo editing uploader video tutorial to see how easy it is to get started:
So, get started now and sign up for a free PhotoUp account, and let our expert real estate photo editors make every one of your listings look spectacular.
We hope this post helped you understand the top 8 photo editing techniques for real estate.
If you enjoyed this post, you should also check out these, related, resources:

