


Table of Contents
- When Would You Want to Remove the Background?
- What Is a Layer Mask?
- When to Use Layer Masks in Real Estate Photo Editing
- How to Remove Background in Photoshop Using a Layer Mask
- How PhotoUp Can Help Edit Your Real Estate Photography
Do you want to learn how to remove background in Photoshop using a Layer Mask?
Removing the background of an image is a powerful technique, especially in real estate photography, where clean, distraction-free visuals can make a property look professional and attractive.
Using Photoshop’s Layer Mask Tool to remove a background offers a non-destructive way to isolate your subject, enabling you to refine or restore the original image at any time.
In this guide, we’ll show you how to remove backgrounds in Photoshop using a Layer Mask, plus cover key details on when and why to use this method in real estate photo editing.
Let’s get into the nitty-gritty details!
When Would You Want to Remove the Background?
Removing the background is essential in situations where the background detracts from the main subject or doesn’t complement the overall aesthetic.
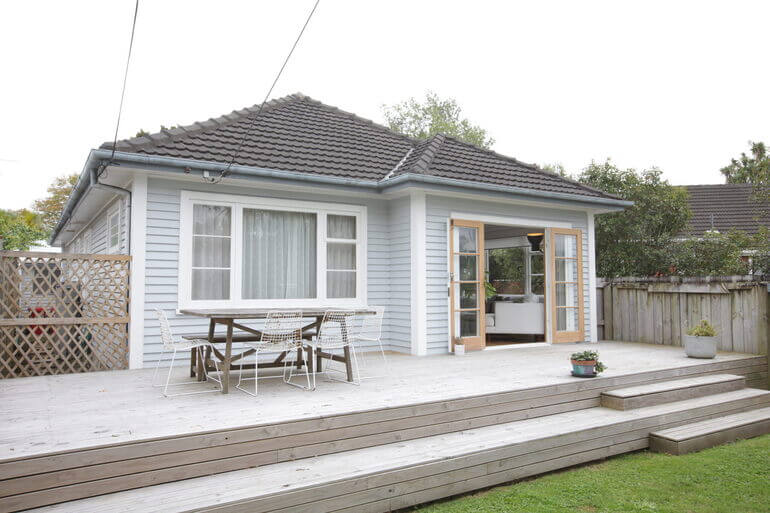
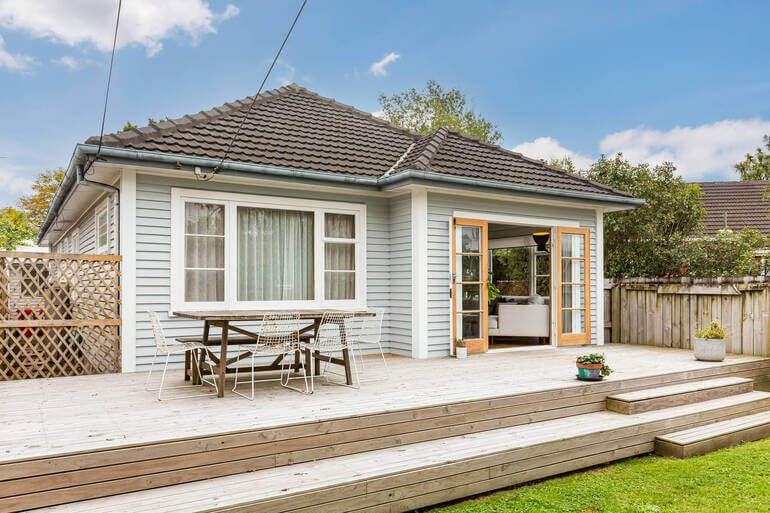
In real estate photography, removing backgrounds is often helpful when:
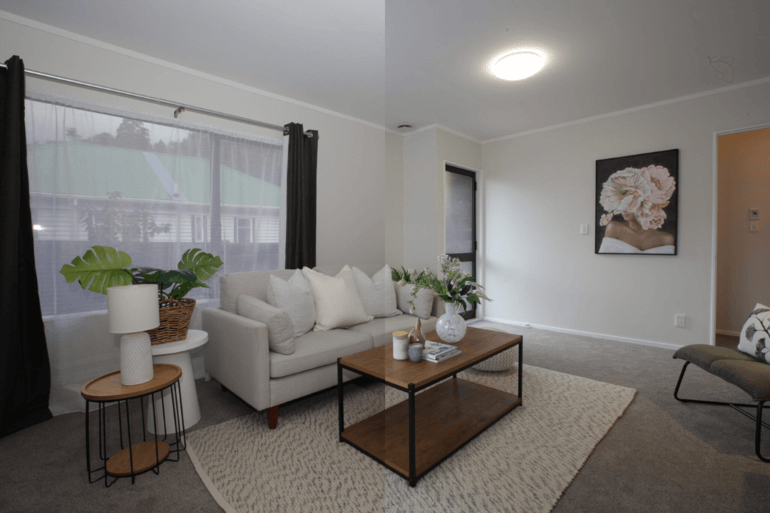
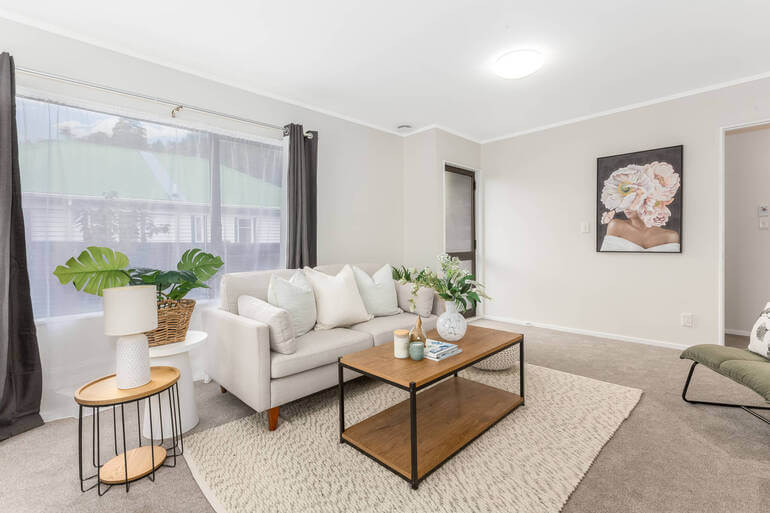
- Showcasing specific elements like furniture or architectural details without distractions
- Performing AI virtual staging to add or rearrange furniture digitally, which requires clean, isolated elements
- Enhancing exterior shots by replacing overcast skies with clear, sunny skies for a more appealing look
- Presenting listings on a single property website or home flyer with a consistent look and feel by isolating specific areas
With this in mind, let’s take a look at what a Layer Mask in Photoshop is and how to use this tool to edit out the background in your images.
What Is a Layer Mask?
A Layer Mask is a non-destructive tool in Photoshop that allows you to control which parts of a layer are visible and which are hidden.
When you add a Layer Mask, you get a black-and-white overlay on the layer: the black areas hide content, and the white areas reveal it.
This feature enables precise editing, such as selectively removing parts of an image or making smooth transitions between layers.
Layer Masks are invaluable because they let you refine your edits and bring back hidden parts of the layer if needed.
Have You Ever Thought To
Outsource Photo Editing?
Try it today with 5 free edits from three professional photo editors.

When to Use Layer Masks in Real Estate Photo Editing
If you’ve read this far, you understand the power of Layer Masks for non-destructive editing. They are especially useful in real estate photo editing when:
| Adjusting backgrounds: For example, in sky replacement, a Layer Mask lets you erase the old sky and blend in a new one seamlessly. |
| Emphasizing details: You can remove or dim the background to make property details stand out more prominently. |
| Virtual staging: Masking allows you to isolate furniture or decor items, making it easier to place them within a property photo. |
| Correcting lighting and shadows: By masking specific areas, you can control lighting effects and shadows without affecting the rest of the image. |
These are some of the most common real estate photo editing techniques where Layer Masks come in handy.
How to Remove Background in Photoshop Using a Layer Mask
All right, let’s move on to the actual tutorial and show you how to remove the background in Photoshop using a Layer Mask.
You can either watch the video tutorial or continue reading the text below:
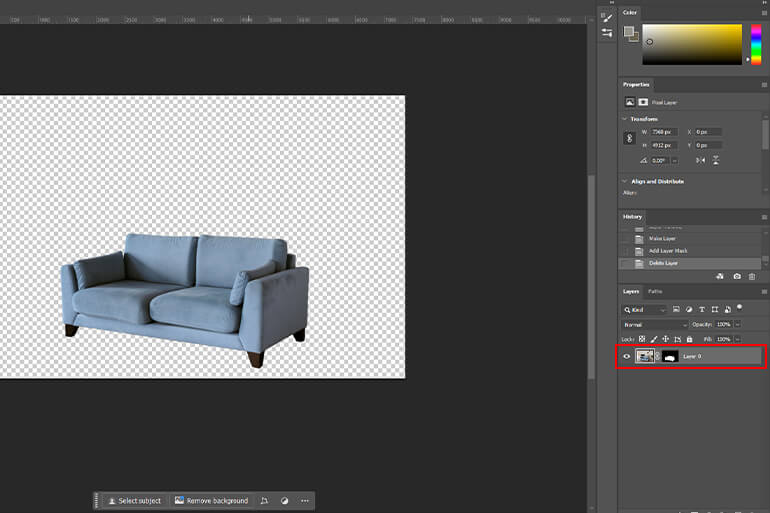
Step 1. First, unlock the background layer by double-clicking on it in the Layers panel. Navigate to the Select menu and choose Subject. Photoshop will automatically detect and select the main subject of your image.
Step 2. You can also use the Quick Selection Tool to manually outline the subject. Alternatively, use the Pen Tool to manually trace the subject for more detailed results.
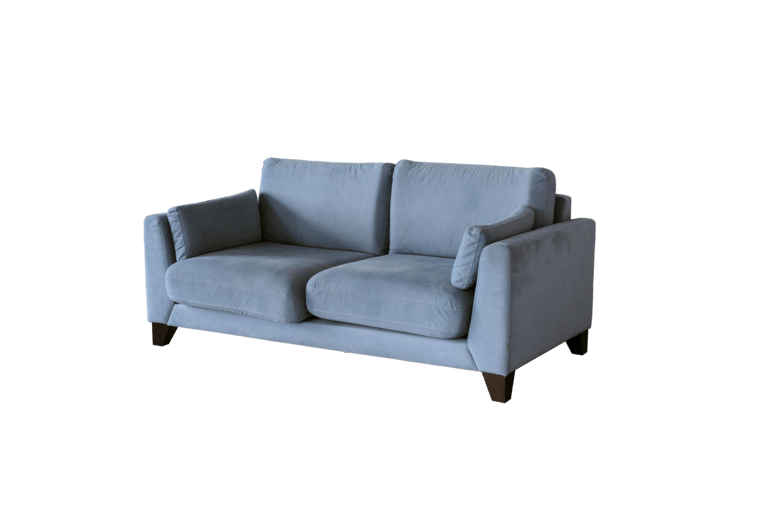
Step 3. With the selection active, click on the Add Layer Mask button at the bottom of the Layers panel. This creates a mask that hides the background while keeping the subject visible.
Step 4. If necessary, refine the mask manually by selecting the Layer Mask thumbnail. In the Layers panel, use a Soft Brush set to black to erase any unwanted background remnants.
Step 5. Adjust the Brush Opacity and flow for smooth blending. Use White to restore any areas that were mistakenly removed.
Step 6. Finally, Save your file in your desired format.
And that’s it! You’ve now learned how to remove the background in Photoshop using a Layer Mask.

Have You Ever Thought To
Outsource Photo Editing?
Try it today with 5 free edits from three professional photo editors.
How PhotoUp Can Help Edit Your Real Estate Photography
Background removal, AI virtual staging, sky replacement, and other techniques can significantly elevate real estate images, but these edits require time and precision.
PhotoUp offers affordable and professional real estate photo editing services, making it easy to enhance your photos with fast turnaround times of 12 to 24 hours.
We can help you with basic and advanced editing, such as:
- Brightness and color correction
- Vertical lines adjustments
- Advanced object removal
- Day-to-dusk conversion and twilight editing
- Lawn greening and sky replacements
- HDR editing
- Manual blending
- Flambient editing
- Window masking
- And much more!
Whether you need basic adjustments or complex edits, PhotoUp’s experienced team can help streamline your workflow and improve your images, leaving you with more time to focus on growing your real estate photography business.
Browse Top Dedicated
Real Estate Photo Editors
Ready-to-hire editors for real estate photo editing, and more.
How to Get Started
Getting started with PhotoUp’s real estate photo editing service is quick and easy! You can have your images professionally edited in 5 simple steps:
Step 1. Sign up for a free PhotoUp account.
Step 2. Upload your photos to our software.
Step 3. Choose the level of editing that you need and provide instructions (optional).
Step 4. Wait for PhotoUp professional editors to edit and return the photos in less than 24 hours (48 hours for virtual staging).
Step 5. Download and start using your beautifully edited photos.
PhotoUp Real Estate Photo Editing Uploader
For more information, you can watch our real estate photo editing uploader tutorial:
It’s really that easy to get beautifully edited photos in less than 24 hours!
A Complete Real Estate Marketing Partner
In addition, PhotoUp is a complete real estate marketing partner and also offers other powerful services like:
By outsourcing your editing and real estate marketing to PhotoUp, you can ensure high-quality results without taking time away from your business.
This will also help you expand your product offerings and make you more valuable to your agent clients.
So, are you ready to streamline your real estate photography workflow? Click here to get started with PhotoUp and see the difference professional editing can make!
We hope this guide helped you learn how to remove background in Photoshop using a Layer Mask. If you found this blog post useful, you may also want to check out the following resources:

