


Table of Contents
- Why Is Photo Editing Important in Real Estate?
- 8 Simple Real Estate Photo Editing Techniques
- Let PhotoUp Edit Your Real Estate Images to Perfection!
Are you looking into editing real estate photos in Photoshop by using some simple techniques that will make your images look amazing?
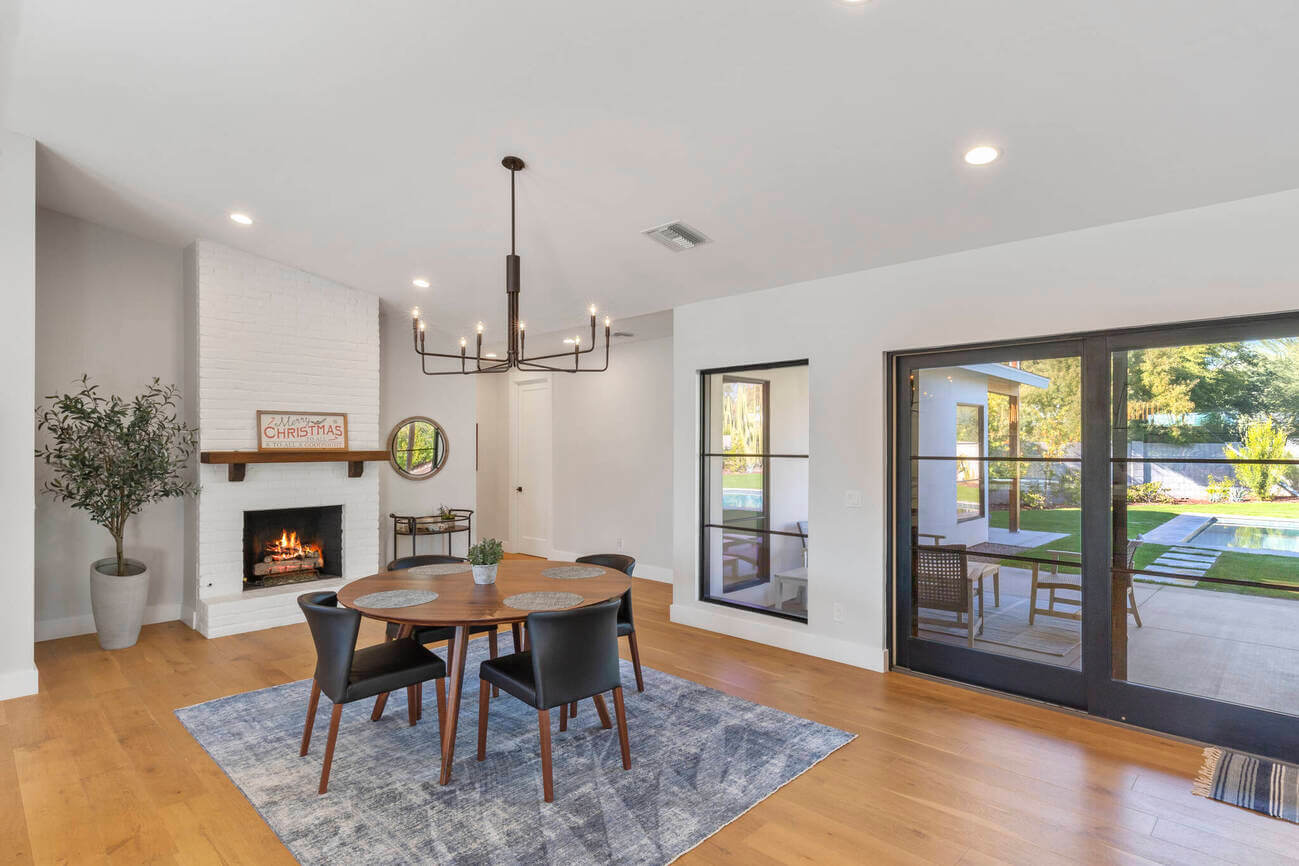
Real estate photo editing is an essential part of showcasing properties for sale or rent in their best possible light. High-quality photos can help attract potential buyers or renters and can even help to increase the perceived value of the property.
However, even the best photos may require some editing to bring out their full potential and to make them look captivating.
So, in this post, we’ll show you how to edit real estate photos in Photoshop using 8 simple and effective techniques.
Before we dig in deeper, let’s first take a look at why photo editing is so important in real estate.
Why Is Photo Editing Important in Real Estate?
Real estate photo editing is important because it helps to present properties in their best light and can help to attract potential buyers or renters.
Editing photos can help to correct any imperfections in the images, such as lighting issues or clutter, and can also help to enhance the overall look of the property.
This is particularly important when the property is being advertised online, as the photos are often the first point of contact for potential homebuyers. For instance, last year, 97% of people use the internet to search for a home, according to recent studies.
By presenting high-quality, attractive photos of the property, you can help to create a positive first impression and increase the chances of making a sale or rental.
8 Simple Real Estate Photo Editing Techniques
That said, here are 8 of the best and simplest techniques for editing real estate photos to enhance your images:
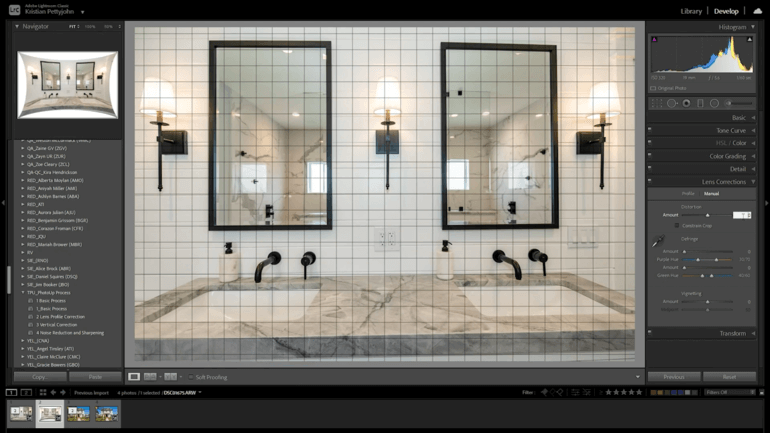
1. Adjust the White Balance
White balance refers to the overall color temperature of a photo. Incorrect white balance can make a photo look too warm or too cool, which can be distracting to viewers.

Adjusting the white balance can help to bring out the true colors of the property and make the photo look more natural. You can adjust the white balance in either Lightroom or Photoshop.
To adjust the white balance of an image in Photoshop, you can follow these steps:
- Open the image in Photoshop.
- Select the Adjustments tab in the top menu and choose Color Balance from the dropdown menu.
- In the Color Balance window, use the sliders under Shadows, Midtones, and Highlights to adjust the colors in the image.
- Alternatively, you can use the Eyedropper Tools in the Color Balance window to select a specific area of the image and adjust the white balance based on that selection.
- You can also use the Auto Button to let Photoshop automatically adjust the white balance based on the image.
- Preview the changes in the image as you make adjustments to the white balance.
- When you are satisfied with the white balance, click OK to apply the changes and close the Color Balance window.
- Save the edited image when you are finished.
Overall, adjusting the white balance can help to remove any color casts in an image and make it look more natural and accurate.
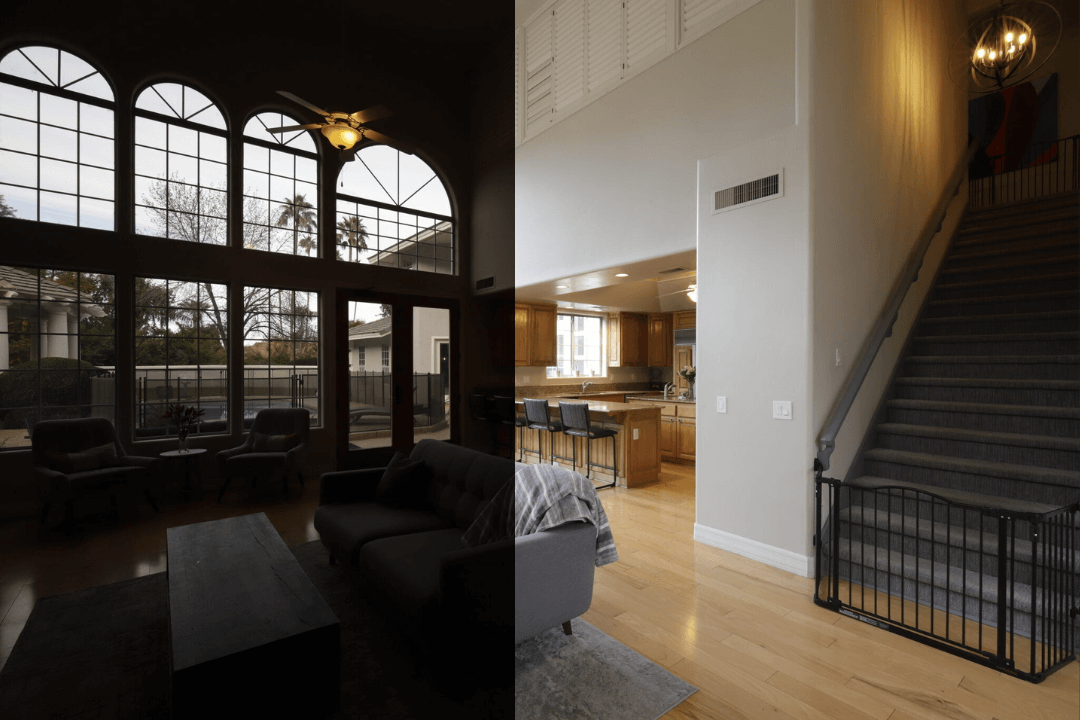
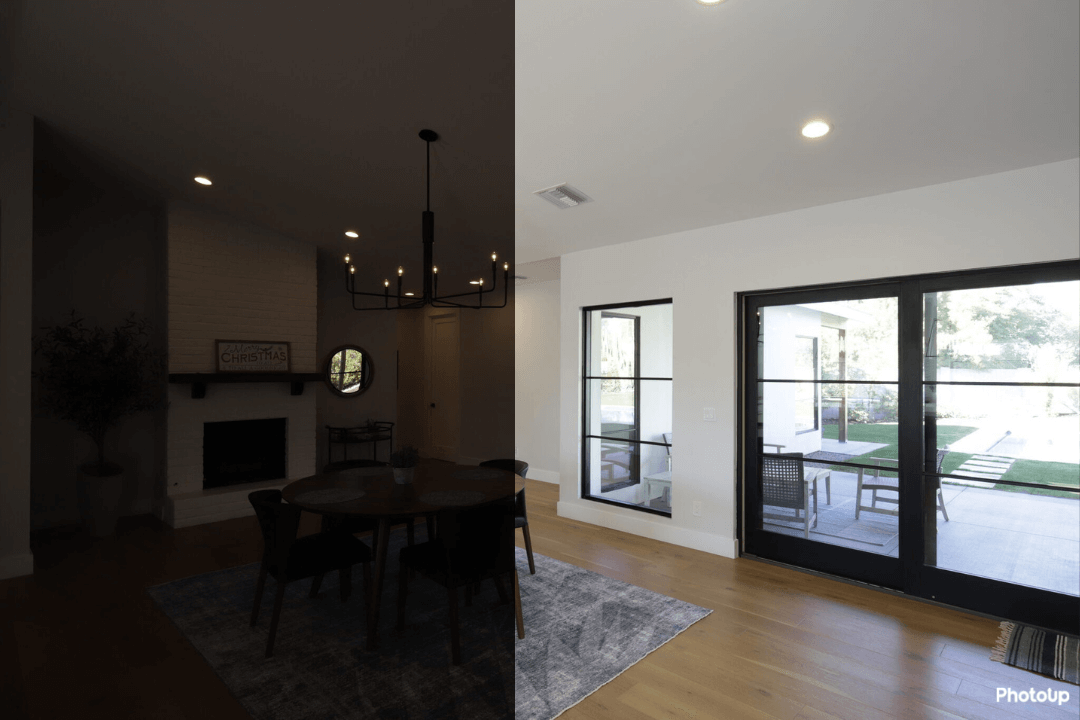
2. Enhance the Exposure
Proper exposure is essential for creating a well-balanced photo. If a photo is too dark, you can use editing software to brighten it up.
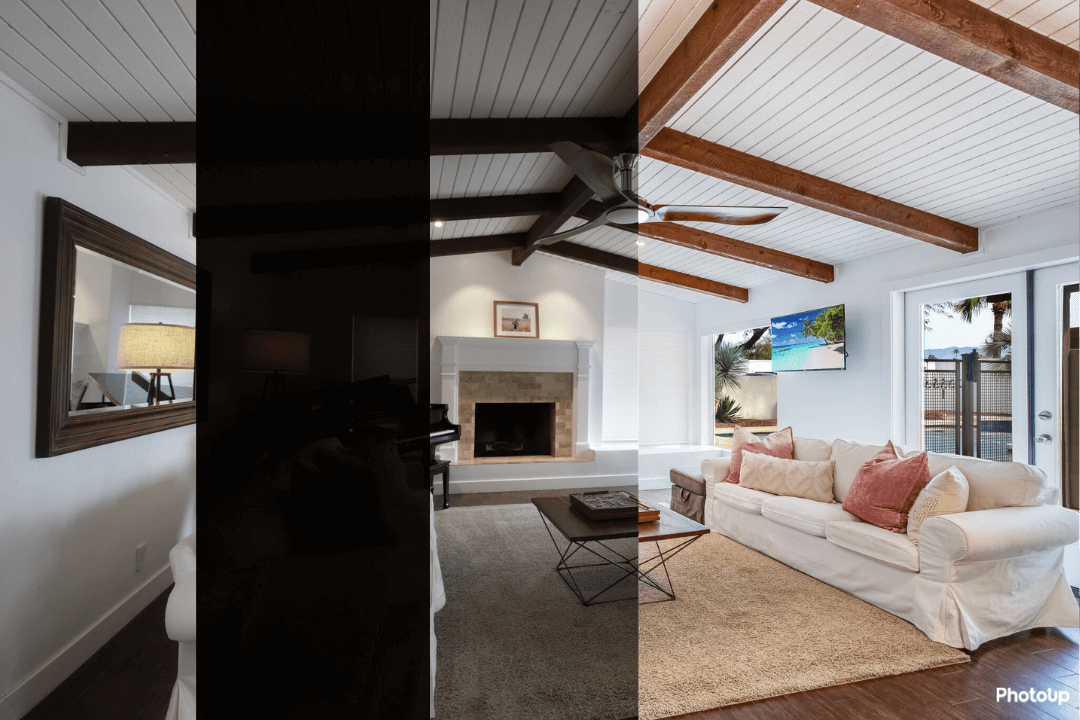
On the other hand, if a photo is too bright, you can use editing software to bring down the exposure and add some contrast to the image.
Follow these simple steps to adjust the exposure of an image in Photoshop:
- Open the image in Photoshop.
- Select the Adjustments Tab in the top menu and choose Exposure from the dropdown menu.
- In the Exposure window, use the sliders to adjust the exposure of the image. You can adjust the Exposure, Offset, and Gamma Correction to affect the overall brightness and contrast of the image.
- You can also use the Highlight and Shadow sliders to adjust the exposure of the highlights and shadows in the image separately.
- Preview the changes in the image as you make adjustments to the exposure.
- When you are satisfied with the exposure, click OK to apply the changes and close the Exposure window.
- Save the edited image when you are finished.
Making adjustments to the exposure, color, contrast, tone, and sharpness may seem obvious and simple. But with a few clicks of a mouse, these simple edits can transform an image from looking bland and boring into a bright and appealing image.
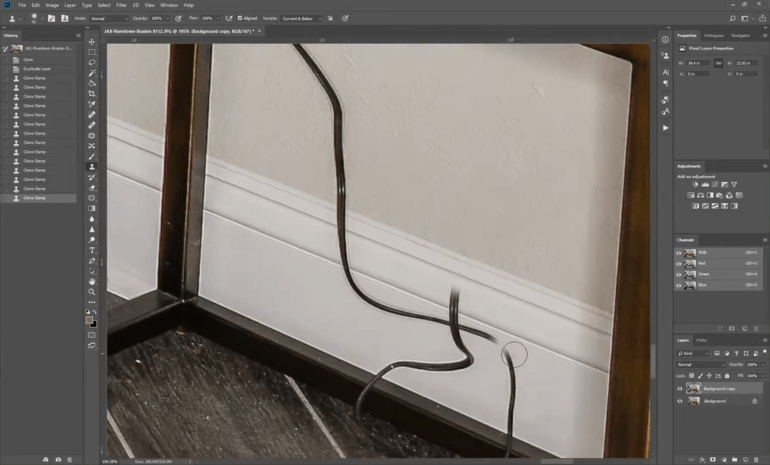
3. Remove Distractions
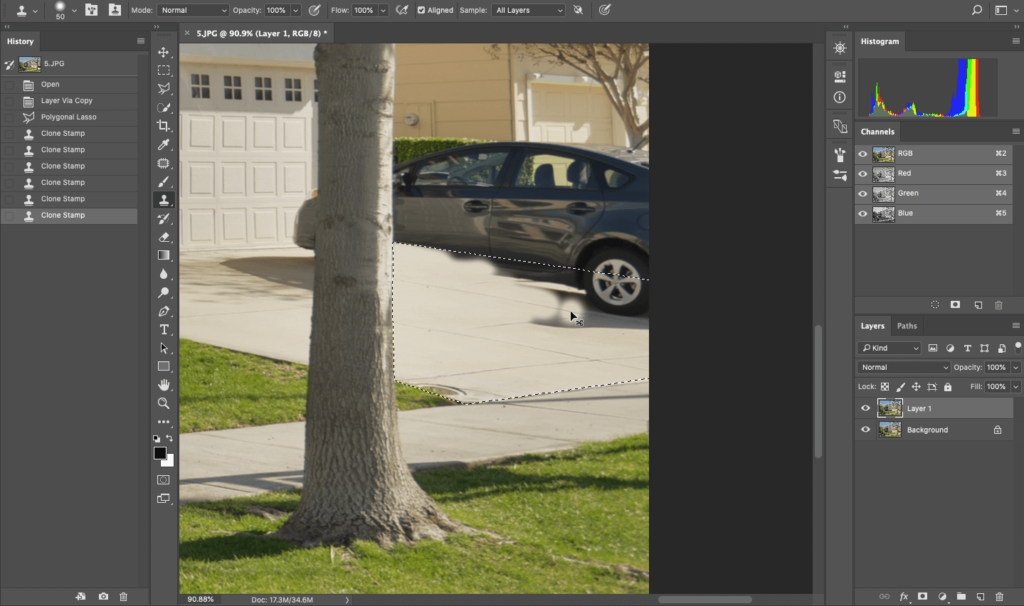
Real estate photos should focus on the property, not on any distractions in the background or in front of the house.
For example, some common situations where you may want to remove an object are:
- There’s a car in the driveway, blocking the wonderful view of the garden
- The TV cords show and make the image appear cluttered
- The granite counter would have been perfect if not for that old frying pan that was overlooked during the shoot
- There’s an ugly crack in the bathtub, or the wallpaper is coming off in the kitchen
- You failed to notice that someone passed by the property while making the shot
You can use the Clone Stamp Tool in Photoshop to remove any clutter or distractions from the photo. This can help to draw the viewer’s attention to the property itself.
For more details and expert tips, check out this video tutorial on how to remove a car from a driveway in Photoshop:
Or, you can watch how to remove cords and wires from your real estate photos:
High-Quality & Consistent
Real Estate Photo Editing
Hire a dedicated editor with performance metrics from $7/hour.

4. Touch Up the Details
Small details can make a big difference in a real estate photo. Use editing software like Photoshop to touch up any blemishes or imperfections in the property, such as scratches or scuff marks on the walls or floors.
You can easily do this using the Clone Stamp Tool in Photoshop by following these simple steps:
- Open your photo in Photoshop.
- Select the Clone Stamp Tool from the toolbar on the left side of the screen.
- Set the clone source by holding down the Alt key and clicking on an area of the photo that you want to clone.
- Use the Clone Stamp Tool to paint over any blemishes or imperfections in the photo. The tool will sample pixels from the clone source and apply them to the area you are painting over, effectively covering up the blemish or imperfection.
- If you need to blend the cloned pixels more seamlessly with the rest of the image, you can adjust the brush size and hardness, as well as the opacity and flow of the Clone Stamp Tool in the options bar at the top of the screen.
- Continue to use the Clone Stamp Tool to touch up any other blemishes or imperfections in the photo.
- Save the edited photo when you are finished.
Note that it’s important to use the Clone Stamp Tool carefully and to blend the cloned pixels well to avoid creating a noticeable or unrealistic patch.
5. Adjust Horizontal Lines
When shooting real estate, it’s important that horizontal lines and perspectives are aligned because it helps to create a sense of balance and order in the photo, and can make the property look more appealing to potential buyers or renters.
When horizontal lines and perspectives are not aligned in a photo, it can create a sense of disarray and can be distracting to the viewer. It can also make the property look less attractive, as it may appear to be poorly maintained or uninviting.
In addition, aligning horizontal lines and perspectives can help to convey the size and layout of the property more accurately.
When these elements are misaligned, it can be difficult for the viewer to get a sense of the scale and proportions of the space, which can make it harder to visualize themselves living in the property.
Overall, aligning horizontal lines and perspectives in real estate images is important because it helps to create a cohesive and attractive visual representation of the property, which can be important in attracting potential buyers or renters.
You can align the lines in Photoshop using the Free Transform Tool. Make sure that you select the entire image and drag the corner of the image opposite to where the lines are leaning towards.
To see how to align verticals using an alternative method, you can check out our video tutorial on how to straighten verticals in Photoshop:
6. Remove Color Cast
Color cast is when an image has a noticeable color tint that’s not accurate to the actual colors of the scene, which can be considered an eyesore in real estate photography.
This can happen when the white balance of the camera is not set correctly, or when the lighting conditions are unusual.

A color cast can be particularly noticeable in real estate photos because the colors of the property are an important aspect of the image. This needs to be avoided in real estate photos because it can distort the true appearance of the property and make it look less attractive.
For example, if there’s a yellow color cast on the photo, the property may look dingy and unappealing. Similarly, if there’s a blue color cast, the property may look cold and unwelcoming.
Additionally, a color cast can make it difficult for the viewer to accurately assess the condition and features of the property. If the color cast is affecting the colors of the walls or finishes, it may be hard for the viewer to determine the true color and quality of these features.
Fortunately, through editing, you can restore the original color of the areas with color cast using 2 simple techniques. These techniques neutralize and remove the unwanted tint that masks the actual colors.
To learn more, check out our video tutorial on how to easily remove color cast from real estate images in Photoshop:
7. Enhance the Lawn


Nothing is more welcoming and inviting than a full, green lawn outside of a home. It makes the property look more attractive and increases the overall curb appeal.
However, sometimes real estate photographers need to take photos in the wrong season when the lawn has dead, brown spots.
While that’s unfortunate, the good news is that you can use Lightroom and Photoshop to easily adjust the color of your lawn to enhance the landscaping of your photo.
To learn how to create a green beautiful lawn, check out our video tutorial on how to make grass green in Photoshop:
8. Add Some Flair

Editing software can also be used to add some creative touches to your real estate photos. This can include adding filters or adjusting the saturation to give the photo a certain look or feel.
Or even virtually stage vacant spaces with digital furniture and decor to make your real estate images look homey and inviting.
Just be sure not to overdo it – the goal is to enhance the photo, not to distract from the property itself. Also, completely changing the images and their structures can in fact be illegal, so make sure it’s still close to its original version.
Overall, the key to successful real estate photo editing is to make subtle adjustments that bring out the best in the photo while still maintaining its authenticity.
With these simple techniques, you can create high-quality photos that showcase the property in the best possible light.
Don't Try One, Try Three
Freelance Photo Editors
Try editing from 3 professional photo editors. Screened and ready-to-hire.
Let PhotoUp Edit Your Real Estate Images to Perfection!
To recap, these are some of the more basic real estate photo editing techniques that will help take your image enhancements a long way.
But if this seems too much for you to learn, and you want to spend your time out on the field taking more property photos instead, you can always outsource your photo editing.
PhotoUp has more than 10 years of experience in the business and employs several hundred photo editors around the world, making it hard to match PhotoUp’s quality, service, and pricing.
Browse Top Dedicated
Real Estate Photo Editors
Ready-to-hire editors for real estate photo editing, and more.
We have a team of highly talented real estate photo editors who are ready and eagerly waiting to take the editing off your plate and can help with for example:
- Image brightness and exposure correction
- Color and tone adjustments
- Window masking and glare reduction
- Clutter and advanced object removal
- Line and angle corrections
- HDR editing and manual blending
- Harsh shadows and lack of light
- Sky replacements
- Twilight and day-to-dusk editing, etc.
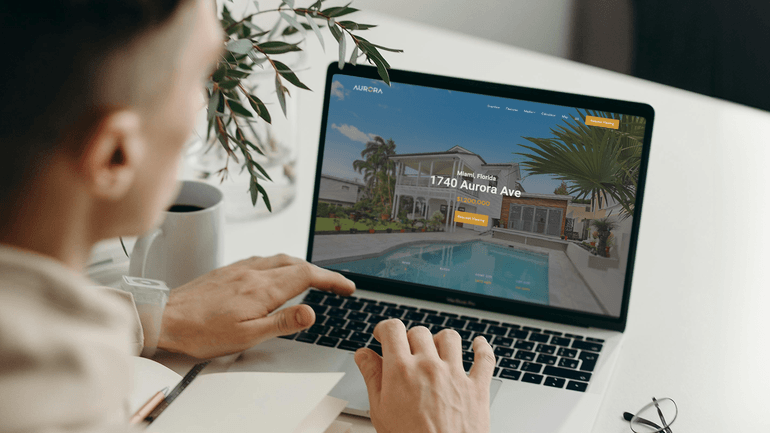
You may also be pleased to know that you can find everything you need for your real estate marketing needs under one roof, as PhotoUp also offers additional services such as:
- AI Virtual staging
- Single property websites
- House portraits
- Virtual house tours
- Property flyers
- And more.
Better yet, you’ll also get access to our user-friendly software, so you can upload and receive photos, and send instructions and feedback. As well as track and manage team members and clients, store final images, and more!
PhotoUp Real Estate Photo Editing Uploader
For more details, have a look at the real estate photo editing uploader video tutorial to see how easy it is to get started:
As simple as that!
Did we say that our photo editing starts at the low cost of $1.15 per image?!
And for a limited time, you even get 5 free edits when you sign up for a PhotoUp account!
We hope this post helped you learn how to edit real estate photos in Photoshop using 8 simple techniques. If you found this post useful, you may also want to check out the following resources:

