


Table of Contents
- What Is Color Correction in Real Estate Photography?
- Why Color Correction Is Crucial for Vibrant Photos
- Color Correction Tips for Real Estate Photo Editing
- Color Correction FAQ
- Outsourcing Color Correction to PhotoUp Is a Smart Move!
In real estate photography🏡, first impressions aren’t just important—they’re everything. A single photo can determine whether a potential buyer clicks on a listing or scrolls past it.
That’s why real estate photo editing plays a crucial role in showcasing properties at their best. Among the many editing techniques available, color correction is one of the most essential.
In this blog post, we’ll share why color correction matters, how it enhances property photos, and how to do it right.
Let’s begin by taking a look at what color correction is in real estate photography.
🎨 What Is Color Correction in Real Estate Photography?

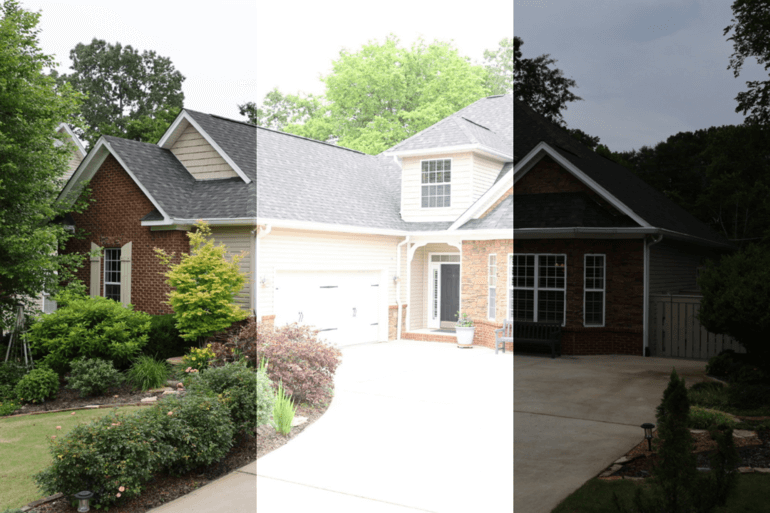
Color correction is the process of adjusting the colors in a photograph so they appear natural, balanced, and true to life.
It involves:
- Adjusting white balance (so whites don’t look blue or yellow)
- Fixing color casts caused by indoor lighting
- Enhancing color vibrancy while maintaining realism
- And matching interior colors to what the eye sees in real life
Without color correction, your photos may look dull, overly warm or cool, or just plain unrealistic—making the property feel less appealing.
Let’s take a look at why color correction is crucial to creating listing photos that attract views and clicks.
🏡Why Color Correction Is Crucial for Vibrant Photos


Here are 4 reasons why color correction is essential for real estate marketing and home sales:
1. Attracts More Views and Clicks Online
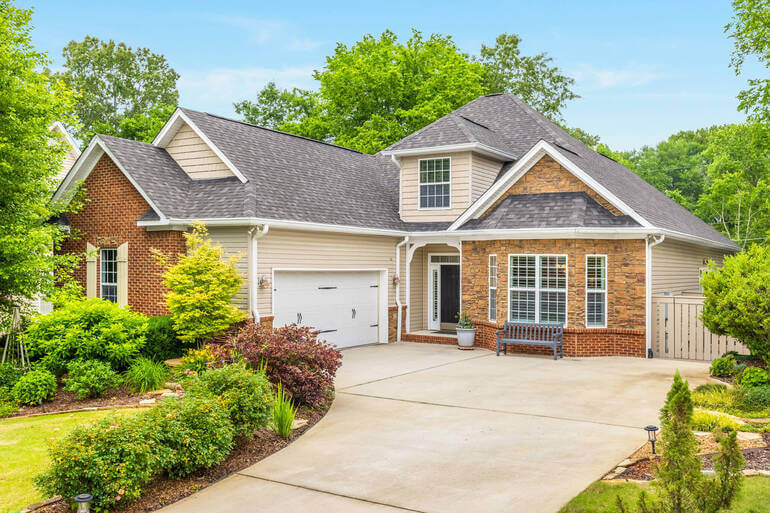
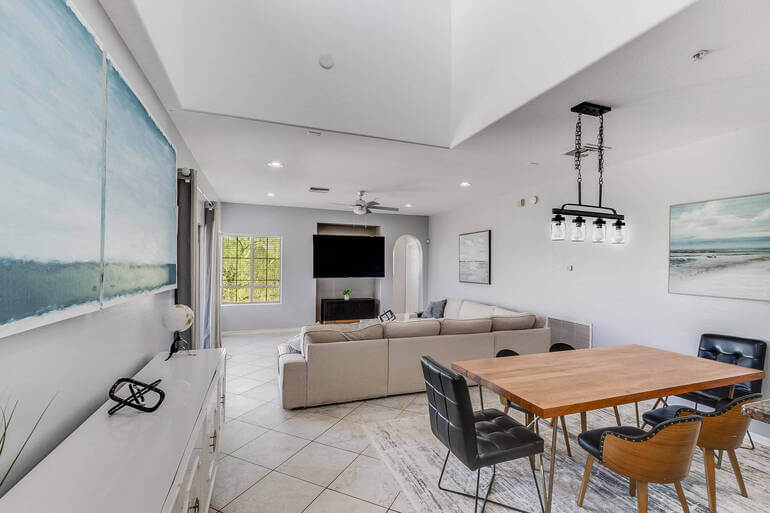
Color-accurate images grab attention. Bright, vibrant, yet natural-looking images stand out in MLS listings, Zillow, or Realtor.com, driving more views and inquiries.
Overall, listings with high-quality photos attract 118% more online views compared to those with lower-quality images.
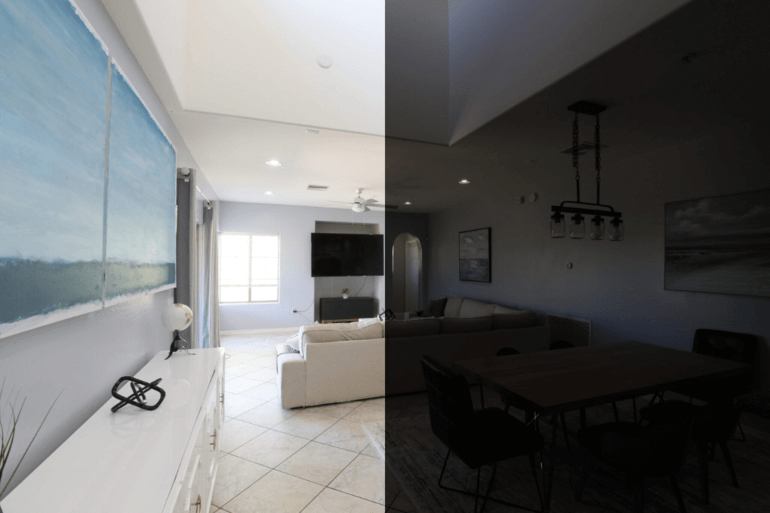
2. Makes Interiors Look More Inviting
According to NAR, 85% of homebuyers consider photos the most critical factor when evaluating a property online.
The listing photos are the most important factor in deciding which homes to view, and accurate colors are crucial to attract views.
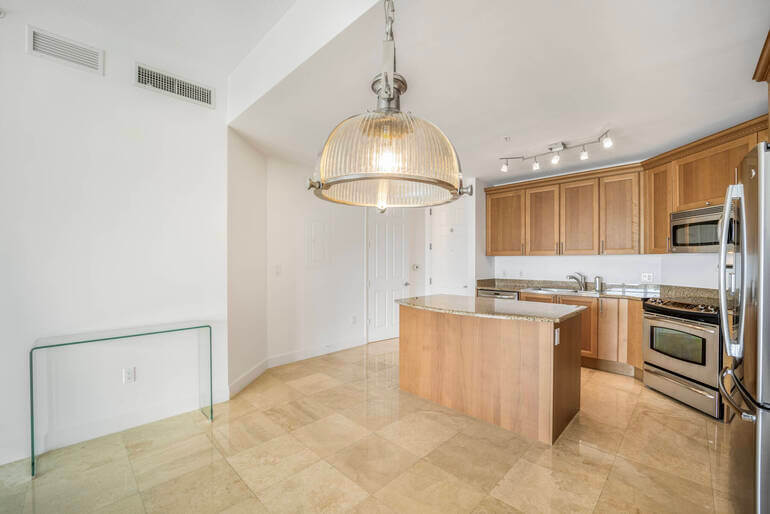
Correcting indoor lighting issues (like yellow or green color casts from tungsten or fluorescent bulbs) makes spaces appear clean, fresh, and move-in ready.
3. Ensures True Representation of Paint Colors and Materials
According to recent studies, viewers spend 60% of the time checking images and only 20% read the listing description.
Buyers want to know what they’re getting. If the wall appears gray in person but looks beige in the photo, it could lead to confusion—or worse, disappointment during showings.
4. Enhances Professionalism and Brand Credibility
63% of real estate agents acknowledge that high-quality photography is essential to their success and the sale of properties.
Real estate photographers and agents who consistently deliver professionally color-corrected images build trust and credibility with clients and buyers alike.
With this in mind, let’s move on to some effective color correction tips.
Have You Ever Thought To
Outsource Photo Editing?
Try it today with 5 free edits from three professional photo editors.

🛠️ Color Correction Tips for Real Estate Photo Editing


To achieve professional, natural-looking real estate photos, here are some essential color correction tips that can dramatically improve image quality.
1. Adjust the White Balance
In Lightroom or Photoshop, use the Eyedropper Tool to sample a neutral gray or white object in the photo.
This helps instantly neutralize unwanted color casts.
For more details, watch our video tutorial on how to adjust white balance in Photoshop:
2. Correct for Mixed Lighting and Color Cast
Homes often have a mix of natural light and artificial bulbs that can cause a color cast in photos.
Adjust temperature and tint to find a pleasing balance that doesn’t skew too yellow or too blue.
If you find that certain areas display a color tint, you can check out this video tutorial to learn how to remove color cast in Photoshop:
3. Use Reference Photos If Possible
If you or your client knows what the colors should look like (e.g., white countertops, navy cabinets), use those references during editing to guide adjustments.
4. Don’t Overdo It
Subtlety is key. You want the photo to look realistic, not overly saturated or filtered.
Over-editing can make a home look fake or misrepresented.
5. Batch Edit Similar Images
Once you’ve nailed color correction for one image, copy and apply the same settings to other shots taken in the same room or lighting.
It saves time and ensures consistency.
By following these best practices, you’ll create cohesive, true-to-life visuals that elevate your listings and impress both clients and buyers.
Final Thoughts
Color correction isn’t just about making a photo look prettier—it’s about making it look right.
When done properly, it makes homes feel welcoming, honest, and appealing to potential buyers.
Whether you DIY or outsource your editing, investing time in color correction will always pay off.
❓Color Correction FAQ
If you still have questions about color correction and real estate photo editing in general, we hope to answer them with some frequently asked questions and answers.
What causes color casts in real estate photos?
Color casts are typically caused by lighting sources like incandescent or fluorescent bulbs, or even reflections from nearby surfaces. They give photos an unnatural tint (yellow, green, or blue).
Can I fix color issues using auto settings in editing software?
Auto correction tools in Lightroom or Photoshop can help, but they’re not always accurate. Manual fine-tuning in Photoshop usually gives better results, especially in tricky lighting situations.
How is white balance related to color correction?
White balance is a key component of color correction. Adjusting white balance ensures that whites actually appear white, which corrects the overall color temperature of your image.
Do I need professional software to correct colors?
While free tools exist, professional photo editing software like Adobe Lightroom, Photoshop, or Capture One offers the best control and quality for color correction.
Is it worth outsourcing color correction?
Absolutely! If you’re a real estate photographer with a high volume of images, outsourcing to professional editing services like PhotoUp can save time, ensure consistency, and improve your overall workflow.
Let’s tell you more…
Have You Ever Thought To
Outsource Photo Editing?
Try it today with 5 free edits from three professional photo editors.
Outsourcing Color Correction to PhotoUp Is a Smart Move!
If you’re a busy real estate photographer juggling multiple shoots, editing can eat up hours of your time.
Outsourcing your real estate photo editing, including color correction, to a trusted service like PhotoUp lets you focus on growing your business.
Based in the US and with additional offices in the Philippines, we offer a full range of services to cater to all your photo editing needs, including:
- Brightness and color correction
- Vertical and horizontal line adjustments
- Advanced object removal
- Day-to-dusk conversion
- Lawn greening
- Sky replacement
- HDR editing
- Window masking
- Flambient editing
- And much more!
With PhotoUp, you can focus more on shooting properties and less on tedious editing tasks.
Our team of experts ensures that your images are polished to perfection, ready to attract potential buyers and clients starting at the low cost of $1.50 per image for on-demand editing.
But that’s not all…
A One-Stop Shop for Real Estate Marketing

Additionally, PhotoUp is a complete one-stop shop for real estate marketing and also offers additional services such as:
We have everything you need to create impressive photography and market real estate in one user-friendly platform!
How to Get Started
Getting started is super easy – this is what to do:
Step 1. Sign up for a free PhotoUp account.
Step 2. Upload your photos to our easy-to-use software.
Step 3. Choose the level of editing that you need and provide instructions (optional).
Step 4. Wait for PhotoUp professional editors to edit and return the photos in less than 24 hours (48 hours for virtual staging).
Step 5. Download and start using your beautifully edited photos.
PhotoUp Real Estate Photo Editing Uploader Tutorial
Check out how easy it is to get started with PhotoUp’s software in this real estate photo editing uploader tutorial:
It’s really that easy to get beautifully edited photos in less than 24 hours!
So, what are you waiting for?
Sign up for a free PhotoUp account today, and let our expert real estate photo editors help you with color correction and much more!
For a limited time, we even offer you 10 free credits you can use on any of our services when you sign up for an account.
We hope this blog post helped you understand the importance of color correction in real estate photography. Before you go, you may also want to check out the following resources:

