


Table of Contents
- What Is a Day-to-Dusk Image?
- How to Shoot for Day-to-Dusk Images (5 Best Practises)
- How to Edit a Day to Dusk Image in Photoshop
- Pricing and Client Value
- Leave Day-to-Dusk Editing to the Experts at PhotoUp!
Day-to-dusk or twilight images have become one of the most effective ways to elevate real estate listings. According to studies, using a twilight image as the listing’s hero photo averaged 76% more views than listings without.
Day-to-dusk images combine the visual drama of twilight photography with the flexibility of daytime shooting—allowing photographers to deliver stunning dusk-style images without waiting for the perfect sunset.
In this post, we’ll share how real estate photographers can capture homes during regular daylight hours and have them professionally edited to look as if they were photographed just before sunset.
Let’s begin by taking a closer look at what a day-to-dusk image is.
What Is a Day-to-Dusk Image?

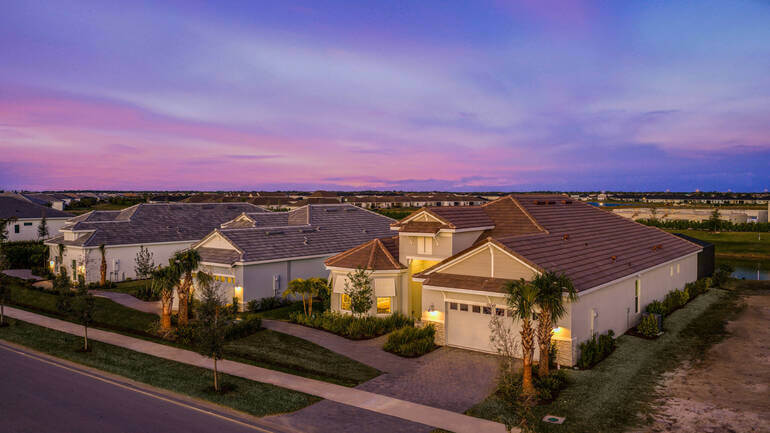
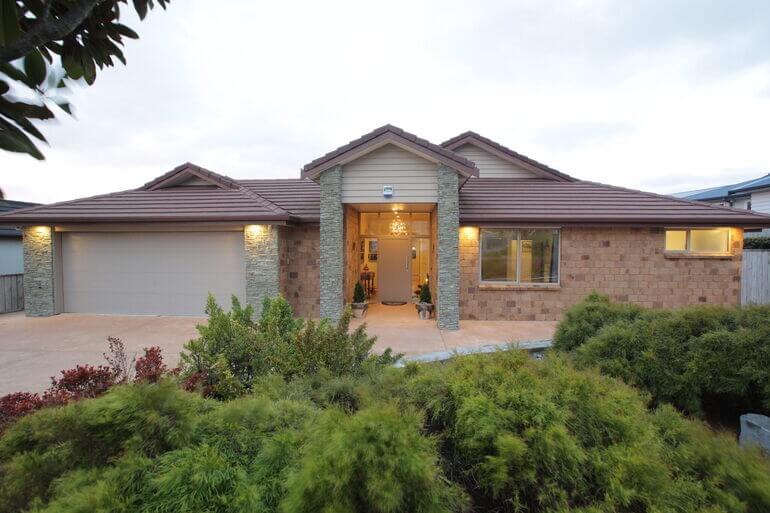
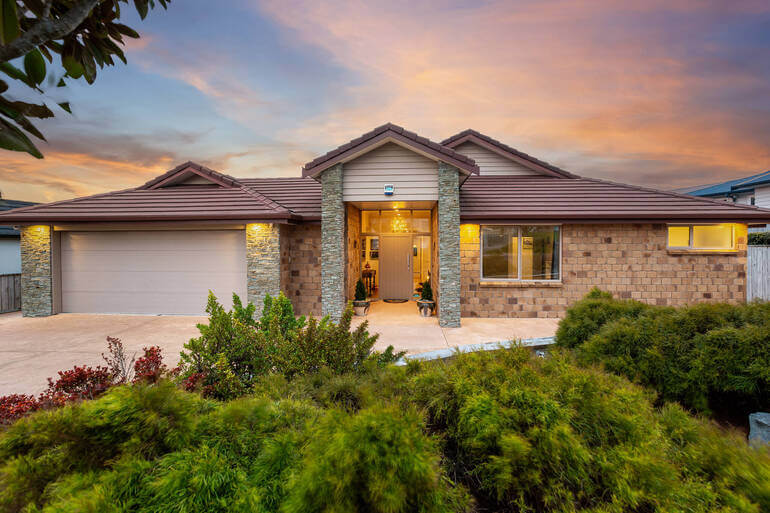
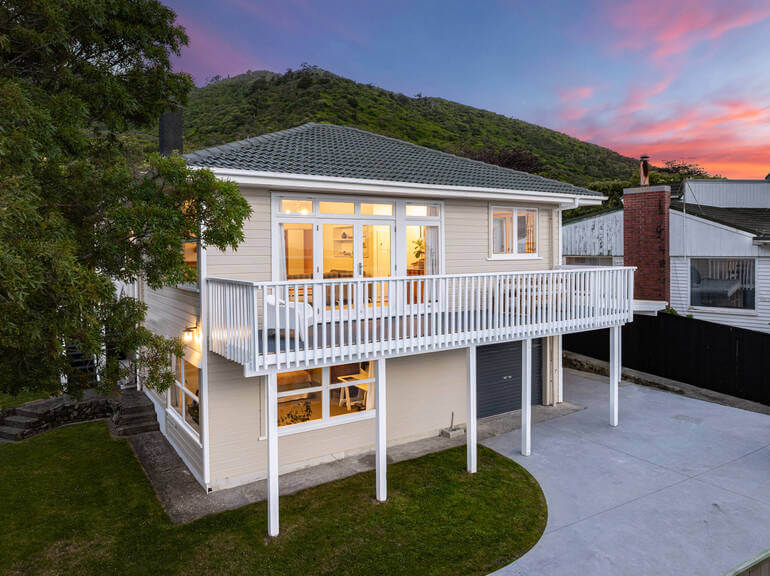
A day-to-dusk image is a professionally edited exterior photo that simulates the look and feel of early evening light🌅.
Professional real estate photo editors replace the daytime sky with a realistic dusk sky, subtly enhance exterior brightness, and illuminate interior and exterior lights to create a warm, welcoming atmosphere.
The result is an inviting exterior with glowing lights, balanced exposure, and a dramatic dusk sky that instantly draws attention online.
Because these images are designed to feel natural—not overly stylized—the quality of the original photo plays a major role in how believable the final result looks.
Why Day-to-Dusk Processing Is a Game-Changer for Real Estate Photographers
One of the biggest advantages of day-to-dusk processing is freedom. You no longer need to:
- Schedule shoots around sunset
- Wait for perfect weather
- Or, rush through twilight windows
Photographers can shoot in the morning or afternoon and still deliver striking dusk images that elevate listings and help agents stand out online.
This flexibility turns cloudy or rainy days into creative opportunities instead of setbacks.
However, shooting correctly is essential. To achieve realistic, high-quality results, it’s important to shoot with dusk processing in mind.
Let’s take a look at what makes the shooting process different from a standard shoot.
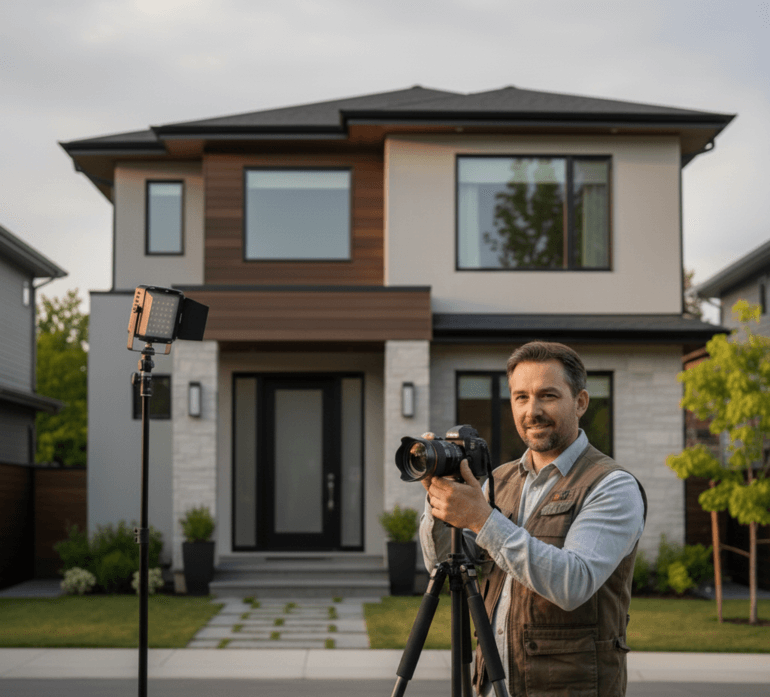
Why Shooting for Day-to-Dusk Is Different
At first glance, day-to-dusk photography may seem similar to a normal exterior shoot.
In reality, small decisions made on-site—lighting, exposure, and file format—can dramatically impact the final image.
Instead of chasing dramatic sunlight or deep shadows, your goal is neutrality and flexibility.
A well-prepared image gives editors room to shape the scene into a convincing twilight moment without fighting harsh highlights or baked-in contrast.
Have You Ever Thought To
Outsource Photo Editing?
Try it today with 5 free edits from three professional photo editors.

How to Shoot for Day-to-Dusk Images (5 Best Practises)🌆
Let’s look a bit closer at how to prepare your photoshoot so that you can create captivating twilight images. Here are the 5 key best practices to follow when shooting day-to-dusk photos:
1. Shoot on an Overcast or Cloudy Day
The best day-to-dusk images are captured when the weather is less than perfect. Cloudy, rainy, or overcast days reduce harsh sunlight and eliminate strong shadows across the home’s exterior.
This creates even lighting, which allows editors to apply dusk effects smoothly and realistically.
In contrast, bright sunny days introduce deep shadows and strong directional light that can clash with a simulated evening sky.
When possible, plan day-to-dusk shoots for days with soft, diffused light—it makes a noticeable difference in the final result.
2. Turn on All Interior and Exterior Lights
Lighting is one of the most important elements of a successful day-to-dusk image. Before shooting, turn on:
- All interior lights
- Exterior fixtures (porch lights, pathway lights, garage lights)
- And landscape lighting, if available
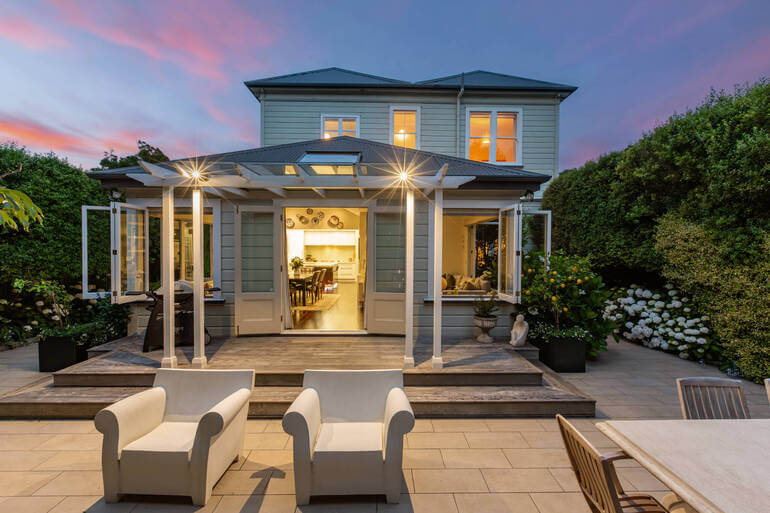
Open all curtains and blinds to let interior light spill out. This gives editors natural light sources to work with, making the final image feel authentic rather than artificially “painted on.”
The glow from interior and exterior lights is what gives twilight images their emotional impact—warm, inviting, and lived-in.
3. Expose Slightly Darker Than Normal
When shooting for day-to-dusk processing, it’s better to underexpose slightly rather than overexpose. For example, a darker exposure:
- Preserves highlight detail
- Prevents washed-out walls and skies
- Gives editors more control over brightness and contrast
If an image is too bright, it becomes difficult to transform it into a pre-sunset scene convincingly.
Real estate photo editors can always lift shadows and add brightness—but recovering blown highlights is far more challenging. Think of your exposure as a neutral foundation, not the final look.
4. Always Shoot in RAW Format

File format matters more than many photographers realize—especially for advanced edits like day-to-dusk.
Here are the main benefits of RAW files:
- They capture full color and light data from the camera sensor
- They allow greater flexibility in exposure, color temperature, and highlights
- They maintain image quality through multiple editing stages
JPEG files, while smaller, discard data during capture and degrade further with each edit. This limits how far an editor can push the image without introducing artifacts or unnatural colors.
For the best possible results, always deliver RAW files when shooting for day-to-dusk processing.
5. Compose With Clean Lines
While not exclusive to twilight photography, clean composition becomes even more important when dramatic skies and lighting are added.
Before shooting, consider:
- Straighten vertical lines
- Remove vehicles, trash bins, and clutter
- Frame the home cleanly with balanced foreground elements
A strong composition ensures the added dusk elements enhance the property rather than compete with distractions.
And there you have it!
By following these best practises, you’ll be able to achieve realistic, high-quality photos that can be turned into captivating twilight images in post-processing.
Have You Ever Thought To
Outsource Photo Editing?
Try it today with 5 free edits from three professional photo editors.
With the shooting process in mind, let’s show you how to edit day-to-dusk images in Photoshop.
How to Edit a Day to Dusk Image in Photoshop🌃
To learn how to perform this powerful edit, you can either watch the video tutorial or continue reading the text below:
Start With the Windows
Step 1. Import your image into Lightroom and do basic adjustments. Make it a little darker as it’s a dusk image.
Step 2. Next, create a Virtual Copy.
Step 3. On that copy, adjust the glow of the windows to make it look like the light is on. Boost the Exposure and Temperature to create a glowing effect.
Step 4. Now, move your images into Photoshop.
Step 5. In Photoshop, make the Window Layer on top and add an Inverted Mask (press and hold the ALT key while clicking the Masking button).
Step 6. Select the windows using the Pen Tool (P), then press the Delete button.
Step 7. Next, add an Outer Glow using the Layer style.
Step 8. Within the Layer Style, use the Sliders to adjust to an appropriate level.
Next, Edit the Sky
Once you’re happy with the windows of the house, it’s time to work on the sky:
Step 1. Duplicate the base photo and go to the Channel panel and duplicate the Blue channel.
Step 2. Adjust the Levels in the Sky by pressing CTRL – L on your keyboard.
Step 3. Select the Non-Sky area, make it black, and use the Dodge Brush (O) to lighten the sky.
Step 4. Now, you want to Load the Channel as a Selection, and then click the Masking button.
Step 5. Next, Import the dusk sky photo that you want to use behind the building.
Step 6. Adjust its position and make sure to Blend it properly with the house. E.g you may want to use the Burn Tool to darken the house overall. Then, Save the new image.
Step 7. Back in Lightroom, you can make one or two adjustments to the white balance until you’re happy with the final product.
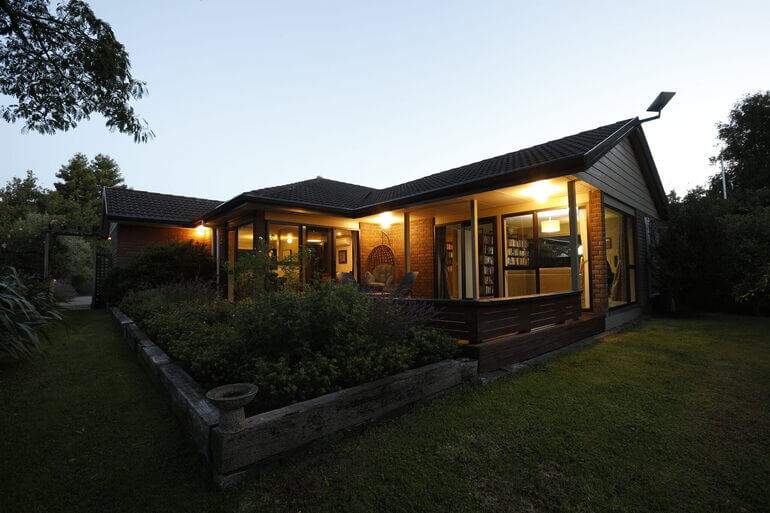
Use the Dusk Scene to Showcase the Property
Keep in mind that you’re showcasing a home for a potential buyer and not trying to create an award-winning nature photograph.
The dusk scene is there to show off the best features of the property and put the viewers in a calm, welcoming state of mind, so they look favorably on the listing.
The goal is to make home buyers think of themselves living in this incredible home and taking in the beautiful evening sunset.
Final Adjustments for a Seamless Look
To make the final adjustments to your images, make sure to remove any unwanted elements and clutter. Also, remember to edit out harsh shadows or artificial lighting discrepancies to create a flawless image.
Lastly, ensure high-resolution images and vibrant colors to optimize your images for real estate listing platforms, and that’s it!

Now that you know how to shoot for day-to-dusk images and edit them in post-processing, let’s move on to pricing vs client value.
Pricing and Client Value🤝
Day-to-dusk processing typically costs a small additional fee per image. Many photographers pass this cost on to clients while charging a premium for the finished result.
Depending on the market, day-to-dusk images often sell for $20–$50 per image. Sometimes, a bit more for luxury listings.
Because these images significantly improve listing presentation and click-through rates, agents are often happy to pay for the added visual impact—making day-to-dusk a smart upsell for photographers.
In fact, having a twilight image as the hero image, which captures properties during the golden hour, increases showings by 3x times, so it definitely adds value to a listing.
Final Thoughts
Shooting for day-to-dusk images isn’t complicated—but it does require intention.
By choosing the right lighting conditions, adjusting exposure, turning on lights, and shooting in RAW, you set your editing team up for success.
When done correctly, day-to-dusk images create emotion, drama, and curb appeal that standard daytime photos simply can’t match.
With the right shooting technique and professional processing, they become a powerful tool for impressing clients and increasing revenue—no sunset required.
If you don’t want to spend hours in post-processing and just want to be out in the field shooting amazing property photos, we have the perfect solution for you – introducing PhotoUp!
Leave Day-to-Dusk Editing to the Experts at PhotoUp!🏞️
If you’re a real estate photographer or agent who wants to offer polished twilight-style images without scheduling shoots around sunset, PhotoUp provides a dependable, high-quality alternative.
Our experienced editing team specializes in day-to-dusk transformations, turning standard daytime photos into striking twilight visuals that instantly elevate listings.
Beyond twilight conversions, PhotoUp supports a wide range of real estate photo editing needs, including:
- Exposure and lighting corrections
- Shadow reduction and low-light enhancement
- Blur correction for images shot without a tripod
- Cropping and visual refinements
- Lawn enhancement and realistic sky replacement
- Object and clutter removal
- Vertical and perspective alignment
- HDR blending
- And many other custom adjustments
From simple fixes to advanced edits, PhotoUp handles projects of all sizes and complexities with consistent results.
Why Work With PhotoUp?
Still not convinced? Here are some compelling reasons why you should consider outsourcing your editing to PhotoUp:
| Cost-Effective Editing Options: PhotoUp offers some of the most competitive pricing in the industry, with on-demand editing starting at just $1.50 per image. Photographers who choose a dedicated editor can see rates drop even further—sometimes as low as $0.50 per image, depending on volume. |
| Quick Turnaround Times: Basic edits are typically delivered in under 24 hours. This speed helps you meet tight listing deadlines without sacrificing quality. |
| Simple, Intuitive Platform: PhotoUp’s online system makes it easy to upload images, track orders, store files, and communicate directly with your editing team. Providing feedback or requesting revisions takes only a few clicks. |
| Consistently Professional Results: Whether you need subtle corrections or full enhancements, PhotoUp ensures every image looks clean, accurate, and market-ready—helping your listings stand out in competitive markets. |
| More Time Behind the Camera: Outsourcing post-production allows you to focus on shooting more properties and serving more clients, while PhotoUp takes care of the editing. The result is higher efficiency, fewer late nights, and more scalable growth for your business. |
More Than Just Real Estate Photo Editing!

In addition to image editing, PhotoUp offers a full suite of real estate marketing services, including:
Adding these services expands your offerings and increases your value to agent clients—helping you grow revenue without increasing your workload.
How to Get Started
Here’s a step-by-step guide to using PhotoUp:
Step 1. Sign up for a free PhotoUp account.
Step 2. Upload your photos to our easy-to-use software.
Step 3. Choose the level of editing that you need and provide instructions (optional).
Step 4. Wait for PhotoUp professional editors to edit and return the photos in less than 24 hours.
Step 5. Download and start using your beautifully edited photos.
As simple as that!
With PhotoUp’s professional twilight editing, you can deliver eye-catching listing photos that attract attention, generate more interest, and help homes sell faster—without ever waiting for the perfect sunset.
Sign up for a free PhotoUp account today and explore how our expert editing team can help you produce standout real estate visuals!
For a limited time, new users receive 10 free credits that can be applied to any PhotoUp service.
We hope this blog post helped you learn how to shoot for day-to-dusk images and enhance them in post-processing. Before you go, you may also want to check out some related resources:
- 9 Proven Reasons Why You Should Use Real Estate Twilight Photos
- How to Edit Twilight Real Estate Photos in Photoshop
- The #1 Edit to Create Stunning Real Estate Photos
- How to Edit for Retreat-Style Properties – Real Estate Photo Editing Tips
- A Complete Real Estate Photo Editing Tutorial for Beginners

