


Table of Contents
- What Is Commercial Real Estate Photo Editing?
- Lifestyle Appeal vs Business Clarity
- 6 Key Commercial Real Estate Photo Editing Tips
- Commercial Often Means Multi-Use Marketing
- Create Compelling Commercial Images With PhotoUp
Commercial real estate photography plays by a different set of rules than residential listings. While homes are marketed to spark emotion and lifestyle appeal, commercial properties must communicate value, functionality, and opportunity—often to investors, tenants, and decision-makers who care deeply about accuracy and scale.
In this article, we’ll discuss how real estate photo editing for commercial properties differs from residential homes and show you 6 key editing tips to create credible commercial listings.
Let’s begin by taking a look at what commercial real estate photo editing means.
What Is Commercial Real Estate Photo Editing?🏢
Commercial real estate photos aren’t just “bigger buildings with more windows.” They sell a different promise.
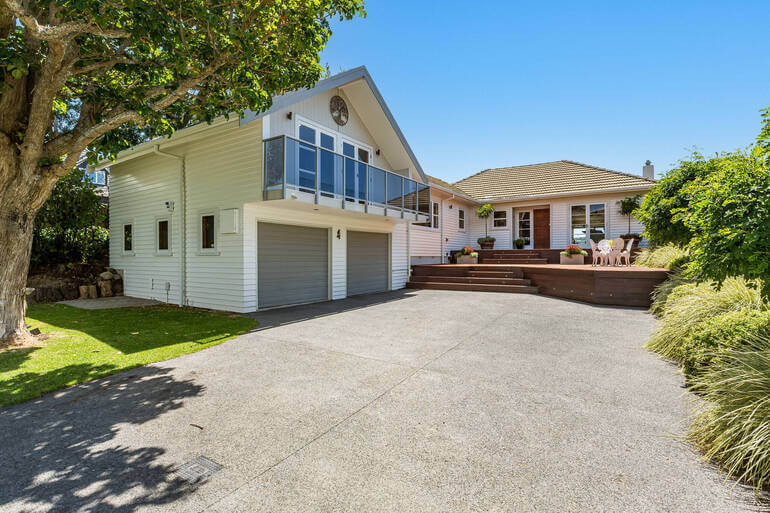
Residential listings are marketed around lifestyle—warmth, comfort, and the feeling of home. Commercial properties, on the other hand, are marketed around function, scale, and profitability.
Buyers, investors, tenants, and brokers want visuals that answer practical questions quickly, such as:
- How much usable space is there?
- How does the building flow?
- What’s the access like? What’s nearby?
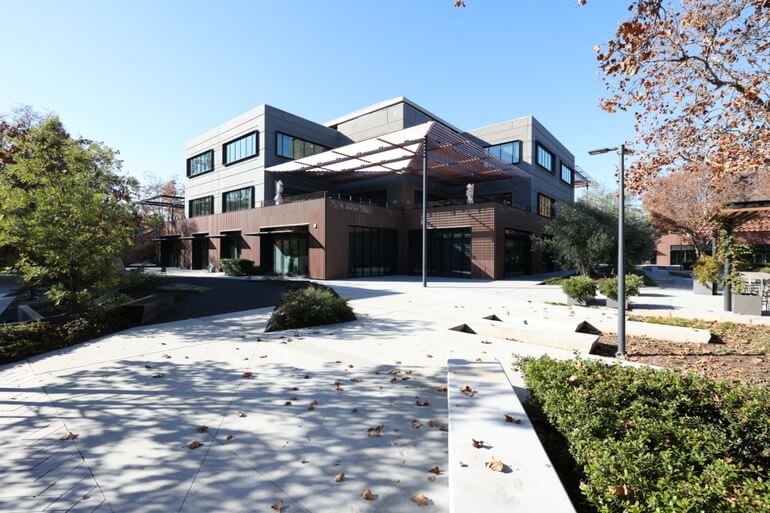
- What condition is the exterior in?
- Does this property look like a smart business decision?
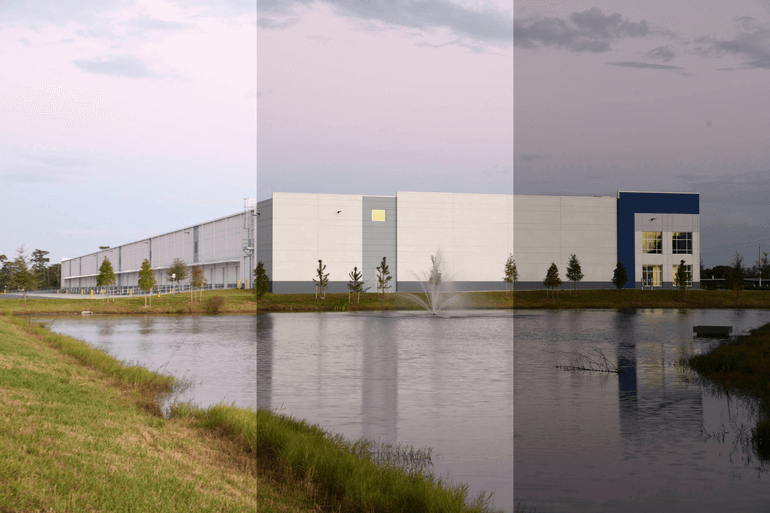
That shift in purpose changes everything about photo editing—from color choices and perspective correction to how you handle signage, lighting, and even the sky.
Lifestyle Appeal vs Business Clarity🏠 🏬
Let’s break down the biggest differences between commercial and residential real estate photo editing, and what to keep in mind when polishing commercial listing images:
| Residential Photo Editing | Commercial Photo Editing |
| Residential real estate photo editing focuses on emotional response. The typical buyer is imagining daily life: cooking in the kitchen, relaxing in the living room, enjoying the backyard. | Commercial real estate photo editing still needs to look appealing, but the priority is clarity and credibility. |
| Editing choices often lean toward softness and comfort—clean whites, inviting warmth, balanced brightness, and a “move-in ready” vibe. | The viewer might be a retail tenant deciding whether foot traffic looks strong, an investor assessing building condition, or a company comparing multiple sites for expansion. |
| The editing must support decision-making—highlighting layout, structural features, accessibility, and surrounding context. |
With that in mind, commercial editing usually aims for a polished but more neutral, documentary style—less “cozy glow,” more “accurate representation with premium presentation.”
And once you start editing with business clarity as the north star, your workflow naturally shifts.
That said, let’s take a look at how to edit photos for commercial properties.
6 Key Commercial Real Estate Photo Editing Tips
Here are 6 powerful real estate photo editing tips to help you create polished and credible commercial listing images:
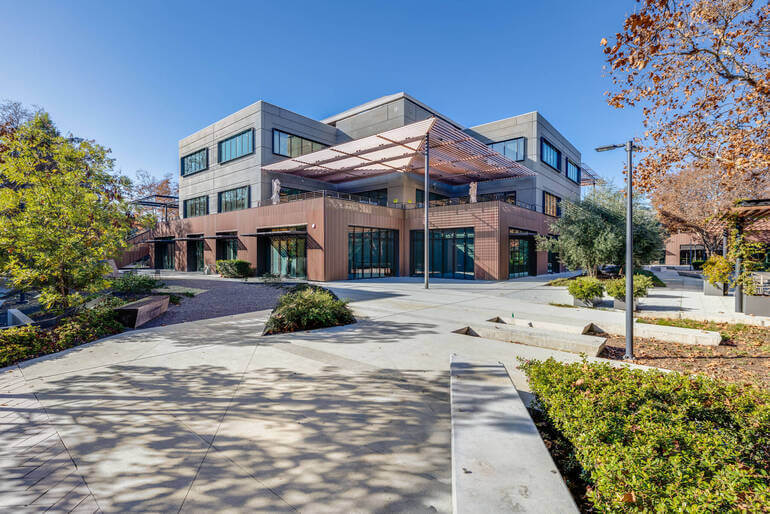
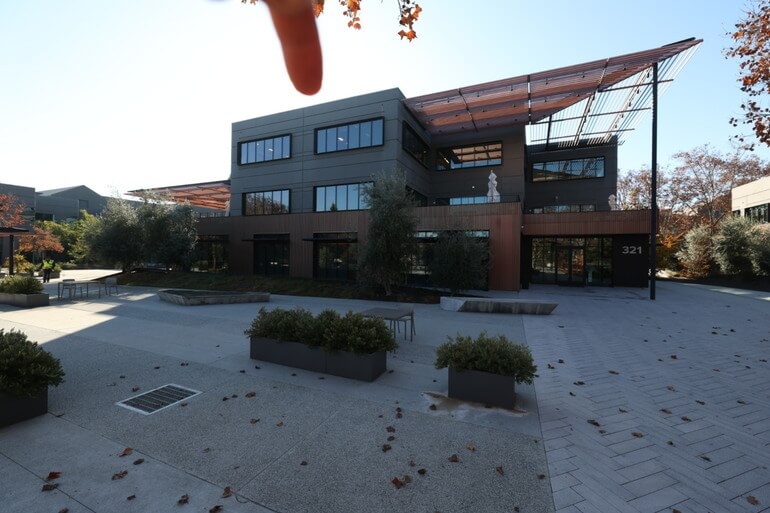
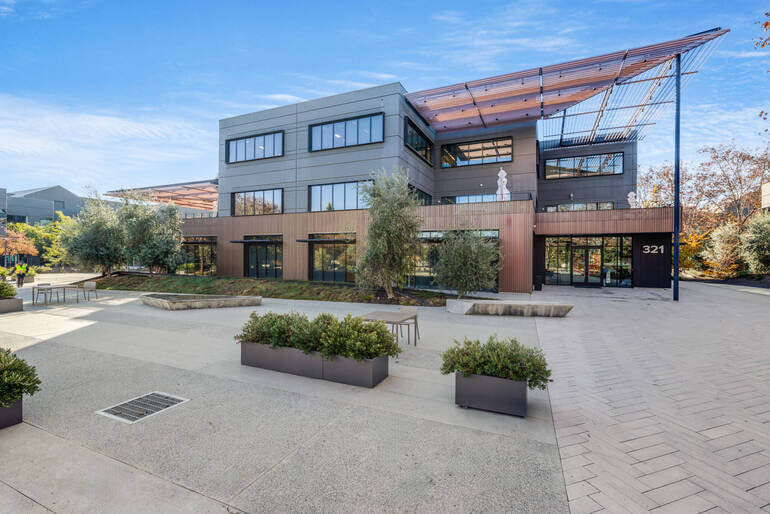
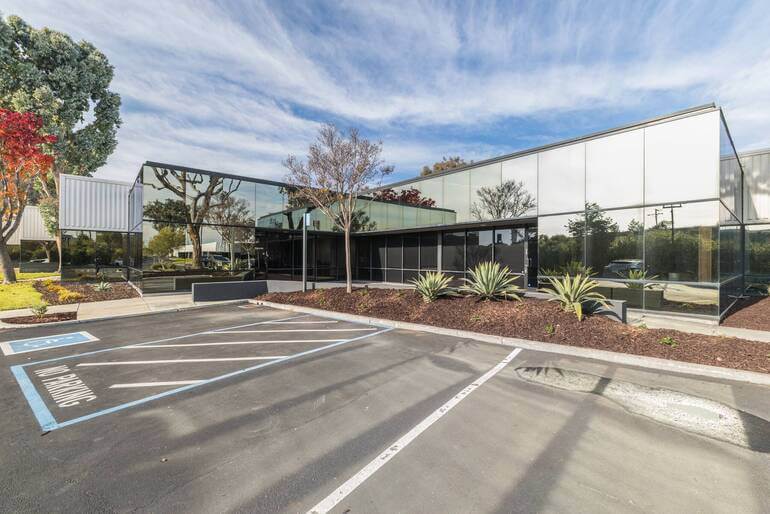
📐 1. Perspective and Geometry Matter More in Commercial Photography


Perspective correction is important for residential listings—but in commercial work, it’s non-negotiable.
Commercial images often include:
- Tall verticals (office buildings, warehouses, hotels)
- Large interior spaces (lobbies, open office layouts, industrial floors)
- And architectural lines that must look straight and true
If vertical lines are leaning or horizons are slanted, commercial photos can feel unprofessional—and worse, distort how the building “reads” in terms of size and structure.
What to prioritize in commercial editing:
- Strong vertical correction (especially exterior building shots)
- Clean horizontal leveling (hallways, large rooms, parking lots)
- Balanced lens distortion correction (wide-angle stretching is common)
Residential images can sometimes “get away with” a slightly stylized wide-angle look because the goal is an inviting impression. Commercial buyers are often more detail-driven, and distorted geometry can create distrust.
To learn how to perform these edits, check out our guides on:
Once your lines are clean, the next major challenge is exposure—because commercial properties often come with more challenging lighting conditions.
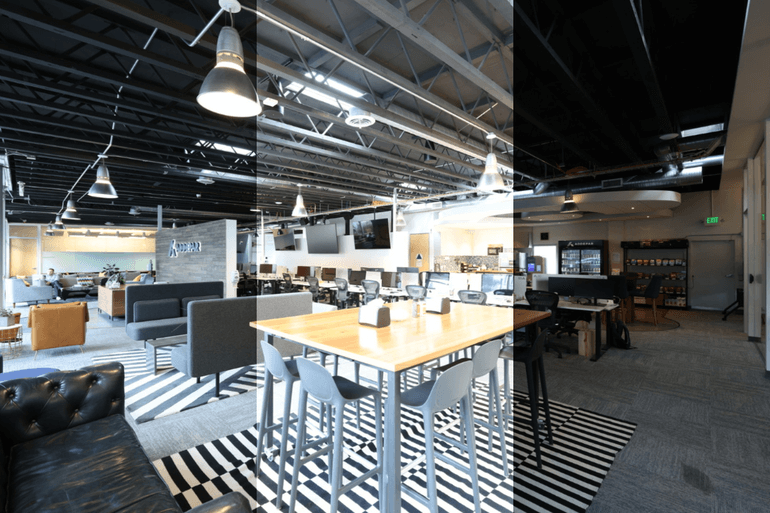
💡 2. Lighting Complexity: Bigger Spaces, Harder Light, Higher Stakes
Commercial spaces tend to have more extreme lighting scenarios than homes. Think of:
- Bright storefront windows with darker interiors
- Warehouse bays with strong overhead lights and shadowy corners
- Office spaces with mixed color temperatures (LEDs + fluorescents + daylight)
- Hotels and restaurants with moody lighting that needs to stay intentional
Residential editing often aims for a bright, evenly lit result across the whole home.
Commercial editing, on the other hand, may require a more nuanced approach: you want a clean look, but you don’t want to flatten the space and remove its real-world lighting logic.
Commercial editing techniques that matter most:
- HDR blending or exposure fusion to control window brightness without “glowing edges”
- Shadow recovery that maintains depth (avoid the “gray wash” effect)
- Highlight control on reflective surfaces (glass, polished floors, metal fixtures)
- And local adjustments to guide attention in wide spaces (dodging/burning)
Here are two guides that can help you achieve balanced lighting in your real estate photos:
- Mastering HDR Blending – How to Achieve Natural-Looking Real Estate Photos
- How to Remove Shadows in Photos (Photoshop + Lightroom Tutorial)
In other words, commercial editing often involves more targeted, zone-based corrections rather than global sliders—because the lighting isn’t consistent across the frame.
And that lighting is closely tied to color, which is another area where commercial and residential editing diverge.
🎨 3. Color Grading: Warm and Inviting vs Neutral and Brand-Ready

Residential editing often favors warmth because warmth sells comfort.
Commercial editing, however, generally leans more neutral—especially for professional spaces like medical offices, corporate buildings, warehouses, or multifamily exteriors aimed at investors.
That doesn’t mean commercial photos should look cold. It means they should look accurate and brand-ready.
Commercial clients often care about consistent representation across a marketing package, and they may be pairing images with branded brochures, signage, or architectural renderings.
What to watch for in commercial color work:
- Correct white balance (mixed lighting is common—avoid green/magenta casts)
- Keep whites clean without turning them blue
- Maintain accurate material tones (wood, concrete, brick, painted walls)
- Avoid trendy filters that date the listing
There’s also a practical reason: commercial listings often involve multiple stakeholders.
When photos look overly stylized, someone in the chain will push back: the broker, the owner, the investor, the property manager, the leasing team. Clean, consistent color reduces friction.
To learn how to ensure realistic tones, check out our guide on how to adjust white balance in Photoshop.
And speaking of friction, commercial editing comes with a different set of “truth and compliance” concerns than residential.
Have You Ever Thought To
Outsource Photo Editing?
Try it today with 5 free edits from three professional photo editors.

✅ 4. Representation Standards: Commercial Buyers Hate Surprises

Residential listing photos still need to be truthful, but they’re typically geared toward inspiring showings.
Commercial photography often supports serious financial decisions, lease negotiations, and due diligence. That means misleading edits can backfire fast.
Edits that are usually safe and expected include:
- Exposure correction and balancing
- Perspective correction
- Window pull for view clarity (without inventing a fake view)
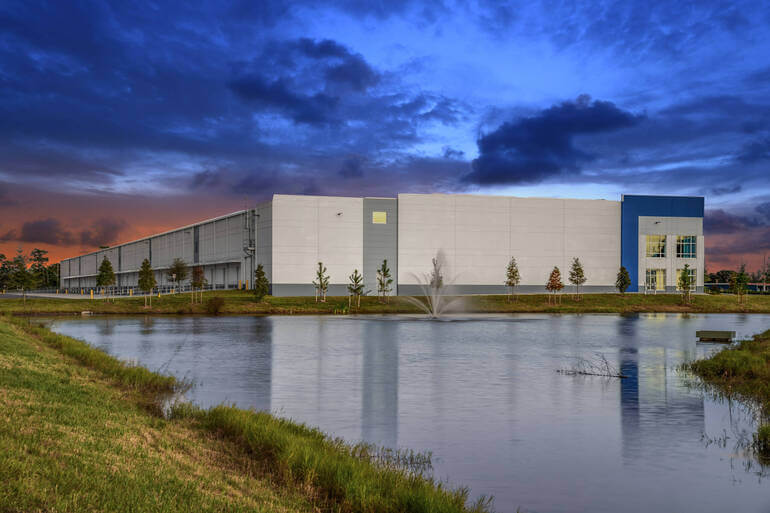
- Sky replacement that stays realistic
- Minor object removal (trash bins, cones, small distractions)
Edits to handle with extra caution:
- Removing cracks, stains, roof wear, or structural issues
- Altering signage, tenant branding, or building identifiers
- Over-smoothing floors/walls to hide the condition
- Changing lot size perception with aggressive wide-angle correction
Commercial clients often want the property to look its best—but not at the cost of credibility. The best commercial editing makes the scene cleaner and clearer while keeping it believable.
From there, another unique commercial factor enters the picture: the environment around the building.
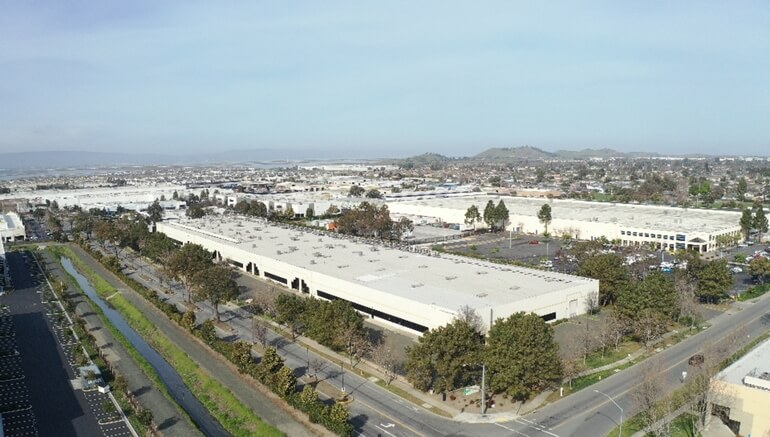
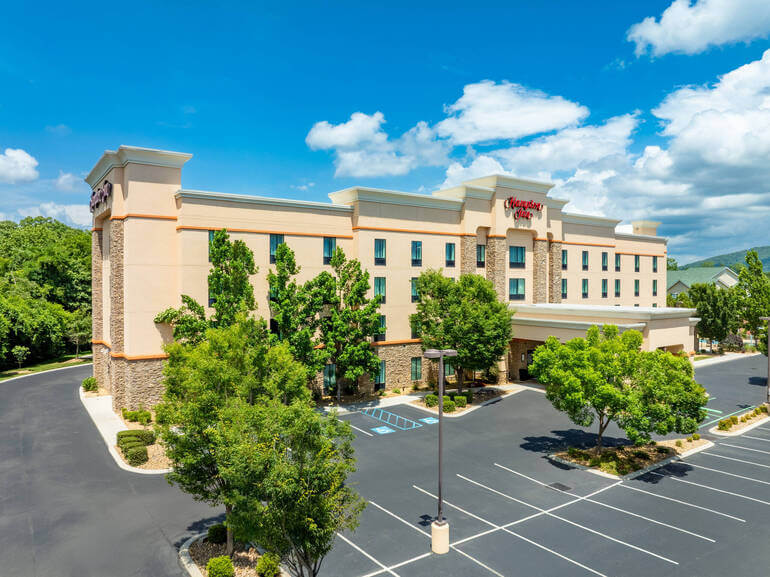
🌆 5. Context Shots: Commercial Listings Sell the Location, Too
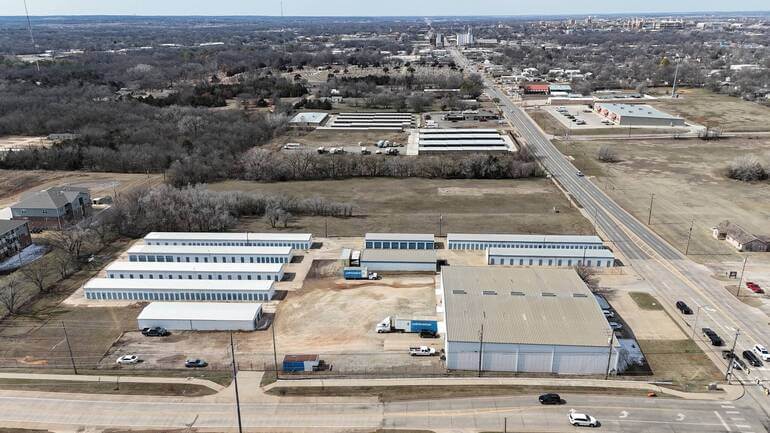
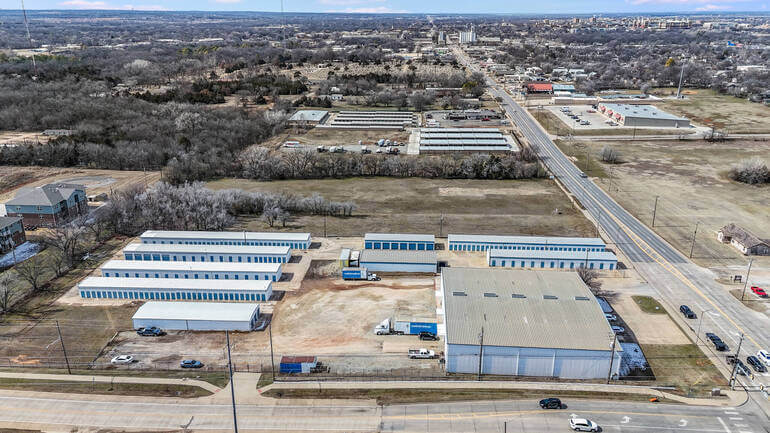
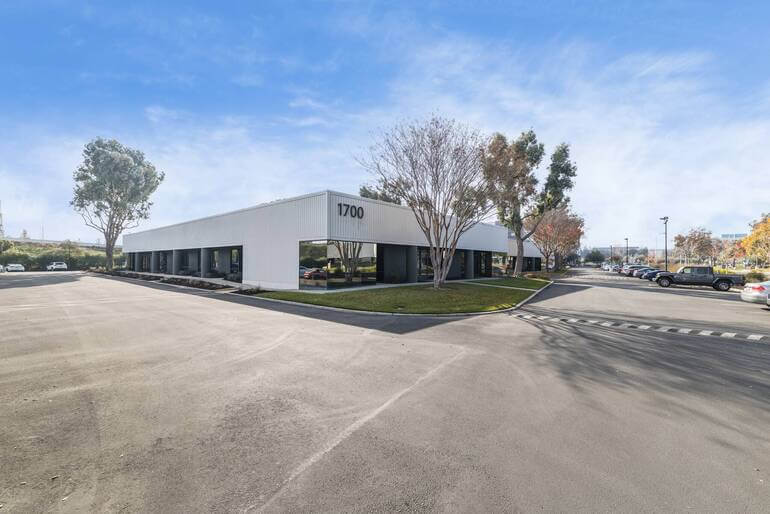
Residential listings usually emphasize interiors and a few hero exteriors. Commercial listings frequently rely on exterior context and surroundings because location drives value.
Commercial photo sets often include:
- Street-facing angles showing visibility
- Parking and access points
- Loading docks, bays, and delivery access
- Nearby businesses, anchors, or intersections
- Walkability cues and neighborhood context
Editing these images requires balancing the property as the hero while keeping the surrounding environment readable.
Here are some key editing considerations for context shots:
- Reduce haze and atmospheric softness (especially in wide city scenes)
- Control dynamic range so signage and street details remain visible
- Avoid oversaturating skies and greenery (it can look fake in urban settings)
- Keep shadows natural so the building still feels grounded
For commercial properties, the “story” is often: This is where your customers will come, your employees will work, your deliveries will arrive, and your business will grow.
Your edits should support that narrative. And because many commercial shots are wide and outdoors, detail cleanup becomes a major finishing step.
🧹 6. Cleanup and Distraction Removal: Different “Clutter,” Different Rules
Residential clutter usually means personal belongings—shoes, toiletries, kids’ toys, cords. In contrast, commercial clutter is different and often unavoidable:
- Signage
- Equipment
- Bins
- Pallets
- Cones
- Cleaning carts
- Temporary barriers
- And construction remnants
The goal in commercial real estate photo editing isn’t to make the space look “lived-in perfect.” It’s to remove distractions that confuse the viewer or cheapen the look.
High-impact commercial cleanup targets:
- Random trash and debris near entrances
- Distracting safety cones or temporary signs (when appropriate)
- Minor stains on floors or walls (without misrepresenting condition)
- Overgrown landscaping and patchy grass around the building perimeter
- And reflections that reveal the photographer or interior mess through the glass
Done well, commercial cleanup makes the property feel operational, professional, and ready for business—without crossing the line into heavy-handed manipulation.
To learn how to declutter your images, you can visit our tutorial on how to remove unwanted objects using Photoshop.
Now, let’s talk about one more major difference: the final output often isn’t a simple MLS slideshow.
Commercial Often Means Multi-Use Marketing🏪
Residential real estate photos usually need to look great on MLS and popular listing sites, where images are often compressed and viewed quickly.
Commercial photos are frequently used across multiple marketing channels, such as:
- Investment decks and offering memorandums (OMs)
- Leasing brochures and flyers
- Websites and landing pages
- Email campaigns
- Property management presentations
- Signage and ads
That means consistency and resolution matter even more. You’ll want clean noise reduction, sharp details without halos, and cohesive color across the full set—especially when images are printed or used in branded collateral.
Commercial editing is less about creating a “wow” from one hero image and more about delivering a complete, consistent visual package that supports a professional sales process.
And that’s exactly where the right editing partner can make a big difference.
Final Thoughts
Residential real estate photo editing is about helping buyers fall in love. Commercial editing is about helping decision-makers feel confident.
It demands straighter geometry, more controlled lighting, truer color, careful cleanup, and consistent delivery across multiple marketing formats—all while staying credible for stakeholders who will scrutinize details.
If you want commercial listings to stand out without sacrificing accuracy, professional editing is one of the smartest investments you can make.
Have You Ever Thought To
Outsource Photo Editing?
Try it today with 5 free edits from three professional photo editors.
Create Compelling Commercial Images With PhotoUp🚀

Commercial real estate moves fast, and your visuals need to keep up—without eating up your schedule.
PhotoUp helps photographers, brokers, and media teams produce polished, professional commercial listing images through expert real estate photo editing services, including:
- Perspective correction
- Exposure balancing
- HDR blending
- Window masking
- Sky replacement
- Distraction removal
- Consistent color grading
- And much more!
Whether you’re delivering a retail space, a multifamily building, an office property, or a warehouse, PhotoUp can help you.
Our expert editors can create clean, compelling images that elevate your listing, support your marketing materials, and help commercial prospects see the property’s true potential.
Browse Top Dedicated
Real Estate Photo Editors
Ready-to-hire editors for real estate photo editing, and more.
A Complete Real Estate Marketing Partner
Furthermore, PhotoUp offers so much more than just real estate photo editing! We are a complete real estate marketing partner and also offer powerful marketing tools such as:
We have everything you need to enhance and market real estate photography under one roof!
How to Get Started
Getting started with PhotoUp is super easy – this is all you need to do:
Step 1. Sign up for a free PhotoUp account.
Step 2. Upload your photos to our easy-to-use software.
Step 3. Choose the level of editing that you need and provide instructions (optional).
Step 4. Wait for PhotoUp professional editors to edit and return the photos in less than 24 hours.
Step 5. Download and start using your beautifully edited photos.
PhotoUp Real Estate Photo Editing Uploader
To see how easy it is to get started with PhotoUp, check out our real estate photo editing uploader tutorial:
As simple as that! So, what are you waiting for?
Sign up for a free PhotoUp account today, and let our expert editors help enhance your commercial listing photos in less than 24 hours!
Plus, for a limited time, we offer 10 free credits you can use on any of our services when signing up for an account.
We hope this blog post has helped you learn the difference between commercial and residential real estate photo editing and provided you with some valuable editing tips. Before you go, you may also want to check out the following resources:

