


Table of Contents
- What Is Virtual Staging?
- Why Use Virtual Staging When Selling a Home?
- 5 Powerful Virtual Staging Tips
- How to Virtually Stage a Listing With the Click of a Button
The real estate industry has been drastically transformed by technology. With advancements in 3D virtual tours and walk-through videos, homebuyers can now explore properties from the comfort of their own homes.
However, real estate professionals are always looking for new ways to impress potential buyers and make their properties stand out from the competition. One such method is virtual staging!
In this article, we’ll show you how to virtually stage a listing for sale with just a click of a button and create captivating property images.
We’ll also cover what virtual staging is and provide you with 5 powerful tips to consider when utilizing this cool technology.
Let’s get started!
What Is Virtual Staging?
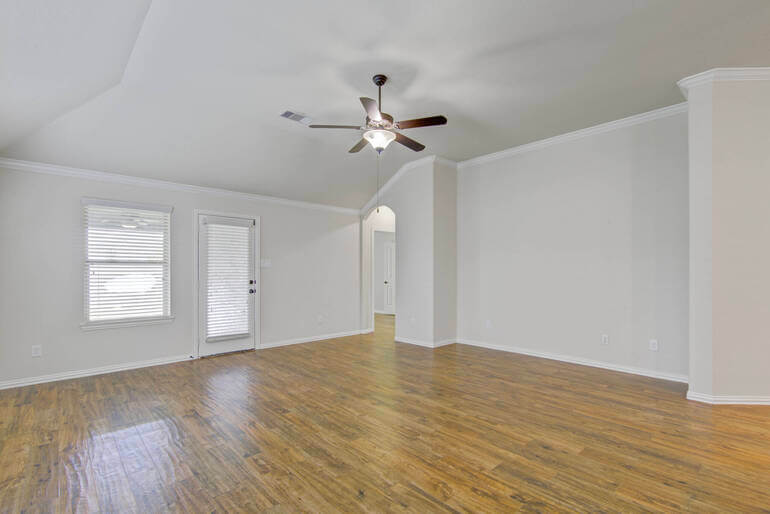
AI Virtual staging is a technique used to digitally furnish and decorate a home. It gives potential buyers a clear picture of what an empty or outdated property could look like, without physical staging.
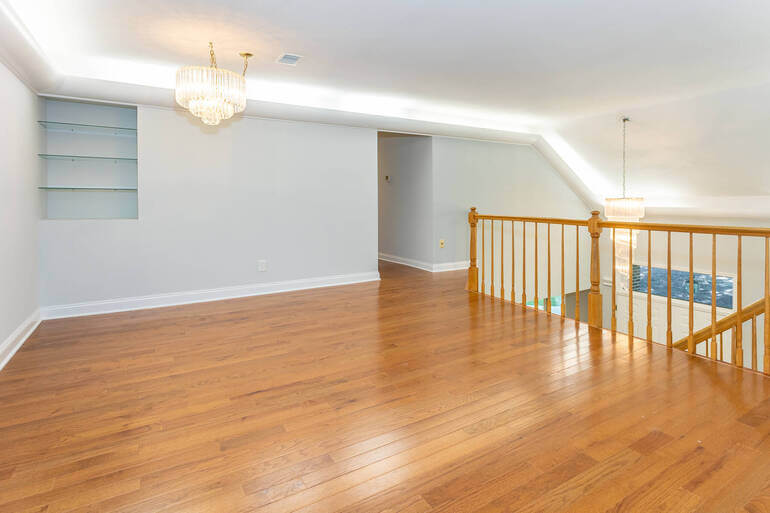

It’s basically the digital version of home staging.
How does it work? With the help of CAD software, you can add new furnishings and decor to any empty room.
For example, you can use this technology to:
- Add furniture and decor to vacant rooms
- Declutter, depersonalize or redecorate outdated spaces
- Perform virtual renovations
- Also, do virtual landscaping, grass greening, and sky replacements
- And so much more!
Why Use Virtual Staging When Selling a Home?

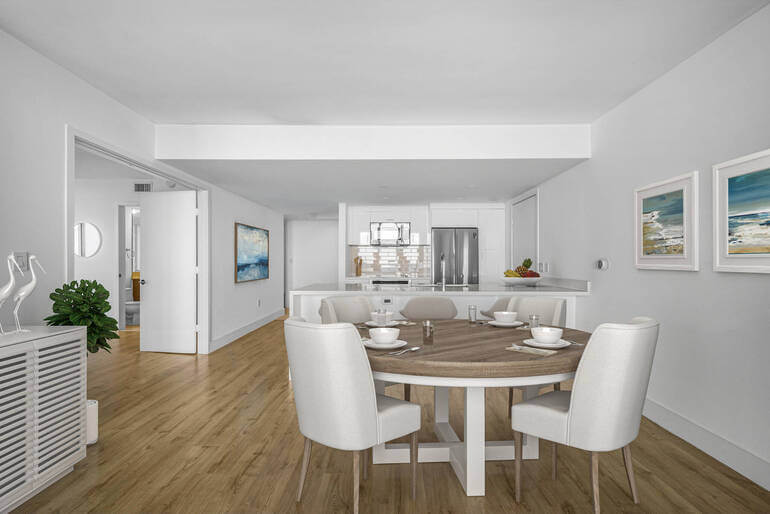
When it comes to capturing buyers’ attention, enhancing listing photos with virtual staging is the way to go.
It works like magic, turning an empty space into an inviting home where potential buyers can envision themselves living.
This relatively new technology of digitally staging vacant spaces has seen a tremendous surge in popularity in recent years.
It has been particularly useful in COVID times and thereafter for people that still prefer to browse listings from the safety and comfort of their own homes.
And here’s the exciting part: it can cut staging expenses by up to 97%! That means you can save big while still achieving impressive results.
Instead of paying thousands of dollars to hire a professional stager and get your home physically staged, you can virtually stage your listing images for as little as $3 per image.
But how to get started?
Let’s take a look at what to consider when getting started and how to easily virtually stage your images.
5 Powerful Virtual Staging Tips
Here are 5 powerful tips to help you digitally stage your real estate photos and market them.
1. Choose the Right Virtual Staging Software
Virtual staging can be done using a variety of software programs or services such as:
- PhotoUp
- BoxBrownie
- VS24
- Stuccco
- Styledod
- And more!
There are also DYI virtual staging apps like ApplyDesign and VisualStager that allow you to do the virtual staging yourself.
Each software has its own features and limitations, so you’ll want to choose one that best fits your needs.
You also need to consider whether you want to do the virtual staging yourself or outsource it to a professional service.
From our experience, it’s always best to use an AI virtual staging service to ensure high-quality results and proper furniture dimensions.

We often see unrealistic staging with tables floating in the air, inaccurate dimensions of furniture and decor, and so forth.
The whole idea is to create realistic images of an inviting home that will help potential buyers to imagine themselves living in the space and see its full potential.
So, when selecting software, consider its user interface, the quality of the final product, and the cost.
2. Take High-Quality Photos

Virtual staging relies heavily on high-quality photographs of the home. Make sure to take professional-level photos with plenty of natural light, and clear angles of each room.
For best results, use a wide-angle lens that can capture the entire room in one shot. It’s also important to make sure the space is clean and free of clutter before taking photos.
For more information, you can check out our blog post on how to take virtual staging photos (5 actionable tips).
3. Understand Design Principles

Virtual staging can be a powerful tool, but it’s not magic. There are still many design principles to keep in mind when selecting furnishings and decor.
Consider the style of the home, and the demographic of the buyer you’re targeting, and create a cohesive design plan that will bring out the best features of the space.
PhotoUp offers 5 different design styles to help you cater to any market. Our extensive virtual staging library includes:
- Mid-Century Modern
- Coastal
- Modern
- Industrial
- And Rustic
If you’re unsure what style would fit your target market best, PhotoUp can help you select an appropriate interior design style for your virtual staging.
4. Stage Your Listing Images Virtually

Once you’ve chosen a virtual staging software and taken high-quality photos, the next step is to stage your home digitally.
This involves selecting furnishings, decor, and accessories that best complement the space and create an inviting atmosphere.
As mentioned, most virtual staging software has a database of furniture and decor, but you can also opt for custom furnishings to better suit your clientele.
Quick & Easy
AI Virtual Staging
Interiors. Landscapes. Commercial. Virtually transform any space.

How to Virtually Stage a Listing With the Click of a Button
Now, let’s show you how to virtually stage your listing images with the click of a button using PhotoUp’s AI virtual staging software.
It’s a super easy and straightforward process!
PhotoUp AI Virtual Staging Demo
You can either watch the video tutorial or read the text below:
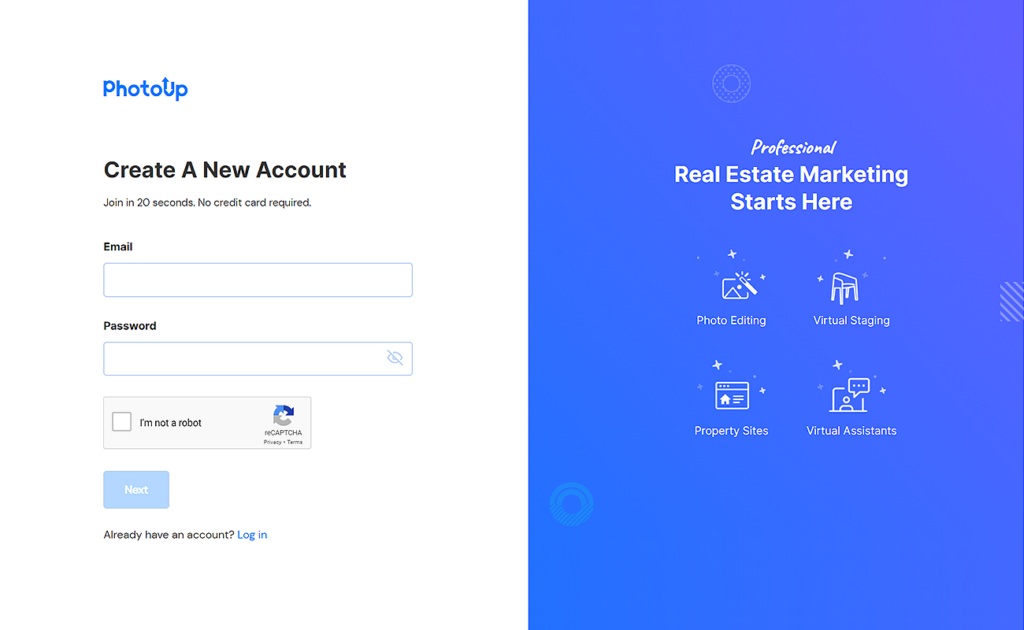
Step 1. Sign Up for a PhotoUp Account
To begin, sign up for a free PhotoUp account on PhotoUp’s website by entering your email address and creating a password.
Step 2. Choose Virtual Staging
Once you’ve signed up for an account, it’ll take you to the PhotoUp Dashboard, where you can choose Virtual Staging » New Order.

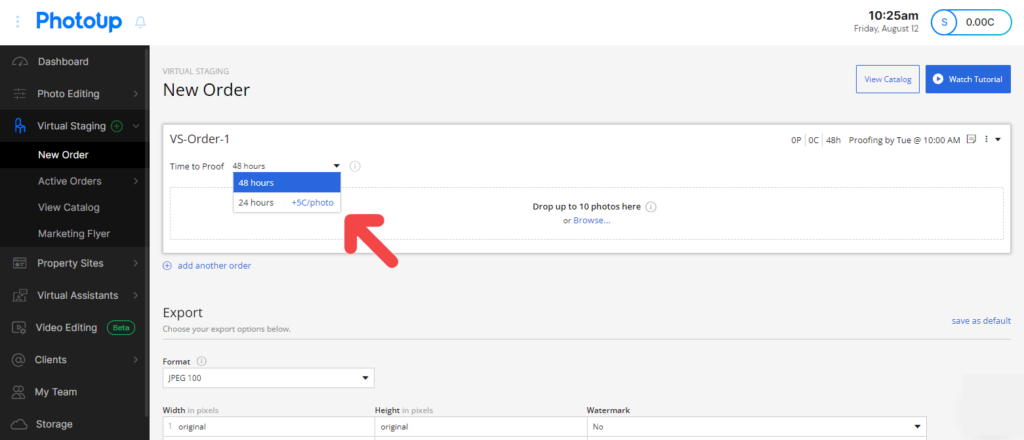
Step 3. Choose Your Preferred Turnaround Time
In the next step, you can choose your preferred turnaround time. PhotoUp offers either 24 or 48 hours turnaround.
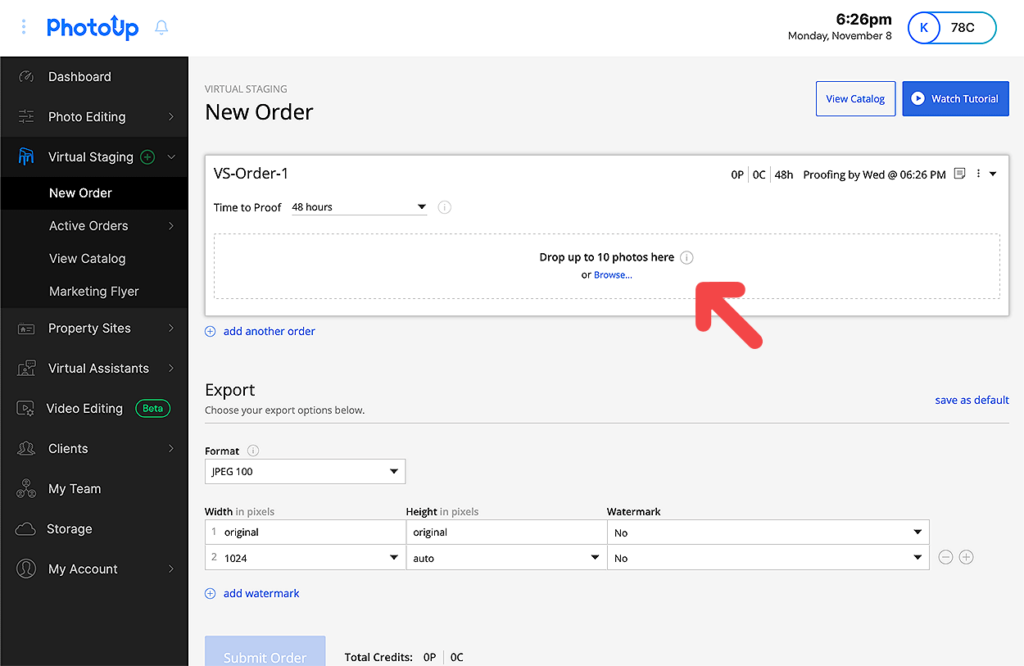
Step 4. Upload Your Photos
Now it’s time to upload your real estate photos of your vacant space that you want to be staged.
Although virtually staging empty spaces is the most common option, you can also choose to declutter and redecorate your photos, or even make virtual renovations.
To begin uploading your images, click on the Browse button in the New Order window and select your photos. Or, you can simply drag and drop up to 11 images at the same time.
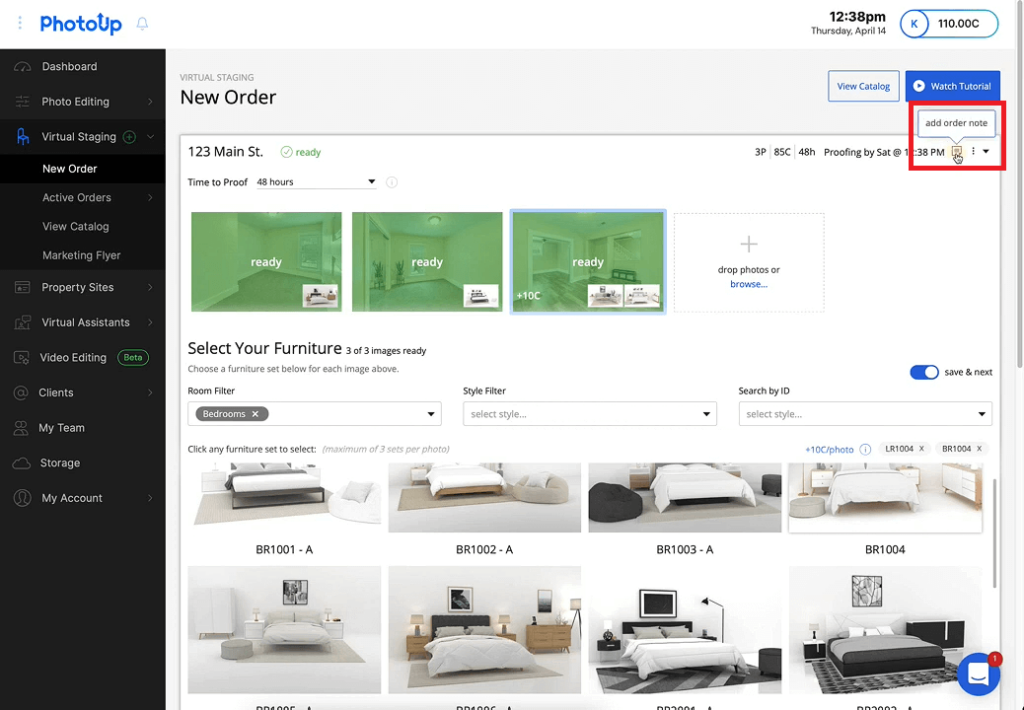
Step 5. Choose Your Furniture
After you’ve uploaded your photos, you need to choose your furniture.
Start by marking the photo you want to add furniture to, and then click on the furniture set you want to add to your image.
You can choose up to 3 sets per photo. And you can either use the Style Filter or Room Filter option or Search by ID for furniture sets.
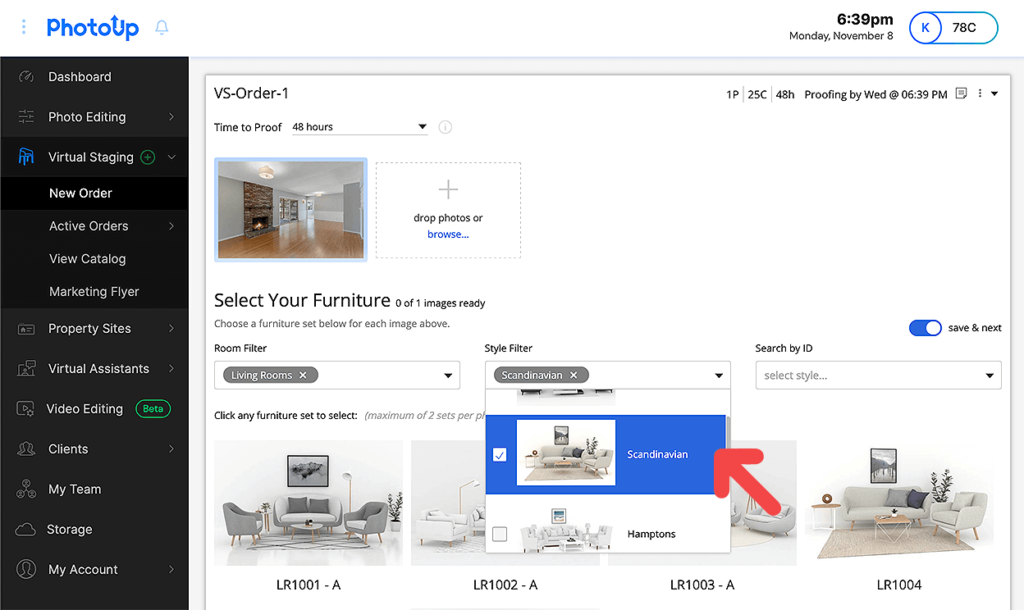

Once you’ve clicked on the set you wish to add to your photo, you’ll see thumbnails of them at the bottom right corner of the uploaded image.

You also have the option to add your comments and instructions in Add order note in the menu in the top right corner of the dashboard. Or, you can leave your comments on each individual photo.
Step 6. Choose Your Export Settings
Once you’ve selected the furniture you want to stage your photos with, you need to scroll down and choose your preferred Export Settings.

This will be the type of image format you want your photos to be delivered in.
Additionally, you can also choose to have your images watermarked. Simply click on the + add watermark button below the export settings and upload your logo or icon.
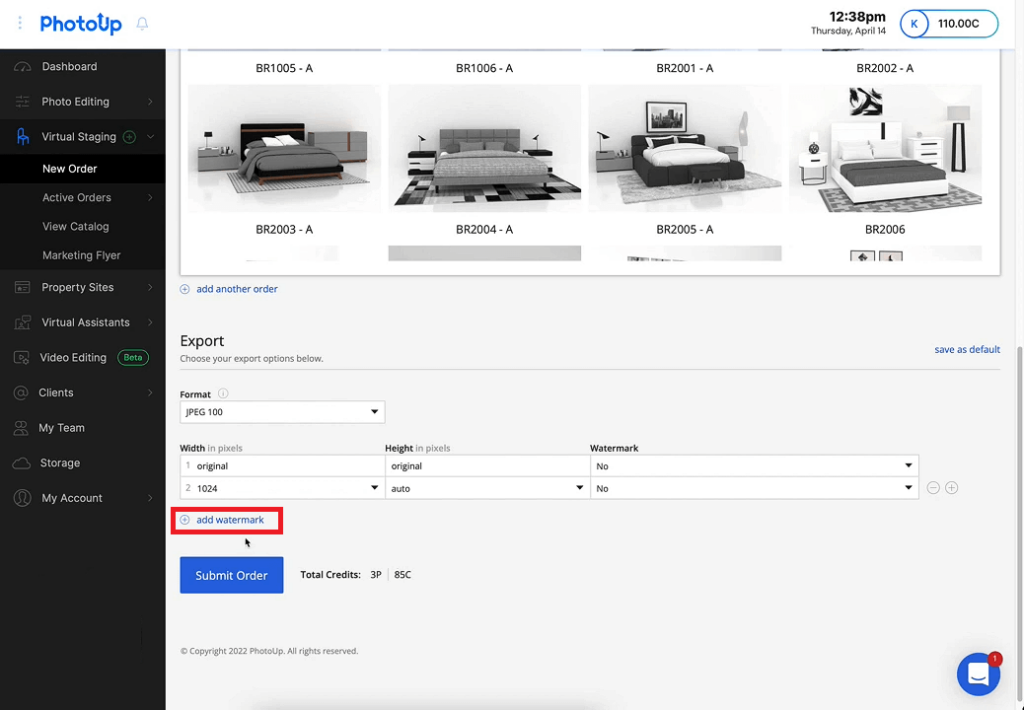
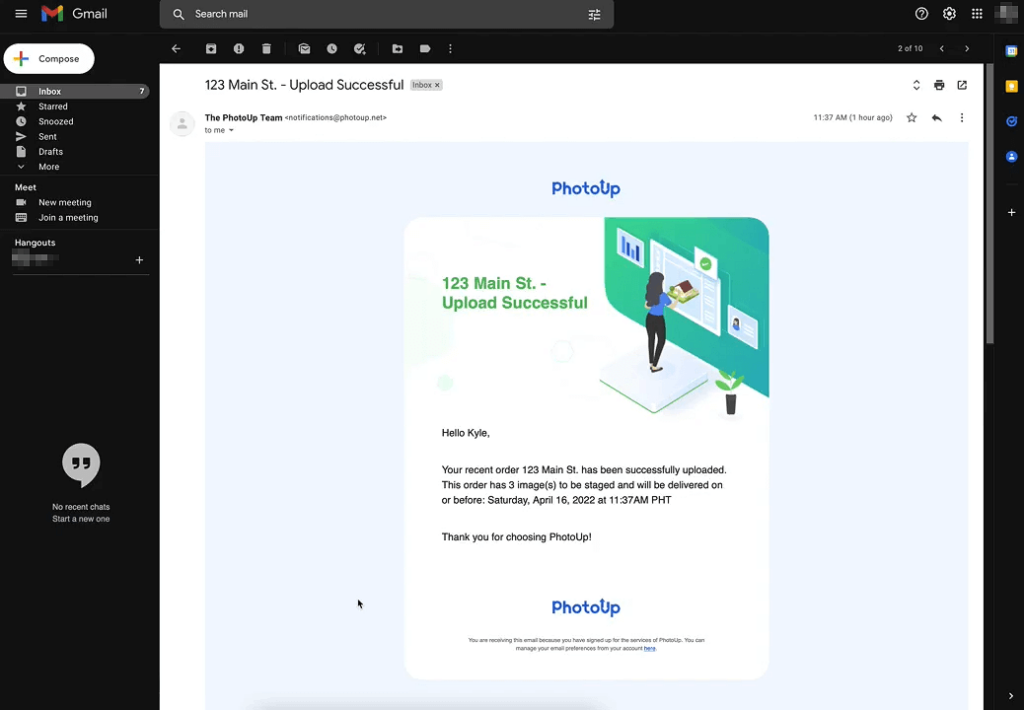
Then, click on the Submit Order button, and you’ll get a confirmation of your order. You’ll also receive a separate email that your upload was successful.
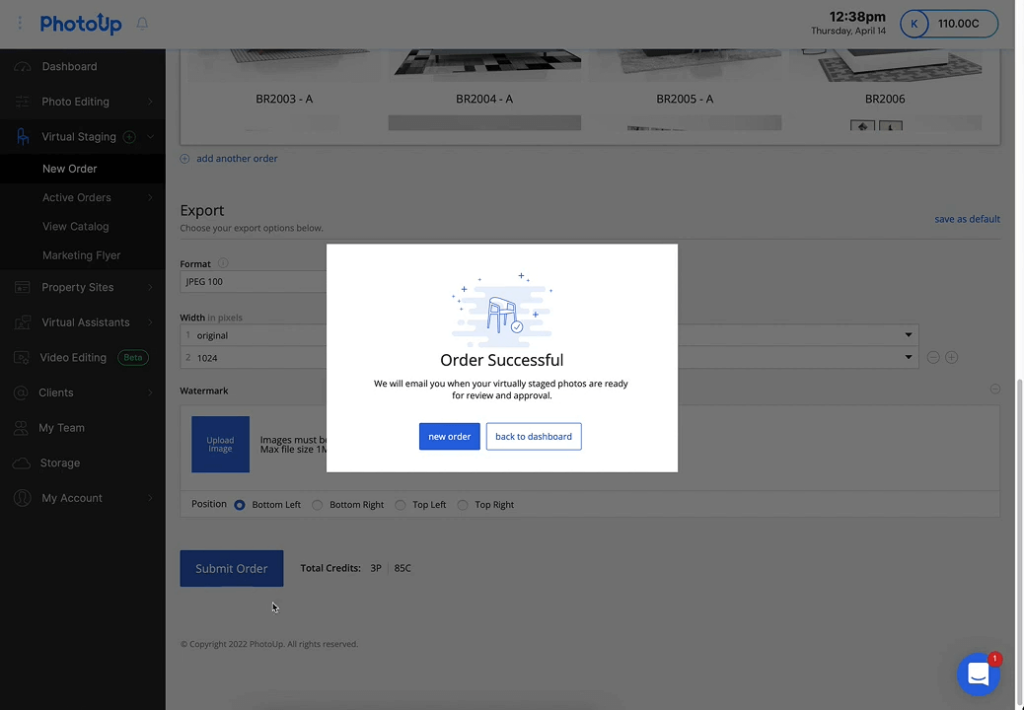
Now, you’re almost finished!
Quick & Easy
AI Virtual Staging
Interiors. Landscapes. Commercial. Virtually transform any space.
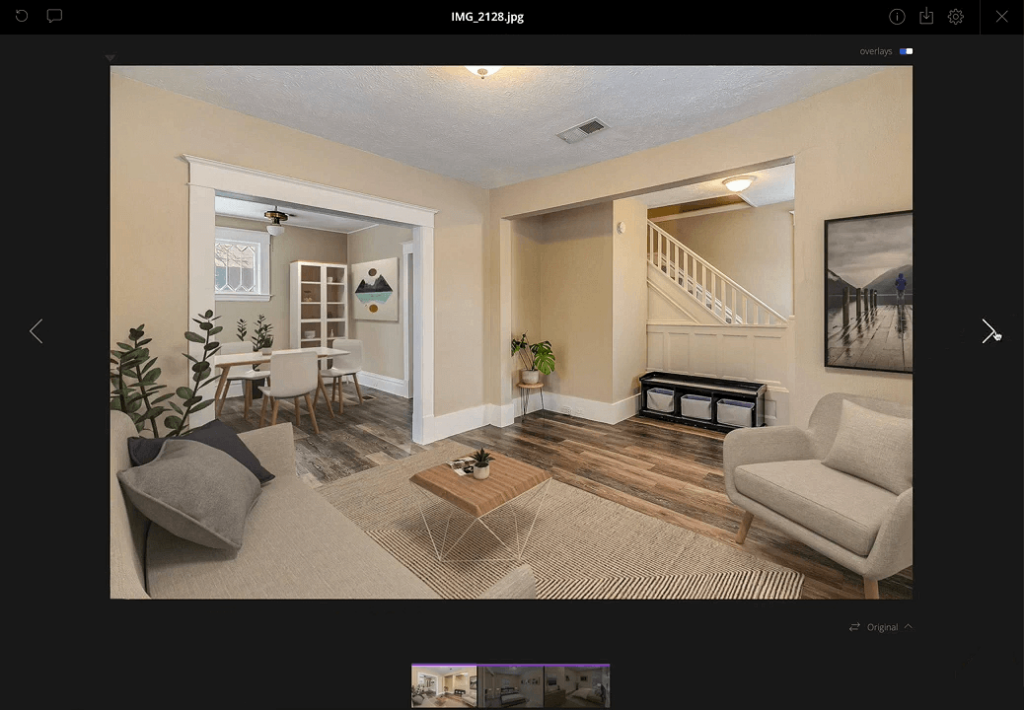
Step 7. Proofing Your Virtually Staged Photos
The final step is to review your virtually staged photos. When your photos are ready for proofing, you’ll receive an email containing a link.
This link will take you to an order page where you have the ability to view your photos and request revisions if needed or approve your order. Just click on the proofing button and review your images.

Additionally, PhotoUp offers 2 free revisions and then each additional revision costs 10 credits.
Further, each image contains a before and after slider of the image. Simply, drag the slider back and forth to see the original photo and the final image.
8. Approve & Download Your Rendered Images
If everything looks okay, you can go ahead and Approve the order.
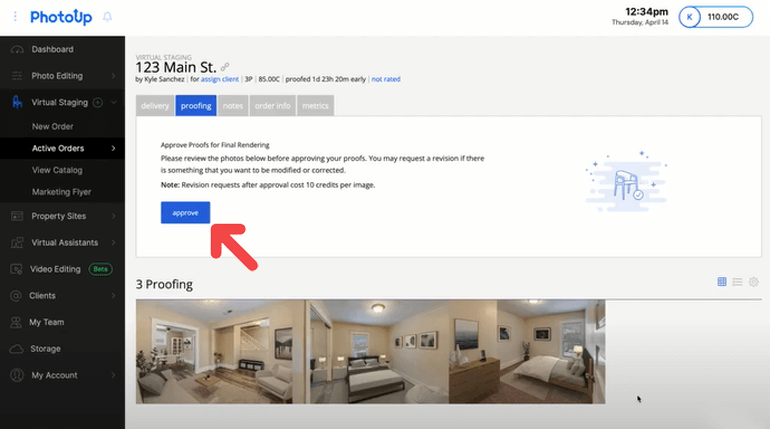
When the images are fully rendered you’ll receive a notification email. And when you click on the link in the email, it’ll take you back to the order page where you can download your high-resolution photos.
And that’s it!
5. Market Your Virtually Staged Images
Now that you’ve virtually staged your listing images, it’s time to showcase them.
The final product should look realistic but still leave room for clients to imagine themselves in the space.
Incorporate the images into your MLS listing, single property website, virtual house tour, and other promotional materials.

In addition, you can create marketing videos using your virtually staged images to give your properties even more exposure.
Conclusion
Virtual staging is an excellent tool for real estate professionals looking to elevate their listings and impress potential buyers.
By choosing the right software, taking high-quality photos, and understanding design principles, you can create a stunning final product that will entice buyers and close more deals.
Remember, virtual staging is not a replacement for physical staging, but rather an alternative – it’s an opportunity to showcase the potential of a property and give buyers a vision of what it could look like.
Lastly, the best practice is to always disclose that the images are virtually staged to avoid misleading buyers.
So go ahead, give PhotoUp’s AI virtual staging a try, and see the amazing results for yourself!
Sign up for a free PhotoUp account today, and let us help you create inviting, top-quality virtually staged images to boost your real estate sales!
We hope this blog post helped you learn how to virtually stage a listing with a click of a button and create stunning images. If you enjoyed this post, make sure to check out the following resources as well:

