


Table of Contents
- Why Matching Interior and Exterior Lighting Matters
- Common Challenges in Matching Light
- How to Match Interior and Exterior Lighting
- Photo Editing Tools
- Bonus Tips for Perfectly Balanced Images
- Ready to Take Your Real Estate Photos to the Next Level?
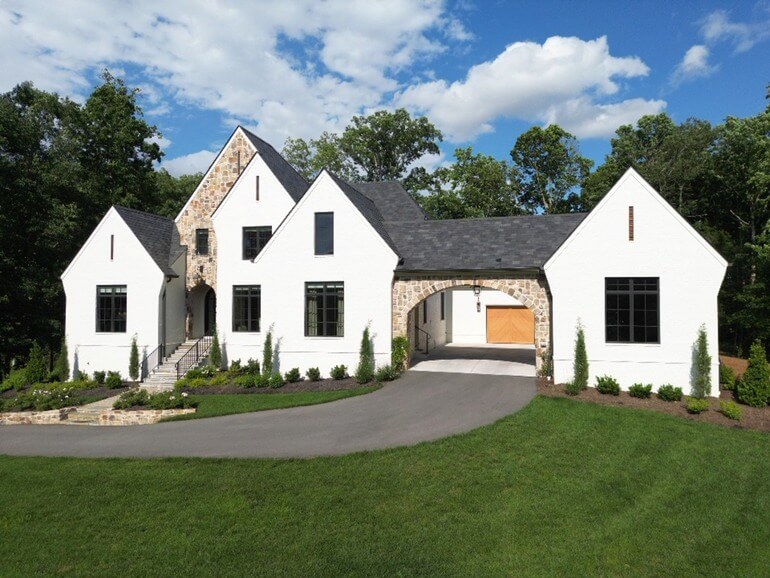
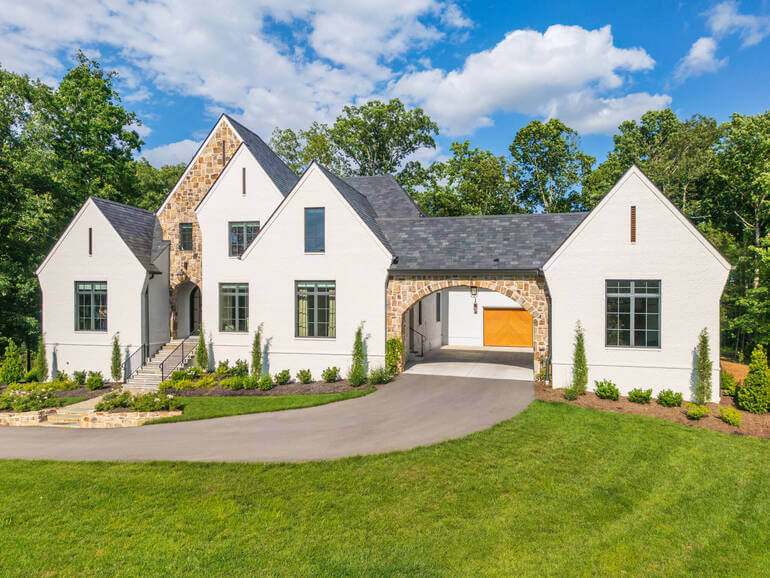
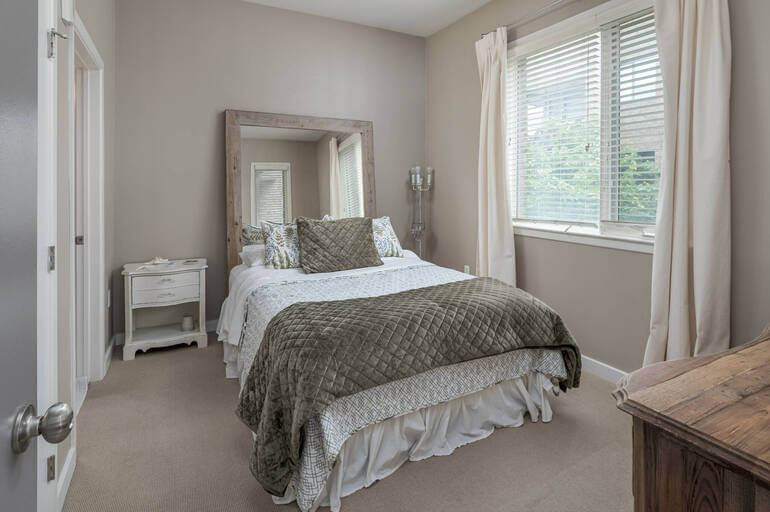
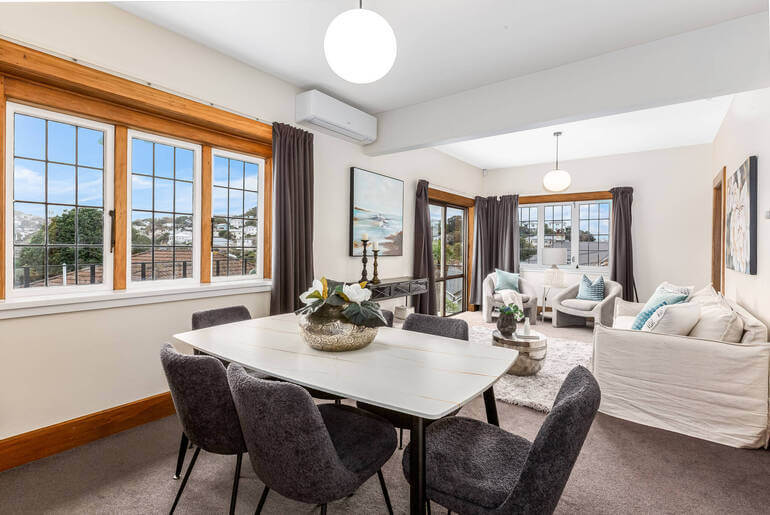
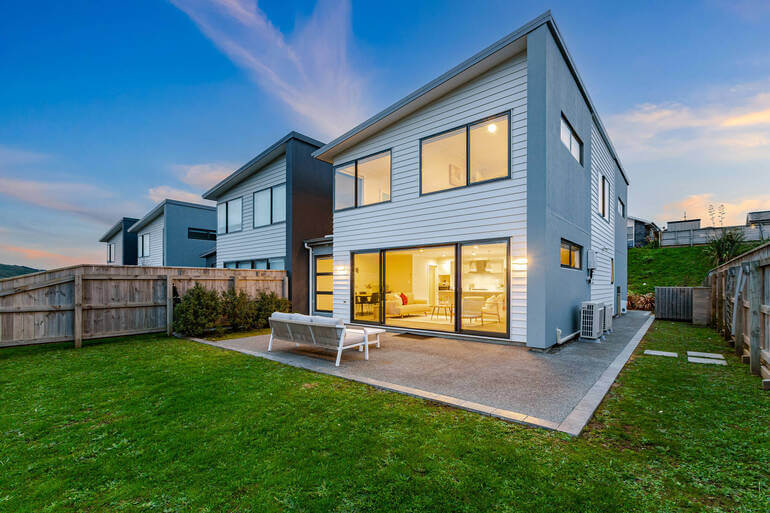
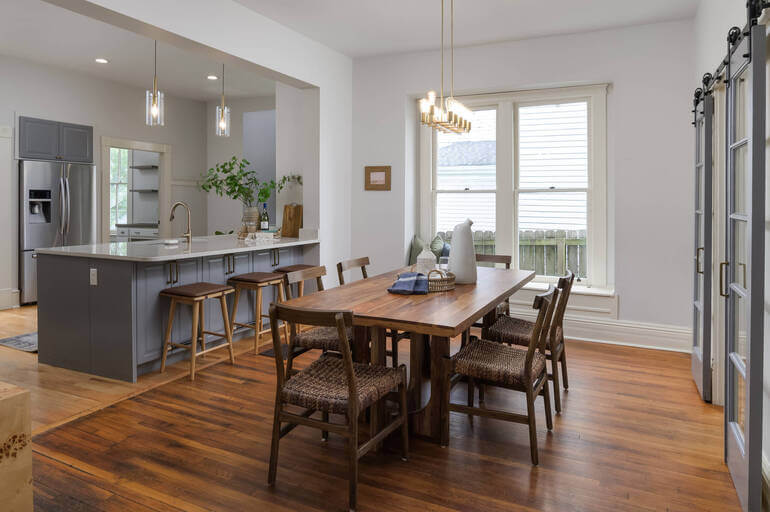
When it comes to real estate photo editing, one of the most challenging and essential tasks is matching interior and exterior lighting.
A well-executed image that balances the bright outdoors with the darker interior areas can elevate your listing, attract more potential buyers, and convey a more inviting and professional space.
In this guide, we’ll show you how to effectively match lighting in your real estate photos, explain why it matters, and share editing techniques you can use to ensure your images pop—without looking fake or overprocessed.
Let’s dive in!
🏡 Why Matching Interior and Exterior Lighting Matters
Around 85% of potential homebuyers say that property photos are the top element they rely on when browsing listings online. Images play the biggest role in determining which homes make it onto their must-see list.
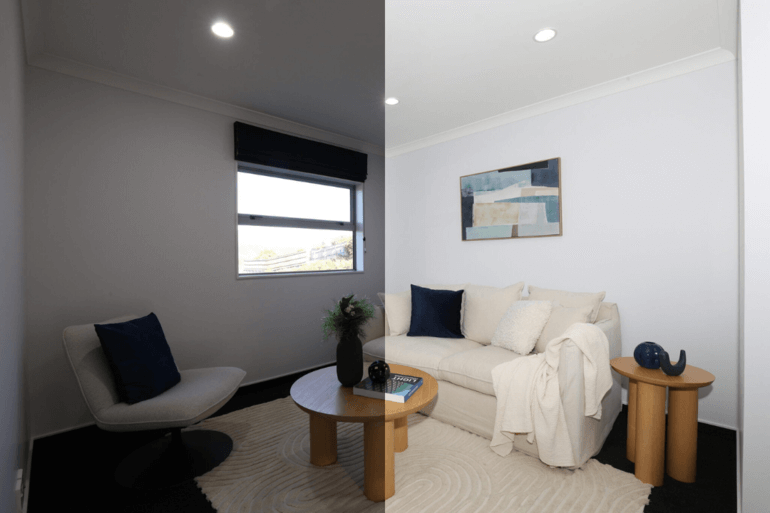
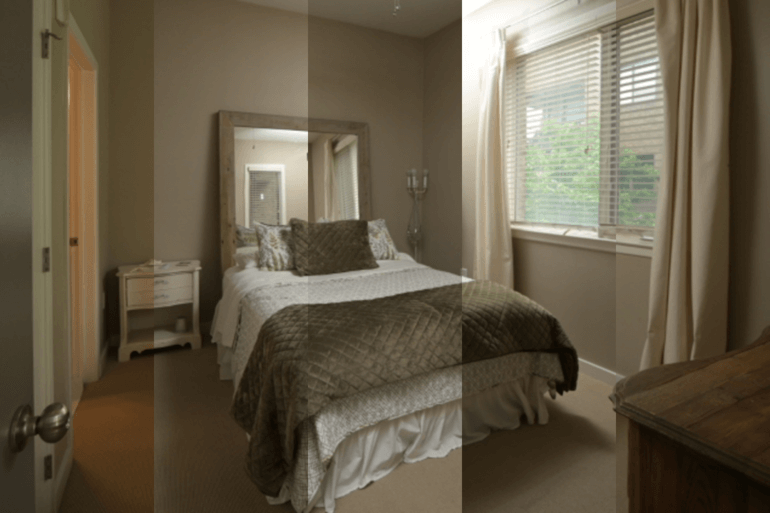
One crucial step in creating listing photos that capture potential buyers’ attention is ensuring that the interior and exterior lighting match.
Without balanced lighting, your photos can look amateurish and dull. On the other hand, balanced light inside and outside a property serves both aesthetic and practical purposes.
Here’s why:
- Visual Consistency: Prevents windows from appearing overly bright or “blown out” while preserving interior detail
- Realism: Mimics what a human eye naturally sees, creating trust in the property’s presentation
Buyer Appeal: Helps listings stand out by showing a cohesive view of indoor spaces and external surroundings - Professionalism: Balanced lighting screams “expert photographer”—even if the image was taken with average gear
By matching interior and exterior lighting, you elevate your real estate photos from ordinary to impactful—giving buyers a clear, compelling reason to step through the front door.
With this in mind, let’s take a look at some challenges in matching exterior and interior lighting.
📷 Common Challenges in Matching Light

Before diving into the fix, let’s understand the typical obstacles you face when shooting real estate interiors with visible windows:
- Bright daylight streaming in through windows
- Underexposed interiors due to high contrast
- Color temperature mismatches (warm indoor lights vs cool natural light)
- Window glare or reflections
- And limited camera dynamic range
These issues often result in either a well-exposed interior with a blown-out window or a detailed window view with dark, murky interior shadows.
Now, let’s take a closer look at how to match interior and exterior lighting.
🌈 How to Match Interior and Exterior Lighting
Here’s how professional real estate photo editors overcome these issues with ease:
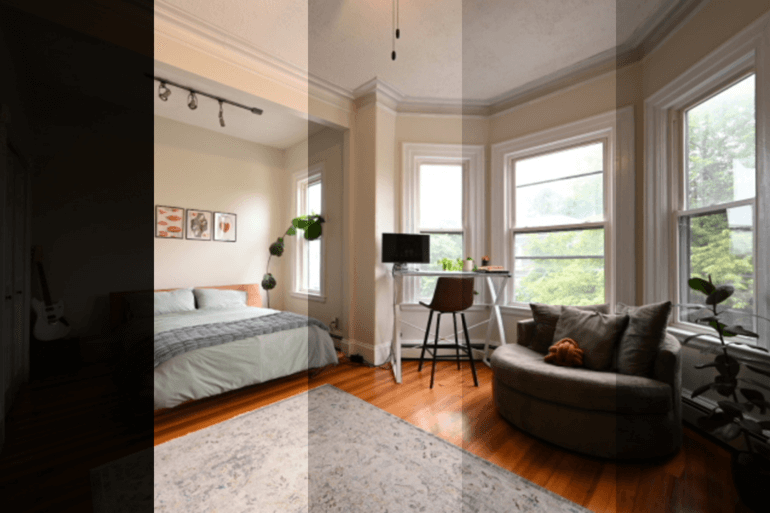
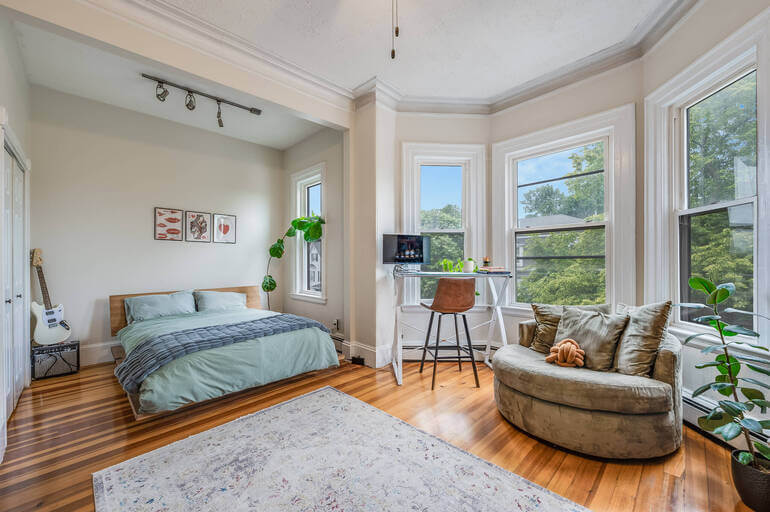
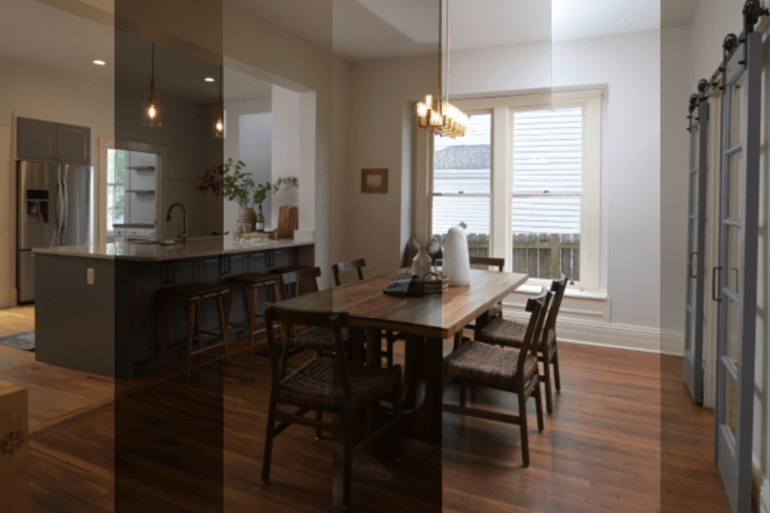
1. Use Bracketed Exposures (HDR)
Capture multiple exposures—typically three to five—from darkest to brightest. This technique, called bracketing, lets you:
- Expose the interior correctly in one frame
- Expose the windows/exterior correctly in another
- Merge them in post-processing to balance everything
Editing tip: Use software like Lightroom or Photoshop to blend exposures. Adjust highlights and shadows until both indoor and outdoor areas are evenly lit but still natural-looking.
For more information on how to do this, visit our guide on how to easily edit HDR real estate photos in Lightroom.
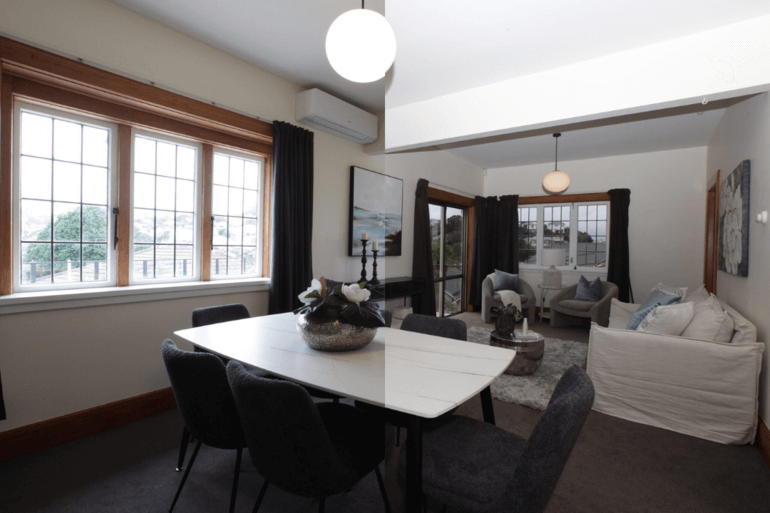
2. Manual Window Masking in Photoshop
Even with thorough preparation, balancing light can be quite a challenge during photoshoots.
This is especially true when dealing with strong sources like the sun. As sunlight streams through windows, it gets amplified by the glass, causing glares and overexposures that need to be addressed.
For maximum control, manually mask and blend the window views using layers in Photoshop.
Here’s what to do:
- Stack bracketed exposures as layers
- Use a Layer Mask to selectively reveal the well-exposed window from the brighter frame
- Carefully brush around edges to avoid halos or hard transitions
- Adjust exposure and contrast locally for realism
Editing tip: Use a soft brush at low opacity to gradually blend transitions. For more details, check out our tutorial on how to mask windows in Photoshop.
3. Color Balance Adjustment
Adjusting the color and brightness is the backbone of all image enhancement.
Interior lighting, window tint, outside weather conditions, camera settings, and other factors can affect the color of the property in the photo.
Even if exposure is right, color temperature might not match and can cause a color cast or tint that’s an eyesore.
For instance:
- Exterior light (sunlight) is cooler (bluish)
- Interior light (incandescent or LED) is warmer (yellow-orange)
To correct this, use Lightroom or Photoshop to:
- Adjust white balance for consistency
- Use selective color corrections or HSL sliders
- Add warming filters to window views if needed
Editing tip: Consider using a local adjustment brush to fine-tune areas instead of applying a global white balance.
To learn how to do these edits, check out our guides on:
- How to color correct in Photoshop
- How to remove color cast in Photoshop using 2 different techniques
- How to adjust white balance in Photoshop
By following these steps, you can ensure accurate colors and well-balanced real estate photos.
The Real Estate Photography
Business Systems You Need
PhotoUp is the ultimate real estate photographer business platform.

4. Correct Perspective & Clean Reflections
As a real estate photographer, numerous challenges arise and can throw off the balance of your photo.
Correcting perspective will help enhance the overall appearance of a property by making it look more realistic and visually appealing.
In other words, matching lighting isn’t just about brightness—it’s also about clarity and realism.
Here’s what to do:
- Use the Lens Correction Tool in Photoshop or Lightroom to fix distorted windows or angled walls
- Remove glare or reflections on windows using the Clone Stamp Tool or the Content-Aware Fill feature
Editing tips: Clean looks build trust. An overexposed window with reflections feels lazy or artificial—editing helps your photos stay clean and high-end.
For more details, check out our guide on how to correct perspectives in Photoshop.
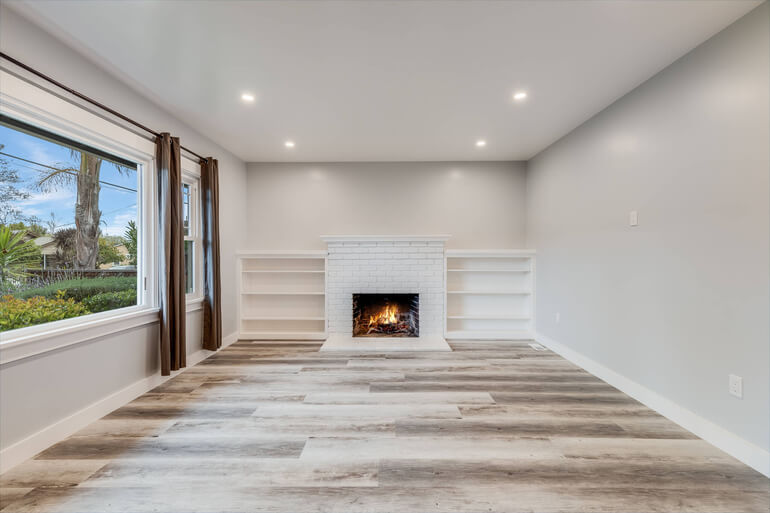
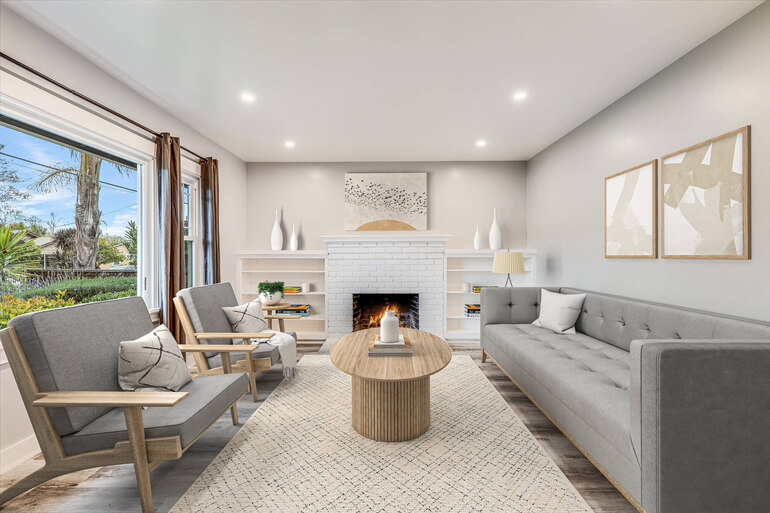
5. Simulate a Day-to-Dusk Conversion (Optional)
If matching lighting proves difficult or your window view isn’t visually appealing, consider converting the shot into a twilight scene.
Twilight photography, which captures properties during the golden hour, increases showings by 3x times and views by 76%.
That’s quite an impactful increase in showings and views from performing this edit!
Here’s the day-to-dusk conversion process in short:
- Replace bright window views with a dusk sky
- Adjust indoor lighting to appear warm and inviting
- Add realistic glow effects on interior lights and windows
- Replace dull skies with dramatic ones using romantic purple and orange hues
Editing tip: This technique, known as day-to-dusk editing, is especially effective for high-end listings or homes with outdoor amenities.
To learn this powerful editing technique, check out our tutorial on how to edit day-to-dusk photos.
And that’s it!
These real estate photo editing techniques will help you create well-balanced interior and exterior lighting in your listing photos.
While it’s tempting to make every photo look like a magazine cover, over-editing can break buyer trust.
Remember that the goal of matching interior and exterior lighting is to maintain a natural, appealing, and believable representation of the property.
Now, let’s take a look at some photo editing software to help you perform these edits.
🔧 Photo Editing Tools
Here are some go-to tools and software solutions for matching lighting in your real estate photo edits:
| Tool | Purpose |
| Adobe Lightroom | Bracket blending, global color correction |
| Adobe Photoshop | Manual window masking, color, and exposure adjustments |
| Photomatix | Automatic HDR merging |
| Aurora HDR | Easy HDR tone mapping |
| PhotoUp | Professional real estate photo editing, starting at $1.50/image |
✅Bonus Tips for Perfectly Balanced Images
Matching lighting between interiors and exteriors is a game-changer for real estate photographers and agents alike.
Whether you’re blending exposures manually or using HDR tools, the result should always feel natural, cohesive, and professional.
Here are some bonus tips to achieve perfectly balanced images:
- Shoot with a tripod to avoid camera shakes and ensure bracketed exposures align perfectly
- Turn off some interior lights to reduce yellow casts
- Avoid extreme contrast scenes during midday; shoot during golden hour if possible
- Use flash sparingly—only when you know how to balance it with ambient light
If you’re short on time or unsure how to handle post-processing, outsourcing to a professional editing service like PhotoUp can save hours and help ensure your listings look consistently polished and high-converting.
Have You Ever Thought To
Outsource Photo Editing?
Try it today with 5 free edits from three professional photo editors.
🚀 Ready to Take Your Real Estate Photos to the Next Level?
Need help editing? PhotoUp’s real estate photo editing service is fast, affordable, and will help you take your property photos to the next level.
Our team of professional photo editors can help you with the following edits:
- Exposure and color correction
- Advanced object removal
- Perspective correction
- Noise reduction and image sharpening
- Lawn greening and landscape enhancement
- HDR editing
- Manual blending
- Panorama stitching
- Flambient editing
- And much more!
We can help you with any type of editing, no matter how small or large, or complex, with a fast turnaround time of 12-24 hours.
Browse Top Dedicated
Real Estate Photo Editors
Ready-to-hire editors for real estate photo editing, and more.
Why Choose PhotoUp?
Here are some reasons why you should consider outsourcing your editing to PhotoUp:
✔ Affordable Pricing – Starting at just $1.50 per image for on-demand editing, PhotoUp provides budget-friendly editing solutions for real estate professionals.
✔ Fast Turnaround Times – Get professionally edited images back in less than 24 hours, ensuring quick and efficient marketing.
✔ Advanced Editing Techniques – From virtual staging and sky replacements to twilight conversions and HDR blending, PhotoUp offers a wide range of editing services tailored to real estate photography.
✔ User-Friendly Platform – Easily upload images, manage orders, and provide feedback through PhotoUp’s intuitive online system.
✔ Dedicated Support – PhotoUp’s team of expert editors and customer service professionals ensures high-quality results and personalized service.
✔ Access to Dedicated Editing – With a Dedicated Editor, you get access to an editor or team of editors who are 100% dedicated to your business and learn your style. This ensures maximum image consistency, which can help you improve your brand.
Wait! There are more reasons to choose PhotoUp…
Real Estate Marketing Ecosystem
Furthermore, PhotoUp has built an entire ecosystem around real estate photography. We also offer other powerful marketing services like:
We have everything you need to enhance and market real estate photography in one user-friendly software!
How to Get Started
If you’re wondering how to get started with PhotoUp, it’s super easy!
Here’s all you need to do:
Step 1. Sign up for a free PhotoUp account.
Step 2. Upload your photos to our easy-to-use software.
Step 3. Choose the level of editing that you need and provide instructions (optional).
Step 4. Wait for PhotoUp professional editors to edit and return the photos in less than 24 hours (48 hours for virtual staging).
Step 5. Download and start using your beautifully edited photos.
As simple as that!
Sign up for a free PhotoUp account today and take your real estate photos to the next level!
For a limited time, you’ll receive a bonus of 10 free credits you can use on any of our services when signing up for an account.
We hope this blog post helped you learn how to match interior and exterior lighting in real estate photo editing. Before you go, you may also want to check out the following resources:

