


Table of Contents
- Why Guiding the Viewer’s Gaze Is Essential
- The Psychology Behind Visual Flow in Real Estate Photos
- How to Edit Photos to Guide the Viewer’s Gaze (10 Techniques)
- Let PhotoUp Help Guide the Viewer’s Gaze
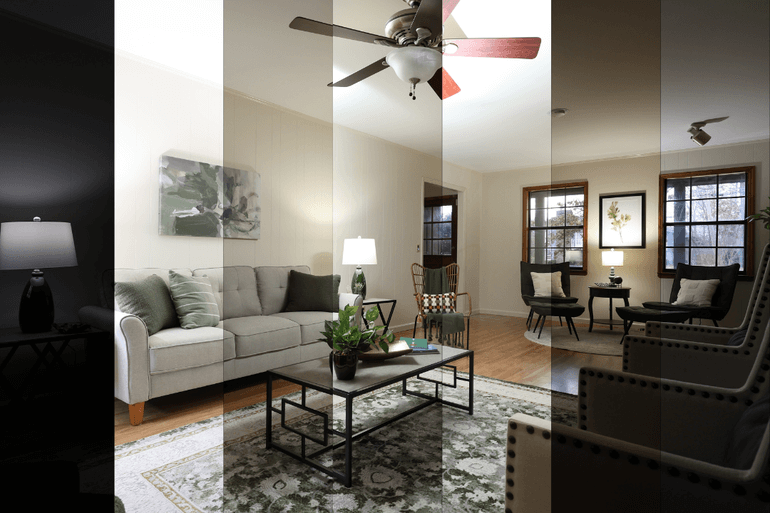
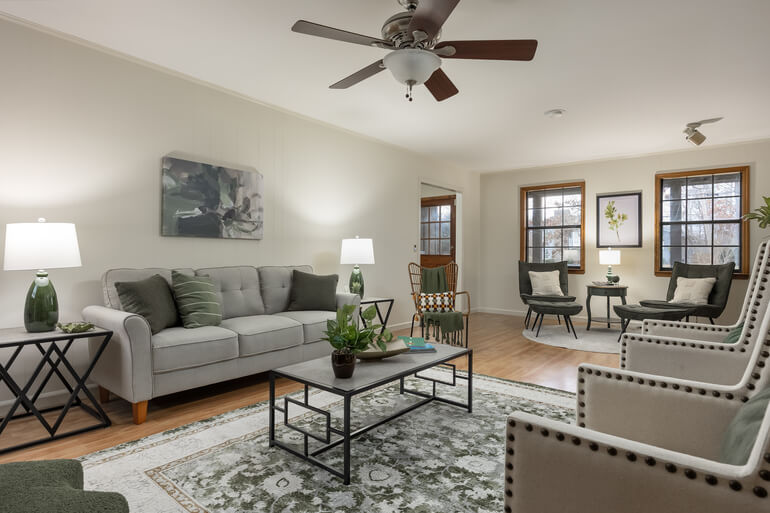
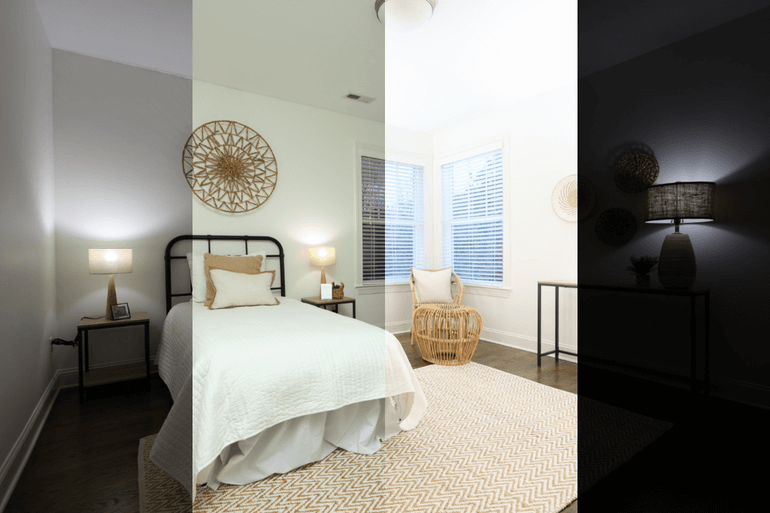
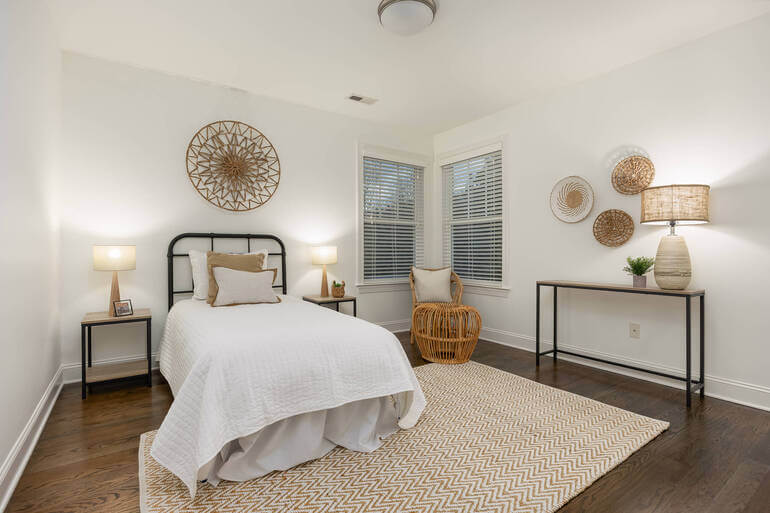
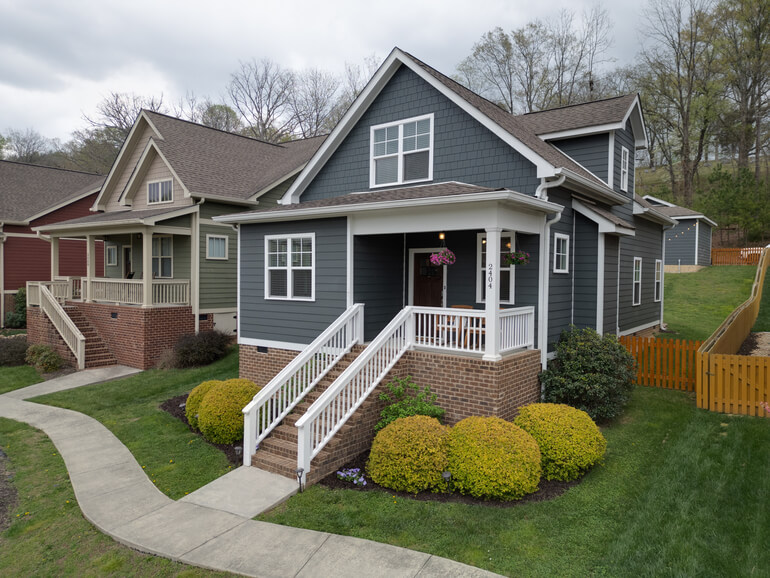
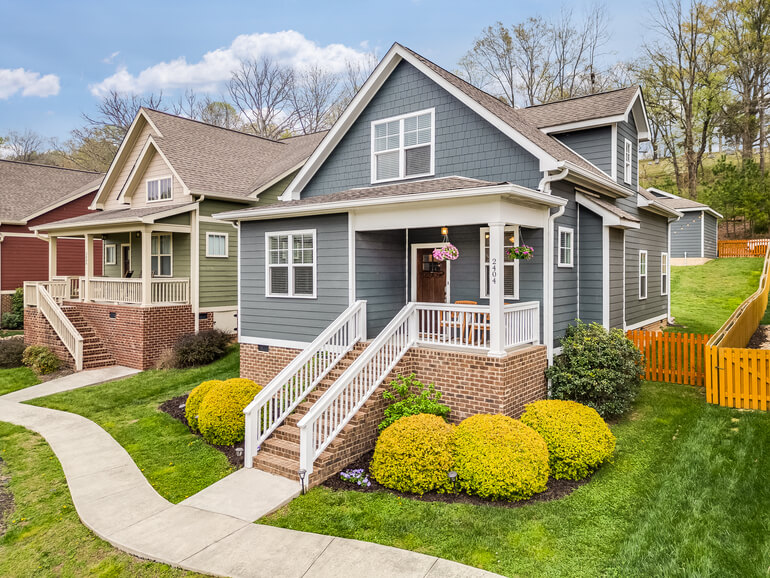
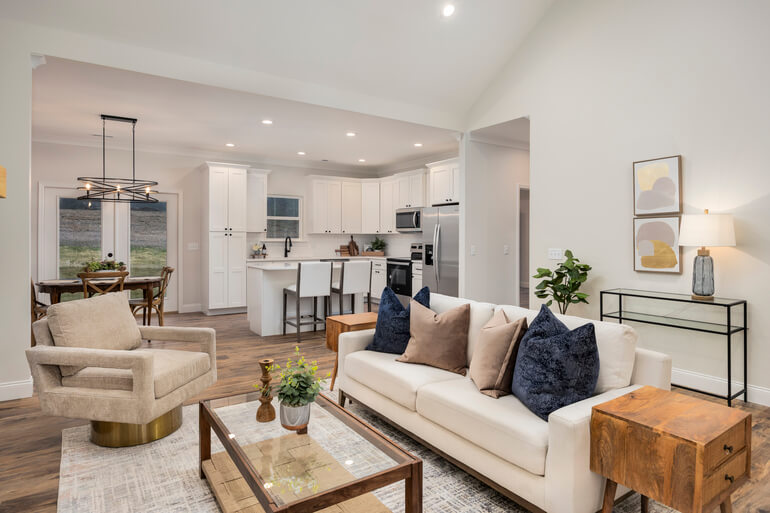
In real estate marketing, your photos aren’t just images—they’re visual storytelling tools that shape a buyer’s emotional reaction the moment they open a listing.
While composition plays a major role, the editing process is where you can truly control how a viewer moves through a scene. By intentionally guiding the viewer’s gaze, you highlight what matters most, reduce distractions, and make each room feel more inviting and memorable.
In this guide, you’ll discover the top real estate photo editing strategies professionals use to influence visual flow, enhance property features, and keep buyers focused on what sells the home.
Let’s begin by taking a look at why guiding the viewer’s gaze is crucial to selling real estate.
Why Guiding the Viewer’s Gaze Is Essential👀
Humans visually scan images in predictable ways—our eyes leap toward the brightest areas, the highest contrast points, and the warmest colors first.
If these aren’t the elements you want buyers to notice, the image loses impact, no matter how beautiful the composition or lighting may be.
Careful real estate photo editing helps you:
- Direct eyes toward key selling points
- Keep attention within the frame
- Reduce meaningless visual noise
- Create an emotional “pathway” through the space
- And encourage buyers to stay longer on the listing
Guiding the viewer’s gaze ensures the viewer never wanders aimlessly around the photo—they follow a path you intentionally created to highlight the home’s strongest features.
The Psychology Behind Visual Flow in Real Estate Photos🧠
Understanding how people visually process images makes editing far more strategic. A few psychological principles drive viewer attention:
• Brightness Draws Focus: The eye naturally jumps to the brightest spot first. If an overexposed window steals attention, the room loses its intended focal point
• Contrast Creates Hierarchy: High-contrast areas pull the gaze instantly; low-contrast areas recede into the background
• Warm vs Cool Colors: Warm tones invite attention. In contrast, cool tones feel distant and non-intrusive
• Leading Lines Shape Direction: Lines created by furniture, flooring, and architecture subtly tell the viewer where to look next
When you understand why certain elements demand attention, you can edit more purposefully—ensuring buyers always see the home in the best possible sequence.
That said, let’s move on to how to actually edit your images so that buyers can’t stop looking at your property photos.
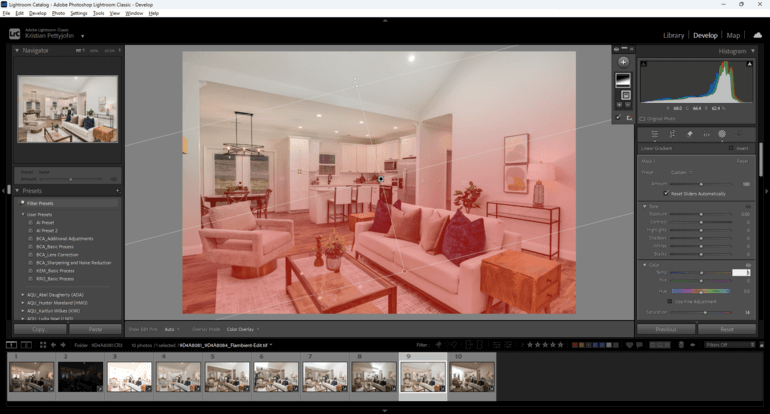
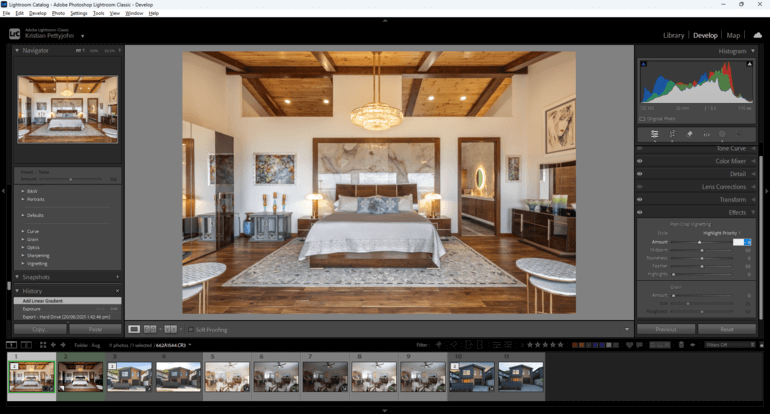
How to Edit Photos to Guide the Viewer’s Gaze (10 Techniques)
Here are the top 10 real estate photo editing techniques professionals use to influence visual flow, enhance property features, and keep buyers focused on what sells the home.
1. Use Exposure to Highlight Key Features🔆
Exposure is one of the simplest yet most powerful tools for directing attention.
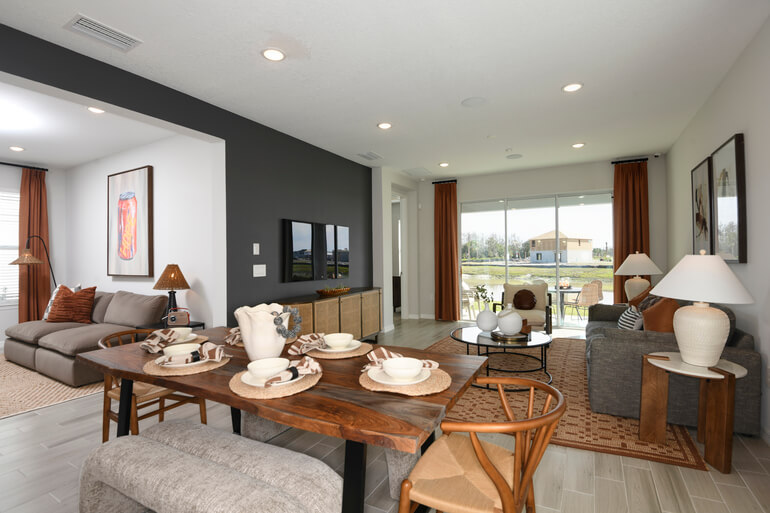
By subtly brightening areas you want buyers to notice first—such as a kitchen island, fireplace, or inviting seating area—you automatically guide the viewer’s eyes toward the focal point.
How to apply:
- Brighten only the most relevant features
- Tame blown-out windows
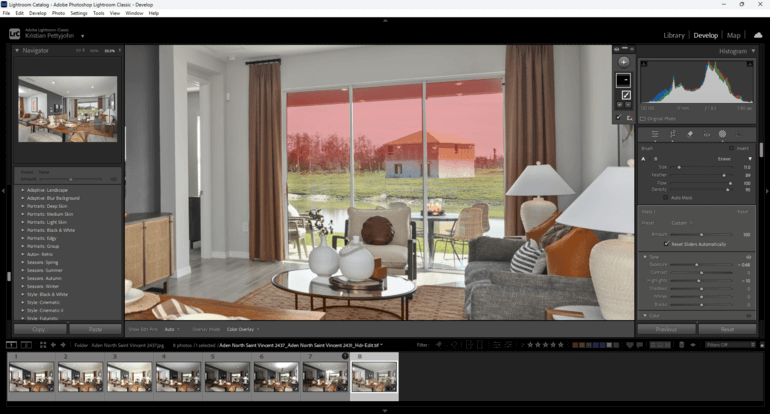
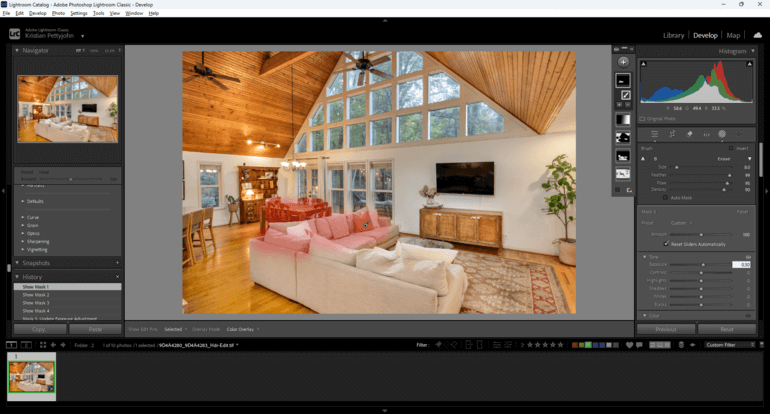
- Use Lightroom local masks to boost specific areas
- Even out the harsh highlights that steal attention
Thoughtful exposure control ensures the brightest, most eye-catching elements are the ones that truly elevate the property.
These tutorials will help you highlight key features with the help of exposure and brightening techniques:
2. Add Selective Contrast to Create Visual Emphasis in Areas You Want to Highlight 🔳
Contrast commands attention, but applying it globally can create visual chaos. Instead, selectively boost contrast in areas you want to stand out.
Where to add contrast:
- Architectural elements
- Beautiful textures like wood and stone
- High-value features such as pendant lights or tilework
Where to reduce it:
- Walls
- Ceilings
- Secondary rooms
By applying contrast intentionally, you help viewers notice exactly what makes the home unique—without overwhelming their eyes.
3. Use Color and Saturation to Guide the Gaze🎨

Color is a magnet for attention, especially warm tones and saturated hues. Subtle color correction creates a visual hierarchy that shapes the viewer’s experience.
Here are some useful tips:
- Boost saturation on desirable features (landscaping, décor, sky)
- Tone down colors in distracting or cluttered areas
- Add warmth to key spaces to draw the gaze
- Cool down non-essential corners or background rooms
Color is one of your strongest tools—use it to signal exactly where the viewer should look first.
To learn how to create captivating yet balanced colors in your images, check out our guide on how to color correct in Photoshop.
Have You Ever Thought To
Outsource Photo Editing?
Try it today with 5 free edits from three professional photo editors.

4. Apply a Soft Vignette for Visual Centering🌓
A gentle vignette darkens the outer edges of an image just enough to push attention toward the center, improving visual flow without looking over-processed.
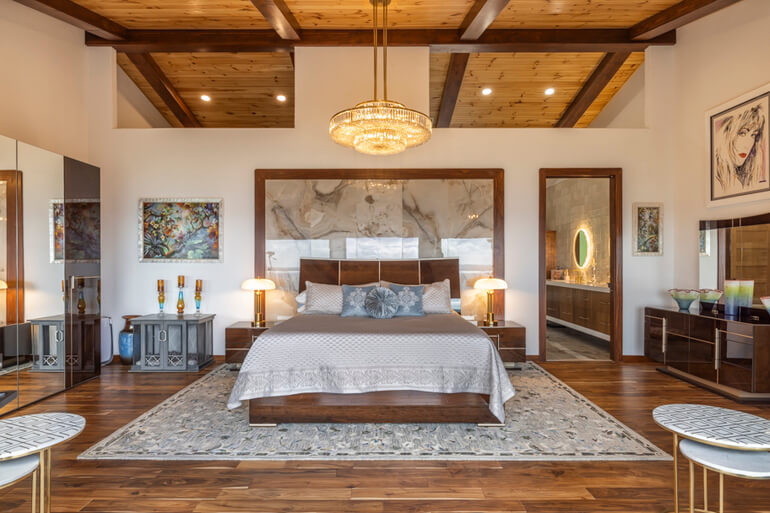
Best uses:
- Living room wide shots
- Bedroom hero images
- Exterior photos with centered composition
Avoid heavy or obvious vignettes—they feel unnatural and distract from the space. A subtle vignette quietly guides the eye inward and keeps the viewer focused on the heart of the scene.
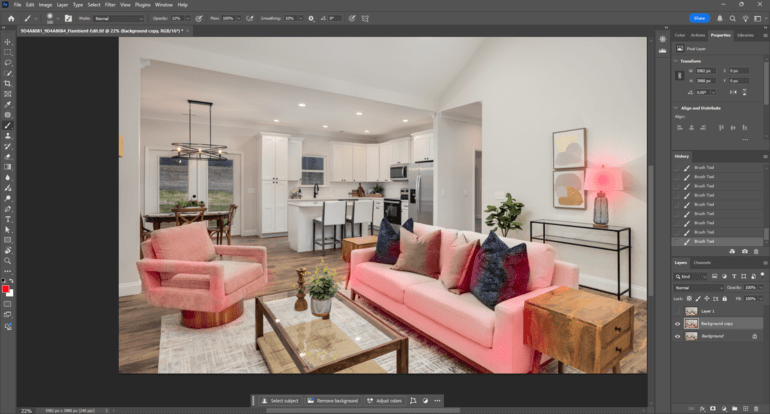
5. Remove Distractions to Keep Attention on What Matters🧹
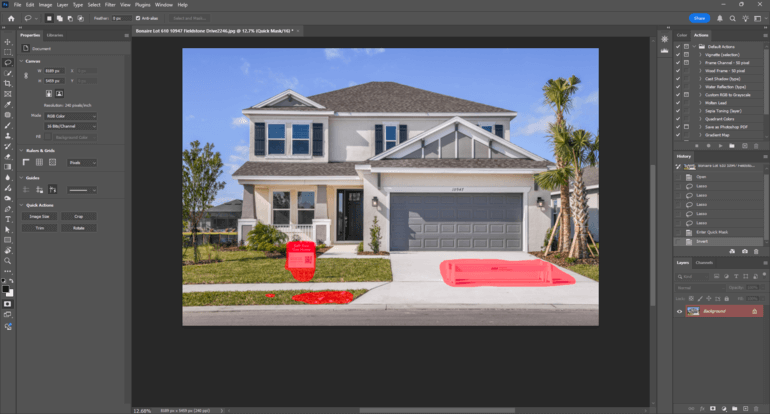
Nothing disrupts visual flow faster than clutter. Even small items—wires, magnets, mismatched décor, reflections—can derail the eye and pull attention away from the room’s best features.
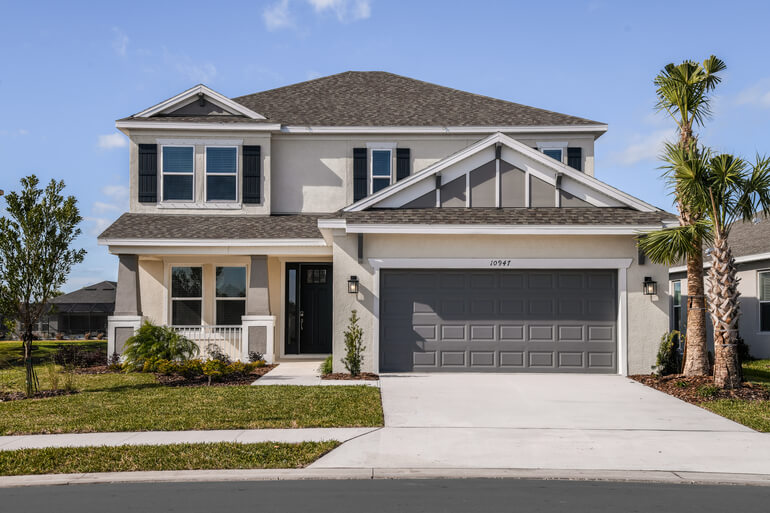
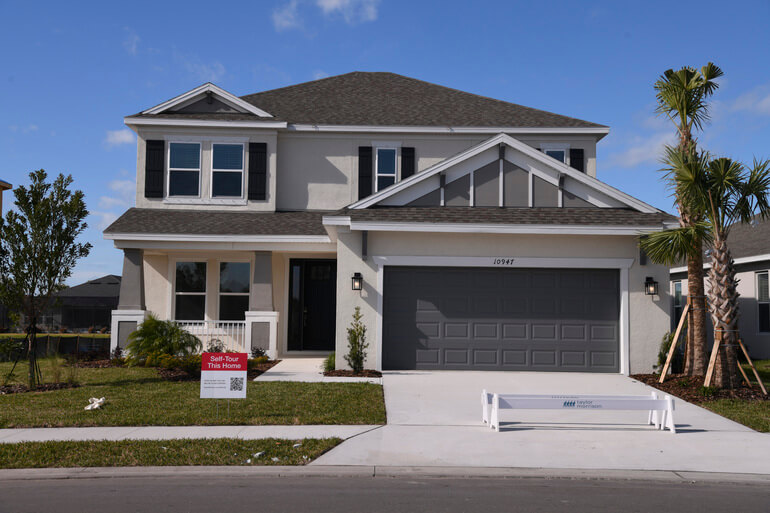
Clean up your images by removing these distractions:
- Cords, objects, and personal items
- Wall marks or outlet plates
- Refrigerator clutter
- Distracting reflections
- Outdoor debris or lawn imperfections
A clean, uncluttered image creates uninterrupted visual flow and ensures the viewer’s attention stays where it belongs.
To learn how to declutter images, you can visit our guide on how to edit objects out of a photo in Photoshop.
6. Use Sharpening and Texture Control Strategically🔍
Sharpness naturally attracts the eye, while soft areas gently fade into the background.
Where to sharpen:
- Key furniture pieces
- Architectural textures
- Center-of-frame details
Where to soften:
- Ceilings and far corners
- Secondary hallways
- Background elements
Strategic sharpening shapes depth and directs attention without the viewer ever realizing why the image feels so balanced.
For more details on how to sharpen your images, check out these two tutorials:
7. Sculpt Light With Dodging and Burning💡
Dodging (brightening) and burning (darkening) allow you to “paint” light and shadow to sculpt the viewer’s visual pathway.
Dodge:
- Seating areas
- Focal décor
- Walkway paths through rooms
- And highlights that suggest openness
Burn:
- Ceilings
- Overly bright walls
- Shadows that distract
- And corners with unnecessary contrast
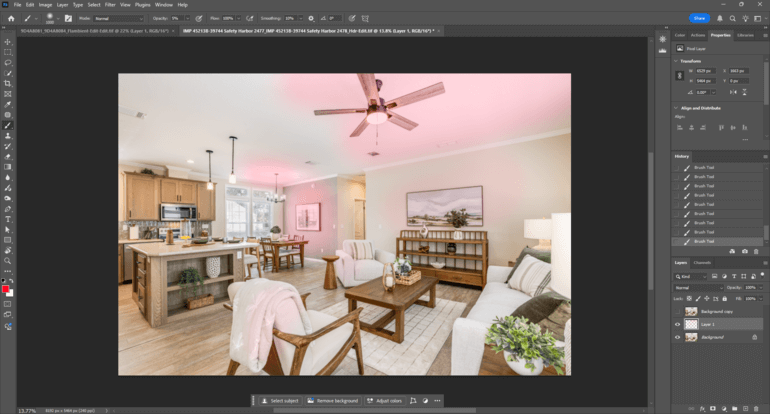
Dodging and burning give you the power to manually shape visual flow, guiding buyers through the image step-by-step.
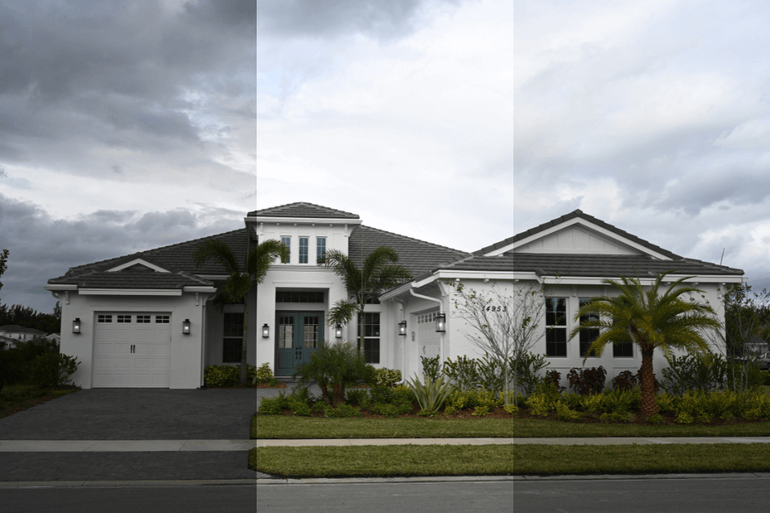
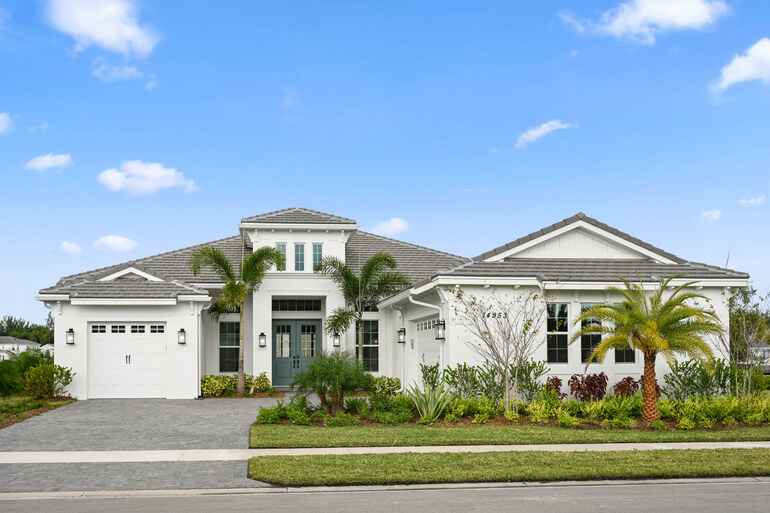
8. Correct Perspective and Refine Composition
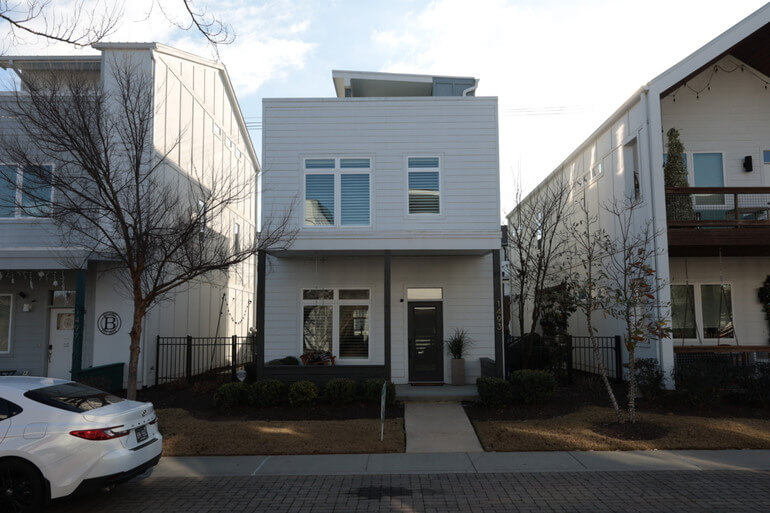
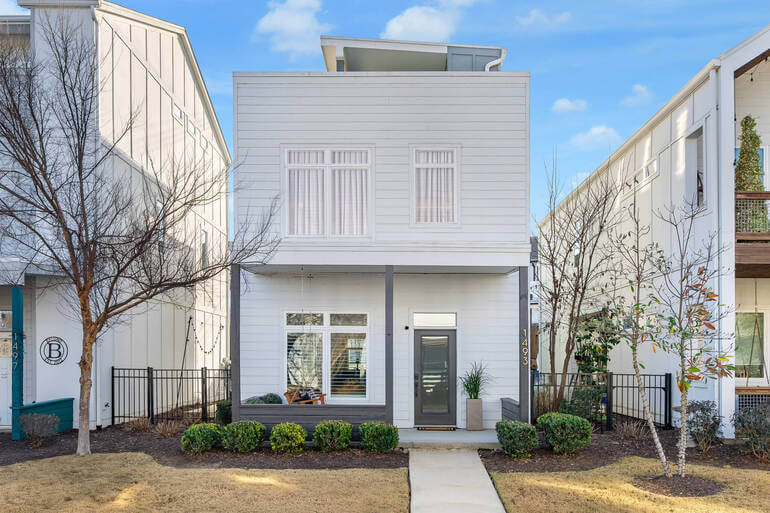
Even with great camera work, perspective sometimes needs refinement. Proper verticals and balanced cropping keep the viewer from feeling visually “tilted” or overwhelmed.
Here are key real estate photo editing steps to follow:
- Straighten verticals
- Remove lens distortion
- Crop to emphasize the room’s main anchor
- Center important elements using the rule of thirds
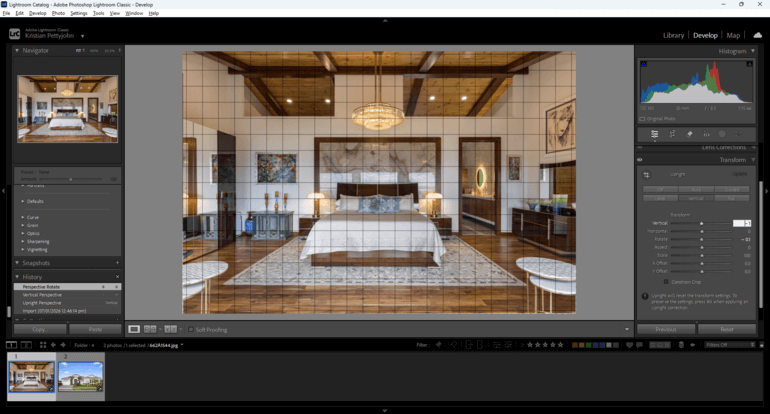

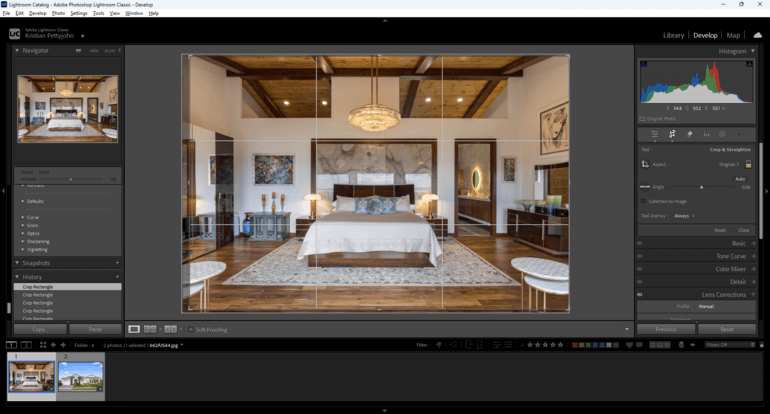
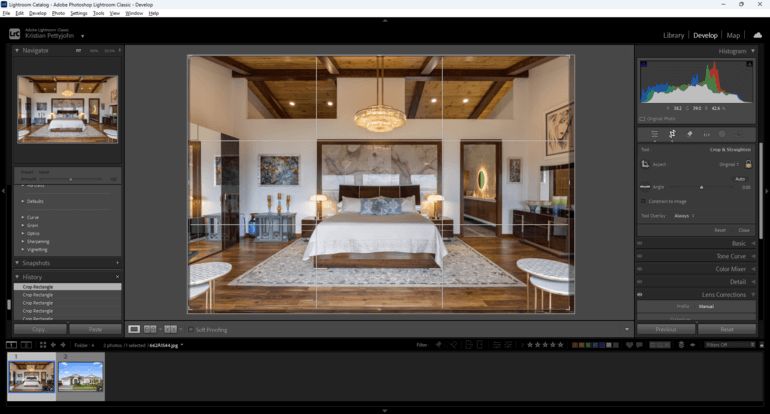
A properly aligned photo feels calm, clean, and professional—allowing the viewer’s eyes to glide exactly where you want them to.
To learn how to adjust horizontal and vertical lines, as well as lens distortion in your real estate photos, you can check out our guides:
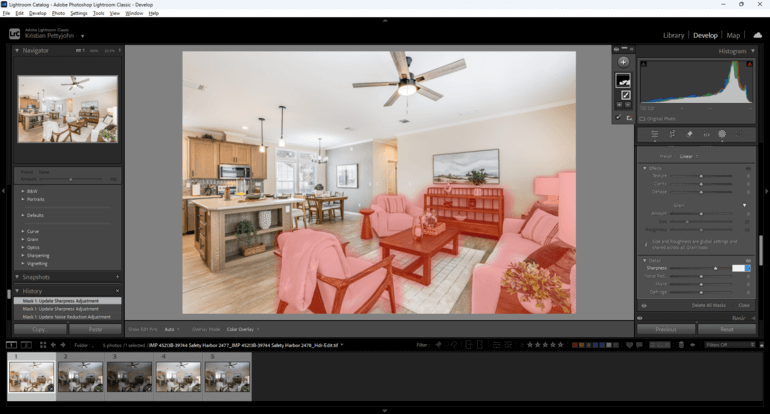
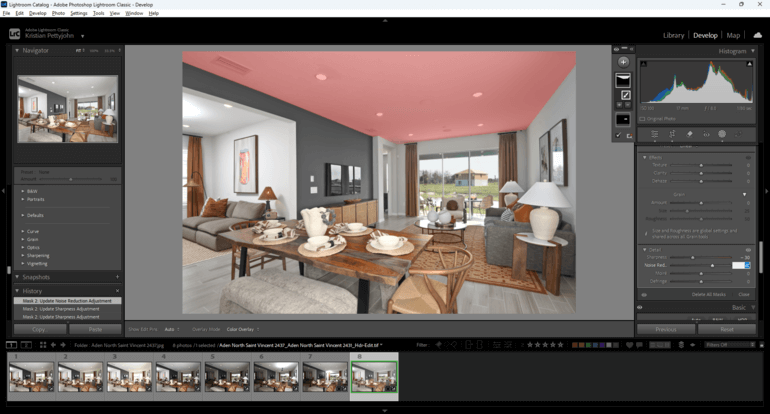
9: Use Local Masks and Radial Gradients for Precision Focus🎯
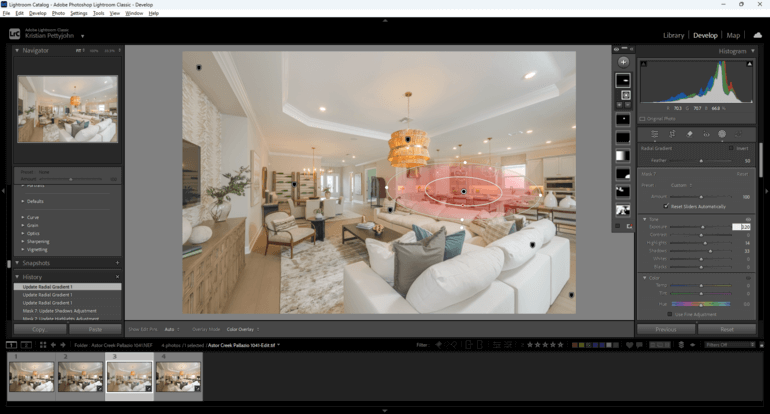
Local masks and radial gradients are the secret weapons of gaze-directed editing. They create smooth, natural emphasis on specific features.
Use local masks to enhance:
- A kitchen island
- A reading nook
- A living room seating zone
- A bathroom tub or shower
Radial gradients work like invisible spotlights, gently leading the viewer to the most important part of each room.
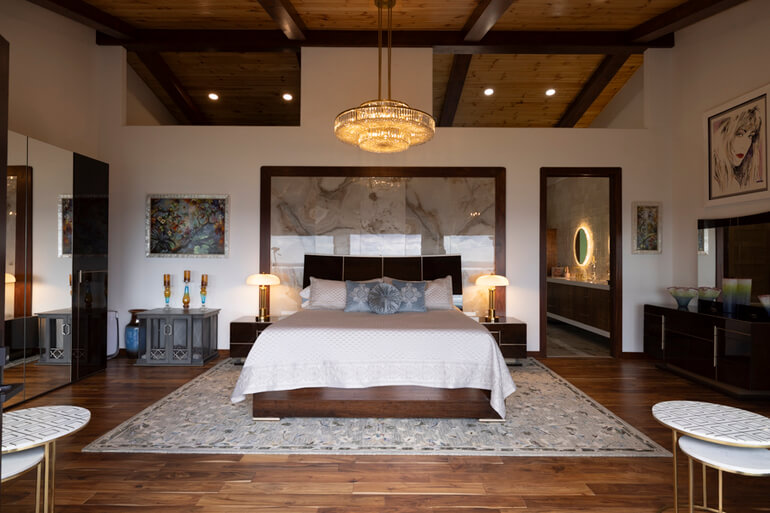
10. Advanced Techniques for Luxury Listings👑
Luxury homes benefit from elevated editing strategies that subtly increase depth, richness, and emotional appeal.
Here are some advanced real estate photo editing methods to consider:
- HSL targeting for color precision
- Micro-dodging to enhance fine detail
- Glow enhancement on light fixtures
- And depth mapping for the atmospheric dimension
Premium editing reinforces the luxury experience by directing attention in a way that feels elegant, intentional, and effortless.
With this in mind, let’s take a look at some common mistakes that can break visual flow.
Common Mistakes That Break Visual Flow❌
Even minor editing mistakes can disrupt how a viewer experiences the scene. To ensure visual flow, you should avoid:
- Oversaturated colors
- Harsh HDR that flattens depth
- Strong or obvious vignettes
- Over-sharpened edges
- Uneven color temperatures
- And bright windows overpowering interiors
Avoiding these pitfalls ensures your editing guides the eye gracefully, without calling attention to the edits themselves.
Conclusion
Mastering gaze-guided editing transforms every image into a purposeful visual journey.
By controlling exposure, contrast, color, depth, and distractions, you’re not just polishing photos—you’re designing how buyers experience a space the moment they see it.
Guiding the viewer’s gaze through intentional editing turns ordinary images into compelling storytelling tools—and ultimately helps sell more homes.
Have You Ever Thought To
Outsource Photo Editing?
Try it today with 5 free edits from three professional photo editors.
Let PhotoUp Help Guide the Viewer’s Gaze🙋♂️
If you’d like help creating images that naturally guide attention and elevate your listings, PhotoUp’s expert editors are ready to optimize your photos with clean visual flow, balanced lighting, and distraction-free polish.
Our skilled real estate photo editors work quickly to transform RAW photos into stunning marketing assets that make listings stand out, including:
- Adjusting improper exposure and lighting
- Correcting harsh shadows or dark, poorly lit areas
- Sharpening blurry images taken without a tripod
- Cropping and adding effects to enhance composition
- Lawn greening and realistic sky replacements
- Twilight and day-to-dusk conversions for dramatic exterior shots
- Manual blending and panoramic stitching
- Clutter removal and advanced object editing
- Straightening lines and correcting angles
- And much more!
Browse Top Dedicated
Real Estate Photo Editors
Ready-to-hire editors for real estate photo editing, and more.
With pricing starting as low as $1.50 per image, PhotoUp combines exceptional quality, reliable service, and unbeatable value.
This makes our editing service one of the smartest investments for real estate professionals looking to streamline their workflow and boost their listings.
And there’s more…
A One-Stop Shop for Real Estate Marketing

In addition to editing, PhotoUp is a complete one-stop shop for real estate marketing and also offers additional services such as:
We have everything you need to create impressive real estate photography that will impress clients and sell listings faster at higher rates!
How to Get Started
Our user-friendly platform lets you upload, review, and approve edits seamlessly, giving you more control over the final product while saving time and money.
Getting started is super easy – this is what to do:
Step 1. Sign up for a free PhotoUp account.
Step 2. Upload your photos to our easy-to-use software.
Step 3. Choose the level of editing that you need and provide instructions (optional).
Step 4. Wait for PhotoUp professional editors to edit and return the photos in less than 24 hours (48 hours for virtual staging).
Step 5. Download and start using your beautifully edited photos.
PhotoUp Real Estate Photo Editing Uploader Tutorial
To see how easy it is to get started with PhotoUp, check out our real estate photo editing uploader tutorial:
As simple as that!
Sign up for a free PhotoUp account and let our professional editors help guide the viewer’s gaze in your real estate photos and accelerate sales!
For a limited time, you’ll receive a bonus of 10 free credits you can use on any of our services when signing up for an account.
We hope this blog post helped you learn how to edit to guide the viewer’s gaze in real estate photo editing. Before you go, you may also want to check out the following resources:
- Mastering Interior Photo Editing: 10 Powerful Techniques
- Quickly Enhance the Inside of Your Home With Interior Photo Editing
- The #1 Edit to Create Stunning Real Estate Photos
- The Power of Visual Appeal to Skyrocket Real Estate Sales
- 8 Secret Real Estate Photo Editing Tricks for Breathtaking Listings

