


Table of Contents
- Why Enhancing “Bad Weather” Photos Drives Better Results
- How to Edit Real Estate Photos for “Bad Weather” Markets
- Editing Bad Weather FAQ
- Saving Any Weather-Challenged Photoshoot With PhotoUp
Bad weather is a common challenge in real estate photography. Overcast skies, rain, winter gloom, and flat lighting can diminish a property’s warmth and curb appeal—even when the home is in great condition.
In fast-moving markets where buyers decide in seconds, dull photos can reduce clicks and showings. Fortunately, poor weather doesn’t have to hurt your marketing.
In this article, we’ll show you how to turn weather-affected images into bright, inviting visuals that keep listings competitive and appealing—without misrepresenting the property.
Let’s begin by taking a look at why enhancing “bad weather” photos drives better results in real estate.
Why Enhancing “Bad Weather” Photos Drives Better Results🌧️
Before diving into specific editing techniques, it’s important to understand why weather enhancement works.
Buyers don’t just analyze photos logically; they respond emotionally. According to NAR, 85% of homebuyers consider photos the most critical factor when evaluating a property online.
And dark skies, dull colors, and wet surroundings can subconsciously signal discomfort, neglect, or inconvenience, even when none of those things are true.
By professionally enhancing photos taken in less-than-ideal conditions, listings immediately feel more welcoming and polished.
Brighter images stand out in search results, attract more attention online, and help buyers imagine themselves enjoying the property—rather than focusing on the weather present during the shoot.
This is especially valuable in regions where gray skies, rain, or snow dominate large portions of the year.
How to Edit Real Estate Photos for “Bad Weather” Markets
With the emotional aspects of weather in mind, let’s move on to show you how to edit real estate photos for “bad weather” markets using 6 editing tips:
1. Laying the Foundation With Exposure and Color Correction🌈
Once you’ve established the value of enhancement, the first step is always correcting the basics.
Bad weather often creates flat contrast, muted tones, and cool color casts that make properties look lifeless.
Adjusting exposure helps bring clarity back into shadowed areas without blowing out highlights.
Correcting white balance ensures that grays don’t skew blue or green, while subtle contrast adjustments restore depth and definition.
These foundational edits set the stage for more advanced enhancements and often make a dramatic difference on their own.
These tutorials will help you lay the foundation with the help of color, exposure and brightening techniques:
- How to Adjust White Balance in Photoshop
- How to Color Correct in Photoshop
- How to Change Exposure in Photoshop
- How to Brighten a Photo in Photoshop
From here, the image begins to feel intentional rather than weather-compromised, preparing it for further refinement.
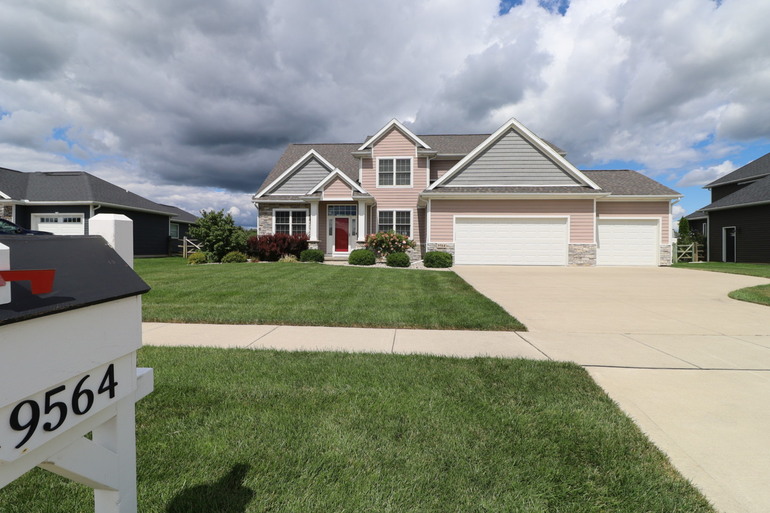
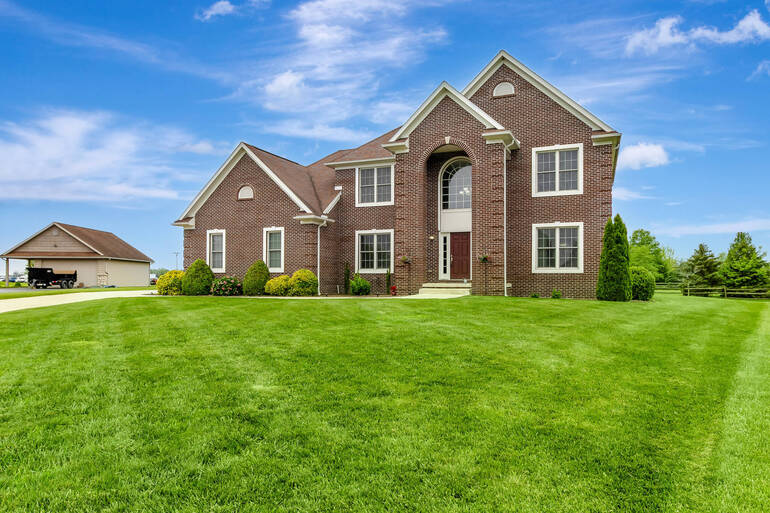
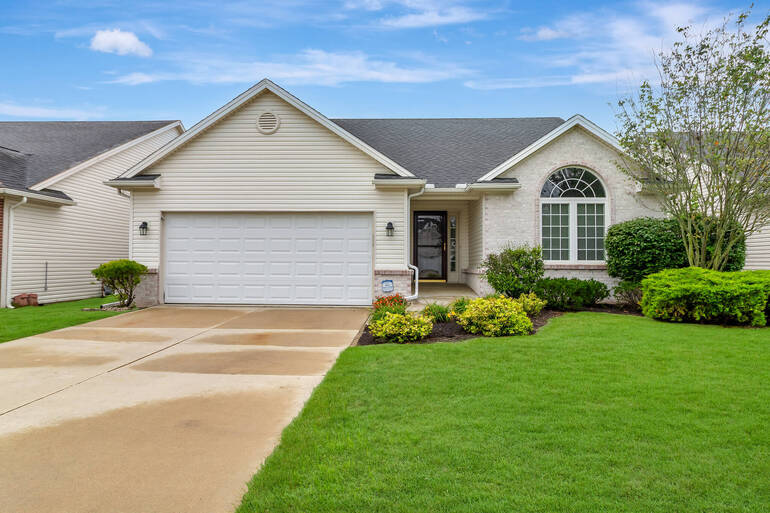
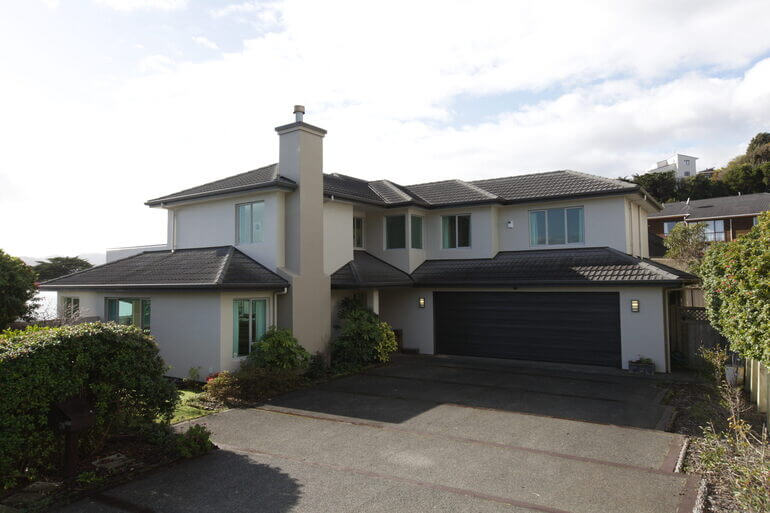
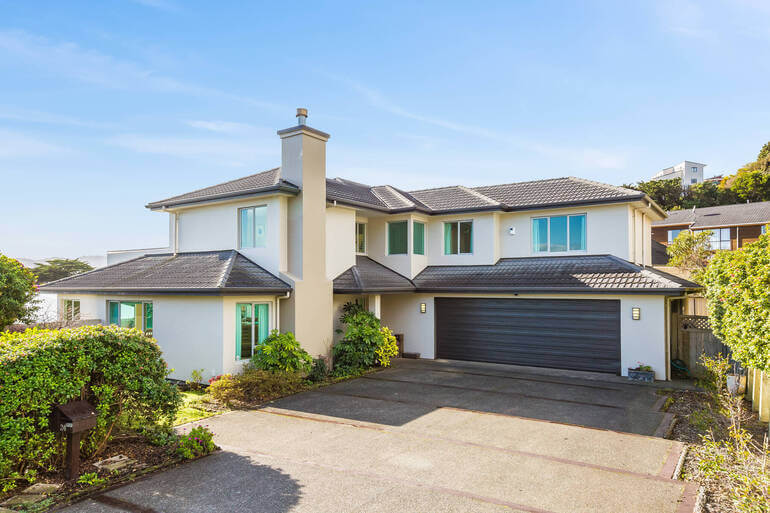
2. Using Sky Replacement to Restore Mood and Balance in Your Images🌤️
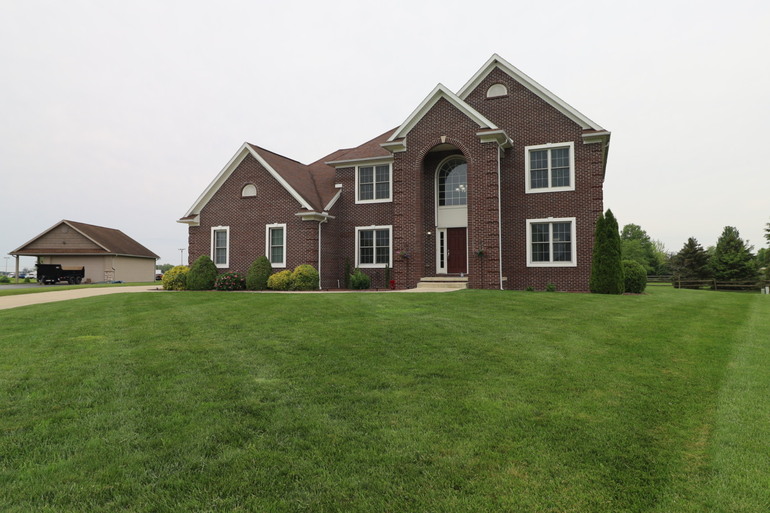
With exposure and color dialed in, the next challenge is often the sky. Overcast or washed-out skies can dominate exterior photos, flattening the scene and pulling attention away from the home itself.
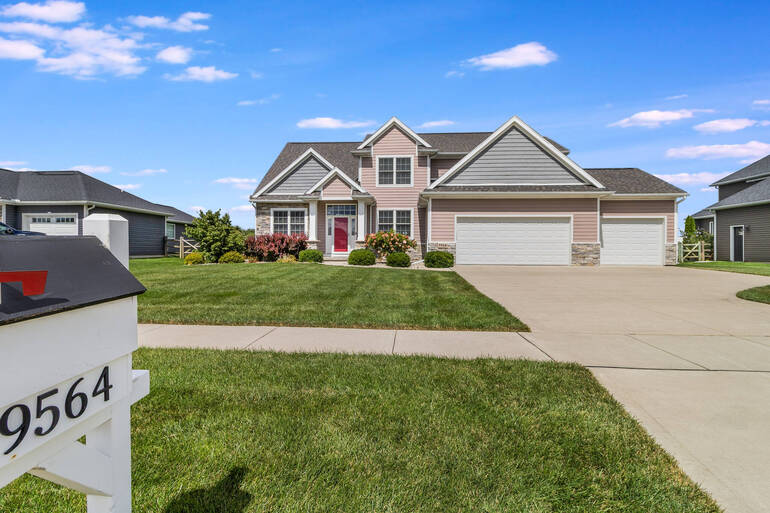
Sky replacement allows you to swap dull skies for natural, realistic alternatives that better reflect how buyers expect a property to look.
When done correctly, this technique restores balance and visual interest without appearing artificial.
Choosing skies that match the original lighting direction and overall brightness is essential to maintaining authenticity.
Rather than creating drama, sky replacement should simply remove distractions and let the property shine as the focal point of the image.
To learn how to create the perfect sky, check out our blog post on what’s allowed when making a sky replacement in Photoshop.
3. Creating Warmth and Emotional Appeal With Day-to-Dusk Conversions🌅
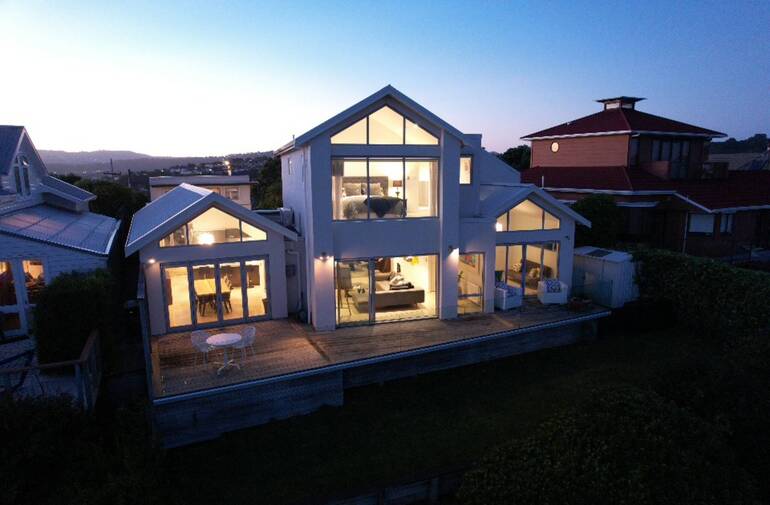
In markets where cloudy afternoons or rain ruin the chance for twilight photography, day-to-dusk conversions offer a powerful alternative. In fact, they can increase views by 76% according to ajcaruso.
By transforming daytime images into soft twilight scenes, you can shift the emotional tone of a listing entirely.
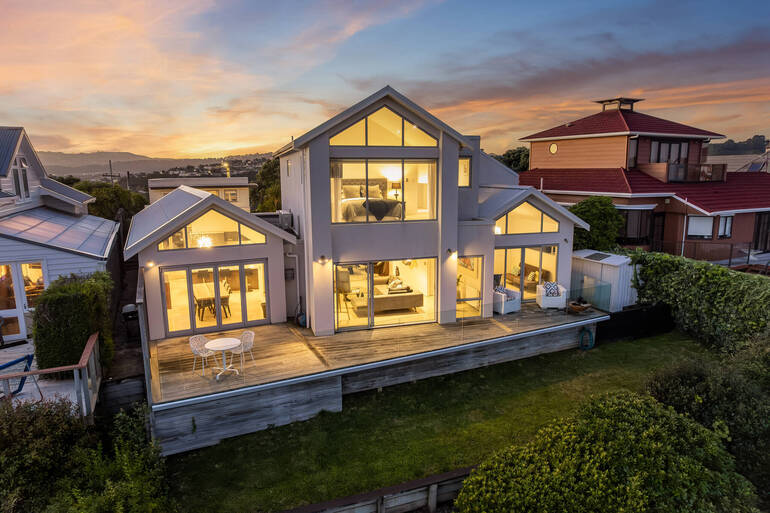
This technique works especially well in bad-weather situations because it minimizes attention on gloomy skies and replaces them with warm, evening tones.
Subtle interior lighting, gentle sky gradients, and balanced contrast create a sense of comfort and elegance that resonates strongly with buyers.
When executed with restraint, day-to-dusk conversions add sophistication and visual impact without feeling staged or exaggerated.
For more details and a step-by-step tutorial, check out our guide on day-to-dusk conversions: the magic of twilight photo editing.
Have You Ever Thought To
Outsource Photo Editing?
Try it today with 5 free edits from three professional photo editors.

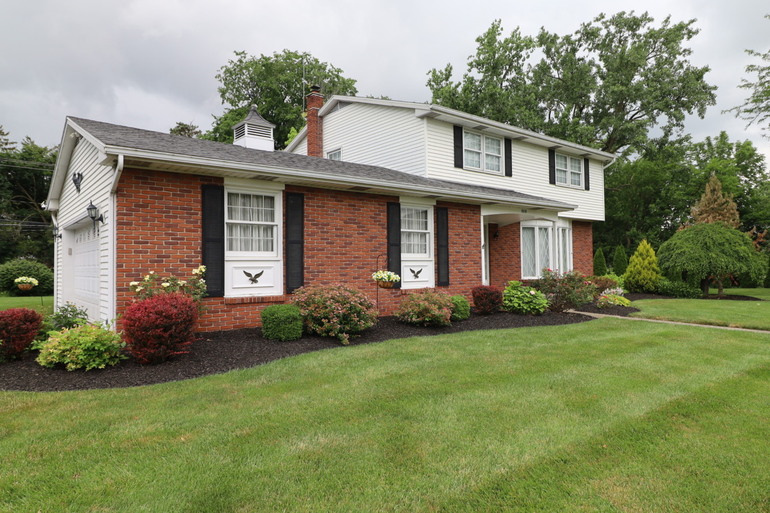
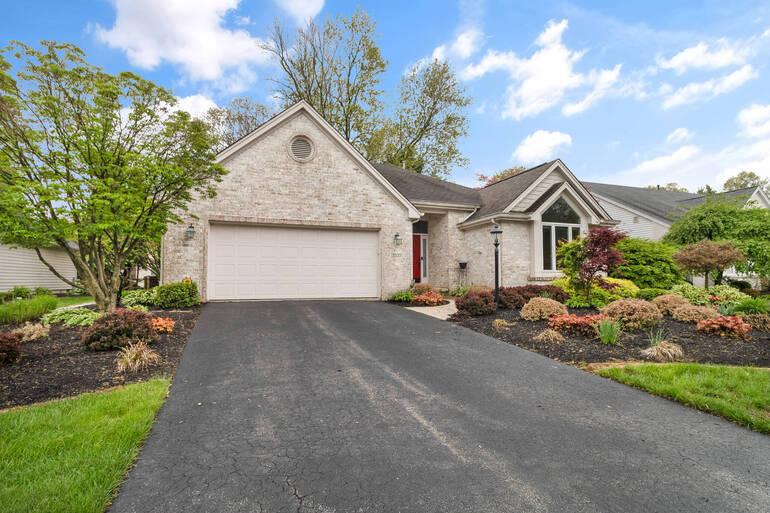
4. Enhancing Lawns When Weather Takes a Toll on the Landscaping🏘️

Weather doesn’t just affect the sky—it often takes a toll on landscaping as well. Rain can leave lawns patchy or muddy, while winter conditions may drain the grass of color altogether.
Unfortunately, poor curb appeal can overshadow an otherwise beautiful home.
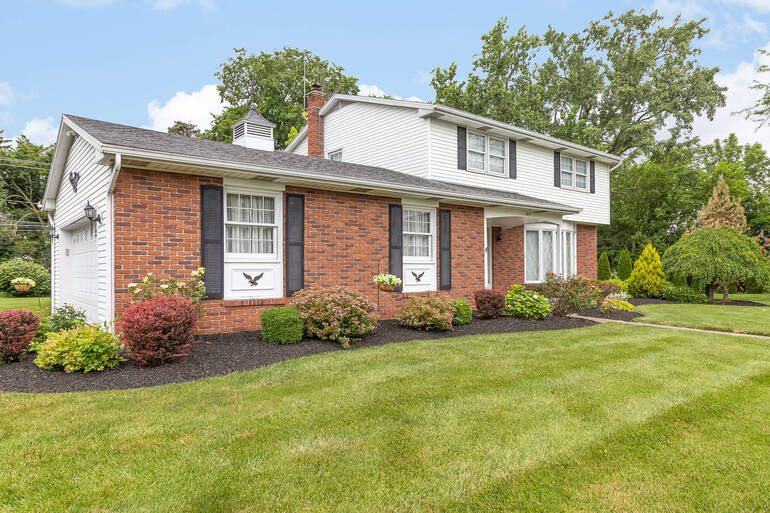
Lawn enhancement helps restore healthy, natural-looking greenery by evening out color and improving overall texture.
The goal is never to create unrealistic vibrancy, but rather to reflect how the property would appear with routine maintenance under normal conditions.
This subtle improvement plays a major role in making exteriors feel well cared for and market-ready.
To learn how to create an inviting lawn, you can visit our guide on how to create a green, lush lawn in Photoshop and boost curb appeal.
5. Addressing Rain, Snow, and Seasonal Challenges Thoughtfully❄️
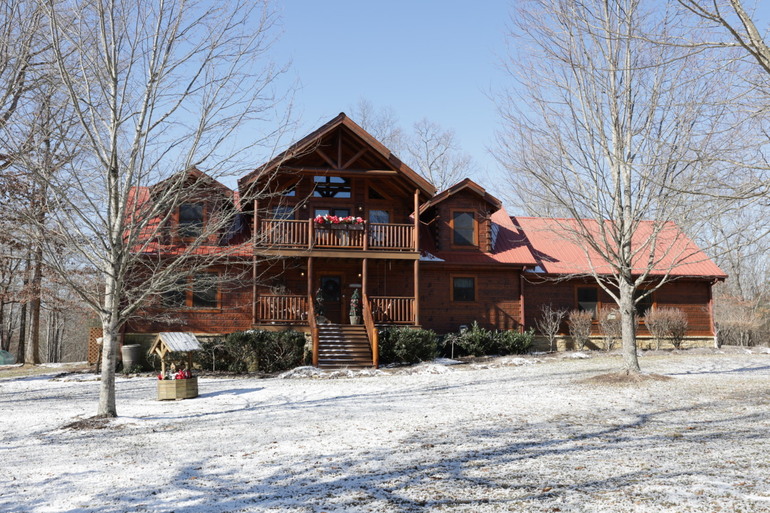
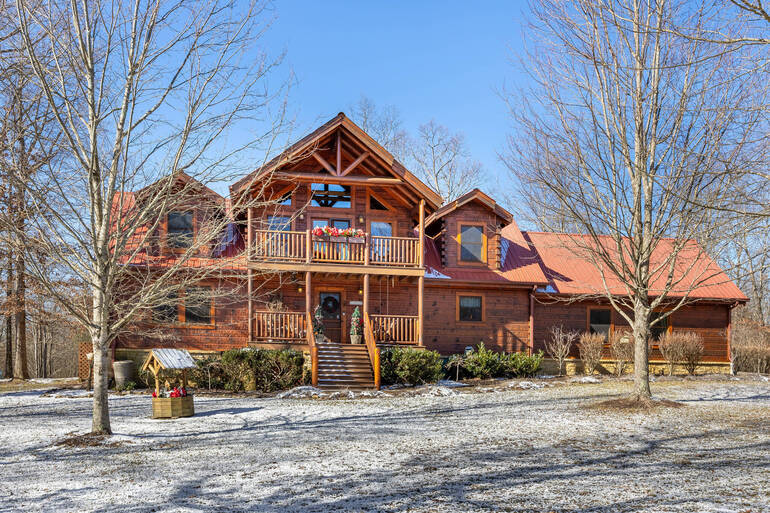
Beyond skies and lawns, certain weather conditions require targeted adjustments. Rainy scenes may benefit from reduced glare on pavement and brighter facades.
Snowy images often need careful color correction to keep whites clean without losing detail. Fog or haze may require gentle clarity adjustments to improve visibility without introducing harsh edges.
Each of these edits should be approached conservatively. The objective is to improve clarity and presentation while preserving accurate representation, ensuring buyers feel confident when they arrive in person.
6. Maintaining Trust Through Realistic Editing🖼️

As enhancements add up, it becomes increasingly important to maintain restraint. Over-editing can quickly cross the line from improvement to misrepresentation, risking damage to buyer trust.
Avoid overly dramatic skies, excessive saturation, or contrast levels that alter the true appearance of the home.
Effective bad-weather editing should feel invisible—buyers notice how inviting the property looks, not how much editing was applied.
This balance between enhancement and honesty is what separates professional real estate photo editing from amateur retouching.
Editing Bad Weather FAQ 📚
Why does bad weather affect real estate listing performance?
Overcast skies, rain, or dull lighting can make a property appear less inviting online. Since buyers form quick impressions while scrolling, gloomy images may reduce clicks, showings, and overall interest.
Should I reschedule a photoshoot if the weather is bad?
Not necessarily. In many cases, professional real estate photo editing can enhance weather-affected images, saving you time and keeping your listing on schedule.
Is editing bad-weather photos misleading?
When done correctly, editing enhances clarity, brightness, and mood without altering the property’s actual features. The goal is to present the home accurately under improved visual conditions—not to misrepresent it.
What types of edits help improve bad-weather photos?
Common enhancements include exposure correction, color balancing, sky replacement, day-to-dusk conversions, and lawn enhancement. These adjustments restore warmth and curb appeal while maintaining realism.
Can editing really increase clicks and showings?
Yes! Brighter, more inviting images stand out in search results and create a stronger emotional appeal, which can lead to higher engagement and more buyer interest.
How fast can weather-affected photos be professionally edited?
Turnaround times vary by provider, but many professional real estate photo editing services offer fast delivery—often within 24 hours—so listings can go live without delay.
Let’s introduce you to an industry-leading editing service that can help you enhance your real estate photos in less than 24 hours – PhotoUp.
Have You Ever Thought To
Outsource Photo Editing?
Try it today with 5 free edits from three professional photo editors.
Saving Any Weather-Challenged Photoshoot With PhotoUp🌞


When the weather doesn’t cooperate, having the right editing partner makes all the difference.
PhotoUp specializes in professional real estate photo editing designed to rescue photoshoots impacted by rain, clouds, snow, or dull lighting.
With experienced editors, fast turnaround times, and affordable pricing, PhotoUp can:
- Replace gloomy skies
- Create elegant day-to-dusk conversions
- Enhance lawns
- Correct exposure issues
- And much more!
Best yet, pricing starts as low as $1.50 per image for on-demand editing. Overall, PhotoUp combines exceptional quality, reliable service, and unbeatable value.
This allows photographers and agents to stay on schedule, protect listing quality, and market properties confidently regardless of the forecast.
A Complete Real Estate Marketing Partner

In addition to editing, PhotoUp is a complete one-stop shop for real estate marketing and also offers other powerful services such as:
We have everything you need to create impressive real estate photography that will impress clients and sell listings faster at higher rates!
How to Get Started
Our user-friendly platform lets you upload, review, and approve edits seamlessly, giving you more control over the final product while saving time and money.
Getting started is super easy – this is what to do:
Step 1. Sign up for a free PhotoUp account.
Step 2. Upload your photos to our easy-to-use software.
Step 3. Choose the level of editing that you need and provide instructions (optional).
Step 4. Wait for PhotoUp professional editors to edit and return the photos in less than 24 hours.
Step 5. Download and start using your beautifully edited photos.
PhotoUp Real Estate Photo Editing Uploader Demo
To see how easy it is to get started with PhotoUp, check out our real estate photo editing uploader demo:
As simple as that!
You may not be able to control the weather, but with the right editing strategy, you can always control how your listings are seen—and how well they perform.
Sign up for a free PhotoUp account and let our professional editors help you enhance “bad weather” shots and accelerate sales!
For a limited time, you’ll receive a bonus of 5 free credits you can use on any of our services when signing up for an account.
We hope this blog post helped you learn how to edit real estate photos for “bad weather” markets. Before you go, you may also want to check out the following resources:
- Mastering Interior Photo Editing: 10 Powerful Techniques
- The #1 Edit to Create Stunning Real Estate Photos
- The Power of Visual Appeal to Skyrocket Real Estate Sales
- 8 Secret Real Estate Photo Editing Tricks for Breathtaking Listings
- How to Craft Realistic Skies That Sell Listings: Real Estate Photo Editing

