


Table of Contents
- What Is Color Matching in Photoshop Exactly?
- When Should You Use Color Matching Techniques?
- Why Getting the Colors Right in Images Matters
- How to Color Match in Photoshop (Step-by-Step)
- Too Busy to Edit? Outsource Your Editing to PhotoUp!
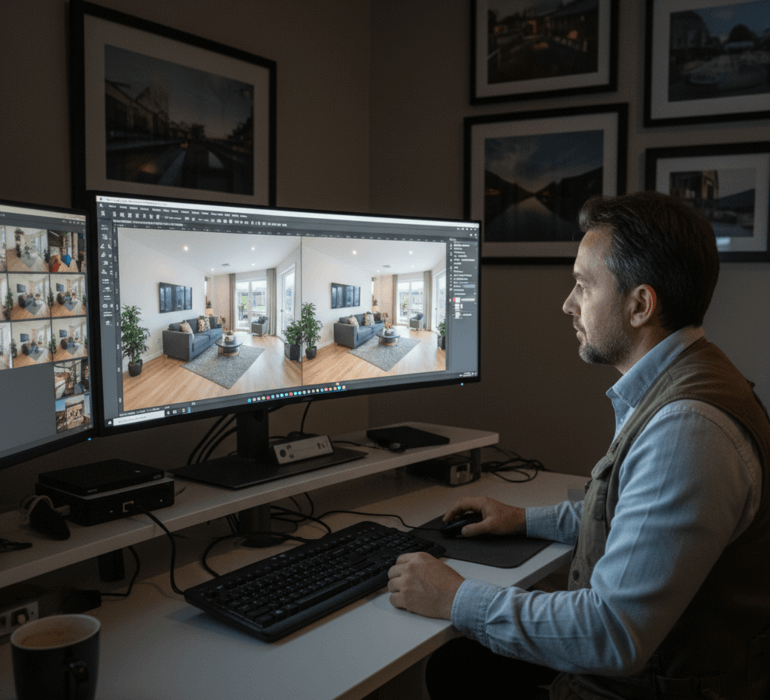
Are you wondering how to color match in Photoshop to make your images look cohesive and professional?
Whether you’re creating composite photos, editing real estate listings, or designing digital artwork, mastering color balance is one of the most valuable Photoshop skills you can learn.
Getting the tones and hues just right ensures your images feel natural and visually consistent—no matter where they came from or how they were shot.
In this guide, we’ll walk you through step-by-step how to color match in Photoshop, explain what color matching means, and show you when and why to use it for stunning visual results.
Let’s get started!
What Is Color Matching in Photoshop Exactly?🎨
Color matching in Photoshop is the process of making sure the colors in one part of an image—or between multiple images—look consistent.
This is especially important in scenarios like:
- Combining elements from different photos into a single, cohesive composite
- Correcting color variations caused by changes in lighting conditions
- Creating a uniform color palette for branding or design projects
- Ensuring that product or real estate photos reflect accurate, true-to-life colors
When done correctly, color matching helps unify your visuals, eliminate distracting inconsistencies, and make your work look polished and professional.
Let’s take a look at when you should use this editing technique.
When Should You Use Color Matching Techniques?🕒
When should you use color matching? You’ll find color matching useful in a variety of projects, such as:
| Composite Image Creation: Blending multiple photos seamlessly so they appear shot in the same lighting. |
| Real Estate Photography: Adjusting photos of rooms taken at different times of the day for consistent color temperature. |
| E-Commerce Product Photos: Making sure product colors appear uniform across your catalog. |
| Branding Materials: Maintaining consistent hues for your company’s visual identity. |
In short, color matching ensures a cohesive, professional finish across all your images, whether for marketing, social media, or print.
👉 Pro tip: If your goal is simply to extract and reuse a specific hue, check out our separate guide on how to copy a color in Photoshop.
Let’s move on to why balanced colors in images matter.
Have You Ever Thought To
Outsource Photo Editing?
Try it today with 5 free edits from three professional photo editors.

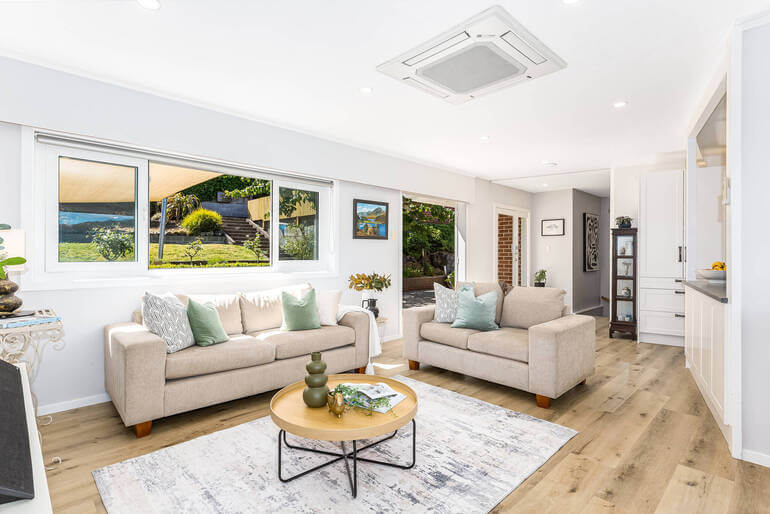
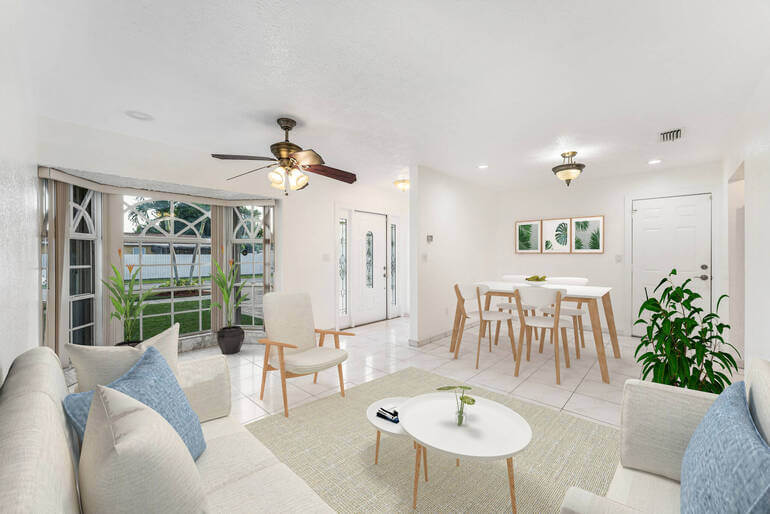
Why Getting the Colors Right in Images Matters🏡
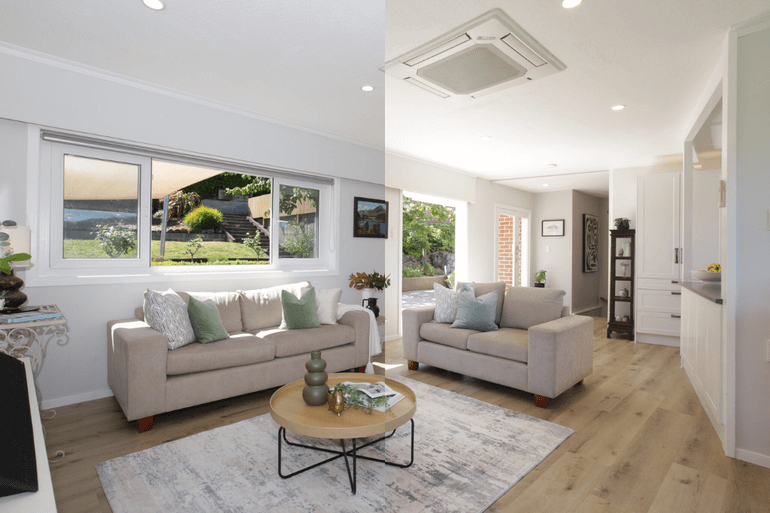
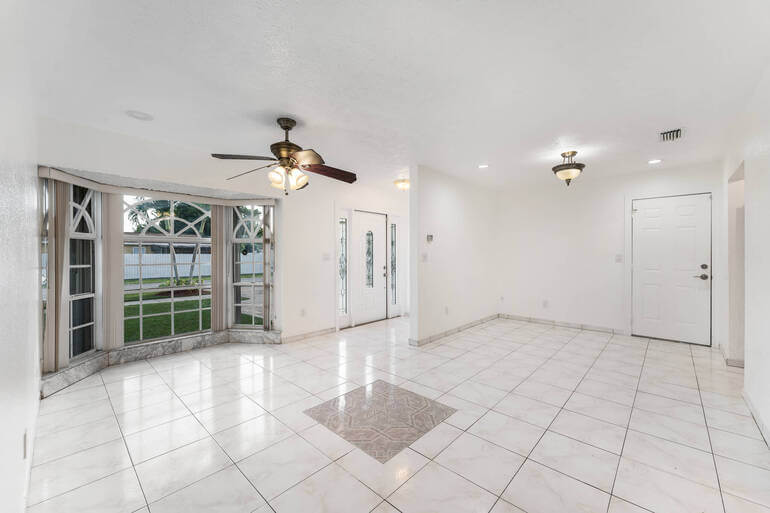
Take real estate photography as an example. Accurate color representation is essential for conveying the true look and feel of a property.
Imagine editing an interior photo where the warm lighting in one room clashes with the cooler tones of another. It immediately feels inconsistent and uninviting.
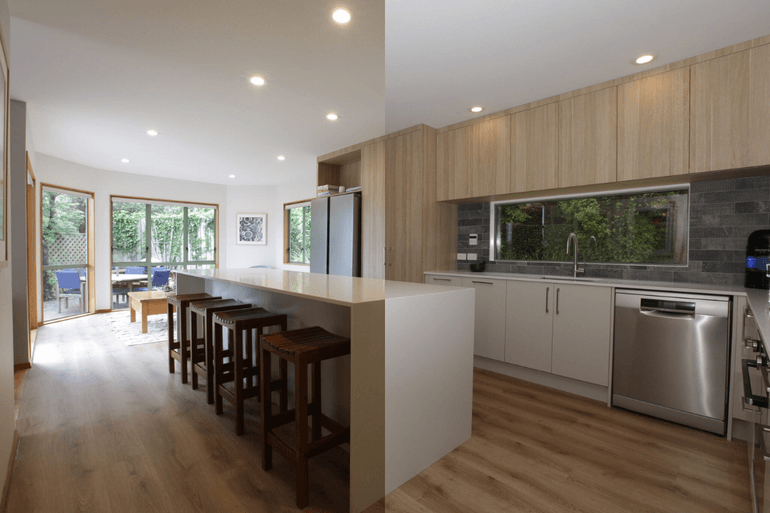
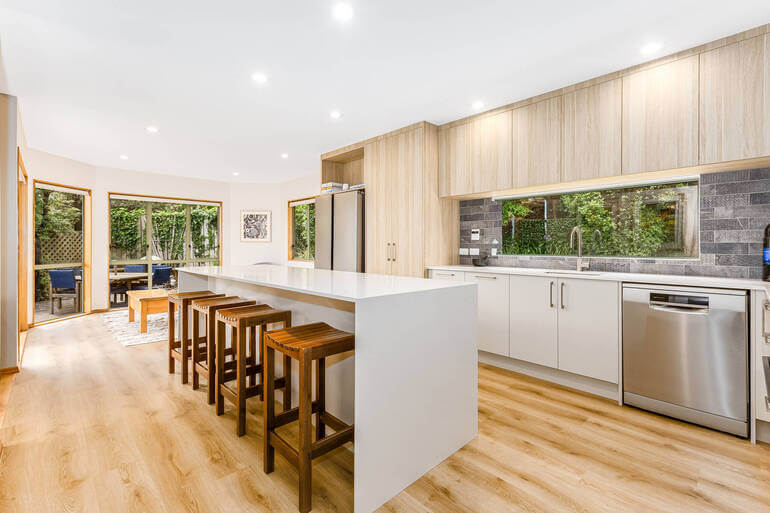
When colors are properly balanced, they bring harmony and realism to your real estate photos.
This not only enhances the perceived value of the property but also builds trust with potential buyers who expect the home to look just as beautiful in person as it does online.
According to the National Association of Realtors (NAR), 85% of homebuyers consider photos the most critical factor when evaluating a property online. And high-quality real estate photography can increase the price per square foot by 47%.
A skilled photographer or real estate photo editor knows how to use subtle color corrections to evoke emotion and curiosity, transforming ordinary spaces into visually captivating experiences.
How to Color Match in Photoshop (Step-by-Step)🌄
Now that you understand what color matching is and why it’s important, let’s look at how to color match in Photoshop.
You can either watch the video or continue reading the text with the screenshots below:
How to Match a Color From One Image to Another in Photoshop
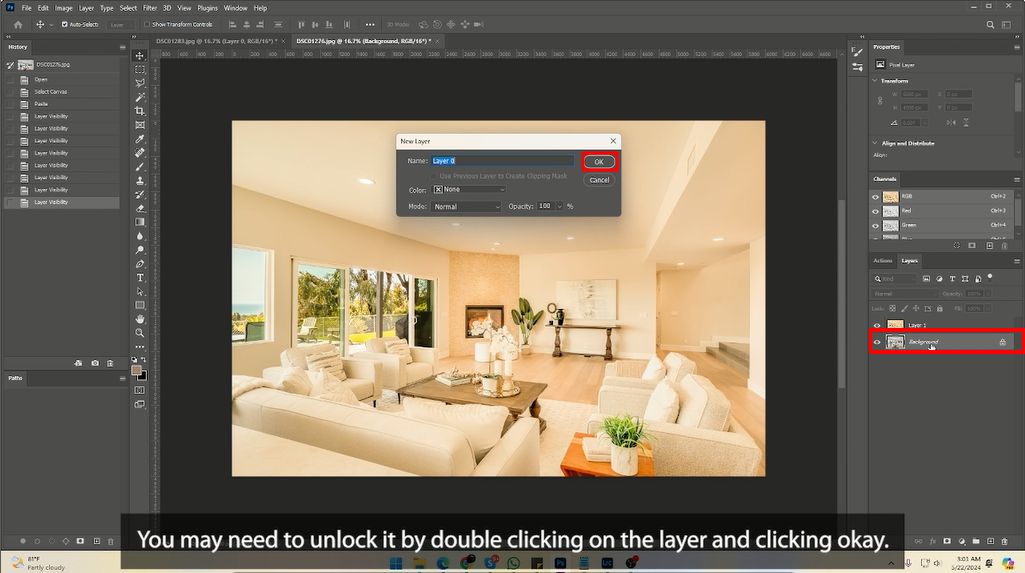
Step 1. Select the Layer you want to change the color of. If it’s the Background Layer, you may need to unlock it by double-clicking on the Layer and clicking Okay.
Step 2. With the Target Layer selected, navigate to Image > Adjustments > Match Color.
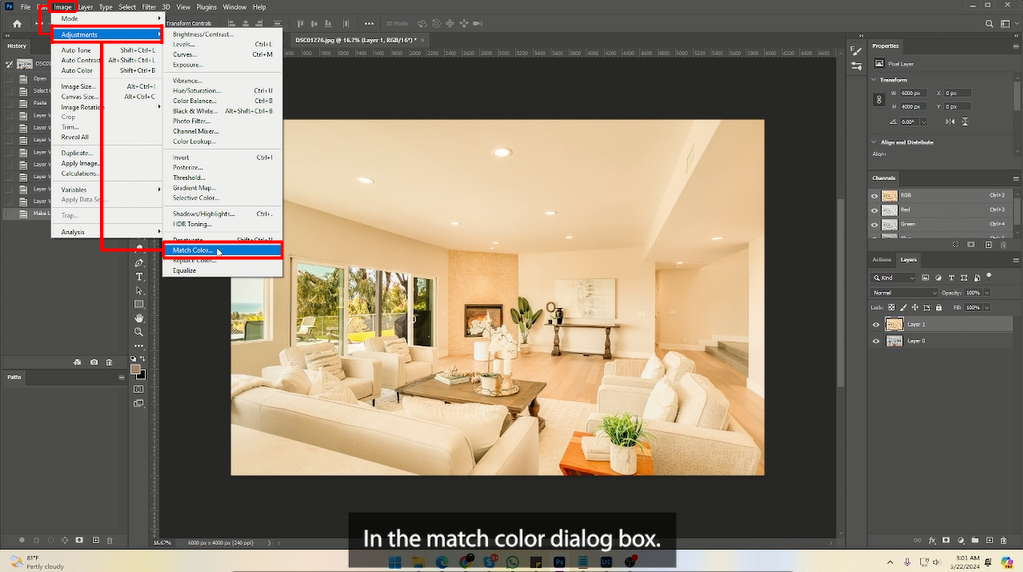
Step 3. In the Match Color dialog box, go to the Source Dropdown menu and select the File Name of the Source Image.
If the Source Image has multiple layers, you can specify which layer to use in the Layer Dropdown menu.
Step 4. You will now see a Preview of the changes in the Target Image. Next, adjust the sliders in Image Options to fine-tune the color match:
- Luminance adjusts the brightness of the target image
- Color Intensity controls the saturation of the color match
- Fade blends the matched color with the original color of the target image
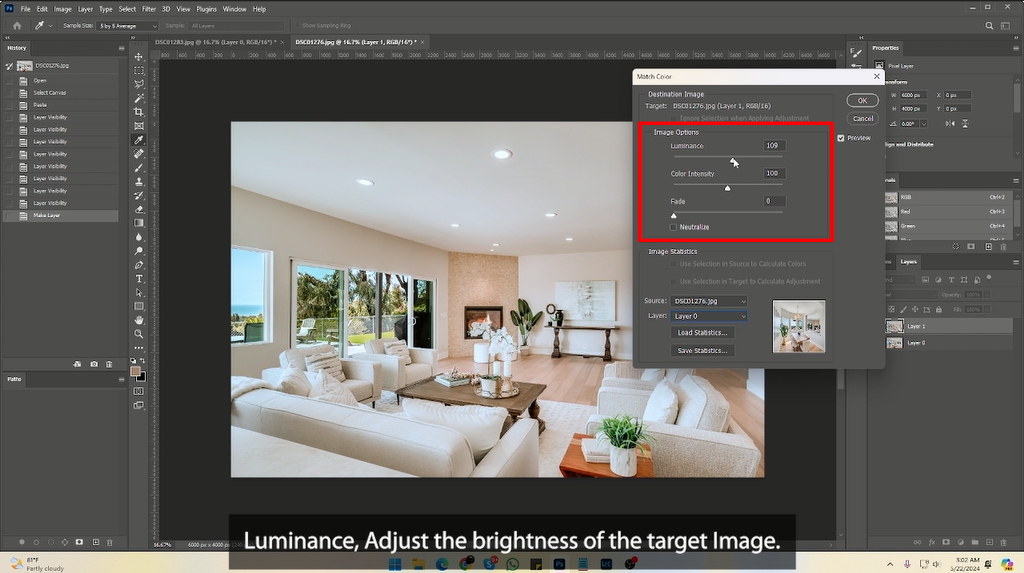
Step 5. If your Target Image has a color cast, you can check the Neutralize box to remove the color cast before matching the color.
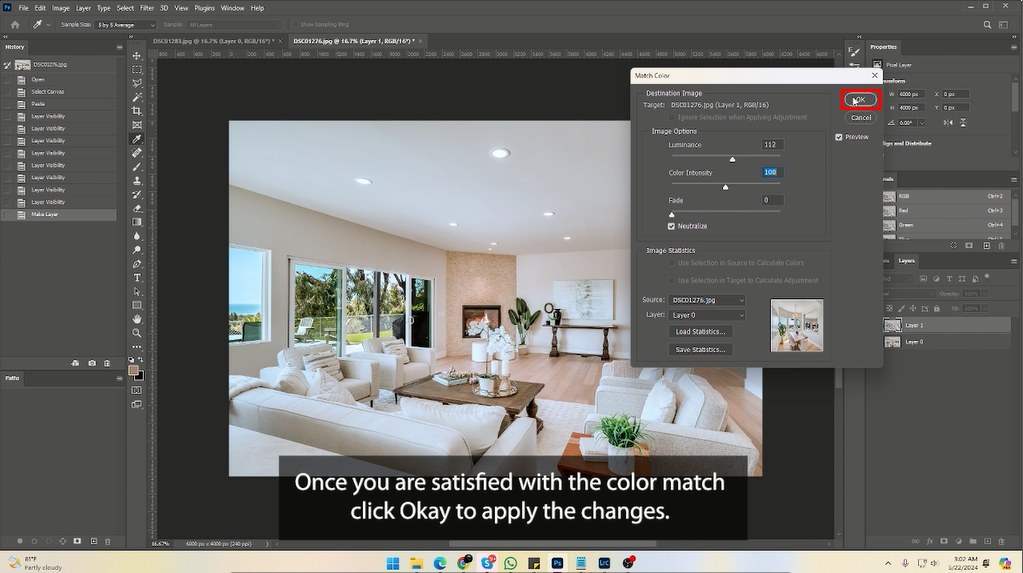
Step 6. Once you’re satisfied with the color match, click OK to apply the changes.
And that’s it!
You have now successfully matched the color of your target image to your source image in Photoshop.
This technique ensures color consistency and can enhance the visual harmony of your designs.
Feel free to use layer opacity and blend modes to achieve the right look, as well as revisit adjustments after taking a break to view your work with fresh eyes.
Final Thoughts
Learning how to color match in Photoshop is a powerful way to make your images look cohesive and professional.
Whether you’re fine-tuning composite artwork or achieving consistent tones in real estate photos, color matching ensures your visuals communicate clarity and quality.
But if you’d rather focus your time behind the camera, let PhotoUp’s professional editors handle the post-processing for you.
Let’s show you how!
Have You Ever Thought To
Outsource Photo Editing?
Try it today with 5 free edits from three professional photo editors.
Too Busy to Edit? Outsource Your Editing to PhotoUp!🧑💻
If all this color matching sounds like a lot of work, you’re not alone! Many photographers—especially in the real estate industry—choose to outsource their photo editing to professionals.
That’s where PhotoUp comes in!
With over a decade of experience and hundreds of skilled editors in the Philippines and the US, PhotoUp delivers fast, high-quality real estate photo editing at affordable rates.
Our photo editing services include:
- Brightness and color correction
- Vertical and perspective adjustments
- Advanced object removal
- Day-to-dusk conversions
- Lawn greening and sky replacement
- HDR editing
- Manual blending
- And flambient editing
And that’s just the beginning!
Browse Top Dedicated
Real Estate Photo Editors
Ready-to-hire editors for real estate photo editing, and more.
A Complete Real Estate Marketing Partner
In addition, PhotoUp also offers a full suite of real estate marketing tools, including:
We have everything you need to enhance, brand, and market your listings—all under one roof.
Our platform also lets you manage clients, track team members, and store your final photos, making it easier than ever to run your photography business efficiently.
Getting Started Is Easy!
Getting started with PhotoUp is super easy – this is all you need to do:
Step 1. Sign up for a free PhotoUp account.
Step 2. Upload your photos to our easy-to-use software.
Step 3. Choose the level of editing that you need and provide instructions (optional).
Step 4. Wait for PhotoUp professional editors to edit and return the photos in less than 24 hours.
Step 5. Download and start using your beautifully edited photos.
It’s really that easy to get professionally edited images returned to you in less than 24 hours!
So what are you waiting for?
👉 Sign up for a free PhotoUp account today and let PhotoUp’s expert real estate photo editors help you create balanced images in no time!
And the best part? When you sign up, you’ll get 10 free credits to use however you like.
We hope this blog post helped you learn how to color match in Photoshop. Before you go, you may also want to check out the following resources:

