


Table of Contents
- Why Balancing Warm and Cool Tones Matters in Real Estate
- How to Balance Warm and Cool Tones in Property Photos
- Warm & Cool Tones FAQ
- Let PhotoUp Balance Your Warm and Cool Tones
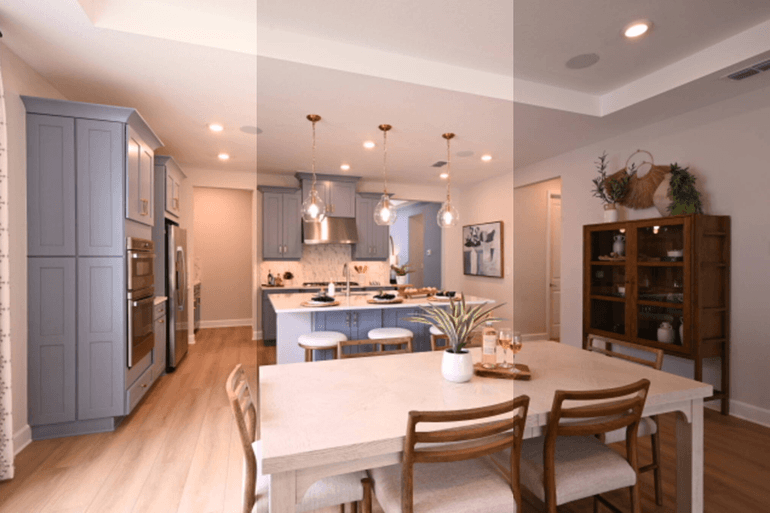
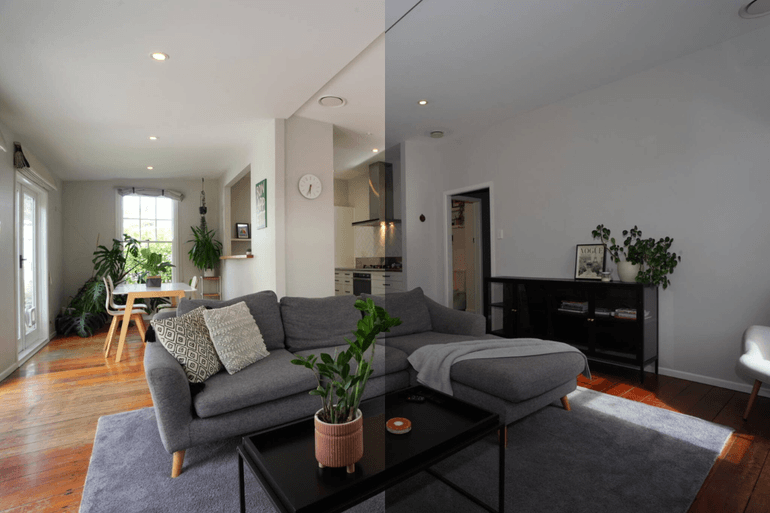
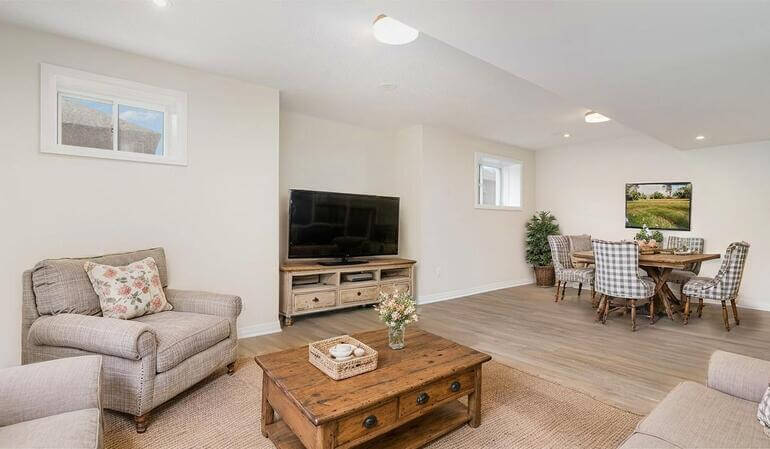
The goal of professional real estate photo editing is to create a natural balance between warm and cool tones, producing images that feel bright, comfortable, and realistic.
Achieving this balance requires careful control of white balance, color temperature, local adjustments, and color grading. When done correctly, the result is a visually appealing image that reflects how the property truly feels in person.
Let’s start by understanding why tone balance is so important in real estate photography, and then explore the editing techniques to create well-balanced images.
Why Balancing Warm and Cool Tones Matters in Real Estate🏡
In real estate marketing, photography isn’t just about documenting a property—it’s about shaping perception.
Buyers scrolling through listings make decisions in seconds, often based purely on how a home feels in the images. Color temperature plays a major role in that emotional response.
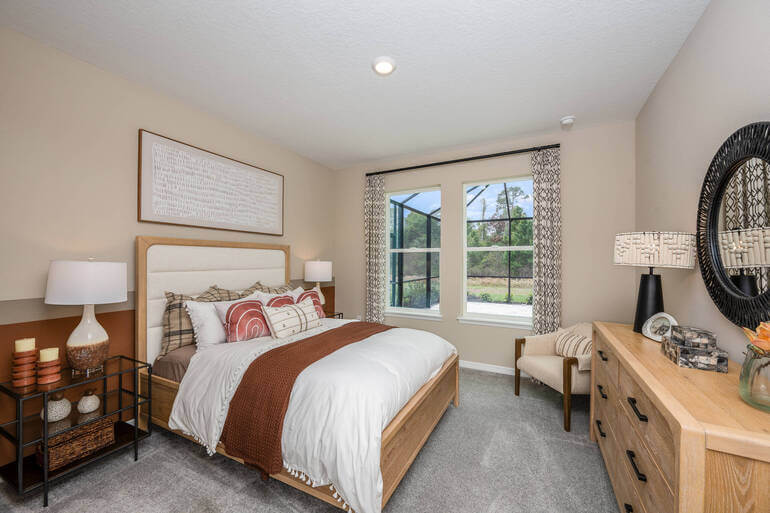
Color temperature subtly influences how buyers emotionally interpret a space. Warm tones—such as soft yellows and golden light—create feelings of comfort, coziness, and hospitality.
In contrast, cooler tones—like gentle blues or neutral whites—communicate cleanliness, openness, and modernity.
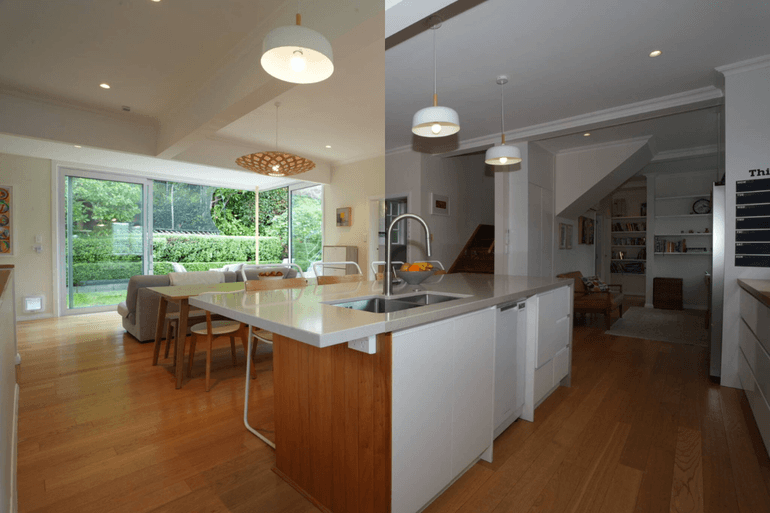
The challenge is that real estate photos often contain multiple light sources at once, including:
- Natural daylight from windows (cooler tones)
- Indoor incandescent lighting (warm tones)
- LED or fluorescent lighting (neutral or slightly cool tones)
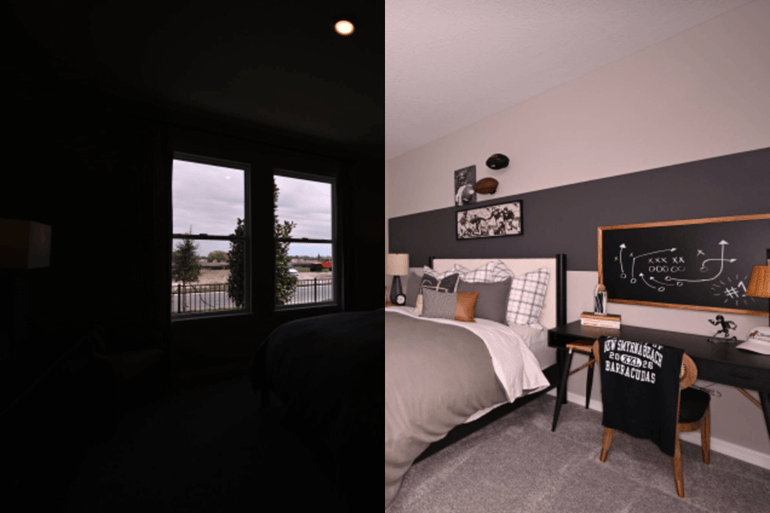
Without correction, these mixed light sources can produce color inconsistencies that make walls appear yellow, floors look orange, or windows glow blue.
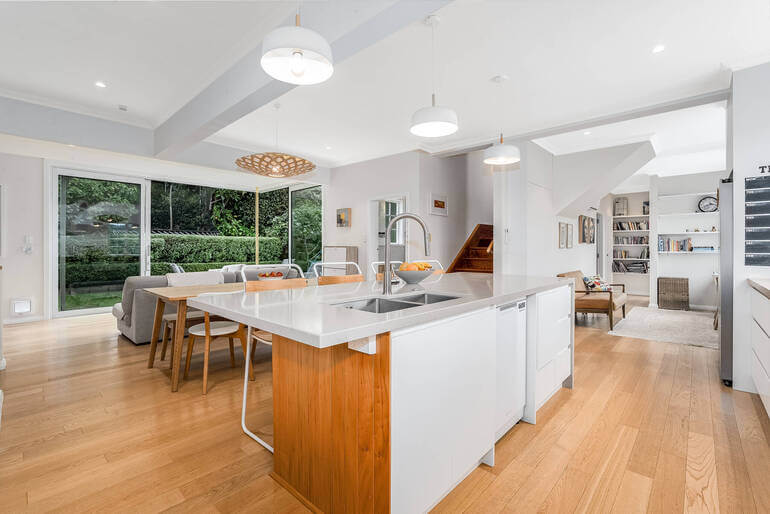
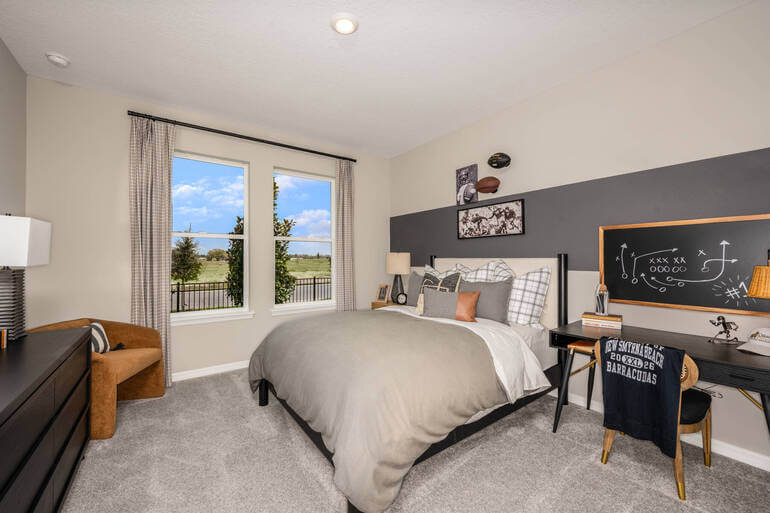
Balancing warm and cool tones helps images look natural, bright, and professionally polished, which increases buyer engagement and trust.
In summary, tone balance creates emotional harmony in listing photos, making homes feel welcoming yet clean and modern.
How to Balance Warm and Cool Tones in Property Photos
Now, let’s look at the 5 most important real estate photo editing steps that set the foundation for balanced color:
Step 1. Correct the White Balance🎨
White balance is the starting point for controlling warm and cool tones in any real estate photo.
When a camera captures mixed lighting, it may incorrectly interpret the color temperature of the scene. The result is often images that look too yellow, too blue, or uneven across the frame.
Professional real estate photo editors correct this using two key sliders:
- Temperature – adjusts warmth (yellow/orange) or coolness (blue)
- Tint – corrects green or magenta color casts
A common workflow includes:
- Selecting a neutral area (white wall, ceiling, or cabinet) as a reference point
- Adjusting the temperature until whites appear natural
- Fine-tuning tint to eliminate unwanted color casts
The goal isn’t perfect neutrality—it’s a natural-looking balance between warm interior lighting and cool daylight.
To learn how to achieve accurate white balance in your real estate photos, you can check out our guide on how to adjust white balance in Photoshop.
Correcting white balance establishes the color foundation of the image. Once the overall temperature looks natural, the next step is refining tones through selective color adjustments.
Step 2. Fine-Tune Color Temperature🎛️
After white balance is corrected, real estate photo editors often make subtle adjustments to refine how warm and cool tones interact throughout the image.
This involves working with global color adjustments, including:
- Temperature adjustments for overall tone
- Highlights and shadows
- Contrast and clarity
Here are some real estate photo editing tips to consider:
- Slightly warming the image can make interiors feel welcoming
- Cooling highlights near windows can maintain a natural daylight look
- Increasing contrast can separate warm furniture from cool walls
The key is subtlety. Overcorrection can easily push the image toward unrealistic color tones.
Professional real estate photo editors aim for a balanced visual temperature, where no single color dominates the scene. Overall, global color adjustments refine the overall warmth and coolness of an image.
These tutorials below will help you fine-tune color temperature and contrast in your images:
- How to Color Correct in Photoshop
- How to Change Exposure in Photoshop (3 Simple Ways)
- How to Color Match in Photoshop – Step-by-Step Guide for Balanced Images
Next, editors often make targeted corrections to solve color conflicts caused by mixed lighting.
Have You Ever Thought To
Outsource Photo Editing?
Try it today with 5 free edits from three professional photo editors.

Step 3. Fix Mixed Lighting🪄
One of the biggest challenges in real estate photography is mixed lighting, where different areas of a room have drastically different color temperatures. For example:
- Windows may appear blue
- Lamps may create yellow pools of light
- Ceiling lights may cast neutral tones
Local editing tools allow editors to fix these inconsistencies without affecting the entire image. Common techniques include:
- Brush adjustments to neutralize yellow hotspots
- Gradient filters to cool down overly blue window areas
- And masking tools to isolate walls or ceilings
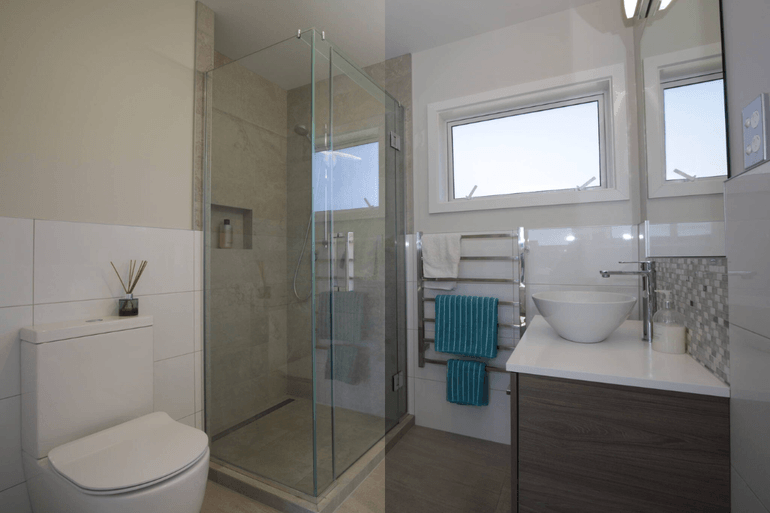
By correcting small areas individually, editors can create consistent lighting throughout the room. This step is especially important in kitchens, living rooms, and bathrooms where multiple light sources are common.
To learn how to fix mixed lighting, you can check out our tutorial on removing color cast in Photoshop using 2 simple techniques.
Local adjustments correct mixed lighting and bring consistency across the image. Once lighting is balanced, editors can move on to enhancing colors for visual harmony.
Step 4. Use Color Grading for Visual Harmony🌈
Color grading is where professional editors refine the final mood of a real estate photo. Rather than dramatically changing colors, this step focuses on subtle tonal harmony between warm and cool elements.
Here are some suggestions for edits to create visual harmony in your images:
- Slightly warm wood tones and furniture
- Neutralize overly yellow walls
- Add a slight cool tone to shadows for depth
- Balance highlights so daylight appears natural
Wondering which editing tools to use? Here are some common tools:
- HSL (Hue, Saturation, Luminance) adjustments
- Split toning or color grading panels
- And selective saturation corrections
The goal is a balanced visual palette where warm elements feel cozy while cool tones keep the image fresh and modern.
Finally, editors perform a last review to ensure the colors look natural and consistent.
Step 5. Perform a Final Naturalness Check🔍

Before exporting the final image, professional real estate photo editors always perform a final quality check to ensure the color balance looks believable.
Key questions include:
- Do walls look neutral instead of yellow or blue?
- Does natural light appear realistic?
- Are warm interior lights soft rather than orange?
- Do wood tones look authentic?
A helpful trick is to step away from the image briefly and return with fresh eyes. This makes it easier to notice color casts or unnatural tones.
Consistency across the entire photo set is also essential. Every image in a listing should maintain similar warmth and color temperature so the property feels cohesive.
The final review ensures color tones appear natural and consistent. And that’s it!
With these 5 steps completed, your images are ready to attract buyers online.
Warm & Cool Tones FAQ📚
Why is balancing warm and cool tones important in real estate photography?
Balancing warm and cool tones helps create images that feel natural, inviting, and visually appealing. If photos are too warm, rooms can look yellow or overly artificial. If they are too cool, spaces may appear cold or sterile.
Proper tone balance ensures that the home looks bright, comfortable, and realistic, encouraging buyers to engage with the listing and schedule showings.
What causes warm or cool color casts in real estate photos?
Color casts typically occur because of mixed lighting conditions. Real estate photos often contain multiple light sources, such as:
- Natural daylight from windows (cool tones)
- Incandescent bulbs (warm tones)
- LED or fluorescent lighting (neutral or slightly cool tones)
When these light sources mix, the camera may struggle to interpret the correct color temperature, resulting in yellow, blue, green, or magenta color casts that require correction during post-processing.
What is the ideal color temperature for real estate photos?
There isn’t a single perfect color temperature for every photo, but most real estate images look natural when the color temperature falls between 5000K and 6500K, which mimics balanced daylight.
However, editors typically adjust color temperature based on the scene. Interiors may benefit from slightly warmer tones for a cozy feel, while bathrooms and kitchens often look better with slightly cooler tones that communicate cleanliness and brightness.
Should real estate photos look warm or cool?
The best real estate images typically include a balanced mix of both warm and cool tones. Warm tones help rooms feel comfortable and inviting. In contrast, cool tones make spaces appear bright, clean, and modern.
The goal is to create a natural visual harmony that reflects how the property actually feels in person.
Can poor color balance affect real estate marketing?
Yes. Color imbalance can subtly influence buyer perception. Photos with strong yellow or blue casts may make rooms appear poorly lit, outdated, or unappealing. This can reduce the number of clicks, showings, and inquiries a listing receives.
Balanced tones, on the other hand, help properties appear well-maintained, bright, and professionally presented, increasing engagement from potential buyers.
Is it faster to outsource tone correction in real estate photo editing?
For many photographers and agents, outsourcing editing is significantly faster than performing every adjustment manually. Professional editors can quickly correct white balance, mixed lighting, and color grading while maintaining consistent tones across an entire photo set.
Services like PhotoUp provide professional editing with fast turnaround times and affordable rates, allowing photographers to focus on shooting more properties instead of spending hours editing color and lighting.
Let’s show you how to get started with PhotoUp!
Have You Ever Thought To
Outsource Photo Editing?
Try it today with 5 free edits from three professional photo editors.
Let PhotoUp Balance Your Warm and Cool Tones🚀
Balancing warm and cool tones takes time, precision, and professional editing expertise. For busy real estate photographers and agents, outsourcing editing can dramatically improve both image quality and workflow efficiency.
PhotoUp’s professional real estate photo editors specialize in:
- Accurate white balance correction
- Mixed lighting adjustments
- Natural color grading
- HDR blending
- Line and perspective corrections
- Sky replacements and lawn enhancements
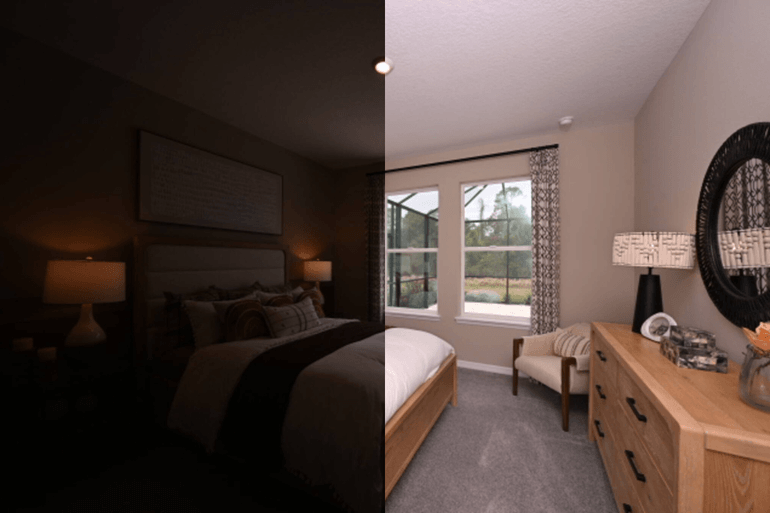
- Day-to-dusk conversions
- And much more!
Even better, we offer affordable pricing and fast turnaround times, allowing photographers to deliver polished listing images without spending hours behind the computer.
With on-demand editing starting at $1.50 per image—and even lower rates with dedicated editors—we make professional editing accessible for photographers at any stage of their business.
Instead of worrying about color balance and tone correction, you can focus on shooting more properties and growing your real estate photography business.
Browse Top Dedicated
Real Estate Photo Editors
Ready-to-hire editors for real estate photo editing, and more.
A Full Real Estate Marketing Partner
On top of that, PhotoUp is offering so much more than just real estate photo editing! We are a complete one-stop shop for real estate marketing and also provide additional services such as:
We have everything you need to edit and market real estate photography on one user-friendly platform!
How to Get Started
Getting started using PhotoUp’s real estate photo editing service is super easy. This is all you need to do:
Step 1. Sign up for a free PhotoUp account.
Step 2. Upload your photos to our easy-to-use software.
Step 3. Choose the level of editing that you need and provide instructions (optional).
Step 4. Wait for PhotoUp professional editors to edit and return the photos in less than 24 hours.
Step 5. Download and start using your beautifully edited photos.
PhotoUp Real Estate Photo Editing Uploader Demo
Have a look at the real estate photo editing uploader demo to see how easy it is to get started with PhotoUp:
As simple as that!
👉 Sign up for a free PhotoUp account today and experience how professional editing can transform your listing photos into bright, balanced, buyer-ready images!
For a limited time, you’ll receive a bonus of 5 free credits you can use on any of our services when signing up for an account.
We hope this guide helped you learn how to balance warm and cool tones in real estate photo editing. If you got something out of this blog post, consider checking out the following resources as well:
- Real Estate Editing on a Budget: Top Services Under $2 Per Image
- 9 Proven Exterior Real Estate Photo Editing Techniques
- The #1 Edit to Create Stunning Real Estate Photos
- How to Replicate Professional Real Estate Photo Editing (10 Expert Tips)
- Why Real Estate Photo Editing Matters in a Competitive Market

