


Table of Contents
- What Is Virtual Renovation?
- How to Renovate a Space With Virtual Staging
- Why Choose PhotoUp’s Virtual Staging Service?
Renovating a space can be a lot of work and can leave a dent in your pocket. But what if we told you that you could renovate a space without spending much or even breaking a sweat?
That’s right!
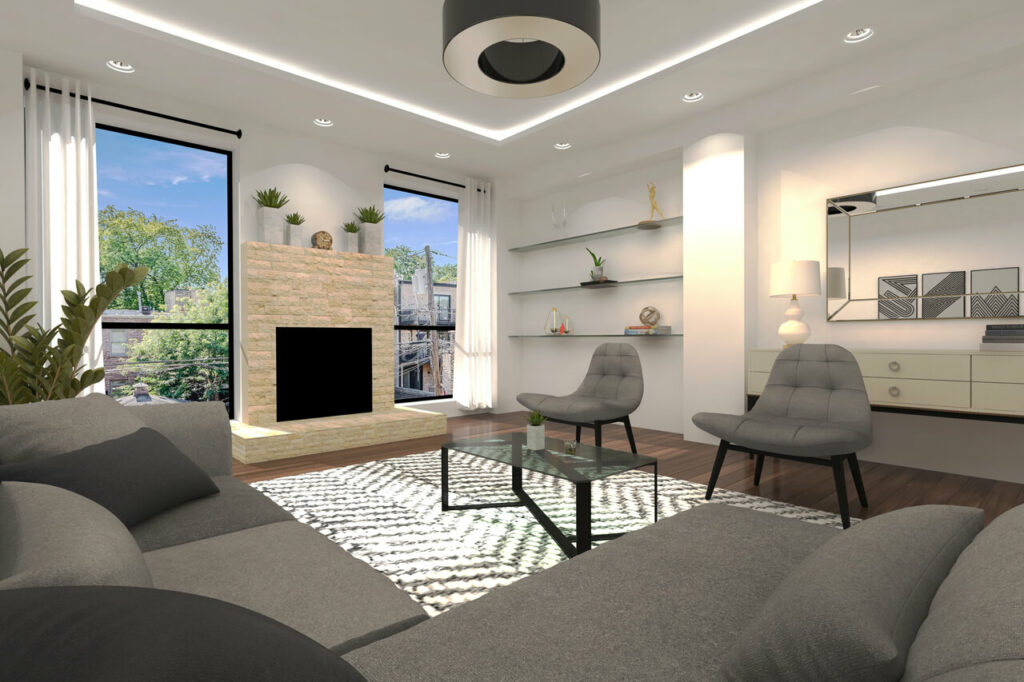
With virtual staging, you can renovate a space before selling it in no time. Virtual staging is a technique that allows you to add furniture, and decor, or even change wall colors in an image of the space to make it look fully renovated.
In this blog, we’ll take you through the steps on how to renovate a space with virtual staging.
Let’s start by taking a look at what virtual renovation is.
What Is Virtual Renovation?
Virtual renovation is an incredible way to transform homes with the power of 2D and 3D design. With this technology, you can update flooring, wall paint, ceilings, and even remodel rooms.
Additionally, you can also use it to declutter spaces, enhance the landscaping, and so much more.
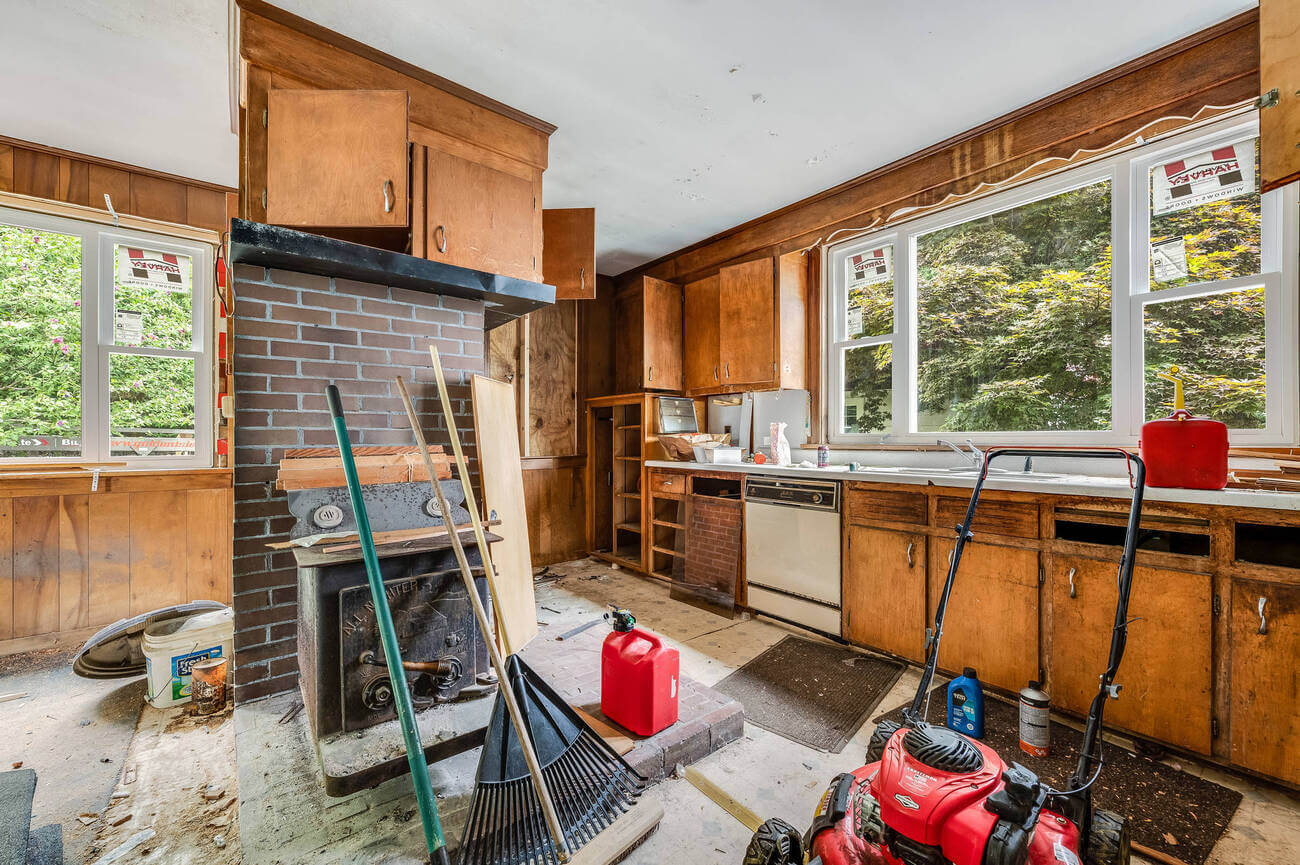

Think of virtual renovation as the ultimate form of AI virtual staging. It’s commonly used in real estate listings to add photo-realistic furniture and decor to empty spaces.
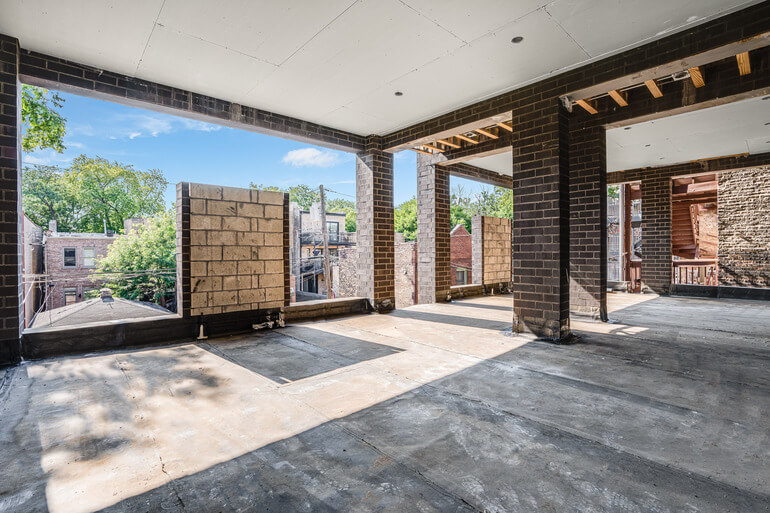
But here’s the game-changer: with virtual renovations, you can stage a home that’s not even fully built yet or revamp outdated spaces in less than 48 hours.
Now that’s efficiency! Just imagine the time you’ll save!
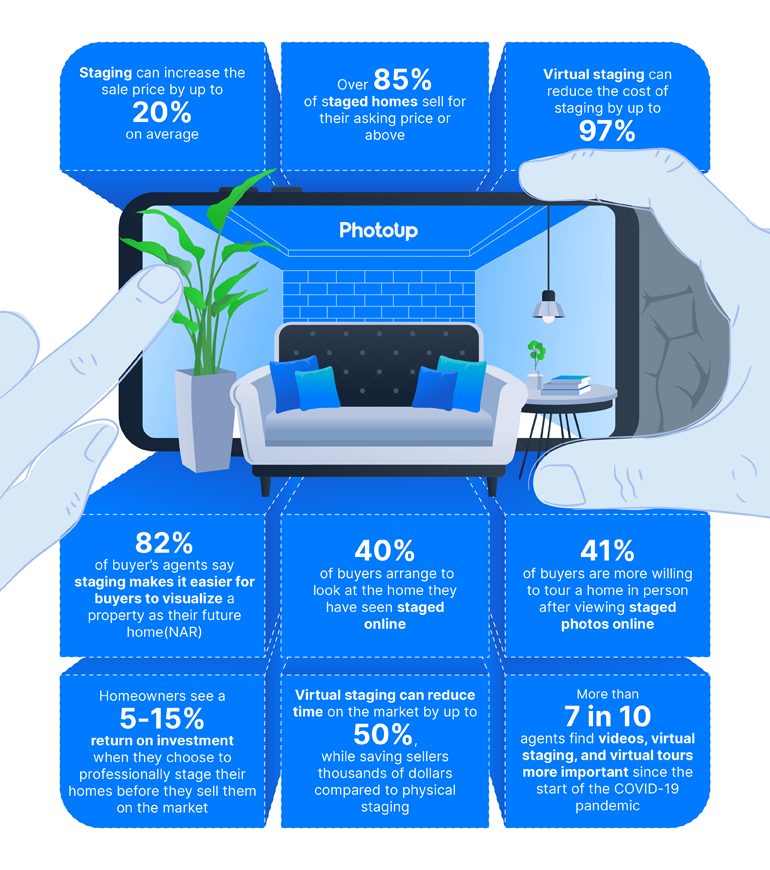
Plus, this digital approach to renovations is not only cost-effective (average cost ranges from $5.00 per image), but it also showcases your property in its best light. That means more interest and faster sales.
To illustrate the power and cost savings of virtual staging, check out these VS statistics:
How to Renovate a Space With Virtual Staging
Goodbye, traditional renovations! Get ready to experience the future of home transformations with virtual renovation. It’s convenient, captivating, and utterly remarkable.
With that, let’s take a look at how to renovate a space with virtual staging.
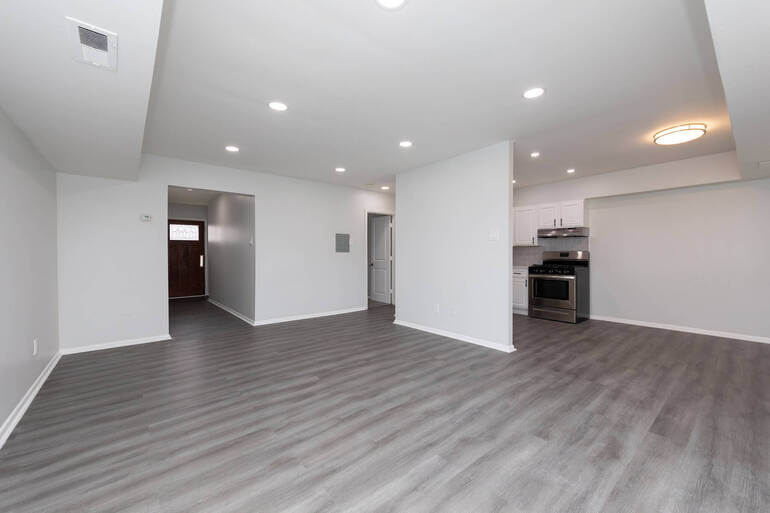
Step 1: Capture a High-Quality Image of the Space
To start with, you need to capture a high-quality image of the space that you want to renovate.
Ensure that there is enough natural light and that the space is neat and tidy. You can also take multiple images of the space from different angles to get a clearer idea.
Step 2. Choose a Virtual Staging Service
Once you have your images ready, it’s time to choose a virtual staging service, app, or AI.
There are many virtual staging software programs available on the market. Choose one that suits your requirements and budget.
We strongly recommend that you use a professional provider like PhotoUp to get the most photo-realistic, virtually staged images.
PhotoUp offers a AI virtual staging service that can help you save money on costly repairs and boost the sales price. It’s also very affordable, starting from only $3 per image.
Their virtual staging and renovating services include:
- Repairs, remodeling, and renovations
- Furnishing and decorating vacant or outdated rooms
- Object removal, decluttering, and depersonalizing of rooms
- Virtual landscaping
- Sky replacements
- Grass greening
- And more.
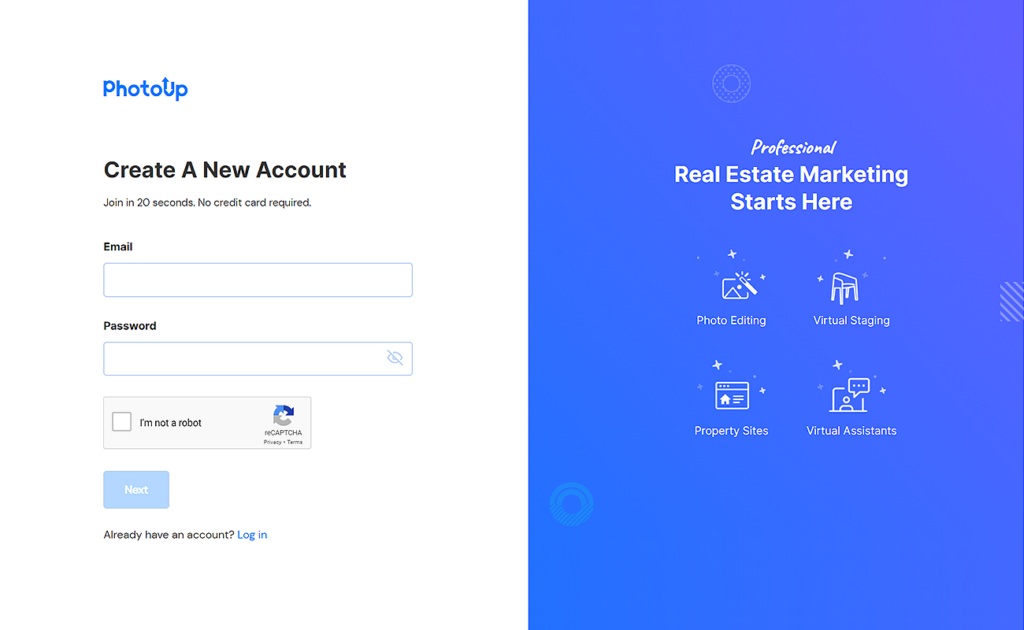
Step 3. Sign Up for a Free PhotoUp Account
Next, sign up for a free PhotoUp account on PhotoUp’s website by entering your email address and creating a password.
PhotoUp AI Virtual Staging Demo
If you rather watch a video on how to use PhotoUp’s AI virtual staging service, you can check out our virtual staging demo:
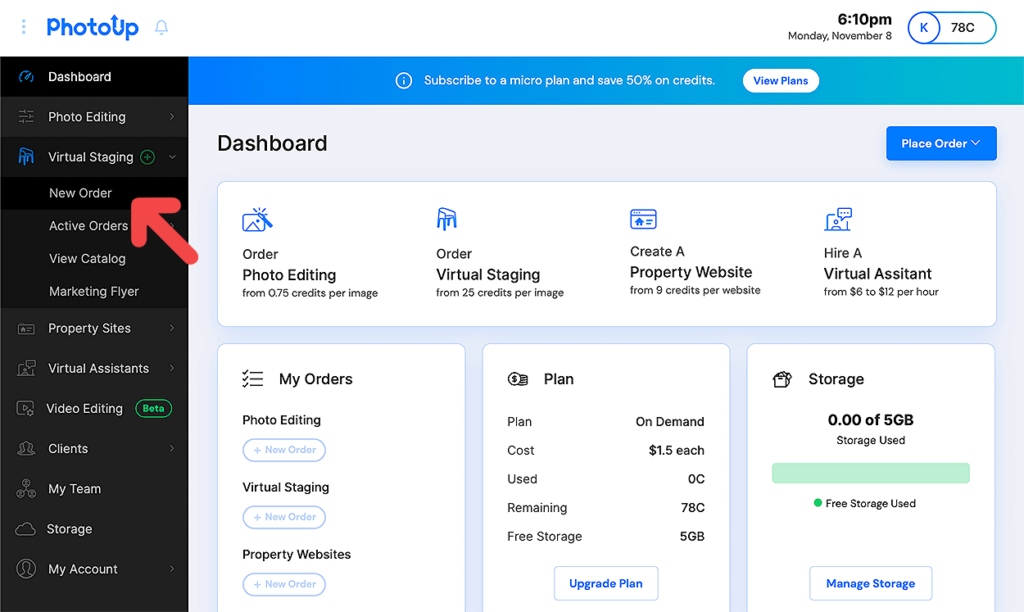
Step 4. Choose Virtual Staging
Once you’ve signed up for an account, it’ll take you to the PhotoUp Dashboard, where you can choose Virtual Staging » New Order.
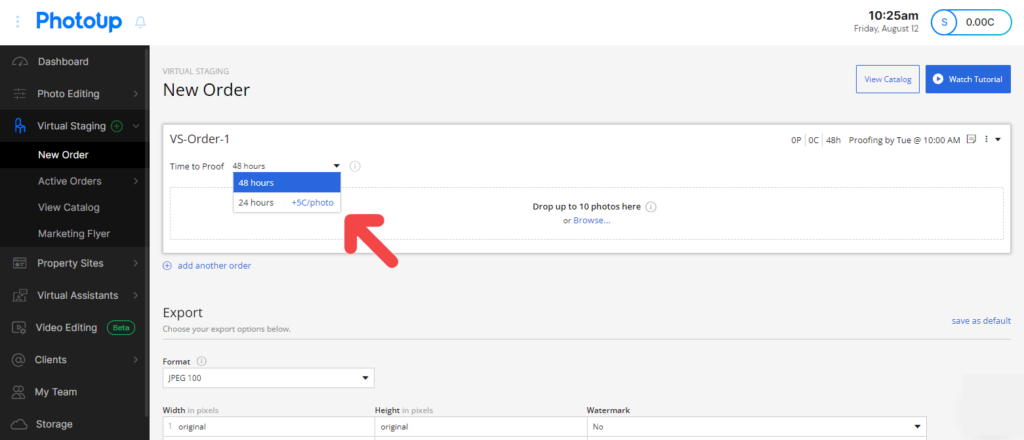
Step 5. Choose Turnaround Time
In the next step, you can choose your preferred turnaround time. PhotoUp offers either a 24 or 48 hours turnaround.
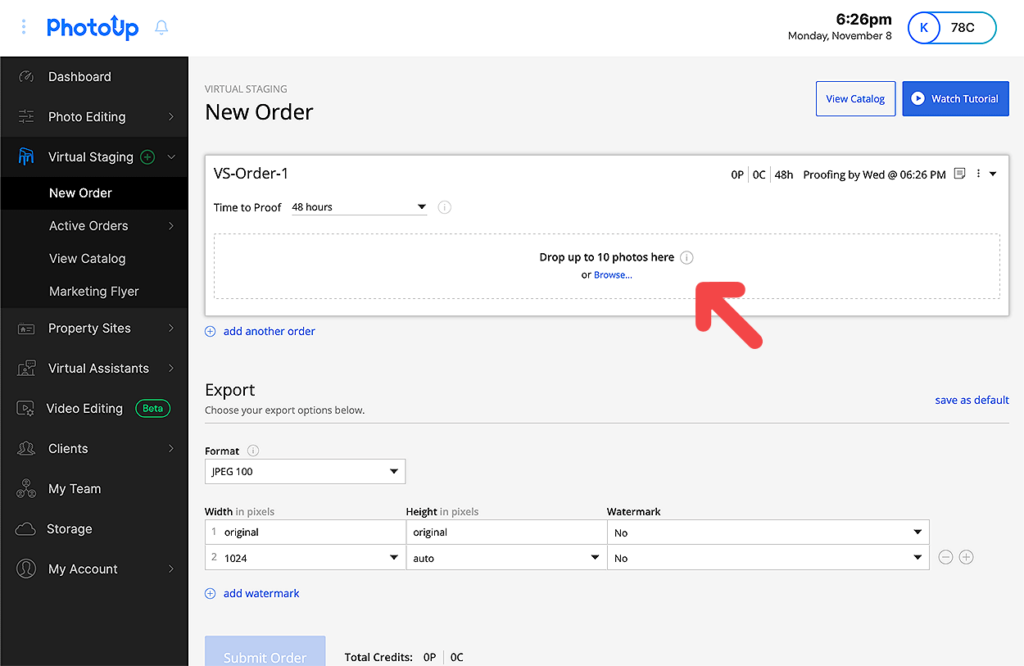
Step 6. Upload Your Photos
Now it’s time to upload your real estate photos of the vacant space that you want to be staged.
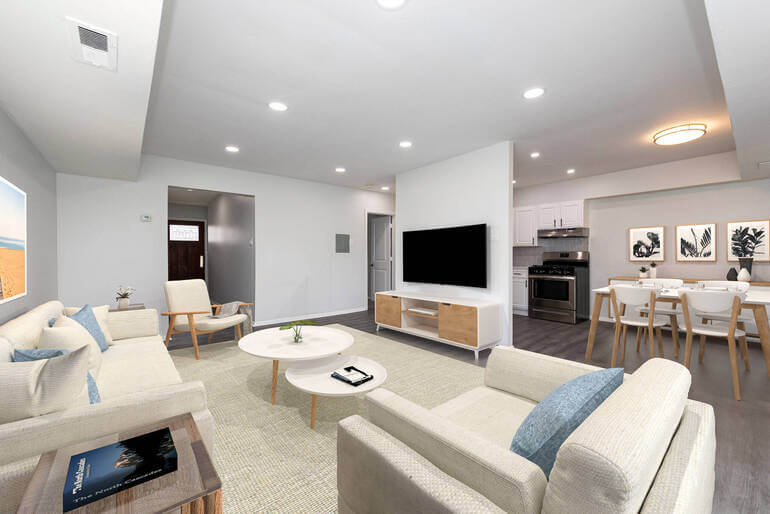
Although virtually staging empty spaces is the most common option, you can also choose to declutter and redecorate your photos, or even make virtual renovations.
To begin uploading your images, click on the Browse button in the New Order window and select your photos. Or, you can simply drag and drop up to 10 images at the same time.
Step 7. Choose Digital Furniture, Decor or Change Wall Colors
You can now start adding furniture, and decor or even change wall colors.
We recommend that you choose furniture and decor that complement the space. And add accent pieces to bring the space to life.
If you’re changing the wall color, choose a color that complements the furniture and decor that you’ve selected.
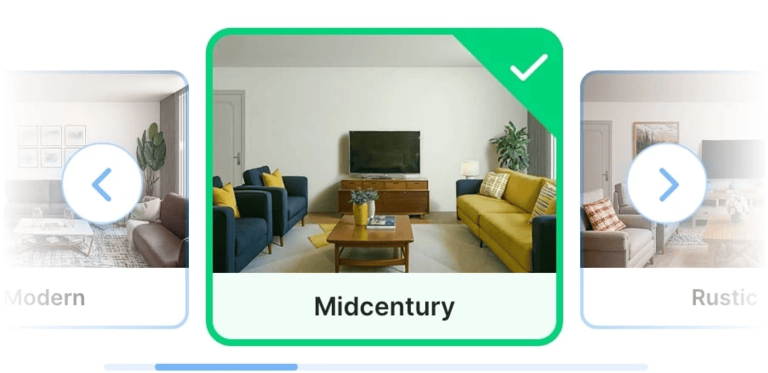
PhotoUp gives you plenty of design and renovation options. You can browse through our library, including 5 interior design styles that can match and enhance your virtual renovations:
- Mid-Century Modern
- Coastal
- Modern
- Rustic
- And Industrial
Quick & Easy
AI Virtual Staging
Interiors. Landscapes. Commercial. Virtually transform any space.

To choose decor and furniture, start by marking the photo you want to add furniture to, and then click on the furniture set you want to add to your image.
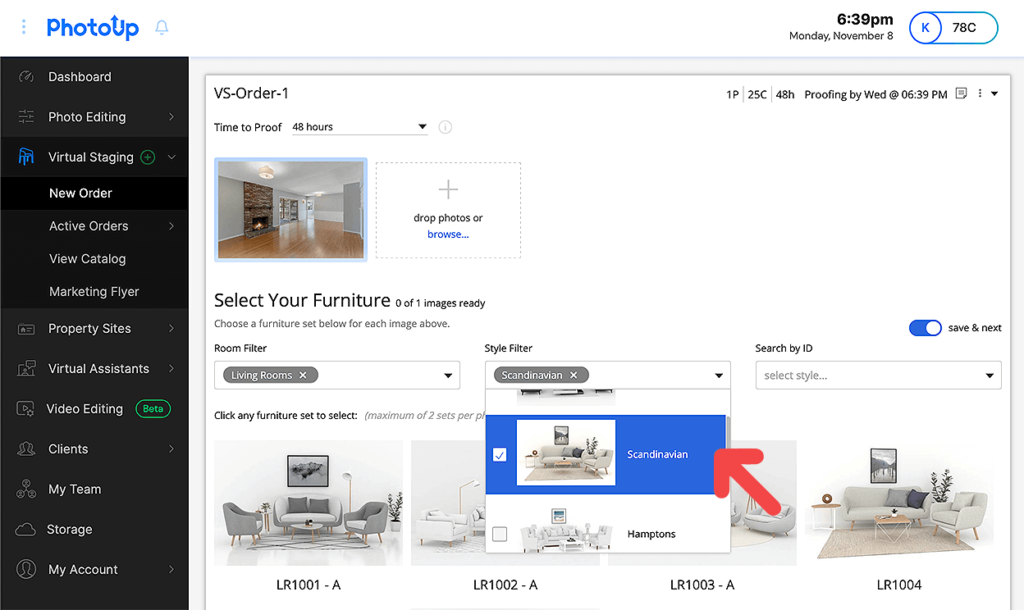
You can choose up to 3 sets per photo. And you can either use the Style Filter or Room Filter option or Search by ID for furniture sets.
Once you’ve clicked on the set you wish to add to your photo, you’ll see thumbnails of them at the bottom right corner of the uploaded image.
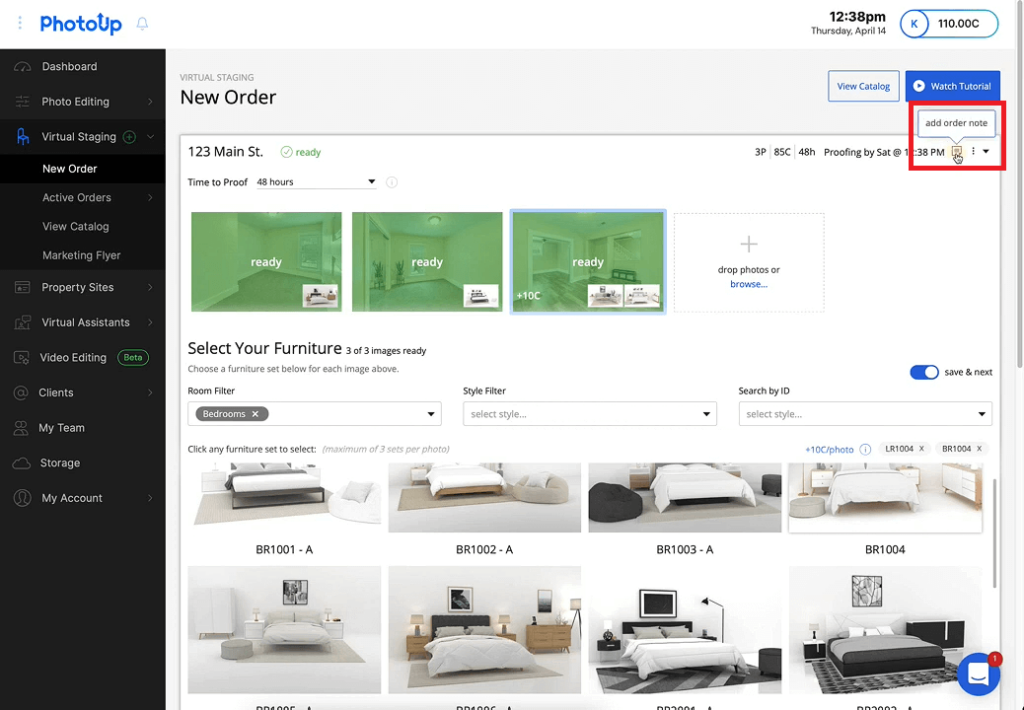
You also have the option to add your comments and instructions in Add order note in the menu in the top right corner of the dashboard. Or, you can leave your comments on each individual photo.
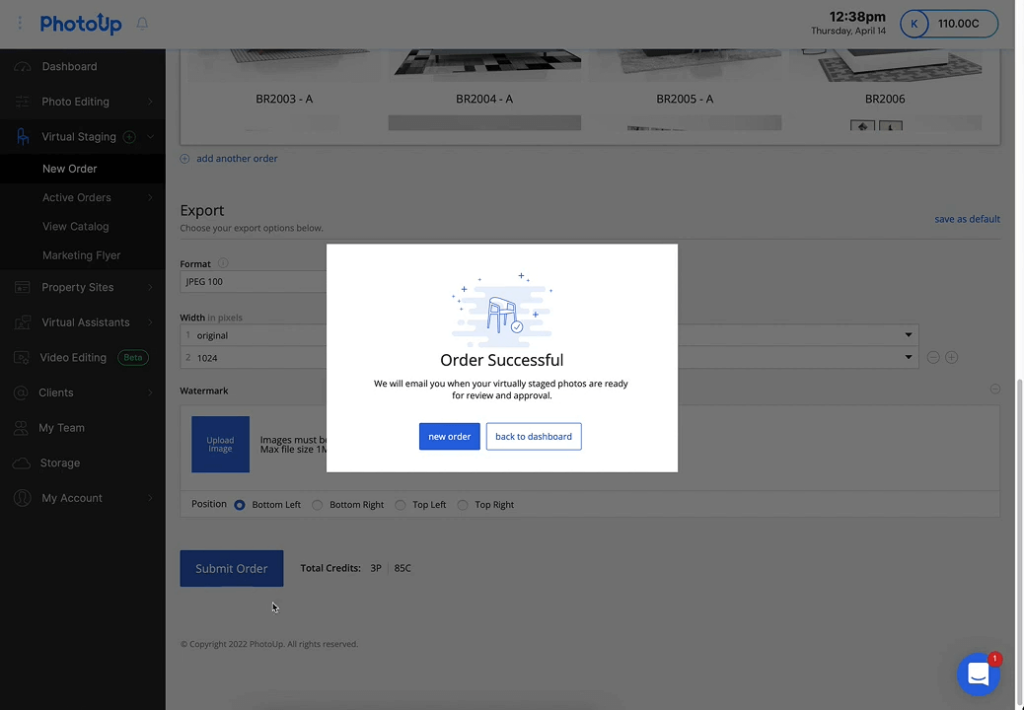
Step 8. Choose Export Settings
Once you’ve selected the furniture you want to stage your photos with, you need to scroll down and choose your preferred Export Settings.

This will be the type of image format you want your photos to be delivered in.
Additionally, you can also choose to have your images watermarked. Simply click on the + add watermark button below the export settings and upload your logo or icon.
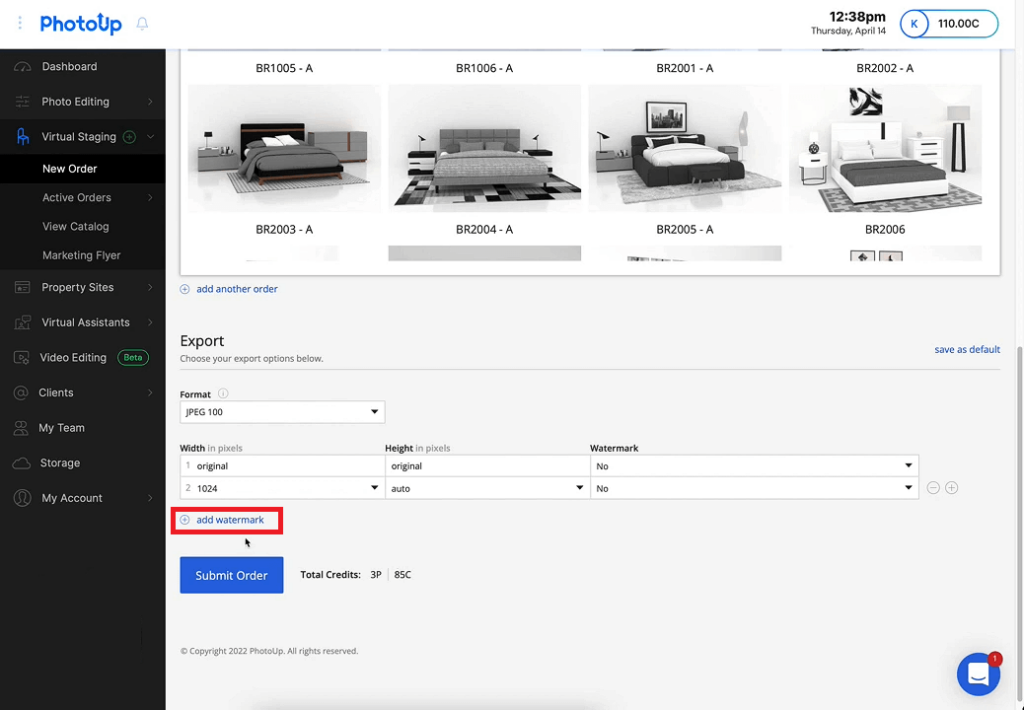
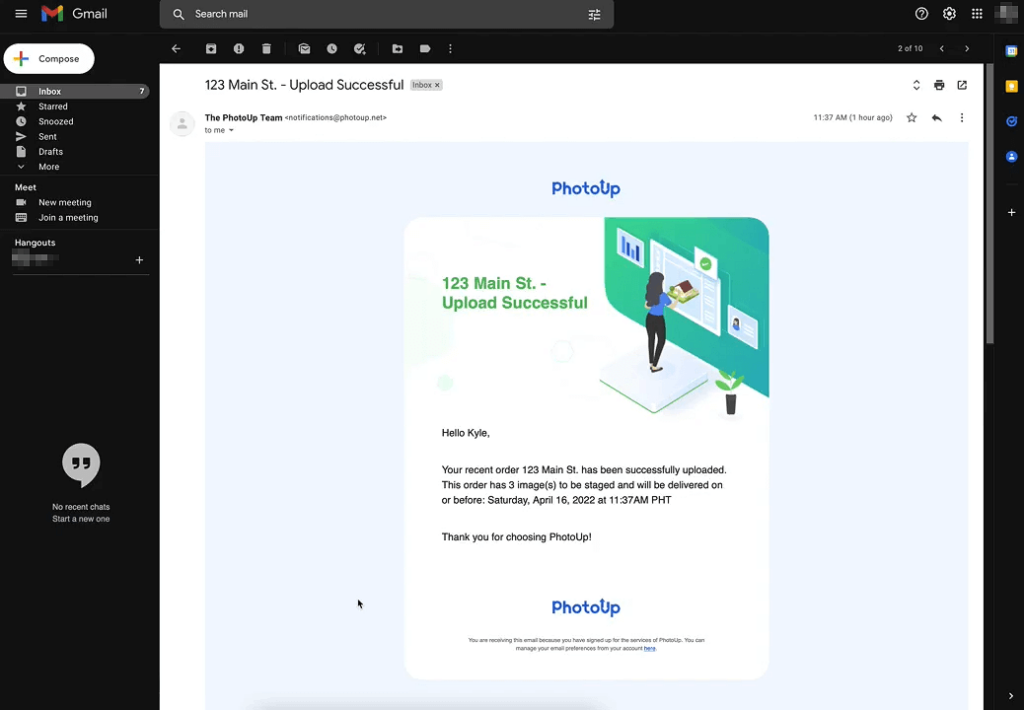
Then, click on the Submit Order button, and you’ll get a confirmation of your order. You’ll also receive a separate email that your upload was successful.
Now, you’re almost finished!
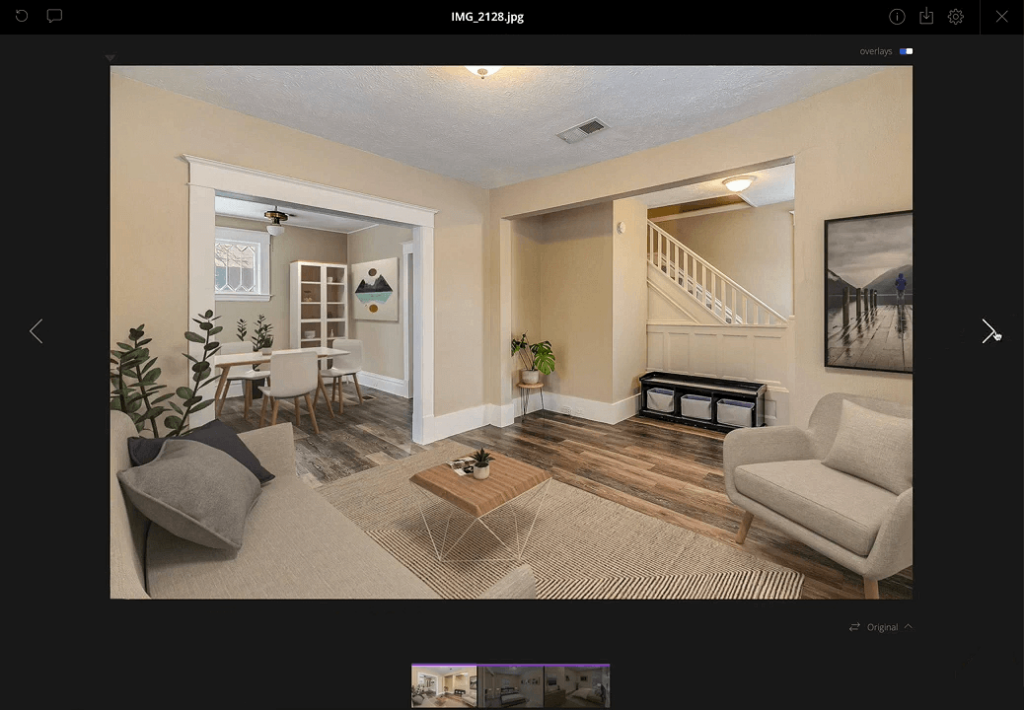
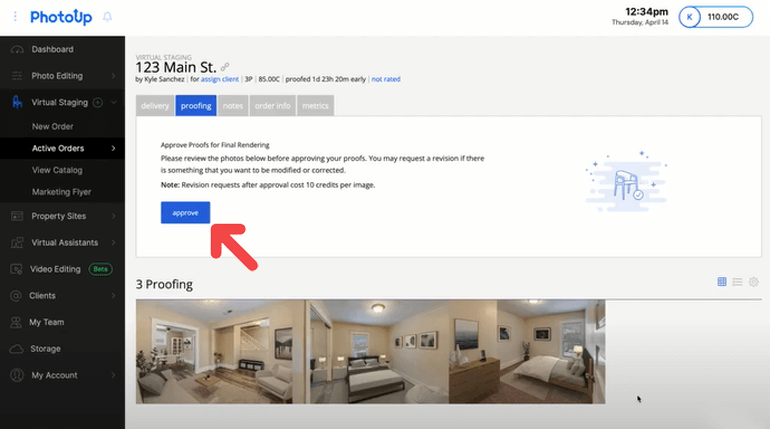
Step 9. Proofing Your Virtually Staged Photos
The final step is to review your virtually staged photos. When your photos are ready for proofing, you’ll receive an email containing a link.
This link will take you to an order page where you have the ability to view your photos and request revisions if needed or approve your order. Just click on the proofing button and review your images.

Additionally, PhotoUp offers 2 free revisions and then each additional revision costs 10 credits.
Furthermore, each image contains a before and after slider of the image. Simply, drag the slider back and forth to see the original photo and the final image.
10. Approve & Download
If everything looks okay, you can go ahead and Approve the order.
When the images are fully rendered you’ll receive a notification email. And when you click on the link in the email, it’ll take you back to the order page where you can download your high-resolution photos.
And there you have it!
It’s a quick and easy order process, and you’ll be equipped with captivating photos to start marketing your listing in a matter of hours.
Step 11. Save and Share
Once you’re done with the AI virtual staging, save the image and share it with your clients.
As you can see, virtual staging is a great way to show your clients what the space can look like once it’s renovated.
It can also save you a lot of time and money as you don’t have to move furniture or repaint walls physically. It’s actually up to 97% cheaper than traditional home staging.
Step 12. Get Feedback and Make Changes
Finally, get feedback from your clients and make changes if necessary.
Virtual staging is flexible and allows you to make changes as per your client’s requirements.
Overall, it’s a great way to get your client’s input before you start the physical renovation.
Quick & Easy
AI Virtual Staging
Interiors. Landscapes. Commercial. Virtually transform any space.
Why Choose PhotoUp’s AI Virtual Staging Service?
Hey, have you heard about PhotoUp? They’re an awesome virtual staging provider, known for their cutting-edge solutions.
With over a decade of industry experience and a team of professional editors worldwide, they can tackle any job, no matter how big or complex.
And the best part? Their AI virtual staging service is super user-friendly and won’t break the bank, starting at just $3 per image.
It includes awesome features such as:
- Photo-realistic staging of any room or space
- Remodeling and repairs
- Decluttering and depersonalizing of rooms
- Sky replacements and twilight effects
- Virtual landscaping
- And more!
On top of that, PhotoUp also provides an ecosystem of real estate marketing services like:
With PhotoUp, you’ll find everything you need to grow your business as a real estate photographer or agent.
Sign up for a free PhotoUp account today and let PhotoUp’s expert team of designers virtually stage your images in less than 48 hours!
We hope this blog post helped you learn how to renovate a space with virtual staging. If you enjoyed this post, make sure to check out the following resources as well:

