


Table of Contents
- Why Make Text Transparent in an Image?
- How to Make Text Transparent in Photoshop
- How to Make a Text Box Transparent in Photoshop
- Leave the Real Estate Photo Editing to PhotoUp!
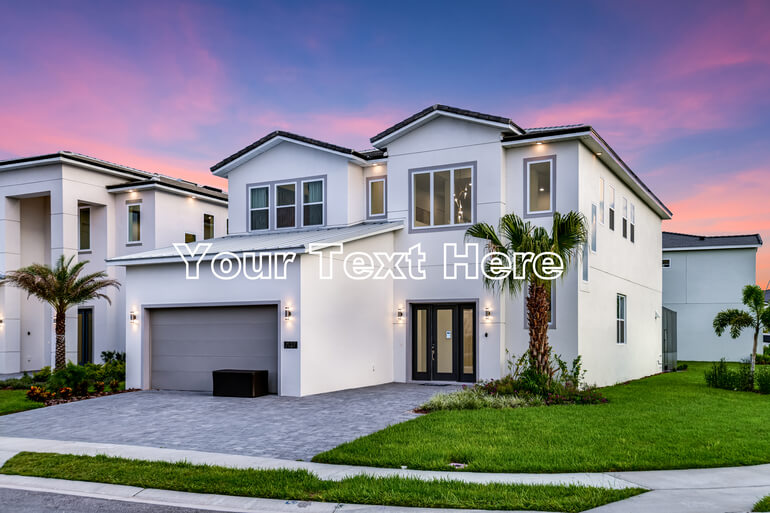
Do you want to learn how to make text transparent in Photoshop?
As a real estate photographer, you understand the importance of adding text to your images for marketing purposes. Whether it’s a property address, a tagline, or a call-to-action, text can help convey important information to potential buyers.
However, placing text on a photo can sometimes make the image look cluttered or too busy. An easy solution to this problem is making text transparent.
In this guide, we’ll show you how to easily make text transparent in Photoshop. We’ll also cover how to make a text box transparent for the person who rather prefers that look.
Let’s start by taking a look at why and when you may want to make your text transparent in an image.
Why Make Text Transparent in an Image?
As a real estate photographer, you can enhance the appeal of your photos by incorporating transparent text.
This technique allows you to add interesting elements without detracting from the beauty of the image.
By placing text strategically on the photo, you can ensure visibility without obstructing any important components.
This comes in handy when adding watermarks to your real estate photography, or when enhancing property flyers, calendars, postcards, magazines, and more.
Incorporating transparent text not only adds value to your photos but also adds a professional touch to your work.
Let’s give it a try and see the difference it can make!
How to Make Text Transparent in Photoshop
When editing your images in Photoshop, you may have noticed that selecting a transparent color for text layers isn’t possible. However, there’s a workaround to create outline-only text by converting it into a shape layer.
The easiest way to create transparent text using the outline method is by converting it into a shape.
But before proceeding with transparency, it’s important to ensure that your text is in its final form. While sizing can be adjusted later, make sure you have the correct font selected.
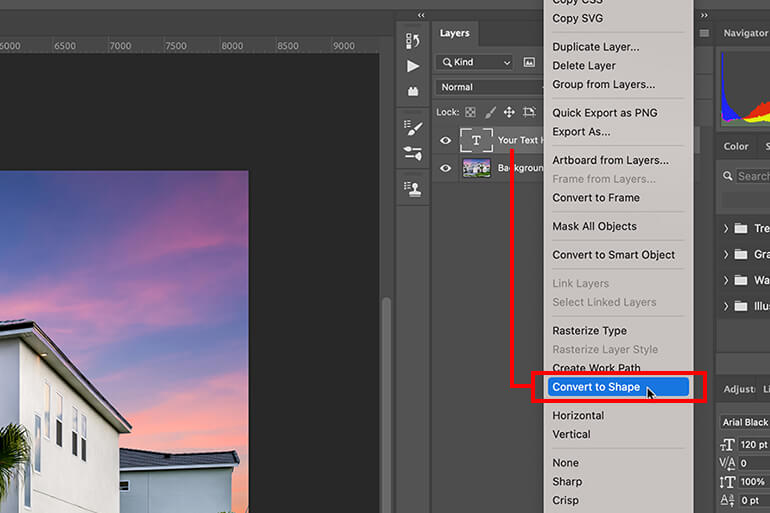
Step 1. Once you’re happy with the style of your text, you can right click on your text layer and go down to Convert to shape, and this will change your text layer into a shape layer.
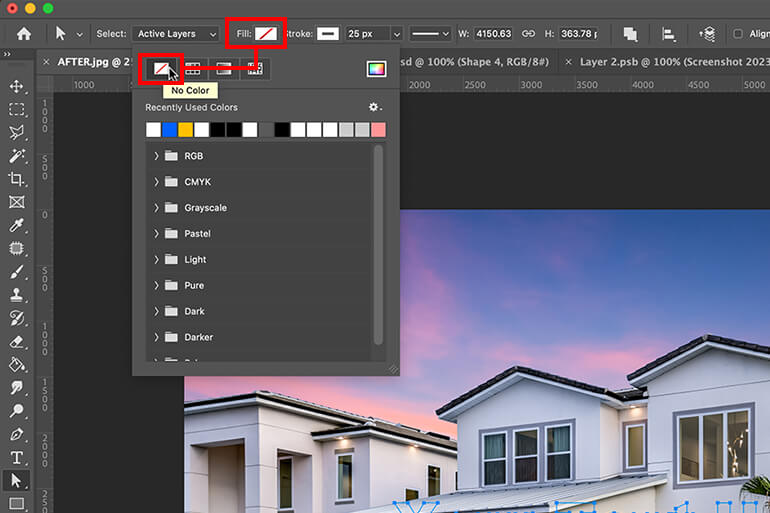
Step 3. You can now access the Shape Tool by pressing U on your keyboard and changing the Fill and the Stroke settings. To change the fill and stroke settings, go to Fill and choose Transparent, and your text will now be completely invisible.
Step 4. The final step is to add an outline by going to the Stroke setting and adding a white outline (or any desired color). You can also increase the size of the stroke to make the outline bolder.
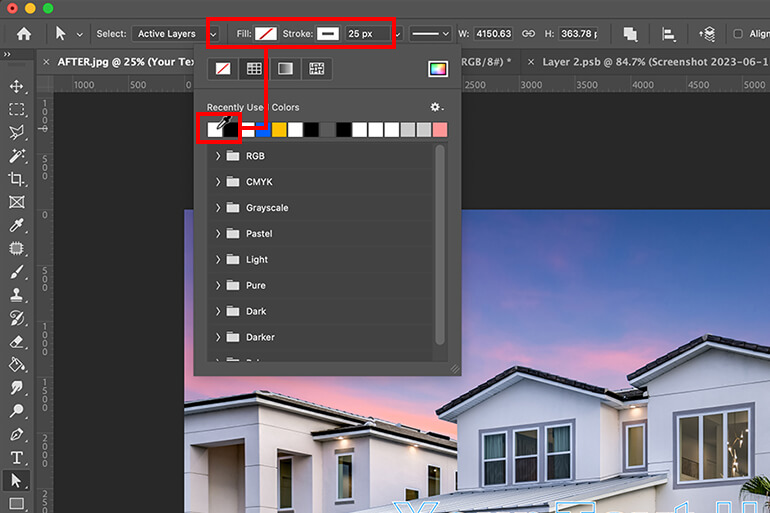
Step 5. Lastly, click off of your image, and you’ll have transparent text with only an outline on its own layer!
By following these steps, you’ll be able to enhance the visual appeal and engagement of your real estate photographs.
Let’s now take a look at how to make a text box transparent in Photoshop.
Have You Ever Thought To
Outsource Photo Editing?
Try it today with 5 free edits from three professional photo editors.

How to Make a Text Box Transparent in Photoshop
If you prefer to create a transparent knockout text box instead of just using a transparent text outline, we’ll create knockout text within a shape next.
To get started, we first need to make a rectangular shape and add some text inside of it.
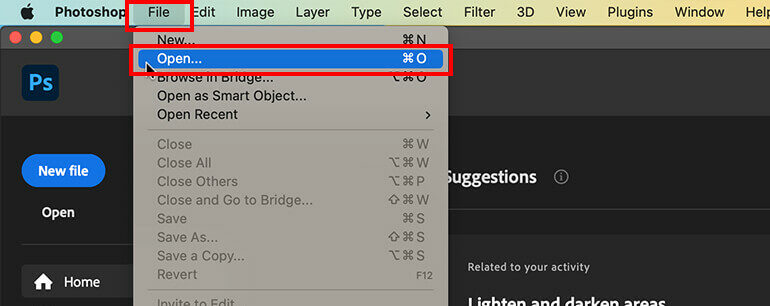
Step 1. To get started, open an image in Photoshop.
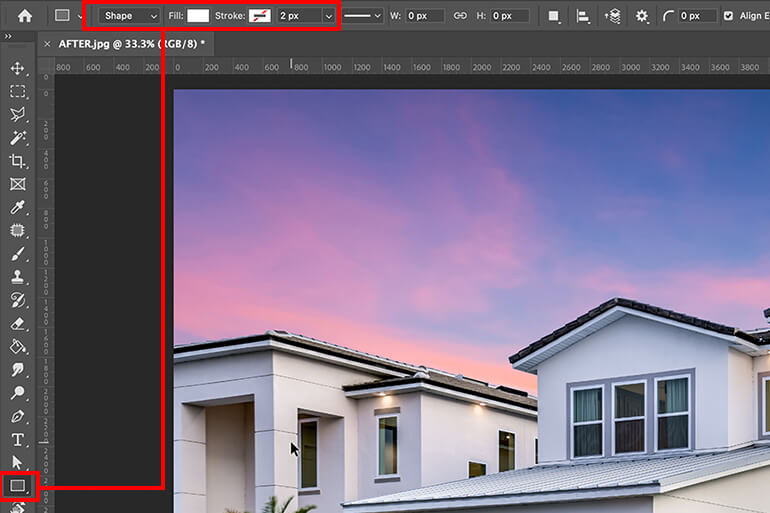
Step 2. Choose the Rectangle Tool in Photoshop, and set the Fill setting to White and the Stroke setting to Transparent.
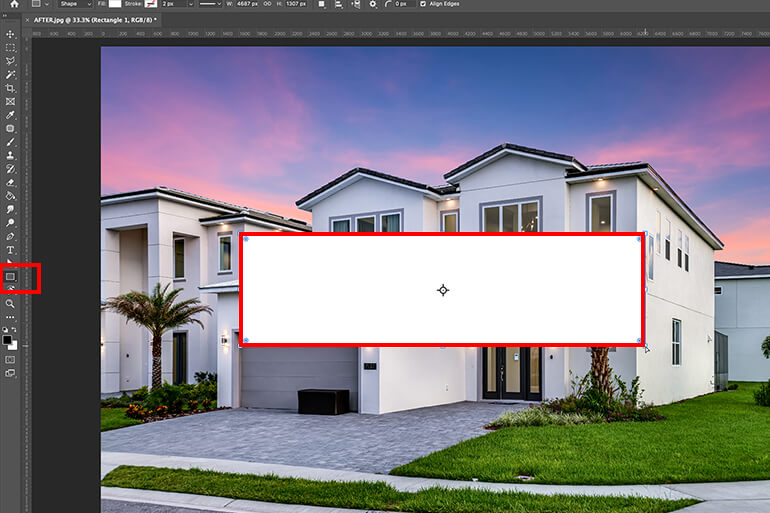
Step 3. Now, click and drag out the rectangle on your image and hold the Space bar to reposition the whole shape.
Step 4. Next, create your text layer by clicking on the Type Tool (T) and typing in your text. Make sure to position the text exactly where you want the knockout text to be because it can be hard to edit this afterward.
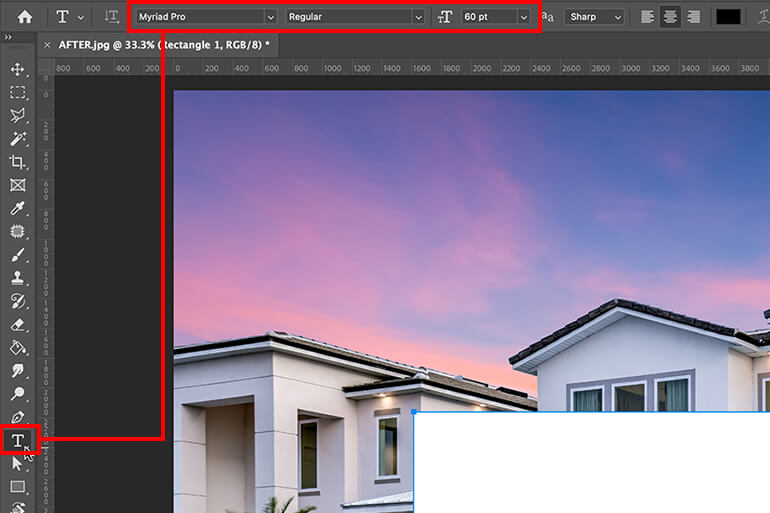
However, you can change the font of your text in the set the font family and set the font style menus, as well as the size in set the font size.
Create a Selection of the Text
Once your text is aligned perfectly within your shape, we’ll create a selection of the text using a Layer Mask.
Step 5. To do the knockout text effect, place your text in the middle of the rectangle. Then, press CMD + D (Mac) or CTRL + D (PC) to deselect the shape.
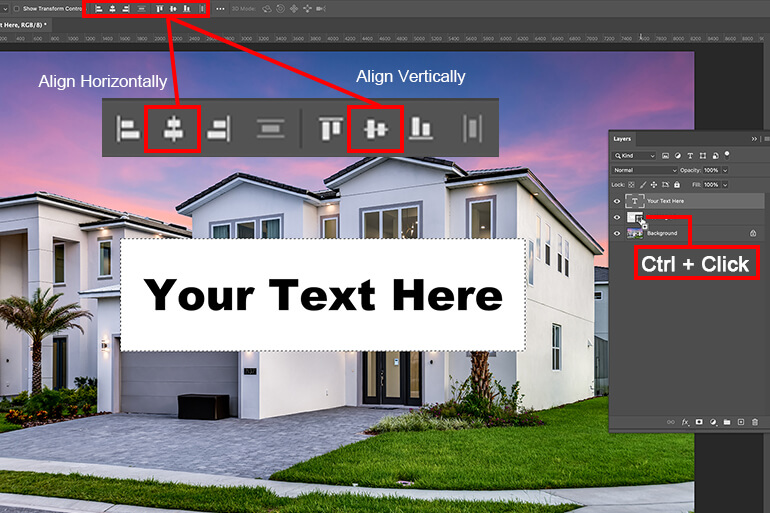
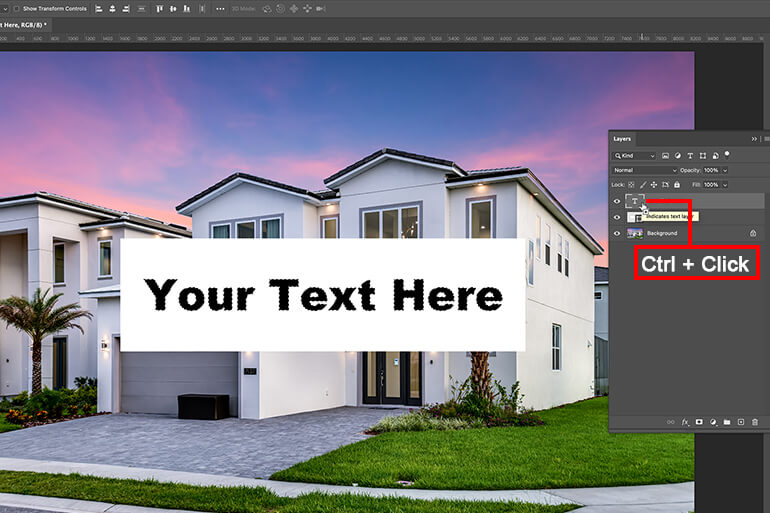
Step 6. Hold CMD + D (Mac) or CTRL + D (PC) once again and click on the text icon. As you can see, a small Marquee selection will pop up on the cursor. Simply, click on it and the text will be selected.
Step 7. Now, we’re going to apply a layer mask on our rectangle layer, so click on the rectangle layer and then press the Add layer mask icon.
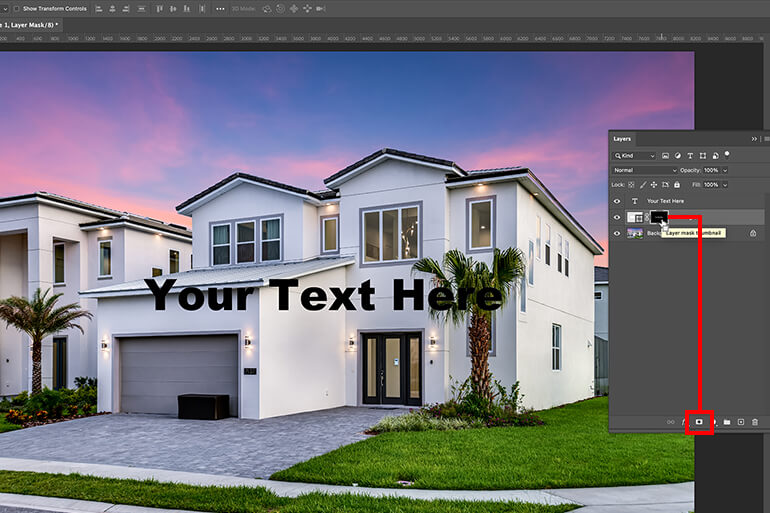
Step 8. Because the selection is opposite to what we want right now, we need to invert it by pressing CMD + I (Mac) or CTRL + I on your layer mask.

Step 9. From there, we’ll hide our text layer by clicking on the Eye icon in front of the layer, and voila!
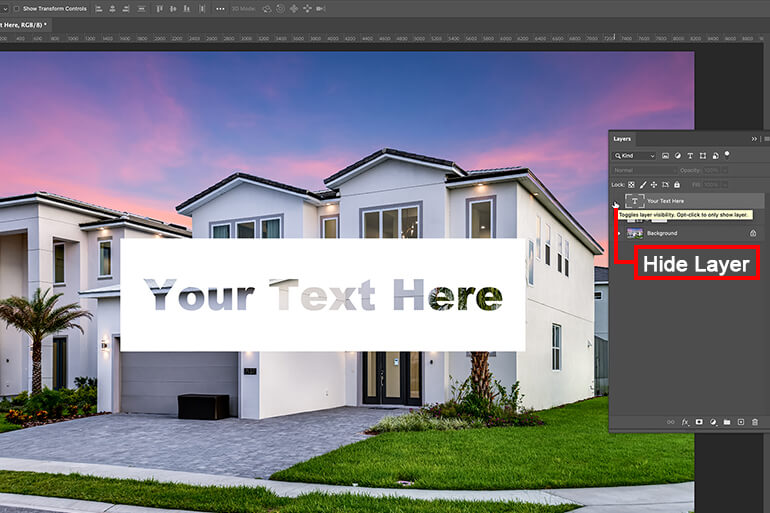
We now have a super cool transparent knockout text within our shape that will stay just where we want it to be!
Making text transparent in Photoshop is a quick and easy way to add text to your images without making them look too busy.
With a few simple steps, you can achieve the perfect level of transparency for your text. Overall, this is a great tool to have in your arsenal for creating eye-catching marketing materials.
Have You Ever Thought To
Outsource Photo Editing?
Try it today with 5 free edits from three professional photo editors.
Leave the Real Estate Photo Editing to PhotoUp!

If you lack the time or skills to edit your images, worry not… PhotoUp has got you covered!
With a team of professional real estate photo editors at your service, you can now leave your real estate photo editing tasks in capable hands.
With over 10 years of experience in the business, PhotoUp takes great pride in delivering unmatched quality, exceptional service, and competitive pricing.
Their extensive team of several hundred photo editors around the world ensures that your editing needs are met with utmost precision and attention to detail.
No matter the type of editing you require, PhotoUp’s dedicated editors will always go the extra mile to ensure that your real estate photos are nothing short of exceptional.
Our editors can help you with things like:
- Image correction and enhancement
- Color, brightness, and tone adjustments
- Window masking and glare reduction
- Clutter and object removal
- Line and angle corrections
- Improper exposure levels
- HDR editing
- Harsh shadows, lack of light, etc.
- And much more!
Browse Top Dedicated
Real Estate Photo Editors
Ready-to-hire editors for real estate photo editing, and more.
An Ecosystem of Real Estate Marketing Services
On top of that, PhotoUp also offers an ecosystem of real estate marketing services such as:

As you can see, we have everything you need for your real estate marketing needs under one roof!
How to Get Started
Getting started using PhotoUp’s real estate photo editing service is super easy.
All you need to do is sign up for a free PhotoUp account, upload your images, choose export setting and turnaround time, get your images returned to download, and that’s it!
PhotoUp Real Estate Photo Editing Uploader
Check out our real estate photo editing uploader demo to see how easy it is to get started:
It’s really as quick and easy as 1-2-3!
So, sign up for a free PhotoUp account today, and leave the real estate photo editing to PhotoUp. For a limited time, you even get 5 free edits when you sign up for an account!
We hope this blog post helped you learn how to make text transparent in Photoshop. If you found this post useful, you may also want to check out the following resources:

