


Table of Contents
- Why Edit the Sky in Real Estate Photography?
- What a Captivating Sky Can Do for Your Photos
- How to Easily Edit the Sky in Photos (9 Quick Steps)
- Expert Real Estate Photo Editing by PhotoUp
Do you want to learn how to easily edit the sky in photos to make them pop and capture homebuyers’ attention?
To sell a property faster and for top dollar, you need to create a feeling that homebuyers simply can’t resist and an inviting sky can change the whole mood of a photo.
In this post, we’ll show you how to easily edit the sky in your photos to create stunning images. But before we dig in deeper, let’s first look at why you should edit the sky in real estate photo photography.
Why Edit the Sky in Real Estate Photography?
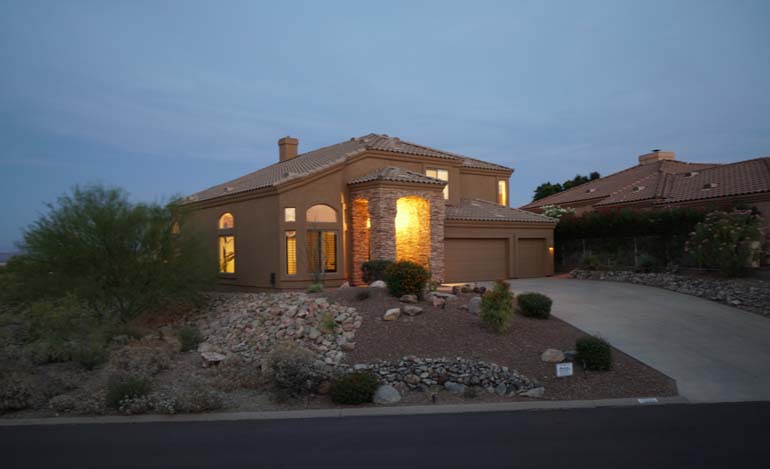

A beautiful, sunny, and inviting sky can have a remarkable impact on potential homebuyers and boost their mood.
A crystal-clear sky will highlight your home and may make it easier for you to sell it. You can also add rainbows, birds, moving clouds, beautiful sunsets, airplanes, and more to enhance your real estate photos.
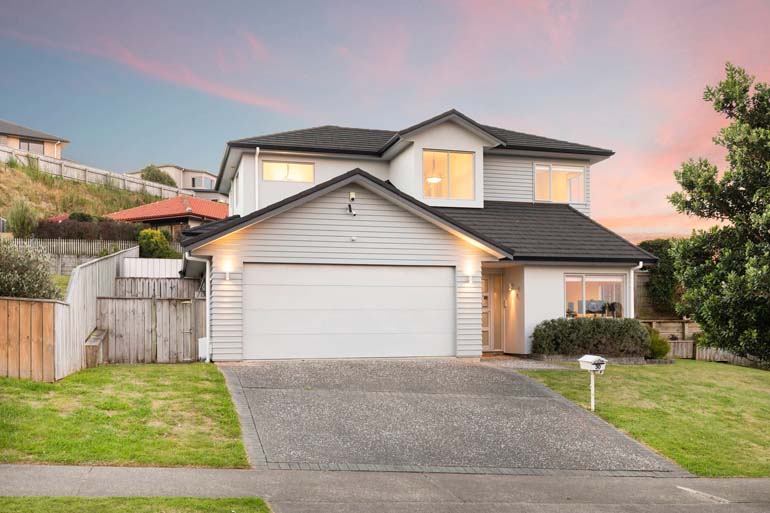
Here are some examples of how you can edit the sky in your real estate photos:


With a clear, bright, and welcoming sky, people may spend longer looking at the image since it looks enticing and they may also get more receptive to the actual property you are selling.
Simply put, it makes your real estate photos look better!
What a Captivating Sky Can Do for Your Photos
There are some obvious benefits of taking the extra time and effort to edit a beautiful sky in your real estate photos. That being:
- If editing the sky, you can tweak your property photograph to look more appealing to prospective homebuyers.
- As a real estate photographer, you don’t have to worry about the weather or choosing the best time of day to shoot the property. Instead, you can edit the sky to look sunny and inviting, no matter the time of day.
- You can edit the sky exactly as you want it to look. For example, you can choose a clear blue sky, a dramatic sunset, white puffy clouds, or a starry night. Whatever feeling you want to create, can be edited in Photoshop.
- As mentioned before, nothing affects a person’s mood more than the weather. Blue, sunny skies lift our spirits and will make us more inclined to look longer at the photo.
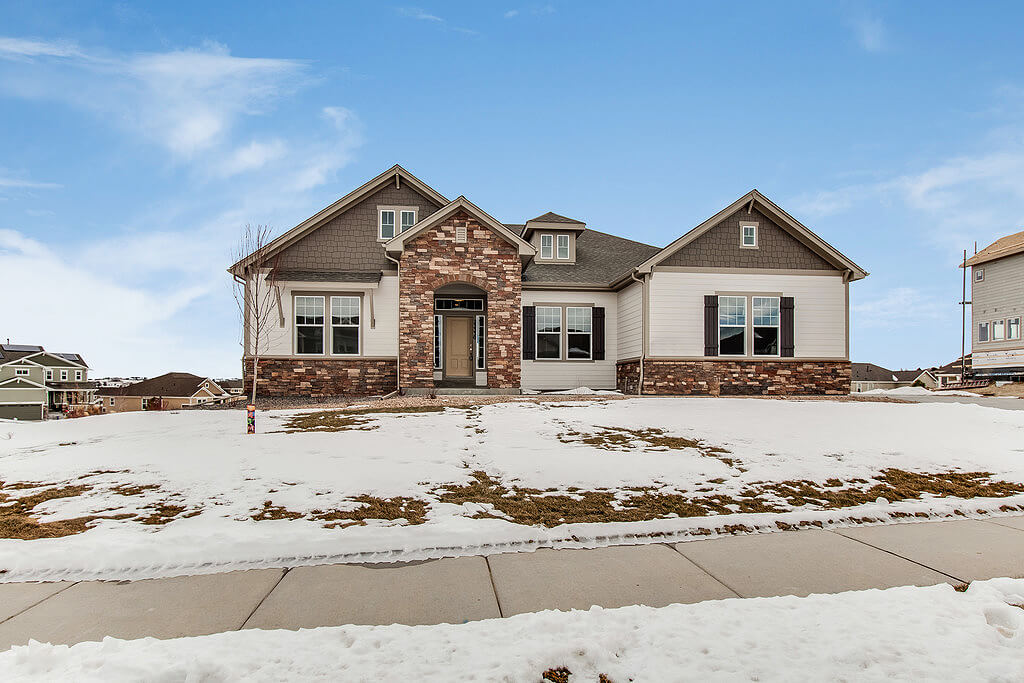
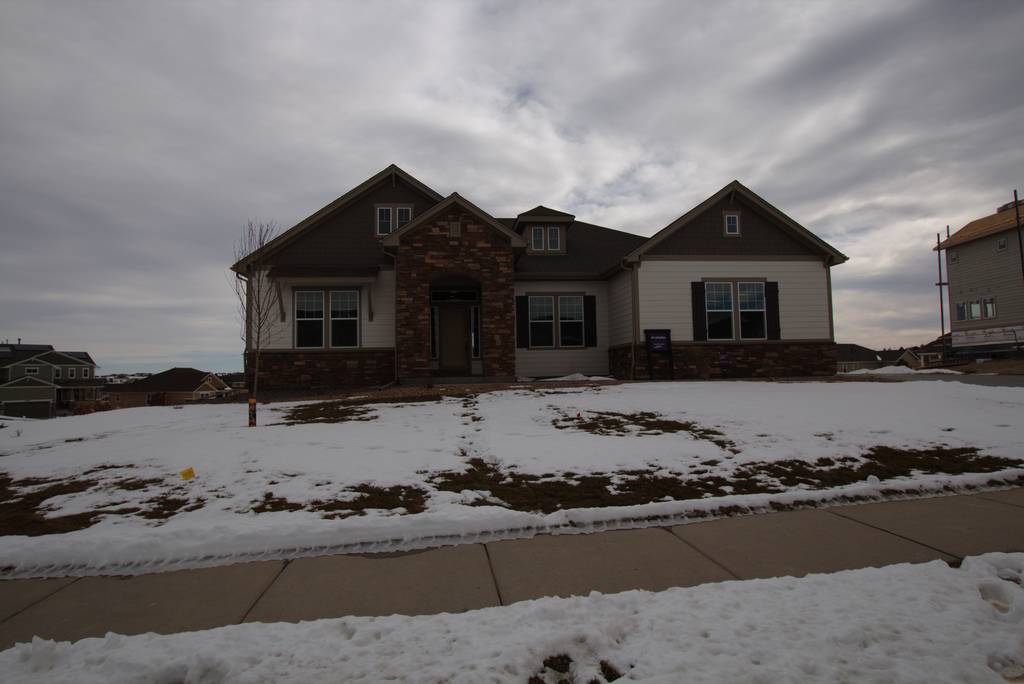
Now, that you know why you should edit the sky in your real estate photos, let’s take a look at how to easily do a sky replacement in Photoshop next. And we’ll show you how to do that by replacing a winter sky.
High-Quality & Consistent
Real Estate Photo Editing
Hire a dedicated editor with performance metrics from $7/hour.

How to Easily Edit the Sky in Photos (9 Quick Steps)
Here are 9 easy steps to editing the sky in your images using Lightroom and Photoshop. You can either watch the tutorial video or continue reading the text below.
Before we begin, select a winter sky or any sky that you’d like to use as a replacement. (A tip is to scroll through stock photos or your own images until you find the kind of sky you’re looking for).
Alright, let’s get started!
Step 1. In Lightroom, start by doing the usual basic adjustments to the photo. Make sure that the snow in your photo has a neutral color that’s not too cold or too warm.
Step 2. Now, move the photo in Photoshop by right-clicking on the image and selecting Edit in Photoshop.
Step 3. Next, duplicate the photo. Go to the Channel tab, and duplicate the Blue channel, as that will help you to process the sky replacement.
Step 4. Adjust the level by pressing CTRL + L on the keyboard. And move the slider to adjust the levels until you’re satisfied.
Step 5. In the next step, you want to make the non-sky area black for easy contrast. (Pro-tip, use a Dodge brush to lighten up the sky for easy selection).
Step 6. Then, load that channel as a selection. Once you’ve loaded the channel, hold down the ALT button while clicking the Masking button.
Step 7. Now, import the sky you’ve chosen into Photoshop as a layer, and place it underneath the duplicate layer you created earlier. Then, adjust its position to look natural.
Step 8. For best results, add a white gradient on the horizon by adding a new blank layer on top of the sky replacement layer.
Step 9. Finally, use the Gradient tool (G) with white to transparent gradient, which will blend the sky nicely into the mountain view. When you are done, save the new image.
And there you have it! You have now made a sky replacement in Photoshop, congratulations!
Have You Ever Thought To
Outsource Photo Editing?
Try it today with 5 free edits from three professional photo editors.
Expert Real Estate Photo Editing by PhotoUp
If you want to edit the sky in your photos, either by a quick sky replacement or a more advanced day-to-dusk edit, PhotoUp’s expert real estate photo editing team can help you create stunning images.
As a leading global real estate marketing company, the company offers a full range of real estate photo editing and AI virtual staging services, as well as single property websites, property flyers, and virtual house tours.
Additionally, PhotoUp’s expert team can handle any photo editing job — big or small, complex, or simple. Our skilled photo editors can help with the following issues:
- Improper exposure levels
- Harsh shadows, lack of light, etc.
- Blurred images that were taken without a tripod
- Images that need cropping or other effects
- Lawn greening and sky replacements
- Twilight editing
- Clutter and object removal
- Line and angle corrections
- And much more!
Best yet, our pricing is affordable, with most photo editing services costing $1.50 to $9.00 per image.
Browse Top Dedicated
Real Estate Photo Editors
Ready-to-hire editors for real estate photo editing, and more.
All you need to do is sign up for a free PhotoUp account, place your first order, and your photographs will be delivered in less than 24 hours.
PhotoUp Real Estate Photo Editing Uploader Demo
To see how easy it is to get started with PhotoUp, you can check out our real estate editing uploader demo:
It’s as easy as 1-2-3!
Get started with PhotoUp today, and we’ll be more than happy to take the editing task off your plate. Did we mention that you get 5 free credits when you sign up!
We hope this post helped you learn how to easily edit the sky in photos using Lightroom and Photoshop. Before you go, you may also want to check out the following resources:

