


Table of Contents
- Why Editing Picture Size Is Necessary for Photo Editing
- How to Edit Picture Size in Photoshop (Step-by-Step Guide)
- Tips for Resizing Images in Real Estate Photography
- Never Worry About Editing Again With PhotoUp!
Do you want to learn how to edit picture size in Photoshop?
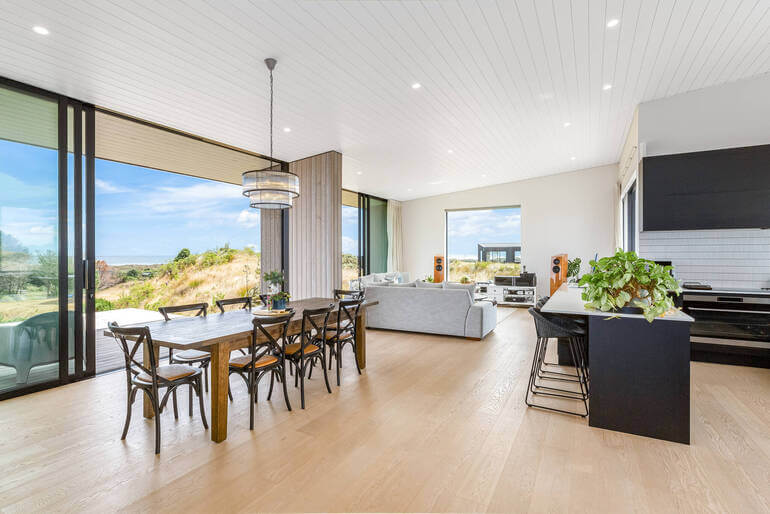
Real estate photography is all about presenting properties in their best light, and properly sizing images plays a crucial role in achieving this.
Whether you’re preparing images for online listings, printing brochures, or creating presentations, editing picture size in Photoshop ensures your photos meet the required specifications.
In this guide, we’ll walk you through the process of editing picture size in Photoshop, discuss when resizing is necessary for real estate photo editing, and provide real-world examples.
Why Editing Picture Size Is Necessary for Photo Editing
Editing picture size in Photoshop is a simple yet powerful way to ensure your real estate photos look their best across all platforms.
From online listings to printed materials, properly sized images contribute to a professional and polished presentation.
Here are some scenarios where you need to change the size of your photos:
- Optimizing for Online Listings: Websites like Zillow, Realtor.com, or other property websites often have size requirements for images. Resizing ensures your photos display correctly without cropping or distortion
- Printing Materials: Brochures, home flyers, and posters require high-resolution images with specific dimensions to look professional and sharp
- Social Media Posts: Platforms like Instagram and Facebook have unique aspect ratio guidelines that need resizing to maintain image quality
- Virtual Tours and Slideshows: Consistent sizing ensures seamless transitions and a polished presentation for virtual tours and slideshows
Adjusting image size not only meets these specific requirements but also ensures your real estate photos make a professional and lasting impression across various platforms.
Examples of When to Resize Images
As mentioned earlier, resizing images is a versatile skill in real estate photography, ensuring your visuals are perfectly suited for different platforms and purposes.
Here are some examples of when it’s good to resize your images:
- Converting a 6000×4000-pixel high-resolution image to a smaller 1920×1080-pixel size for web use
- Resizing images for a print-ready resolution of 300 dpi for brochures
- Adjusting an image to a 1:1 aspect ratio for Instagram posts
- And more.
By tailoring your image dimensions to specific needs, you can maintain both the visual appeal and functionality of your real estate photos.
Have You Ever Thought To
Outsource Photo Editing?
Try it today with 5 free edits from three professional photo editors.

How to Edit Picture Size in Photoshop (Step-by-Step Guide)
With this in mind, let’s take a look at how to edit the picture size in Photoshop. By following the steps outlined in this guide, you’ll be able to resize images efficiently and confidently.
You can either watch the video tutorial or continue reading the text below:
How to Edit Picture Size in Photoshop Using the Image Size Dialogue Box
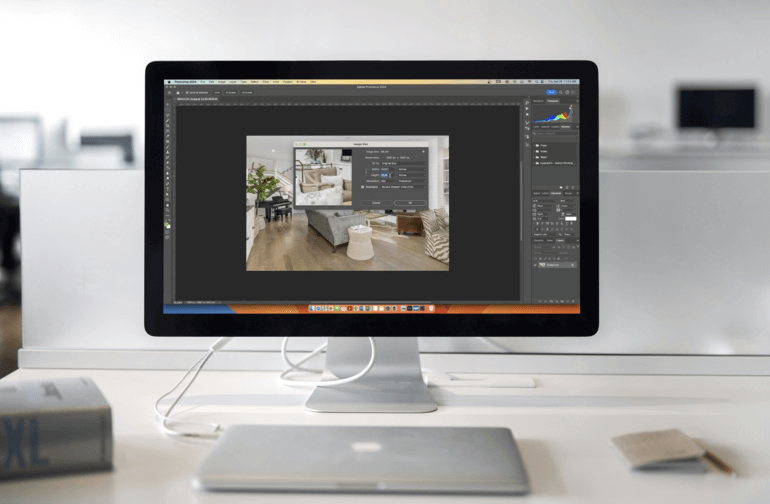
Step 1. With your image open, navigate to Image > Image Size. The Image Size dialogue box will appear.
Step 2. In the Image Size dialogue box, you will see options to change the Width and Height of your image.
Step 3. Make sure the Constraint Proportions checkbox is checked to maintain the aspect ratio.
Step 4. Enter the new dimensions for your image. You can choose to input the size and Pixels, Inches, Centimeters, and more.
Step 5. Now, choose the Resampling Method. Below the Dimensions, you will find the Resample option. This determines how Photoshop adds or removes pixels. Select a resampling method from the dropdown.
Step 6. At the top of Dimensions, you will see the estimated file size. Adjust the Dimensions and Resampling method until you get a file size close to your target.
Step 7. Once you are satisfied with a new size, click OK to apply the changes.
You’ve now learned how to edit picture size in Photoshop!
Let’s move on to showing you how to create a smaller file size without losing image quality.
How to Create a Smaller File Size Without Losing Image Quality
If you want to resize a photo in Photoshop while keeping the original file size intact, you can use the Export Method.
This is what to do:
Step 1. Navigate to File > Export > Export As. The Export As dialogue box will appear.
Step 2. In the Export As dialog box, you will see options to change the Width and Height of your image. Enter the new dimensions for your image.
Step 3. Select the desired File Format from the dropdown menu. Choose the one that best suits your needs.
How to Adjust the Quality Settings
Step 4. Use the Quality slider to adjust the Compression level. Lower quality means more compression and a smaller file size while higher quality means less compression and a larger file size.
Step 5. Keep an eye on the Estimated file size displayed on the left side of the dialogue box. Adjust the quality slider until you achieve the desired file size.
Step 6. Once you are satisfied with the new size and quality settings, click Export. You can export the image as a JPEG and reduce the quality to further decrease the file size.
Additionally, use PNG or PSD format if you want to keep a transparent background.
Your original file will remain unchanged, ensuring you maintain the highest quality version.
And that’s it!
Tips for Resizing Images in Real Estate Photography
Here are some tips for resizing your real estate photos or any type of images:
- Batch Resize: If you’re working with multiple images, use Photoshop’s Image Processor to resize all images at once
- Crop for Composition: After resizing, consider cropping to enhance the composition and focus on key property features
- Export for Web: When saving images for online use, use File > Export > Save for Web to optimize file size without losing quality
Whether you’re preparing a single photo or an entire portfolio, resizing ensures your work meets the standards of a competitive real estate market.
Have You Ever Thought To
Outsource Photo Editing?
Try it today with 5 free edits from three professional photo editors.
Never Worry About Editing Again With PhotoUp!
At PhotoUp, we understand the power of exceptional real estate photography in making a lasting impact.
Whether you’re a real estate photographer looking to optimize your workflow or an agent aiming to make your listings stand out, our team of expert editors is ready to provide the support you need.
What Is a Dedicated Editor?
A dedicated editor is your go-to professional who consistently works on your projects, ensuring your photos maintain a cohesive style and unparalleled quality.
Browse Top Dedicated
Real Estate Photo Editors
Ready-to-hire editors for real estate photo editing, and more.
With a dedicated editor, you get tailored attention. Your editor becomes familiar with your unique preferences and requirements, ensuring consistency across all your images.
Their expertise extends beyond editing to include:
- Photo culling and organization
- Maintaining a consistent style and quality
- Custom branding and labeling
- Account management, photo delivery, and placement
This personalized approach doesn’t just improve your photos—it saves you valuable time and money.
Cost-effective and High-Quality Solutions
On average, a dedicated editor can produce over 1,800 high-quality edits per month, reducing your cost to as little as $0.50–$0.72 per edit.
This is an affordable way to elevate your images without sacrificing quality. Our dedicated editors are rated “Good” or “Amazing” over 99% of the time!
Investing in a dedicated real estate photo editor isn’t just about better images—it’s about expanding your business, impressing clients, and standing out in the competitive real estate market.
Enhance Your Real Estate Marketing
Not just editing… A dedicated editor can also help with a range of marketing tasks, including:
We have everything you need to enhance and market real estate photography in one user-friendly platform.
How to Get Started
Wondering how to begin collaborating with a dedicated photo editor? It’s a breeze with just two straightforward steps:
Step 1. Reach out to the sales team via email at support@photoup.net to express your interest in trying out a dedicated editor.
Step 2. Upload a Dedicated Editor Trial, enabling you to submit one set of images to three dedicated editor candidates.
PhotoUp Dedicated Editing – Real Estate Photo Editing
To see how easy it is to get started with a dedicated editor, check out our dedicated editing demo:
It’s as simple as 1-2-3!
During the free trial period, PhotoUp remains committed to collaborating with you until you are completely satisfied with the results and service.
Let PhotoUp help you make a memorable impact and take your real estate marketing to the next level! Sign up for a free account and get started today!
For a limited time, you even get 10 free credits you can use on any of our services when signing up for an account.
We hope this guide helped you learn how to edit picture size in Photoshop. Before you go, you may also want to check out the following resources:

