


Table of Contents
- What Characterizes Dark and Moody Photography?
- 4 Tips for Shooting a Moody and Dark Photography
- How to Edit Moody and Dark Images in Photoshop
- Save Time With PhotoUp’s Professional Photo Editing
Are you looking into how to edit moody and dark images in Photoshop to create a mysterious and melancholic look?
The moody and dark look in images is becoming more and more popular with the rise of social media and image-based platforms like Instagram and Pinterest.
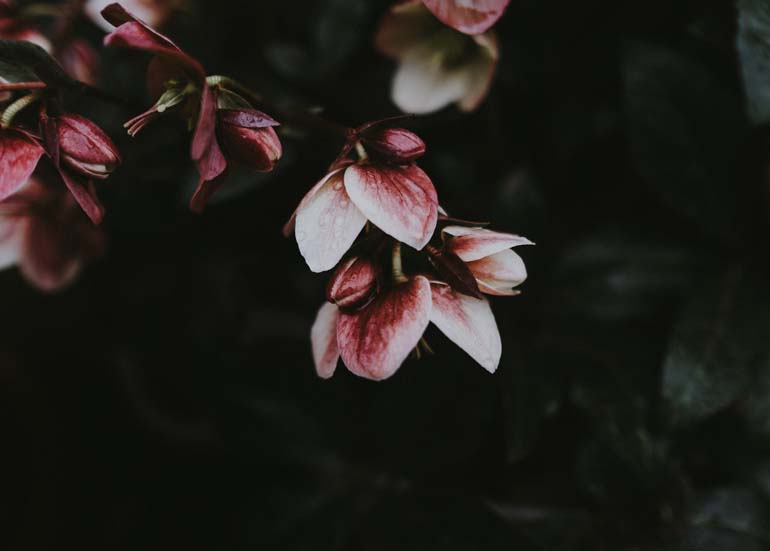
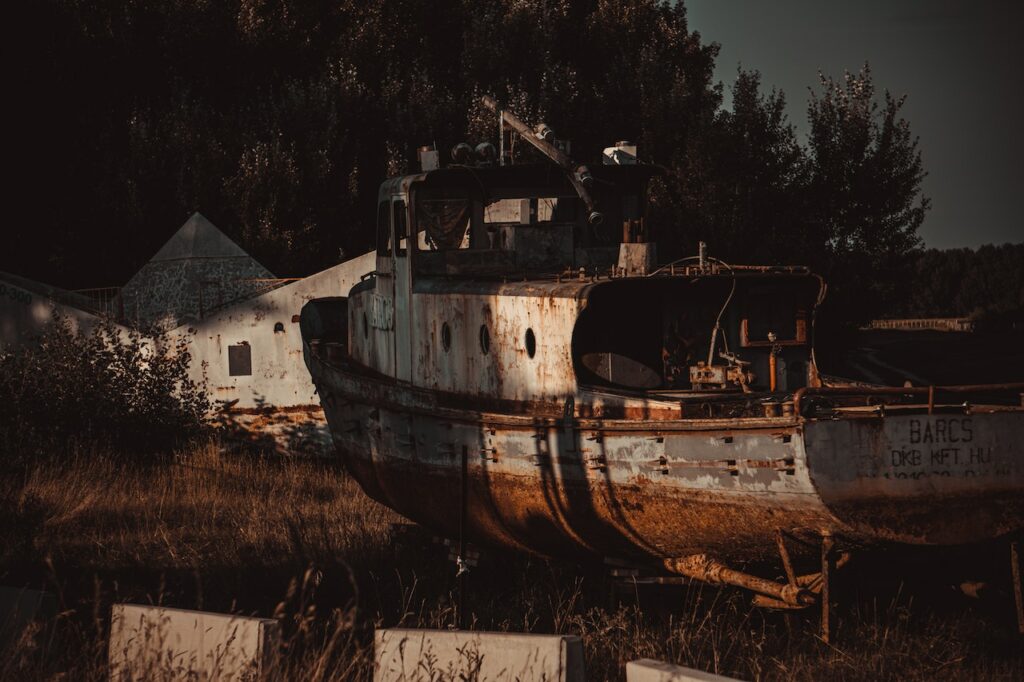
Dark and moody images give an impression of melancholy and mystery that can create the emotional response from viewers that many photographers are looking for.
In this post, we’ll show you how to edit moody and dark images in Photoshop. We’ll also cover what dark and moody photography is and give you tips on how to shoot this type of photography.
What Characterizes Dark and Moody Photography?
Mood essentially relates to the lighting and tones in the photo, making it look dark and brooding.
When the subject, lighting, and composition work together to create a photo that makes the viewer feel a sense of melancholy and mystery, that picture is considered moody.
In other words, dark and moody photography describes an overarching look and feel that encapsulates the light, tones, and processing of an image.
You can achieve this look using some simple photo editing techniques in Photoshop, which we’ll show you in a bit. But as an experienced photographer, you can also prepare your photoshoot to get similar results.
4 Tips for Shooting a Moody and Dark Photography

Good photography is more than knowing how to use your camera. And being able to invoke an emotional response in your viewers takes preparation and skills.
You also need an understanding of composition and light.
Mood doesn’t happen by accident and to shoot a dark and moody photo, you’ll have to carefully consider things like light, location, lens choice, and shutter speed.
We have put together 4 tips to shoot a moody and dark photo:
1. Use a Normal Focal Length Lens
To best capture the dark and moody light, we recommend that you use a wide to normal focal length lens.
Lens range starting from 24mm and tops out at 85mm or 35mm to 50mm are generally good focal lengths for dark and moody photos.
Even though it may be tempting to open your lens up as far as it goes, shooting at f/4-5.6 or narrower will help you shoot a moody and brooding shoot.
2. Leverage the Correct Light
It’s essential to use the correct light to get that dark and mysterious look in your photos. That being the case, dark and moody light has some notable characteristics, which are:
- Dim
- Directional
- And contrasty.
For this composition, it’s best to shoot in low light at the end of the day, also described as the golden hour. Additionally, window light is another great tool to achieve this type of lightning as well.
3. Consider the Location of Your Shoot
In both indoor and outdoor shots, the location plays a big role in the color palette of the image. For the most favorable results, it’s best to work with dark or neutral elements in the frame.
For example, indoor factors to help get dark and moody shots are the use of backdrops and furnishings, plus items that cast shadows.
And for outdoor shots, you’ll need to work with the scenery and foliage like the natural browns of late fall and the last light of the day.
4. Take Long Exposure Shots
While this mainly applies to landscape photography, you can apply long exposure shots to other subjects as well with a little imagination.
Slow shutter speeds are a result of shooting in low light, with a narrow aperture, and using a low ISO setting like 100 to obtain the best image quality.
The required shutter speed for moody and dark shots is somewhere around 1/2 second to 60 seconds or more.
Remember to use a good tripod and a cable release to keep the camera still throughout the exposure.
Have You Ever Thought To
Outsource Photo Editing?
Try it today with 5 free edits from three professional photo editors.

How to Edit Moody and Dark Images in Photoshop
Now that you know how to shoot dark and moody photos, let’s take a look at how to edit them in Photoshop.
To get started, you can either watch the video or continue reading the text below:
Editing Dark and Moody Images in Photoshop
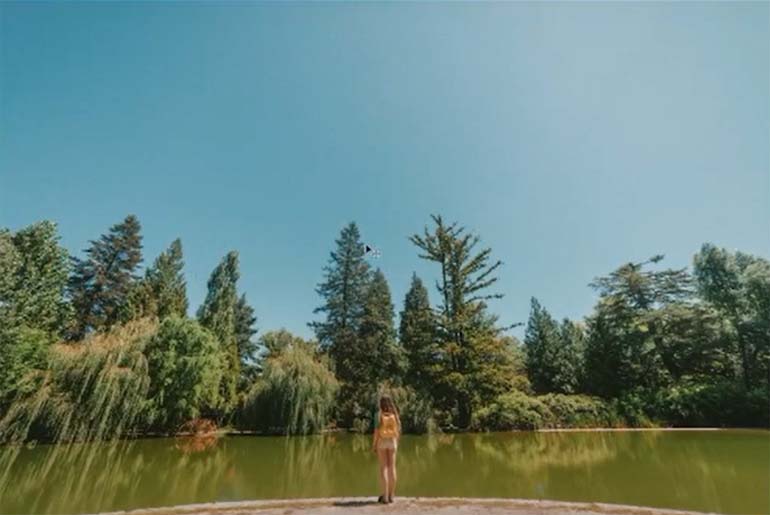
Step 1. To turn this photo into a dark and moody image, go to Filter and click on the Camera Raw Filter option and the Camera Raw Filter will open.
Step 2. From here, open the Basic Panel and apply some adjustments. Adjust the White Balance, Temperature, and Contrast to make it a natural-looking shot.
Step 3. Once your image looks good, bring down the Highlights, Shadows, and Whites to make the photo dark. But bring the Blacks up to retain details in the dark areas.
Step 4. Next, add Clarity and Dehaze to make the image crisp and clear.
Step 5. Then, bring down Vibrance and Saturation to apply the moody effect.
Step 6. In the next step, adjust the Tone Curve to create an interesting low-contrast effect.
Step 7. Now, go to the Color Mixer and adjust the color that you want to boost or desaturate.
Step 8. Once you’re happy with the toning, adjust the Luminance to darken some of the colors. And apply Sharpness to sharpen the image and reduce the noise from the adjustment that we have applied.
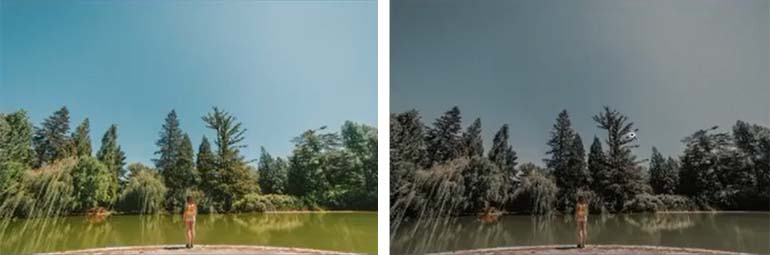
Step 9. When you feel satisfied with your image, click Okay to save. We have now turned this bright and vibrant image into a moody and dark image after applying some adjustments.
Check the before and after preview to see the difference, and that’s it!
Have You Ever Thought To
Outsource Photo Editing?
Try it today with 5 free edits from three professional photo editors.
Save Time With PhotoUp’s Professional Photo Editing
Typically, editing dark and moody images isn’t difficult. However, with an easy technique like this, you can easily go overboard and end up with an image in which the toning is more distracting than mood-enhancing.
By using a professional photo editing service like PhotoUp, you can ensure the perfect color and exposure balance to make your images look dark, moody, and mysterious.
Browse Top Dedicated
Real Estate Photo Editors
Ready-to-hire editors for real estate photo editing, and more.
Best of all, this will help you save time that you can use to be out in the field shooting more photography and getting more clients. Not to forget, spend more time with your family and loved ones!
Starting at the low cost of $1.50 per image and with a turnaround of 24 hours or less, our skilled photo editors can, for example, help with:
- Improper exposure levels
- Harsh shadows, lack of light, etc.
- Blurred images shot without a tripod
- Images that need cropping or other effects
- Image correction and enhancement
- Color and tone adjustments
- Image retouching and background removal
- Lawn greening and sky replacements
- Decluttering and angle corrections
If you’re a real estate photographer or agent, you may also be pleased to know that PhotoUp also offers additional services such as:
When signing up for a free PhotoUp account, you’ll get access to our user-friendly photo management system, so you can easily upload and receive photos.
PhotoUp Photo Editing Uploader
To see how quick and easy it is to get started with PhotoUp, check out our photo editing uploader demo:
As simple as that!
Before you go, we have another surprise for you…
…if you sign up for a free PhotoUp account today, you’ll receive 5 free edits to try us out!
We hope this blog post helped you learn how to edit moody and dark images in Photoshop. If you enjoyed this article, you may also want to check out the following resources:

