


Table of Contents
- What Does Transparent Text on an Image Mean?
- When to Add Transparent Text on an Image?
- 2 Techniques to Make a Text Box Transparent in Photoshop
- Want Help With Professional Photo Editing?
Do you want to learn how to make a text box transparent in Photoshop using 2 simple techniques?
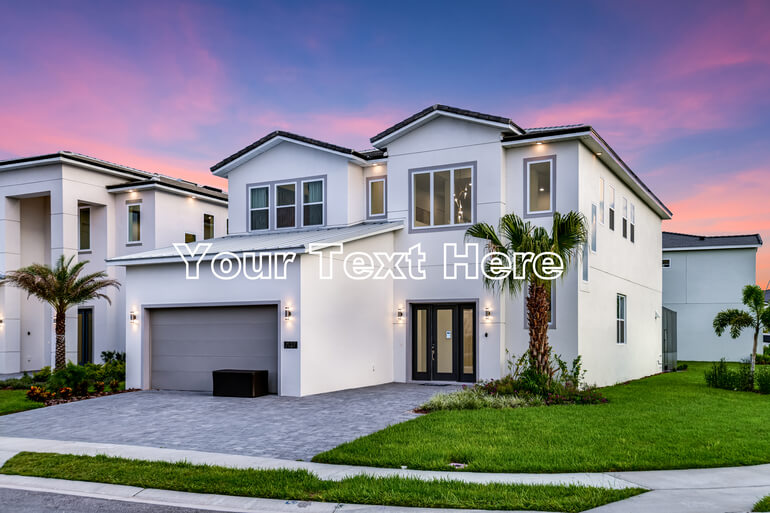
Adding transparent text to an image can be a fun and creative way to make it stand out, without taking anything away from the beauty of the image itself. This technique is perfect for anyone looking to enhance their photos or add watermarks to protect their intellectual property.
In this tutorial, we’ll show you how to make 2 different types of transparent text in Photoshop, as well as make the background shape transparent so that your text will be extra eye-catching.
Don’t worry, the techniques we’ll use are beginner-friendly and easy to follow.
Let’s get started by explaining what transparent text is and when it can be useful to add to your images!
What Does Transparent Text on an Image Mean?
Transparent text is text that appears to be cut out of a background due to its transparency, allowing the background to show through its lettering. This creates a visually striking effect.
In other words, transparent text has nothing in the background pixels, allowing what’s behind it to show through.
When to Add Transparent Text on an Image?

Incorporating transparent text on an image is a great way to add interest to a photo without taking away from its beauty.
Basically, it allows you to place the text on an image so that it can be seen without obstructing any essential components of the photo.
This technique is ideal for adding watermarks to your real estate photography, enhancing calendars, postcards, magazines, and even more.
3 Techniques to Make a Text Box Transparent in Photoshop
Here are 3 simple techniques on how to make a text box transparent in Photoshop, including how to make a transparent shape underneath your text box to make it pop and create a cool effect.
1. Transparent Knockout Text Box
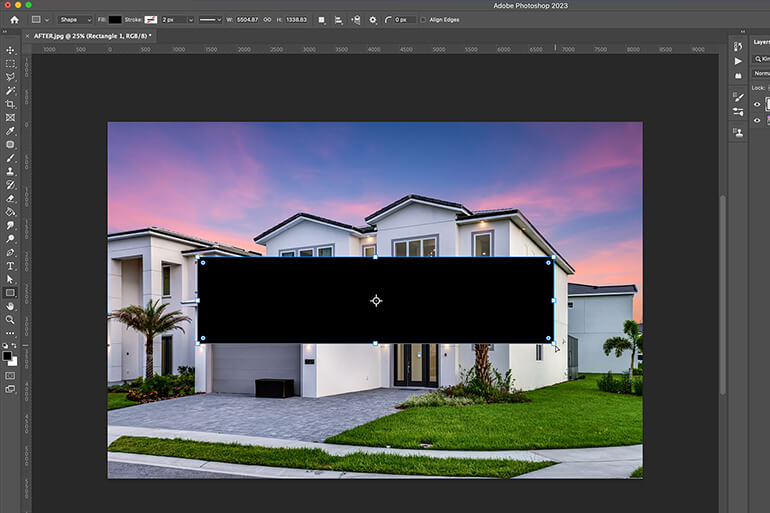
For our first effect, let’s create knockout text within a shape. First, we need to make a rectangular shape and add some text inside of it.
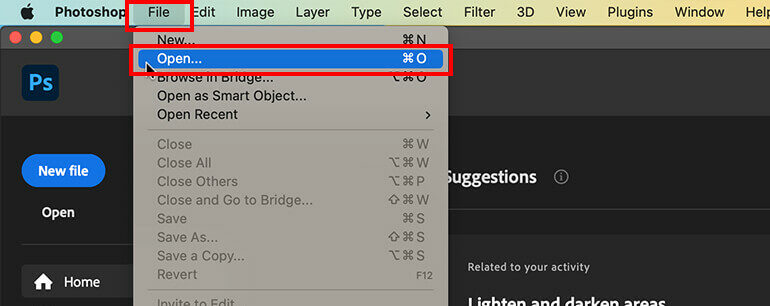
Step 1. To get started, open an image in Photoshop.
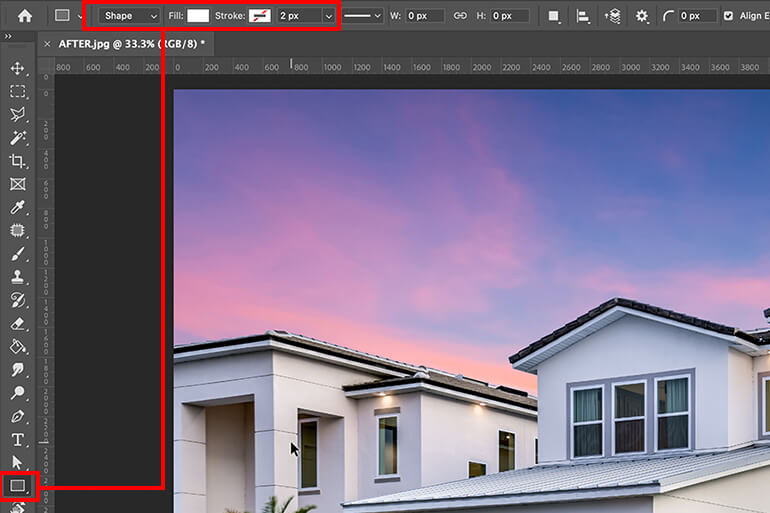
Step 2. Choose the Rectangle Tool in Photoshop, and set the Fill setting to White and the Stroke setting to Transparent.
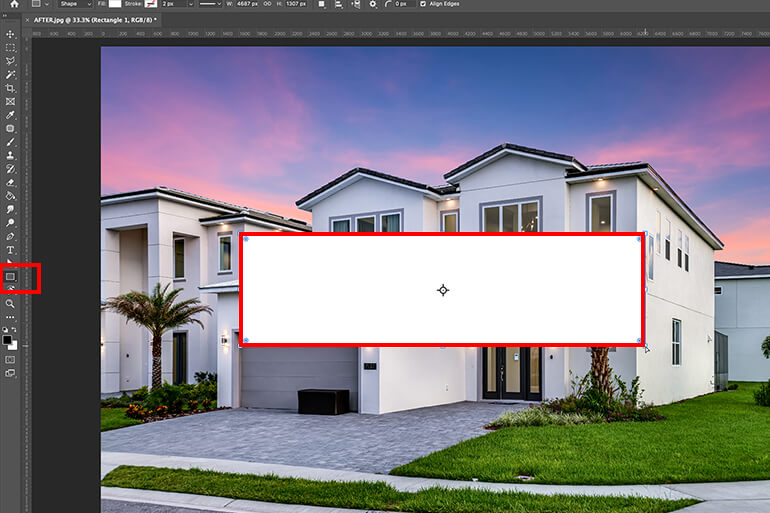
Step 3. Now, click and drag out the rectangle on your image and hold the Space bar to reposition the whole shape.
Step 4. Next, create your text layer by clicking on the Type Tool (T) and typing in your text. Make sure to position the text exactly where you want the knockout text to be because it can be hard to edit this afterward.
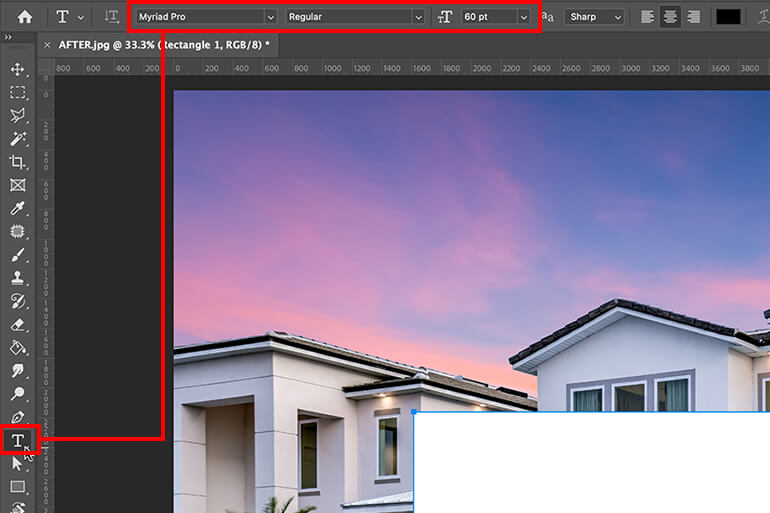
However, you can change the font of your text in the set the font family and set the font style menus, as well as the size in set the font size.
Once your text is aligned perfectly within your shape, we’ll create a selection of the text using a Layer Mask.
Step 5. To do the knockout text effect, place your text in the middle of the rectangle. Then, press CMD + D (Mac) or CTRL + D (PC) to deselect the shape.
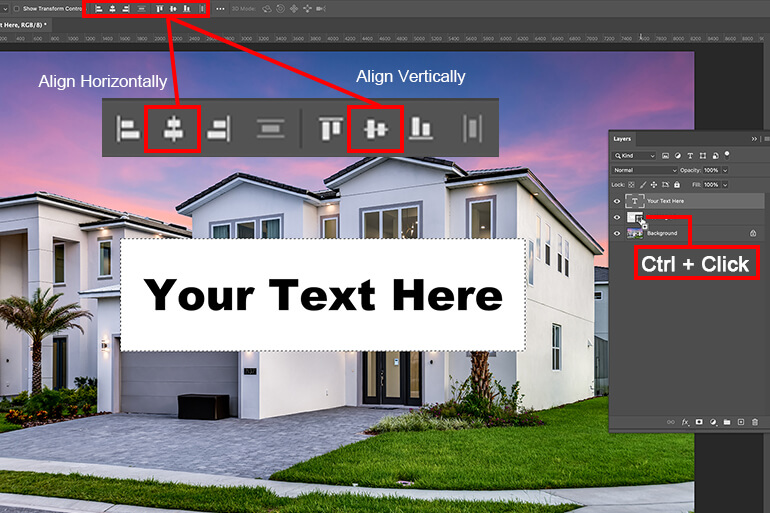
Step 6. Hold CMD + D (Mac) or CTRL + D (PC) once again and click on the text icon. As you can see, a small Marquee selection will pop up on the cursor. Simply, click on it and the text will be selected.
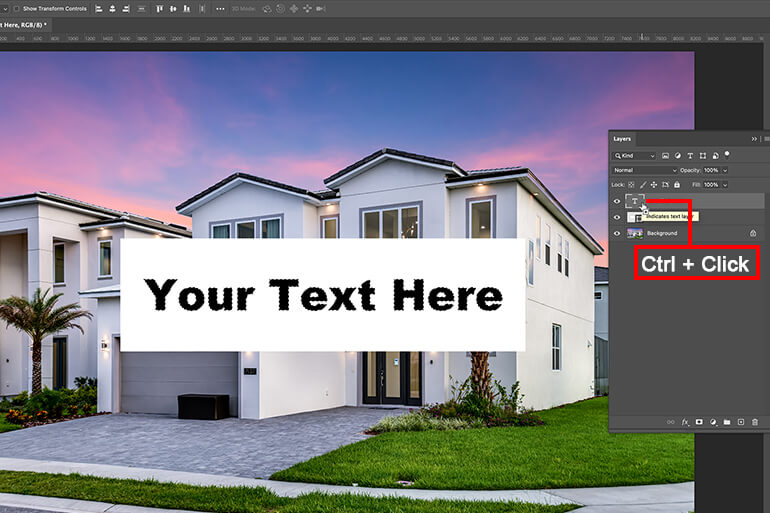
Step 7. Now, we’re going to apply a layer mask on our rectangle layer, so click on the rectangle layer and then press the Add layer mask icon.
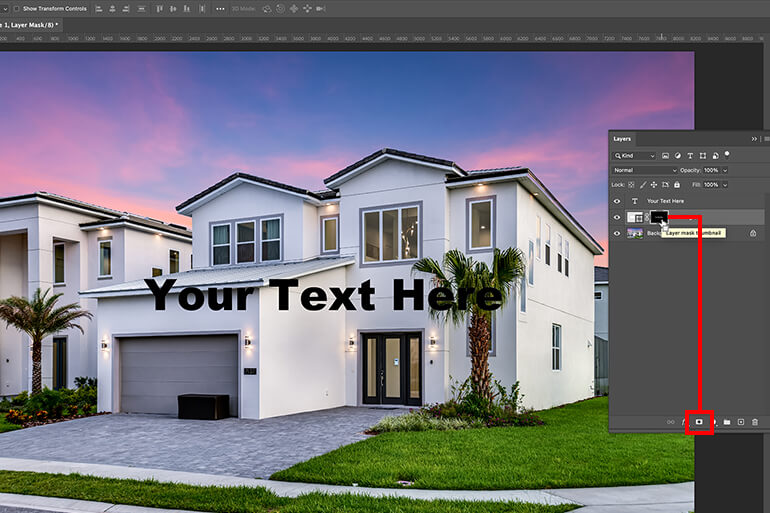
Step 8. Because the selection is opposite to what we want right now, we need to invert it by pressing CMD + I (Mac) or CTRL + I on your layer mask.

Step 9. From there, we’ll hide our text layer by clicking on the Eye icon in front of the layer, and voila!
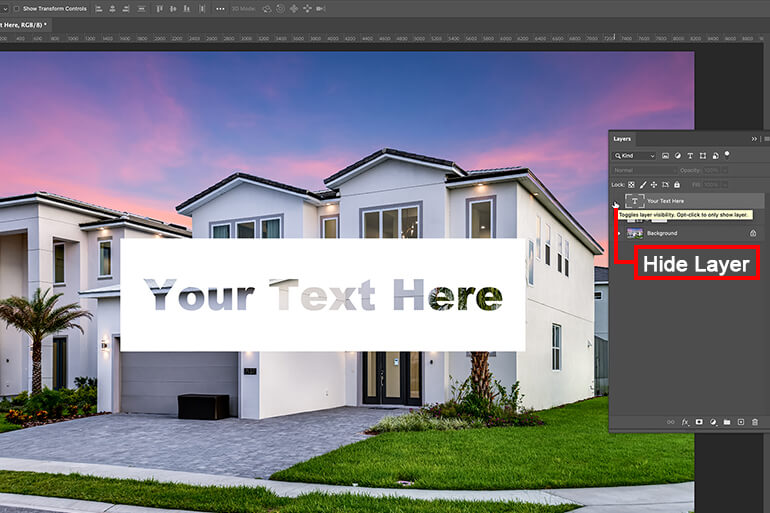
We now have a super cool transparent knockout text within our shape that will stay just where we want it to be!
High-Quality & Consistent
Real Estate Photo Editing
Hire a dedicated editor with performance metrics from $7/hour.

2. Outline Transparent Text
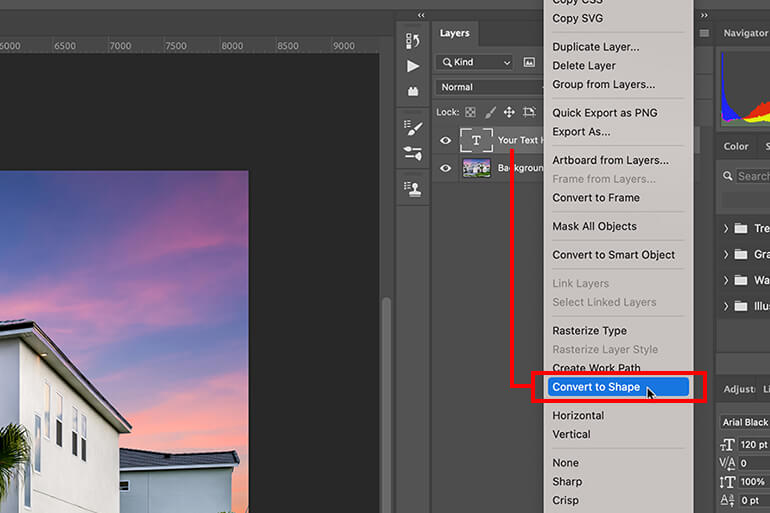
Next up is how to make an outline transparent text. Unfortunately, you can’t select a transparent color when using the text layer, but you can create an outline-only text by converting the text into a shape layer.
The easiest way to create transparent text using the outline method is by converting it into a shape.
Again, make sure that your text is exactly how you want it before making it transparent. The sizing can be adjusted later but you want to make sure you’re using the the correct font.
Step 1. Once you’re happy with the style of your text, you can right click on your text layer and go down to Convert to shape, and this will change your text layer into a shape layer.
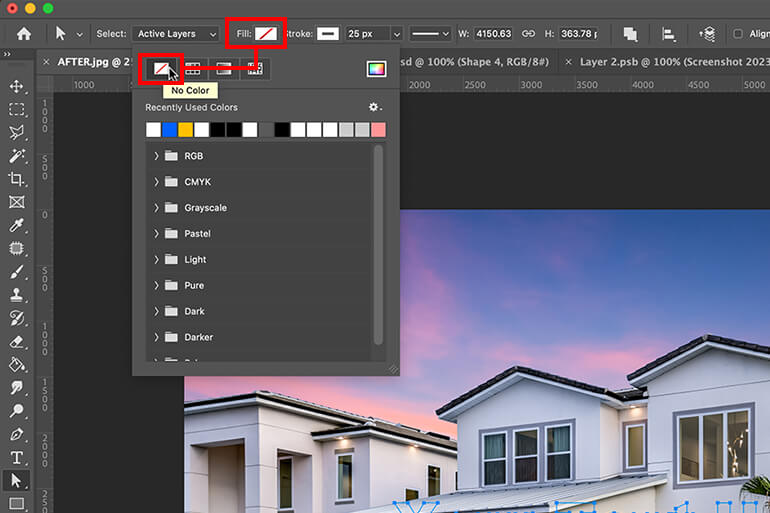
Step 3. You can now access the Shape Tool by pressing U on your keyboard and changing the Fill and the Stroke settings. To change the fill and stroke settings, go to Fill and choose Transparent, and your text will now be completely invisible.
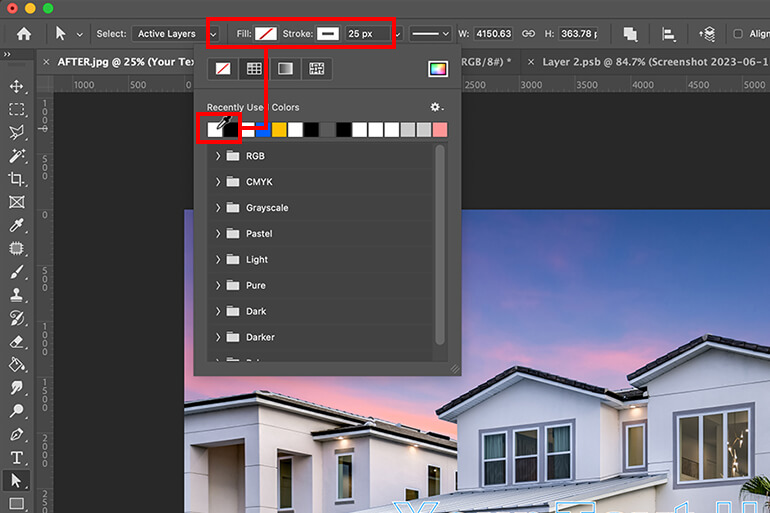
Step 4. The final step is to add an outline by going to the Stroke setting and adding a white outline (or any desired color). You can also increase the size of the stroke to make the outline bolder.
Step 5. Lastly, click off of your image, and you’ll have transparent text with only an outline on its own layer!
3. Transparent Background Shape
The last editing technique we’re going to show you is to add a shape underneath the text and make it transparent to make the text on top of it pop.
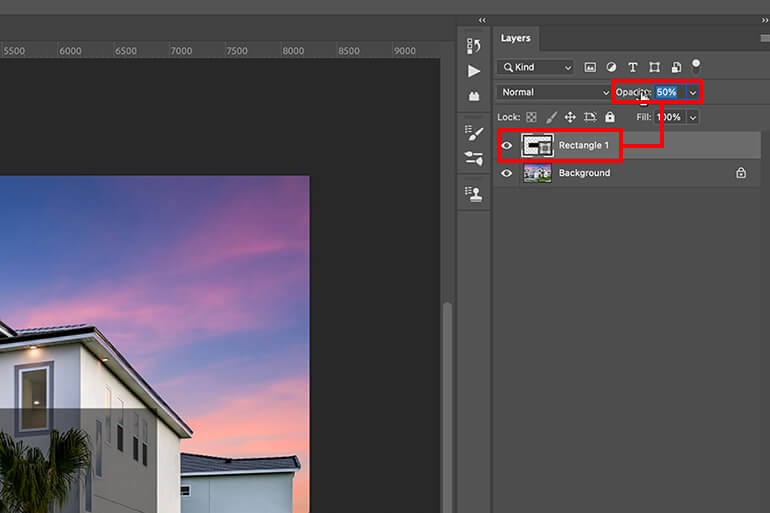
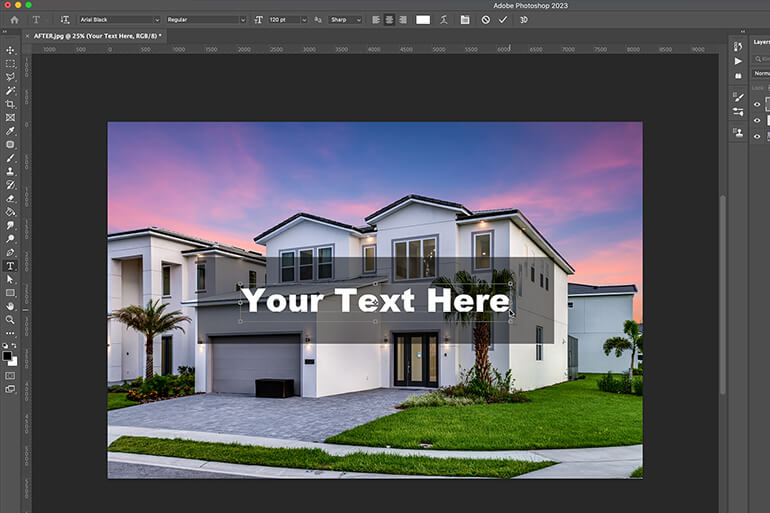
Step 1. Create a shape using the Rectangle Tool, and choose the desired color of your shape. For example, you can make a rectangular or round shape depending on the style you want to create.
Step 2. Then, go to the Layers menu and choose Opacity. Drag the Slider from 100% to 50% to make your shape transparent. You can choose your preferred percentage depending on how much transparency effect you’d like to add.
Step 3. Lastly, type your text using the Type Tool (T) and place it on top of your transparent shape, and that’s it! Your text will now pop and look more eye-catching.
And there you have it – 3 different transparent text looks that anyone can create in Photoshop. Try them out and see which one suits your fancy!
High-Quality & Consistent
Real Estate Photo Editing
Hire a dedicated editor with performance metrics from $7/hour.
Want Help With Professional Photo Editing?
PhotoUp is an awesome choice if you are a real estate or architectural photographer looking for an affordable, yet highly skilled photo editing service.
Based in the US with additional offices in the Philippines, we provide a full array of services to meet all your needs, including:
- Brightness and color correction
- Advanced object removal
- Day-to-dusk conversion and twilight editing
- Lawn greening and sky replacements
- HDR editing
- Manual blending
- Flambient editing
- Floor plans
- And much more!
But our services don’t stop there…
PhotoUp is a complete one-stop shop real estate marketing firm and also offers additional services like:
PhotoUp’s team of editors can handle any editing job — big or small, complex, or simple. And our pricing is also affordable, with most photo editing services starting at only $1.10 per image depending on your subscription.
Browse Top Dedicated
Real Estate Photo Editors
Ready-to-hire editors for real estate photo editing, and more.
All you need to do is sign up for a free PhotoUp account, place your first order, and your professionally edited images will be delivered back to you in less than 24 hours.
PhotoUp Real Estate Photo Editing Uploader
To see how easy it is to get started using our software, you can check out our real estate editing uploader demo:
As simple as that!
Sign up for a free PhotoUp account today, and give PhotoUp’s professional real estate editing service a try! For a limited time, we even offer 5 free edits when you sign up for an account.
We hope this blog post helped you learn how to make a text box transparent in Photoshop using 2 simple techniques. Before you go, you may also want to check out some related resources:

