


Table of Contents
- Real Estate Photo Editing Is Crucial for Buyer Interest
- What Is a Real Estate Photo Editing Style Guide?
- How to Build a Photo Editing Style Guide for Your Brand
- Pro Tip: Use a Platform That Supports Your Workflow
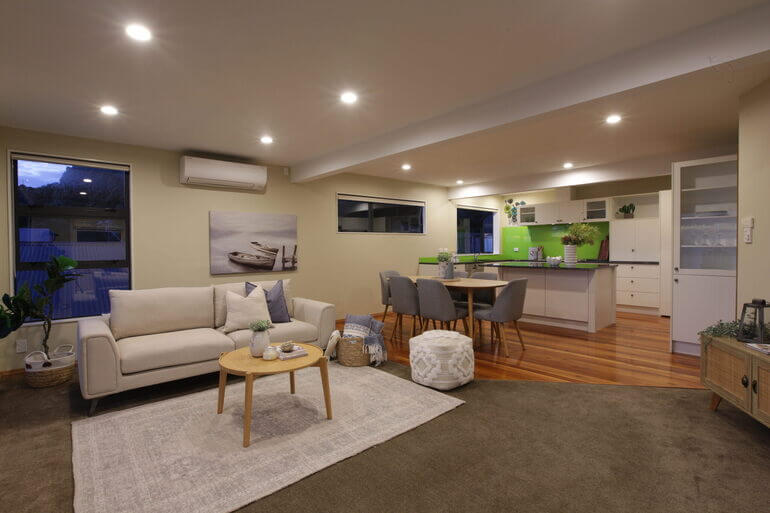
High-quality real estate photos are more than just eye-catching—they are essential tools for attracting buyers and closing deals faster. And while great photography starts behind the lens, the real magic happens during the editing process.
But to ensure consistency, professionalism, and brand alignment, real estate photographers and agencies need more than just editing skills — they need a Real Estate Photo Editing Style Guide.
In this article, we’ll explore why real estate photo editing is crucial and walk you through the steps to build a powerful and consistent editing style guide for your brand.
Let’s begin by discussing why editing your real estate photography is crucial to deliver high-quality property photos that will create buyer interest.
Real Estate Photo Editing Is Crucial for Buyer Interest 🏠


Here are 5 key reasons why real estate photographers should edit their property photos to ultimately increase engagement and buyer interest.
1. Enhances Visual Appeal
Real estate photo editing enhances colors, lighting, and sharpness to create photos that look polished and inviting.
This is especially important in real estate, where the first impression is usually online. Edited photos can showcase the property in the best possible light — literally and figuratively.
According to recent studies, 63% of real estate agents acknowledge that high-quality photography is essential to their success and the sale of properties.
2. Increases Buyer Interest and Engagement
According to a study by the National Association of Realtors (NAR), 87% of homebuyers rely on photos when house hunting online, and listings with high-quality images receive 118% more views than those with low-quality visuals.
Getting people through the door starts with captivating listing photos, which are created in post-processing.
3. Reinforces Brand Identity and Professionalism
Inconsistent editing (in color tone, saturation, or lighting) can make your portfolio look disjointed and unprofessional.
A well-defined style gives your brand a signature look that clients recognize and trust.
4. Saves Time and Streamlines Outsourcing
A documented style guide ensures that in-house editors or outsourced editing teams deliver consistent results without constant supervision or revisions.
Working with a Dedicated Editor is a way to ensure maximum consistency and brand awareness.
A Dedicated Editor is 100% dedicated to your business and learns your style. This also leads to faster turnaround times, which will help you meet tight deadlines.
5. Typically Lead to Higher Sales Prices
Professional visuals can help homes sell 32% faster and at higher prices, as buyers are more likely to be drawn to listings that showcase properties in the best possible light.
In fact, homes with high-quality images see a price increase of 47% per square foot.
Now that you know the benefits of editing your listing photos, let’s explain what a real estate photo editing style guide is.
What Is a Real Estate Photo Editing Style Guide?🌅
A Real Estate Photo Editing Style Guide is a formalized document that outlines the specific visual standards, preferences, and editing instructions that align with your brand’s image and goals.
Think of it as a branding manual for your property photos—a tool that ensures consistency, quality, and professionalism across all your visual content, regardless of who edits the images.
In real estate marketing, where visual storytelling plays a critical role in attracting buyers, the way a property is presented needs to be both aesthetically appealing and brand-aligned.
Your style guide is the roadmap that dictates how to achieve that consistently, from subtle lighting adjustments to more advanced techniques like sky replacements, window masking, or virtual staging.
Key Functions of a Photo Editing Style Guide
| Defines a Signature Look and Feel: Whether your brand identity leans toward bright and airy interiors, crisp whites with cool tones, or warm and inviting ambiance, the style guide sets the tone for every image. This creates visual consistency across listings and platforms. |
| Standardizes Editing Across Teams and Vendors: If you’re working with multiple editors—whether in-house or outsourced—your guide ensures everyone follows the same standards. It eliminates guesswork and reduces the risk of inconsistent or off-brand visuals. |
| Improves Efficiency and Communication: Instead of repeating your preferences for each batch of photos, you can simply refer your team to the style guide. This saves time, minimizes revisions, and ensures faster delivery of final images. |
| Acts as a Training and Onboarding Tool: For growing teams, the style guide serves as a valuable resource for onboarding new photo editors, photographers, or virtual staging professionals. It gets everyone up to speed quickly and maintains quality control as your business scales. |
| Supports Your Brand’s Marketing Strategy: In real estate, photos do more than showcase a property — they also represent your brand. A consistent editing style communicates professionalism, builds trust with clients, and reinforces your brand identity in every marketing channel. |
How to Build a Photo Editing Style Guide for Your Brand🧭
With the key functions in mind, let’s take a look at how to create a real estate photo editing style guide.
1. Define Your Brand’s Visual Identity
Before you dive into the technicalities, ask yourself:
- What feeling do I want my real estate photos to evoke? (e.g., warm, luxurious, modern, minimalistic)
- Who is my target market? (e.g., luxury homebuyers, urban renters, or commercial clients)
Use the answers to define the visual tone — whether it’s bright and airy, bold and high-contrast, or clean and neutral.
2. Establish Editing Standards
In the next step, you need to establish your editing standards. Clearly outline your editing preferences for the following areas:
✅ Exposure & Brightness
- Ideal brightness levels
- Shadow and highlight balance
- Avoiding overexposure or dark interiors
🎨 Color Correction & White Balance
- Preferred color temperature (warm vs cool)
- Consistency in white walls and ceilings
- Neutralizing color casts from lighting
🪟 Window Masking
- Should the exterior view be visible through windows?
- How much clarity and detail is expected?
🌅 Sky Replacements
- When to replace skies (e.g., overcast conditions, replace a winter sky with a summer sky)
- Preferred sky types (clear blue, dusk/twilight, lightly clouded)
- Color matching to existing lighting
🌿 Lawn & Exterior Enhancements
- Guidelines for greening grass, adding virtual landscaping
- Retouching dead patches or fallen leaves
🧹 Object Removal & Decluttering
- Common items to remove (e.g., garbage bins, pet toys, cords, reflections)
- Whether virtual decluttering is allowed for occupied homes
🖥️ Virtual Staging
- Staging styles by room type (Modern, Scandinavian, Coastal, Industrial, etc.)
- Color palette and furniture preferences
- Vendor or software guidelines (e.g., PhotoUp or AgentUp Virtual Staging AI)
🧱 Vertical and Horizontal Alignment
- Ensure vertical lines are straight (especially for walls and furniture)
- Horizon correction for outdoor shots
📏 Cropping & Composition
- Standard aspect ratio (e.g., 4:3, 3:2, or 16:9)
- Guidelines for what to include or avoid (e.g., doorframes, fixtures)
Have You Ever Thought To
Outsource Photo Editing?
Try it today with 5 free edits from three professional photo editors.

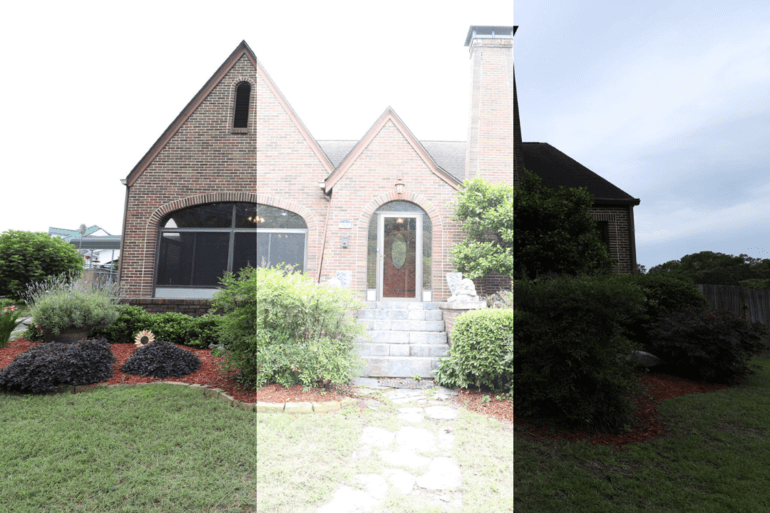
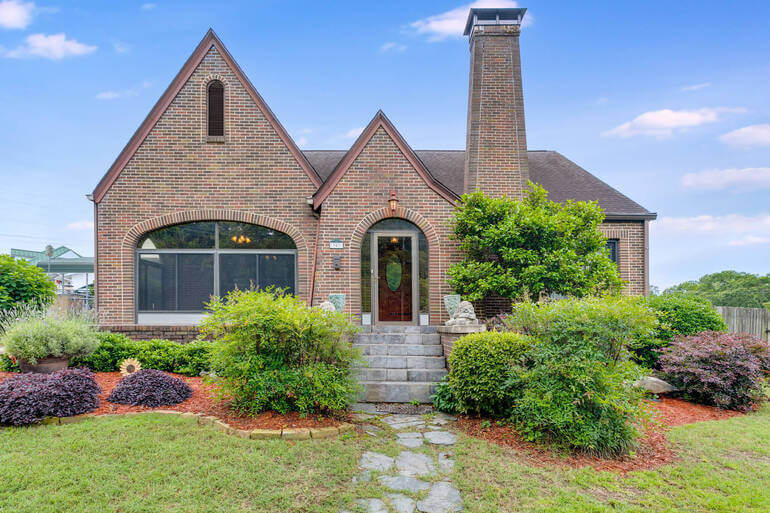
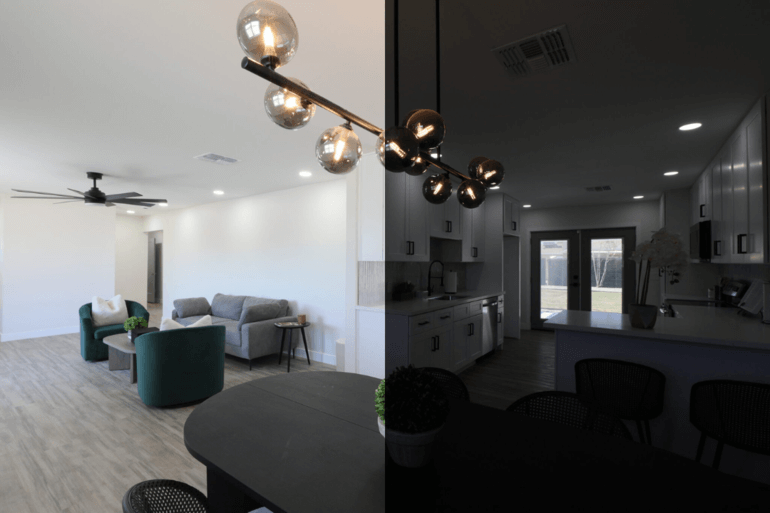
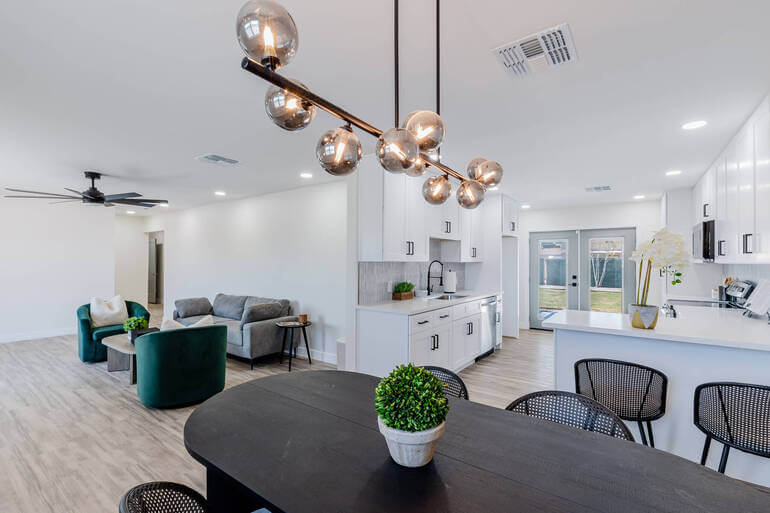
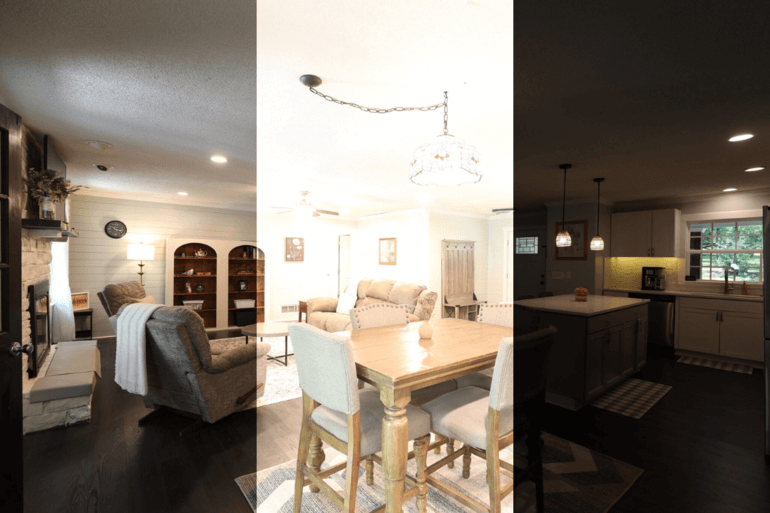
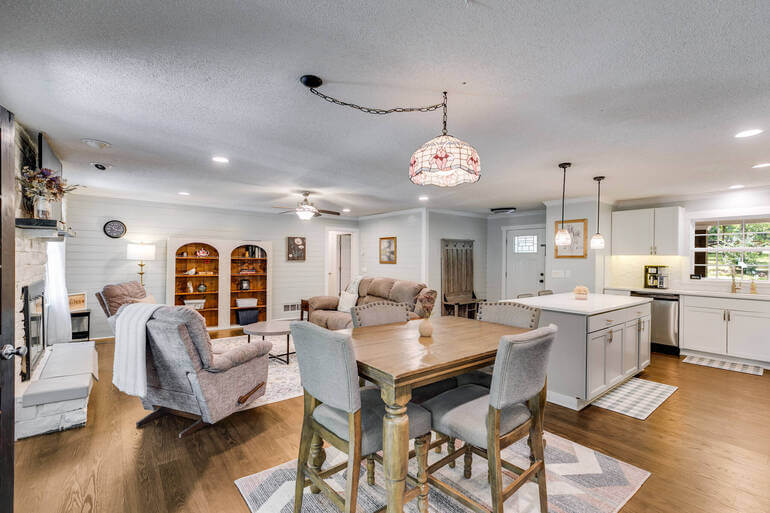
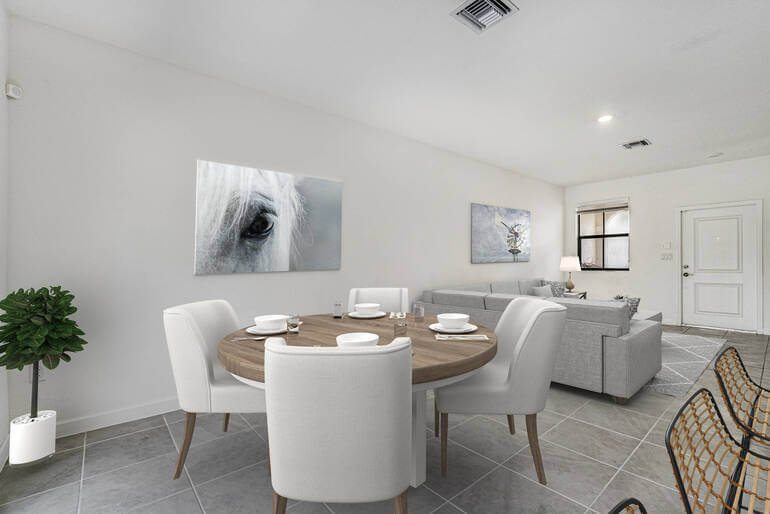
3. Use Before-and-After Examples
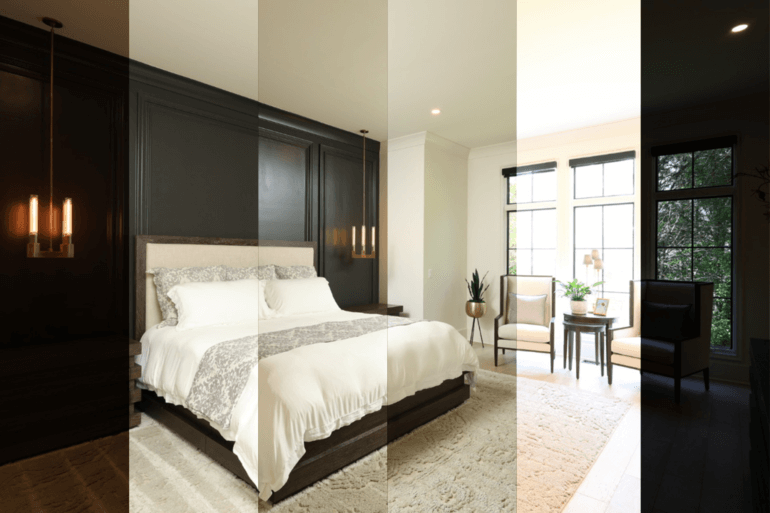

Visual references are crucial. Include side-by-side comparisons showing:
- Original photo vs edited version
- Preferred sky type examples
- Good vs bad window masking
- Accepted vs excessive color saturation
This helps editors understand what is expected without second-guessing your vision.
4. Specify Tools and Software
List any preferred software or platforms used in your workflow. For example:
- Adobe Lightroom – for batch edits and light adjustments
- Photoshop – for object removal, sky replacement, and manual blending
- HDR software – like Photomatix or Aurora HDR for bracketing
- Virtual staging software – such as PhotoUp or AgentUp
5. Document File Types and Delivery Guidelines

Ensure consistency in file handling by including:
- Required file format (e.g., JPG for MLS, TIFF for print)
- Image resolution (e.g., 300 DPI for print, 72 DPI for web)
- File naming conventions (e.g., PropertyAddress_LivingRoom1.jpg)
6. Create a Template or Checklist

Turn your style guide into a checklist or editable template for your team and contractors. This should include:
- Required edits per image
- Optional enhancements based on image quality
- Approval process or sign-off procedure
7. Share and Train Your Team

Once your style guide is complete:
- Train your editors and photographers on its use
- Host a kickoff call if you’re working with a remote or outsourced editing team
- Periodically review and update the guide based on client feedback and evolving trends
And that’s it! You’ve now created a Real Estate Photo Editing Style Guide to ensure your brand’s image will stay consistent.
Final Thoughts
A well-crafted real estate photo editing style guide is more than just a document—it’s a brand asset that ensures every property photo you deliver is visually consistent, polished, and aligned with your business goals.
Whether you’re an individual photographer or a growing real estate marketing agency, investing time in creating your style guide will help scale your business, streamline editing, and strengthen your brand presence in the market.
By combining strategic photo editing with a clear visual identity, you’ll not only impress your clients but you’ll also help sell homes faster and at higher prices.
The Ultimate All-in-One
Real Estate Photographer Business Platform
Grow a successful real estate photography business with PhotoUp.
Pro Tip: Use a Platform That Supports Your Workflow 🛠️

Working with an editing company like PhotoUp makes it easier to integrate your photo editing style guide into a seamless workflow.
As a trusted name in real estate photo editing, PhotoUp offers editing services such as:
- Expert HDR blending for natural, balanced images
- Color correction, brightness, and tone adjustments
- Image enhancement to bring out key details
- Window masking and reduction of glare
- Clutter and object removal for cleaner compositions
- Line straightening and angle corrections
- Fixing exposure issues, harsh shadows, and dim areas
- Day-to-dusk conversions for added visual appeal
- …and much more!
Our user-friendly platform allows you to upload style guides, send feedback, and receive professionally edited photos with a turnaround time of 12-24 hours, starting at just $1.50 per image for on-demand editing.
Additionally, dedicated editing can go as low as $0.50 per image, depending on your editing style and batch.
Browse Top Dedicated
Real Estate Photo Editors
Ready-to-hire editors for real estate photo editing, and more.
A Full Real Estate Marketing Service
On top of that, PhotoUp is a full real estate marketing service and also offers powerful marketing tools, including:
As you can see, we have everything you need to enhance and market real estate photography under one roof!
How to Get Started
Getting started is super easy! This is all you need to do:
Step 1. Sign up for a free PhotoUp account.
Step 2. Upload your photos to our easy-to-use software.
Step 3. Choose the level of editing that you need and provide instructions (optional).
Step 4. Wait for PhotoUp professional editors to edit and return the photos in less than 24 hours (48 hours for virtual staging).
Step 5. Download and start using your beautifully edited photos.
As simple as that!
Sign up for a free PhotoUp account today and let our expert editors help you boost your real estate photography brand with flawless images according to your style guide.
For a limited time, we even offer 10 free credits you can use on any of our services when you sign up for an account.
We hope this blog post helped you learn how to build a Real Estate Photo Editing Style Guide for your brand. If you find this post useful, you may also want to check out some related resources:
- 7 Simple & Effective Real Estate HDR Photo Editing Tips
- AI’s Best-Kept Secrets for Flawless Real Estate Photo Editing
- 6 Benefits of Using a Dedicated Photo Editing Service
- Try Professional Real Estate Photo Editing (Get 10 Free Credits)
- 8 Secret Real Estate Photo Editing Tricks for Breathtaking Listings

